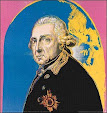
Friday, July 29, 2011

Battle of Waldeck - Part Two


British Guards and Keith's Highlanders (both Suren figures) keep the French entertained on the allied right flank. They are backed up by two squadrons of Household Cavalry (Staddens) on the left and Hanoverian Dragoons (Front Rank) on the right. Click all pix once or twice to enhance your viewing pleasure.

Here are the remainder of the pictures that I took a couple of weeks ago at the Battle of Waldeck. My memory of the events is beginning to fade, so I will just post the pix with captions and let the captions tell the story.


In the center, the 3rd Dragoon Guards (RSM figures) protect the Hessian battery of 12-pounders (Foundry crew and Elite French 12-pounders)


Royal Welsh Fusiliers advance up the sunken road after chasing off the French Auvergne regiment. Elite Miniatures painted by Leonard Albright. He did a nice job on the flags too! This unit is proof that you can play the BAR rules with 30 figure regiments, such as this one.


The French Carabiniers (Elite Miniatures) arrive on the field. Les Gardes Francaises (Surens) form a second line on a handy ridge where the retreating French infantry can rally. Lanciers de Saxe (Surens) are skirmishing in the foreground.


Les Carabiniers manuever to the front of the French line. They were eventually well positioned to charge into the flank of one of the British battalions in the top right corner. They also took out the Allied 12-pounder battery, before the remnants retired back to their own lines, with many battle trophies.


Lord Granby gives the order for a general advance of the British army as the French fall back to the second ridge, anchored by Les Gardes Francaises. The 44th Foot (Surens) are in the foreground flanked by Hanoverian dragoons (Front Rank)


A pair of pictures showing the retirement of the Carabiniers. The Irish Regiment Bulkeley (Capitulations Figures) is seen in the foreground in their colorful red coats.

A rather interesting decision had to be made by the British commander (me) near the end of the game. Through some skillful maneuvering, the French Carbiniers had positioned themselves to charge into the flank of a British battalion on the ensuing turn. It would all come down to who drew the first initiative turn. I had a joker on hand so I could use it to trump any initiative card that the French might draw first, thus allowing the British battalion to turn its facing and fend off the inevitable cavalry charge.

However, it was a little more complicated then that. For on the prior turn, the British badly needed the first fire initiative card so that it could blow away the opposing French battle line My colleague commanding the threatened British battalion wanted me to save the joker in case it was needed to trump the French initiative on the next turn. But I felt that it was more important to use the joker trump card on the prior turn during the musketry phase. There had been a nice run of French cards from the card deck, so the odds were in favor of the first initiative card on the next turn being a red British card.

I weighed my choices: use first fire this turn and hope that the odds favor the British getting the first initiative on the next turn (thereby preventing the French from charging their horses into the flank of one British battalion; of two, cede the first fire on the current turn to the French and guarantee that the British would have the first initiative on the next turn, thus stopping the cavalry charge.

I chose to opt for the first fire on the current turn and take my chances on the initiative card draw. So I used the joker card to fire first -- a French battalion broke and ran while the other battalion was much reduced in strenght. So far so good. We all waiting for the first initiative card on the next turn. Would it be a black card (French ) or a red card (British)?

It was a black card!

The Carabiniers commenced their trot towards the flank of the first British battalion. I figured, oh well, we will probably lose the battalion but there is a chance that it wins the melee. But then Bill Protz did something that I was not expecting -- he peeled off a squadron of Carabiniers to charge into the Allied 12-pound battery. I was not expecting this move by Perfidious France. The battery was wiped out by the charge. So I would have lost it no matter who had the first initiative on the turn because I did not see this one coming.

The British battalion was struck in the flank. A second battalion to its right had time to change its facing towards the Carabiniers and avoid a similar fate. We then played out the melee, and darn it but the British nearly won the melee, losing by one casualty (the French did not roll very good dice during the melee, making a British win possible). They routed and the Carabiniers elected not to pursue into the teeth of the British battle line. Instead, they turned around and returned to their lines.

Who says that you need special rules to create a fog of war in the wargame? This goes to show that the individual players in the game create plenty of fog of war on their own, without the aid of restrictive special FoW rules. I had to make a decision with respect to the use of my trump card. Either way, the British would win a little and lose a little. So I elected the certainty of firing first on the current turn and waited for chance or Fate to determine what would happen on the ensuing turn. In none of my calculations did the possibility of losing all of our artillery come into play. It was not a possibility that I could envision, but there it was staring us all in the face and all of the four British players missed it.

It was a fun game with lots of to and fro, give and take, and unexpected turns of events. In a word, we had a blast.

So the French infantry began to tumble back to the last ridge line that was bulworked by the reserve of Les Gardes Francaises. The French rallied all of their infantry onto this position and presented a formidable defensive line. The British were not about to launch and assault on this ridge, not without their artillery, which was all gone by now. It was the concensus though that the British had won the battle, having pushed the French army back in the center and on both flanks. Huzzah, a redcoat victory at last!
e

Wednesday, July 27, 2011

Minden Fritz Painted


Minden Fritz on his Mollwitz Grey (center) with the Duke of Brunswick (blue sash) and his ADC standing on the windmill platform to get a better look of the goings on. RSM officers flank Fritz on the left (Schwerin) and the right (Winterfeldt). Windmill and terrain pieces by Herb Gundt. Please click to enlarge.

I am rather surprised that I did not drop everything and paint all of the new Minden SYW Austrian and Prussian personalities and staff immediately. However, sometimes life throws other obstacles in the way and so I did not tuck into these little gems until a couple of days ago.

So here are the first three figures in the Prussian set that I have painted. I have not had time to put them on bases and terrain said bases, but the pictures give you a fairly good idea of how they look and how well they match the RSM figures in size and proportion.


A close-up view of Ferdinand of Brunswick (left), Frederick II (center) and an Aide de Camp (right). Click pix to enlarge.

I would imagine that the Prince Ferdinand figure on foot would be a useful figure for those of you who need a king or herzog for you fictional 18th Century countries.

Thursday, July 21, 2011

Battle of Waldeck


The British center at the start of the game. Click or double click all pix for amazingly larger view of the battle. Infantry include (l-r) 44th Foot (Suren) and the 8th Foot (Stadden) with Front Rank Hanoverian horse protecting their advance.

Last weekend we assembled at Chez Protz in Brown Deer, Wisconsin to have another go with our British and French SYW armies. The British had a rather long losing streak (maybe 4 in a row) in our BAR campaign that they hoped to end. We had players traveling from Minnesota, Illinois and Wisconsin and had a grand old time playing on Bill's expansive wargame tables (6ft by 24ft with two parallel side tables of the same length, but only 2.5 feet wide).

I had the honor of commanding the left flank of His Britannic Majesty's Army in Western Germany, while my colleague Derek commanded the main attack in the center. The father-son team of Todd and Andy, respectively, commanded the cavalry and the right wing.

The premise of the game was that the French army of Lt. General Chevert was on the move hoping to drive the Allies back into their base at Minden. The French had just crossed the Diemel River, near the town of Waldeck, in Westphalia, and they were rather spread out across the length of the table. Prince Ferdinand of Brunswick, commander of the Allied army, saw an opportunity to smite the French as they crossed the Diemel and send them tumbling back to Frankfurt.


The British left, commanded by Der Alte Fritz in his alter-role as the Erbprinz. Keith's Highlanders (Suren figures) in the forground lead the attack supported by the 11th (Sowles) Foot (Staddens), British Guards (Suren), two troops of Life Guards horse (Staddens) with a half regiment of the 23rd (Huske's) Royal Welsh Fusiliers (Elite Miniatures). British artillery pieces are from Elite and are manned by Suren and Stadden artillery crew.


British right flank. Perry jagers lead the way, supported by some converged British grenadiers of various makes.


The advance guard of the French advance down the Sunken Road, rather haphazzardly, and place themselves in great danger.


French right wing, lead by Eureka Grassins and supported by Capitulations d'Eu Regt (in white) and the Bulkeley Regt (in red).


The British left advances towards the Arquebusiers de Grassin. The Life Guards position themselves for a glorious charge up the Sunken Road to put the French Auvergne regiment to the sword.


The British center shakes out into a symetrical battle order while the battery of Hessian 12-pounders takes up position on the high ground. Hanoverian cavalry cover the advance of the Hessian artillery. It will drop trail and start firing on the Auvergne Regiment in the Sunken Road. Auvergne is about to get hit from the front and the flank at the same time.


The Hessian artillery prepares to fire, while the 44th Foot move in on the Sunken Road.

That is about half of the pictures that I took of the game. I will post the other half later in the week so that you can see how the battle turned out.

I will give you a hint: the British army finally won a wargame!


Sunday, July 17, 2011

83rd Foot Receives Its Flags


Some lovely GMB Designs standards now grace the 83rd Foot. Lt. Colonel Collins and Major Carr supervise the turnout of the regiment. All figures are from Elite Miniatures. Click once or twice to enlarge the view.

I really got a lot of things done over the weekend: I completed both flank companies of the 83rd Regiment of Foot and now have six companies or 72 figures. I also participated in a SYW battle between the British and the French (somewhere in Western Germany). The grenadier company had been started earlier in the week and I was able to finish them off Friday evening. Then, after a day's gaming in Brown Deer, WI , I returned home and applied the first base coat of "Blood Red" Reaper paint to the light company. Somehow, I managed to find the time to finish the light company by Sunday evening.

You can see the whole regiment (6 companies of 12 = 72 figures + 2 standard bearers and three mounted officers):


Double click this picture to see all six companies on the parade ground. Buildings and large tree were made by Herb Gundt. Pico railroad back drop. Elite Miniatures figures.

The six companies take up a frontage of 30-inches and I will be adding one more center company (I currently have 4 center companies and 2 flank companies) to make it 5 center companies and 2 flank companies, for a total of 7 companies, or 84 figures. There will also be a 6-figure stand for the colour guard (2 ensigns, 3 drummers, and the RSM). The next company will be the last one in the 83rd Foot, which will be complete, save for a couple mounted officers. This is starting to look awesome!

Battle of Waldeck - SYW
I will post the pictures of the SYW game that we played over the weekend, tentatively called "The Battle of Waldeck", tomorrow night. I am pleased to announce that for the very first time in all of our BAR battles, the British finally won a battle. Huzzah! They also captured the standard of the Saxon Lieb Curassiers to make the victory that much sweeter.

The French army was moving across the Diemel River and the advance guard got a little too far ahead of the rest of the army. Ferdinand of Brunswick saw that the opportunity was ripe for a counter-attack and so he dispatched Lord Granby and his contingent of British infantry and cavalry to hurl the French back into the Diemel.

Minden Miniatures Frederick Arrives
Another bit of good news was that my order of Minden Austrian and Prussian senior officers arrived on Saturday. I will be priming some of the figures tomorrow night so that I can paint them this week. The figures look even better than the pictures that I have seen of these figures and I can't wait to paint them.

Friday, July 15, 2011

Weekend Preview - SYW Game


Battle of Fontenoy - previously fought in 2010. (click to enlarge)

What with all of this Bones Apart nonsense of late, you might understandably wonder if Old Fritz was going to have anything to with the Seven Years War for awhile. Well, you would be wrong because I am travelling to Brown Deer tomorrow with my Red Coats to take on Monsieur Chevert's French across the table top. We have several of our colleagues from Minneapolis driving the 400+ miles to the Milwaukee area to game with us, so we want to make sure that we put on a spectacle that is worthy of the journey.

This will be a smaller game than we normally play, with about 8 battalions and 8 to 10 squadrons of cavalry. The original plan was for me to bring my Prussian army, but then it occured to me that my smaller British army would fit the requirements of the game quite nicely. I don't get to game with my SYW British army that often, so this is kind of a treat for me.

I will post pictures over the weekend. The British have not won a battle yet, so perhaps our luck will take a turn for the better. It might also spur me to paint up some more SYW British in the future. A good shellacking of your army provides plenty of incentive to make it stronger the next time.

Over the hills and far away, to Flanders, Portugal and Spain, King George commands and we'll obey, over the hills and far away...

***************
Napoleonics Update

My flags for the 83rd Regiment arrived from GMB Designs today and I am really looking forward to gluing them onto the flag staffs and taking some pictures. The flags are really very sharp, and they look nifty too.

Mrs. Fritz is going out this evening so I get to stay home and do some painting, after I pack my SYW gear into the car. The grenadier company is about half way done and hopefully I can complete it over the weekend. It will be hard to put in much painting time given that I'm spending the whole day Saturday having fun while Mrs. Fritz... Hmm, maybe I had better nix the painting, or at least not do very much.

Per some comments left by Rob and others, I've decided that the 5/60th Rifles will be used for my two companies of rifles in my Peninsula establishment. That sounds like a good idea to me. Also, I am searching for a new colonel's name as the Colonel Fitch that I mention had the misfortune of dying in Jamaica in the mid 1790s. More likely, a Lt. Colonel would have been commanding anyway.

There was also a discussion on TMP today about the use of the British light companies during a battle. The upshot is that they were not generally positioned on the firing line with the rest of the battalion once the shooting began. So this has me thinking that I can have 5 centre companies and 1 grenadier company on the firing line (divided into grand divisions of two companies each), resulting in 3 grand divisions (and a shorter linear frontage, sans the light company). So my battle line will have 6 companies or 72 figures with a frontage of 36 figures or about 24 inches of frontage in line formation, if I have done my math correctly. That seems to be more manageable in terms of the amount of space that it takes up.

Check back in on Sunday for some pictures of the weekend's activities.
m

Thursday, July 14, 2011

Recruiting Continues for the 83rd Regiment

No pictures to post this late evening, but I promise to follow up with some within the next day or two so that you can view the progress that I've made on the 83rd (Dublin) Regiment of Foot. As of this evening, I had completed four companies of 12 infantry plus two ensigns and 2 grenadiers, for a total of 52 foot. So I'm halfway there to the eventual goal of 102 figures. I have also painted Colonel Fitch and Major Banastre Lee-Mallory.

My order of reinforcements from Elite Miniatures arrived in record time: 3 days! A tip of the cap goes out to Peter Morbey for his excellent service. I wasn't planning on seeing the box for at least another 5 to 7 days. I immediately opened the parcel and sorted the various figures into their eventual units: Royal Horse Artillery equipment and crew, regimental officers and brigade officers, and some light infantry company figures for the 83rd.

I cleaned up Colonel Fitch and RHA Captain Hew Grant and gave them a coating of grey primer last evening so that I could paint them today. I only had time to work on Colonel Fitch, but managed to complete the painting of the mounted officer. This was due primarily to the need to finish the fourth center company today and to get a start on the grenadier company, which now has the primary colors blocked in. Once the tedious block painting is done, then the real fun starts as I begin to add the details and start shading and highlighting the uniform colors. At this point, the painting really begins to pick up speed and I can see the proverbial "light at the end of the tunnel" with the 12 figure company.

Forty eight figures in a two deep line looks rather impressive (and long). This has caused me to reconsider the size of the regiment. I may reduce it from 102 to approximately 80 figures. That would work out to 5 centre companies (60 figures total) and 2 flank companies (24 total), or 84 figures plus 4-6 figures in the color guard. Hmm, 90 figures is not that much of a space savings afterall. So maybe I will only have 4 centre companies (completed as of today) plus 2 flan companies for a total of 72 figures plus the color guard. I can always add more companies later.

I've been giving some thought to the names of the officers in the regiment and have decided that each company captain must have a name, along with names for the senior officers and staff.

Regimental Colonel - Colonel Fitch
Major = Major Banastre Lee-Mallory

Regimental Sgt.-Maj. - Sargeant Major Padraic Quincannon
Regimental Chaplain - Barry Fitzgerald (he could also be a company captain)

Company A - Captain Patrick Fitzgerald
Company B - Captain Konrad Kinch
Company C - Captain Christoper Duffy
Company D - Captain Sean Thornton
Company E - Captain (to be named later if I paint a fifth centre company)

Grenadier Company - Captain Trevor Howard
Light Company - Captain O'Toole

I am sure that some or all of these names are familiar to all of my blog readers and followers, in some fashion.

Did British regiments have two majors? Then if so, I would also add a Major Dundee to the cast.

At my current painting pace I should have the regiment close to completion by the end of this month, July 2011. The grenadier company is currently on the painting table, with the light company to follow. For the latter company, I selected figures that are more active than the advancing pose used in the other companies. So the light company will have figures firing and loading and also have their own mounted officer.

The two companies of 95th Rifles and 3 sections of RHA will follow the completion of the 83rd, sometime in August.