Showing posts with label Painting. Show all posts

Monday, December 31, 2018

A List of the Figures that I Painted in 2018


Vignette of Frederick the Great grabbing the flag of the von Bulow regiment at Zorndorf


Here is a list of all of the wargame units that I painted in 2018, all of which are Seven Years War figures. Click on the links to go to the blog post that covers each unit that I painted.

Los Rios (Austrian) 2 x 32 figure battalions   November 15, 2018
Lacy (Austrian) 2 x 32 figure battalions    October 12, 2018

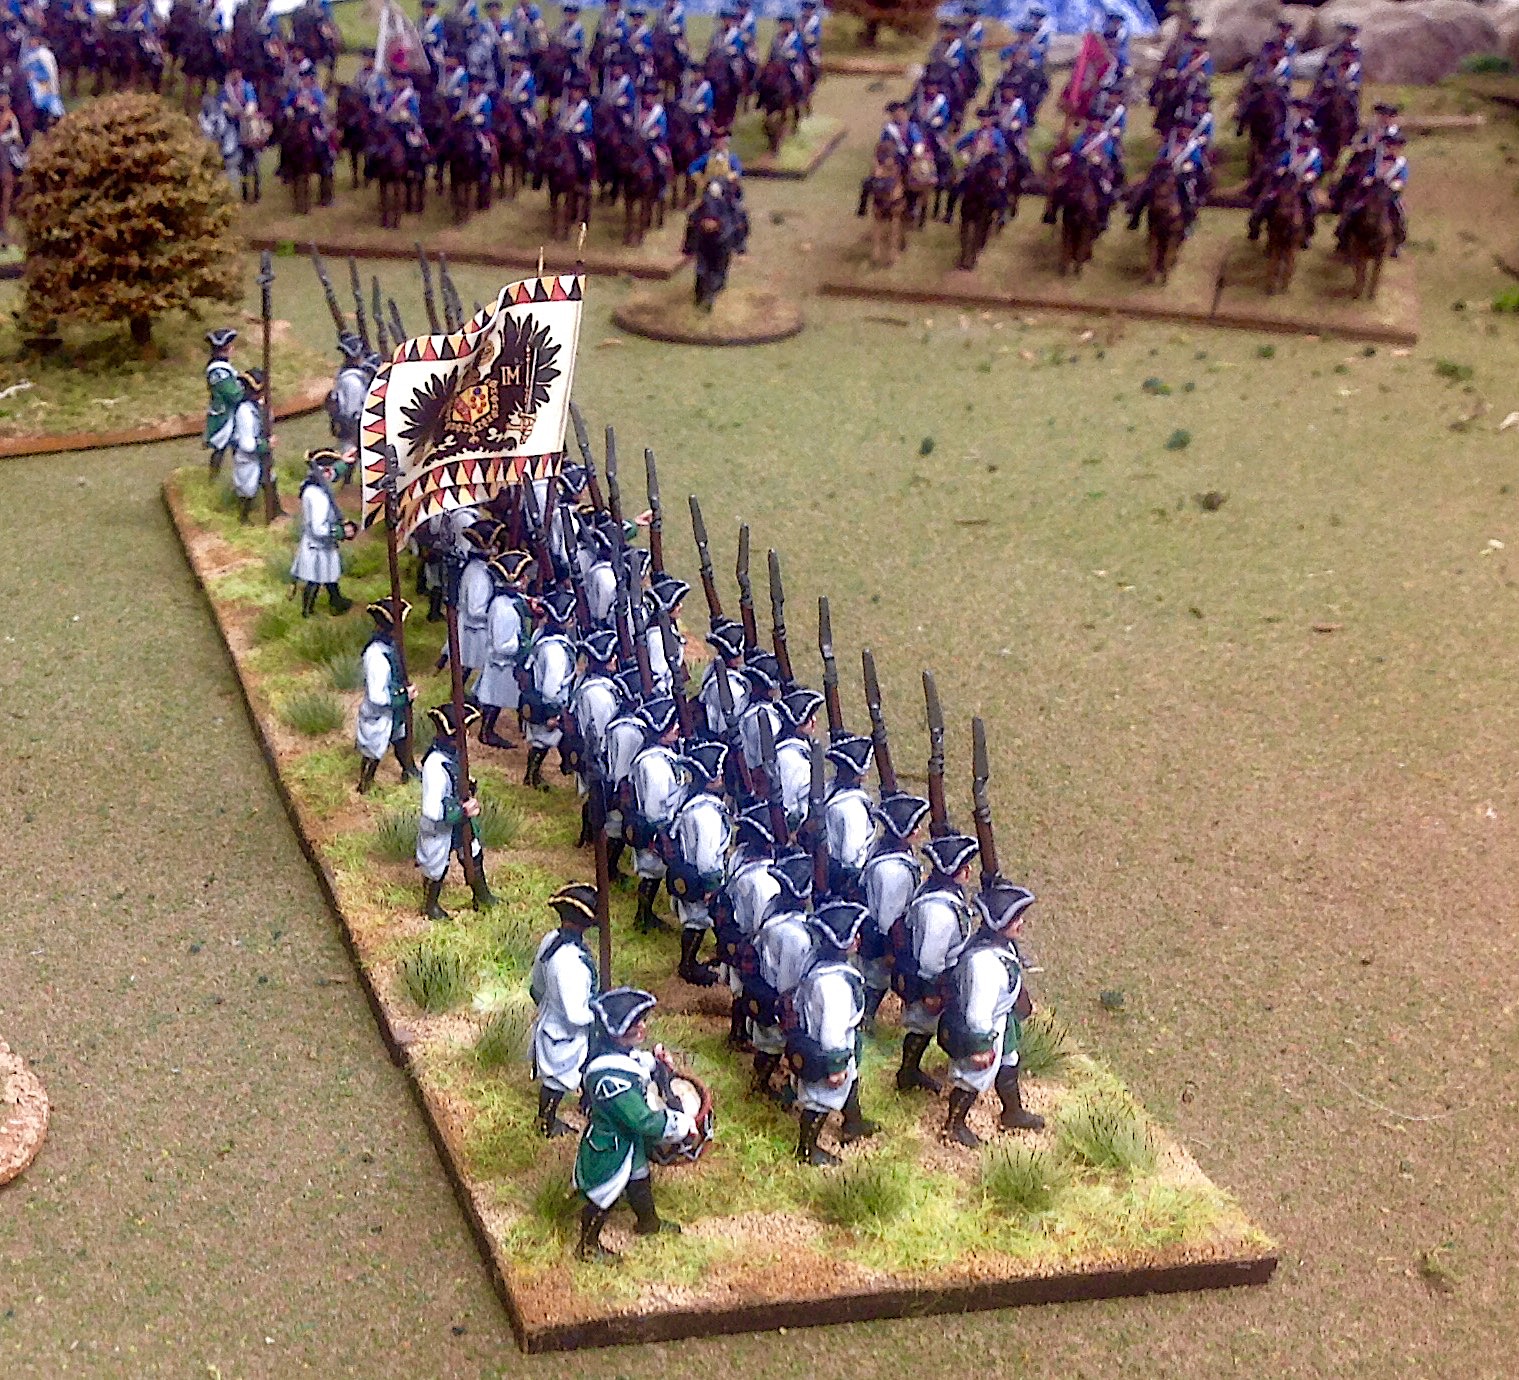
The Austrian Musketeer regiment Lacy, showing a new basing style that I am contemplating.


Russian 4th Grenadiers 1 x 32  September 29, 2018
Perm Musketeers (Russian) 1 x 32   September 23, 2018


2nd South Carolina Regiment (AWI)   July 25, 2018

2nd South Carolina Regiment (AWI)

IR2 von Kanitz Musketeer Regt. (Prussian) 2 x 32 figure battalions   July 18, 2018
Manstein Grenadier Battalion (Prussian) 1 x 32 figure battalion  June 30, 2018

Manstein Grenadier Battalion

Von Kanitz Musketeers

Observation Corps Grenadiers (Russian)   May 21, 2018

Observation Corps Grenadiers


IR46 von Bulow Fusilier Regt. (Prussian) 2 x 32 figure battalions May 12, 2018  and June 8, 2018 
IR35 Prinz Heinrich Fusiliers (Prussian) 2 x 32 figure battalions    May 4, 2018
Jung Sydow Garrison Battalion (Prussian) 1 x 32 figure battalion   April 30, 2018

Von Bulow Fusiliers


Observation Corps 5th Musketeers (Russian) 1 x 32 figure battalion  January 30, 2018
Permski Regiment (Russian) 1 x 32 figure battalion January 14, 2018 
Narva Regiment (Russian) 1 x 32 figure battalion  January 6, 2018

Russian Observation Corps Musketeers


I also painted 4 Russian artillery pieces, each with 4 crew plus limber teams of 4 horses, 1 rider and 1 limber. Here


Russian artillery battery with limber teams

If my math is correct, the total number of figures painted in 2018 was 652 figures. There are probably more than that if I include some vignettes that I made and some samples that I painted for the Fife & Drum on-line webstore and catalog.

Now in some of these instances, I posted the date when I flagged and based both battalions of a Prussian or Austrian battalion. So for example, the IR2 von Kanitz Musketeer Regiment indicates 2 x 32 battalions = 64 figures. I did not paint all 64 figures at one time, but rather, over the course of several weeks. My painting pace is approximately one unit of 32 figures per week, although I do not paint every week. I wish!


Thursday, October 25, 2018

Painting Tutorial: SYW Austrians


I was starting a new battalion of SYW Austrians so I thought that I would take a dozen figures aside and illustrate a step by step tutorial for how I paint Austrians. The Russian painting tutorial was well received so I hope that you will find this one useful too.

Twelve steps from primed figure (left) to finished musketeer (right)

Steps 1, 2 and 3
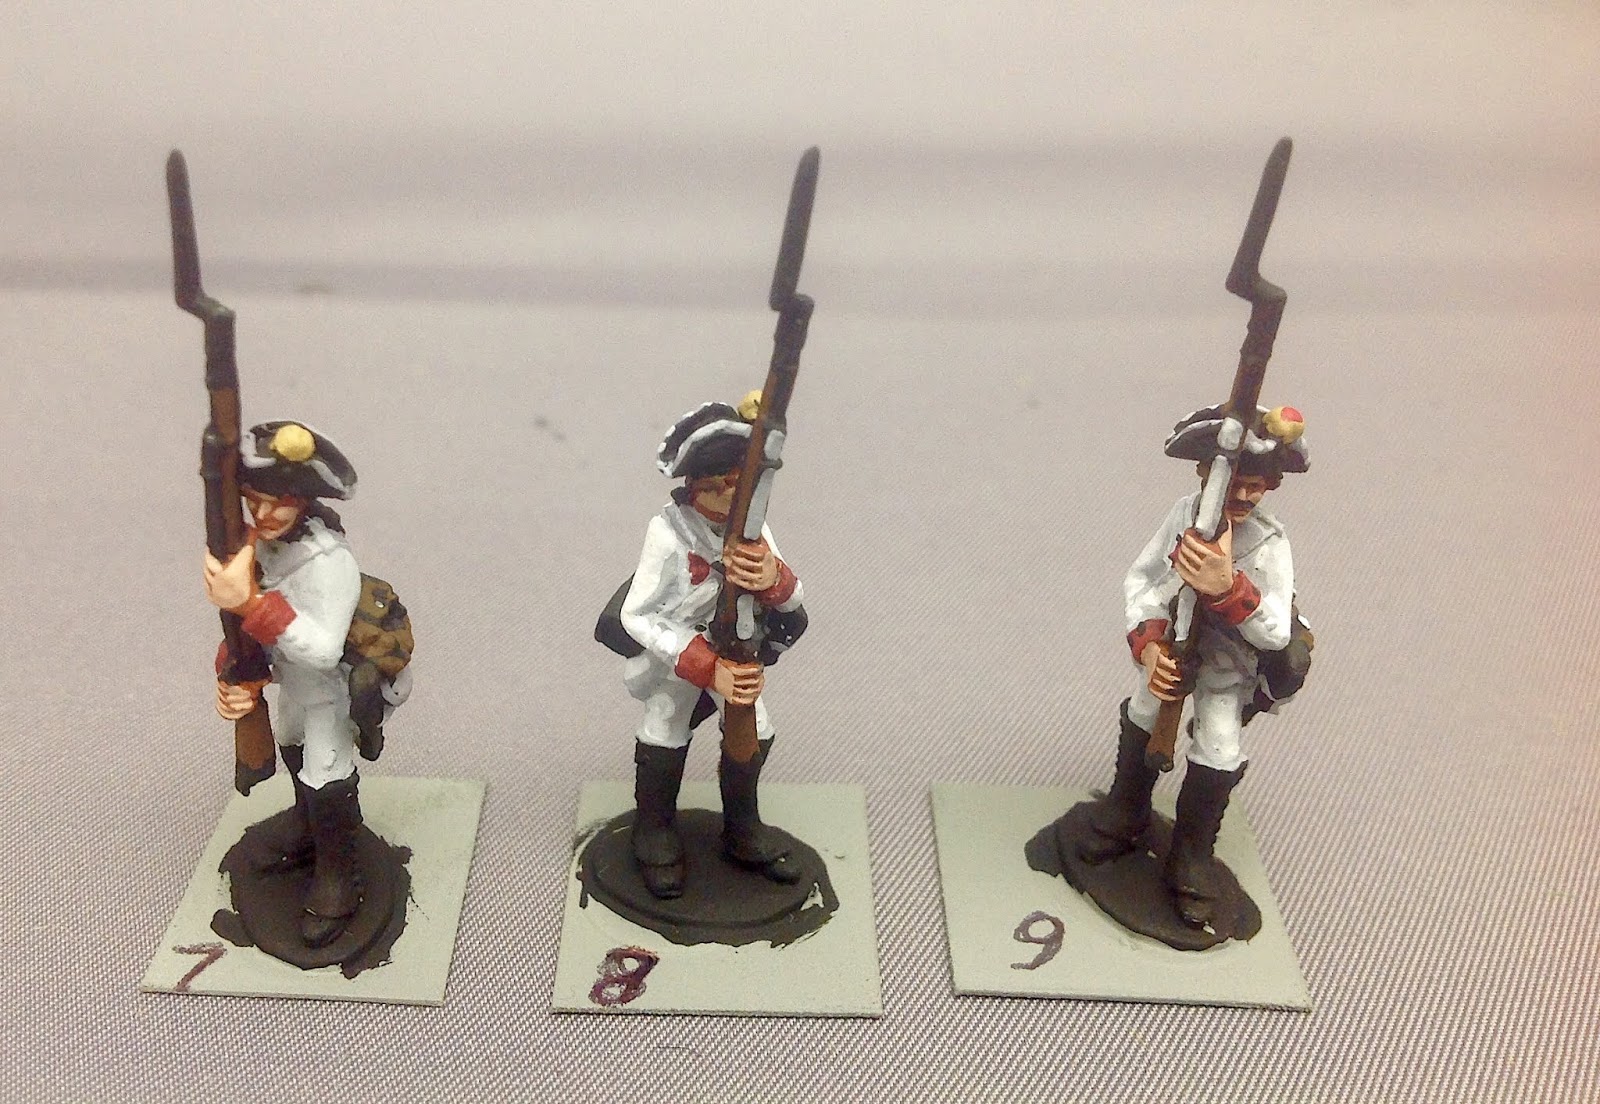
Steps 1 to 3: I start all of my painted figures with a coat of grey primer. I don't like how colors work with black primer and white primer oftentimes shows through for lighter colors such as red. Grey primer is a happy medium and works well for me.

I start the Austrian uniform with a coating of Ral Partha (or Iron Wind Miniatures - IWM paints, 77-707) "Light Grey" for my base coat (step 2). Next I apply a red brown color (IWM 77-713) for the flesh areas as the undercoats (step 3).


Steps 4, 5, and 6
Steps 4 through 6: The next step in the process (step 4) can be tediously time consuming and cause you to lose your will to live. However, it is probably the most important step in my painting procedure. I use a common craft paint black to black in the equipment on the figure. I apply black paint to the tricorn hat and the gaitors. I also apply black as an undercoat for all equipment items such as the musket and the fur pack. Remember how I don't like black primer? Well in this case, equipment items look much better underneath brown, which I use in step 6 for the musket stock, hair and fur pack.

Step 5 is the application of the red facing color on the cuffs and lapels. I use Reaper Pro Paints "Blood Red" (19002) for my basic red color on all of my figures. Through step 6, the figure still looks rather rough, but now that all of the base colors have been blocked in on the figure, the pace will pick up considerably from here on and make the painting of the figure fun and relaxing for me.

Step 6 is the application of all of the brown color (Reaper Master Series #09109) onto the musket stock, the hair and the fur pack.


Now the figures are starting to look like Austrian musketeers -
the transition from Step 7 through completion in Step 12
Steps 7 though 9: Now on step 7, I use some regular grey, mid-tone color for the hat lace and all of the cross belts. The grey is a common craft paint color. I also block in the dark yellow (P3 Rucksack Tan 93062) on the hat pom.

Step 8 is when we start to work on the final white uniform color of the Austrian coat. The white (P3 Morrow White 93073) is thinned down a little bit with a small drop of water to make the color flow that gives the coat color a consistent look. When I use the white paint straight out of the bottle I find that I sometimes get globs of pigment sticking to the figure in an uneven coat. Thinning down the white fixes this problem. I use white straight from the bottle for all of the cross belts because the thinning method doesn't work very well for smaller areas on the figure. I finish off the hat lace by using IWM Light Grey again - this time making small hash marks along the rim of the hat lace so that the darker grey underneath gives the lace some definition.

Step 9 is the application of red highlight color to the base red. I use Reaper Master Series Paint "Fire Red" #09004 for the highlight which helps to make the red "pop"!

Steps 7, 8 and 9.
 Steps 10 through 12 - finishing the figure

Step 10 is another one of my least favorite steps, the application of the metallic musket barrel and bayonet. I have yet to find a color that I really like, but for these models I used Reaper Master Series "Aged Pewter" #09196.

Step 11 is the application of brass (Valejo "Old Gold" #70.878) to butt of the musket, the buttons on the coat and the gaitor buttons, the hanger sword, the scabbard tip and any buckles that might appear on the figure. The gaitor buttons can be a bit of a pain to paint, but the Minden figures have raised buttons that are easy to paint by simply running the edge of your brush along the row of buttons.

Step 12 is when we add flesh highlights (Reaper Master Series "Dark Rose Skin" #09067), just dabbing a single dot on the tip of the nose, on the chin and on each cheek. I apply a couple of lines across the wrist of the figure. I don't paint knuckles, but some people like to do so. I also paint in the eyes by making a pin prick of white paint on each end of the eye socket, which I have previously painted black on Step 9. The final step is to paint the base of the figure dark green. Sometimes I will add some wood grain to the musket stock using Reaper Master Series "Oiled Leather" #09110 and use the same color as a highlight for the hair and fur pack.

Getting to the finish line: Steps 10, 11 and finally, 12.
In recent times I have stopped adding highlights to the muskets and fur packs on the theory that you can't discern the difference from afar. Also, I only use 2 colors rather than the triad paint system. One less color saves me a lot a time.

Steps 4 through 12 shows the progression of the painting after the initial base coats are painted.

I hope that you enjoyed this tutorial and that it will help you with some of your own painting projects. At a future date I will do a Prussian tutorial.

Saturday, September 29, 2018

Russian 4th Grenadiers - Newly Painted


Minden Miniatures Russian Grenadiers in coats.

CLICK PIX TO ENLARGE

A few days ago I finished a new battalion of Russian grenadiers wearing their green coat. These are the new Minden SYW Russian figures that Richard Ansell recently sculpted. A big thank you to Richard and to Griffin Moulds, the latter having turned the greens into production moulds in record time for me.

I think that these figures, the Russian grenadiers in coats, might be one of the most gorgeous units of Minden figures that I have ever painted. The fine details on the figure, the wonderful faces, the body proportions and last but not least, the colorful combination of red and green colors and gold-copper miters make for a beautiful wargame figure.

Russian 4th Grenadiers with view of the Ordanance flag.


In the picture below, the flags were hand-painted using Kronoskaf images as a painting template. Note that the Russian army had organized standing grenadier regiments that carried their own regimental standards.

Russian 4th Grenadiers - Minden Miniatures.
I wanted to pitch in and paint these grenadiers right away, but some recent "life events" kept me away from the painting table. Notably, painting figures is very relaxing for me and helps me to deal with some of the life stresses related to the recent passing of my mother. But I digress and am not looking for sympathies...

I use 32-figure battalions in my Russian units and base them on four stands. This is done so that I can place the drummers at the end of the line, where they should be, and the NCO is also at the end of the battalion line, again, where he should be.

However, four bases creates an imbalance in the symmetrical look of the battalion, noting that the flags are offset from the center of the unit due to having an even number of stands rather than an odd number of stands. My "fix" for this visual problem had been to add a stand of a battalion gun on the flank of the battalion. I use two Russian artillerymen and a Prussian 3-pounder for the actual gun (one of these days, in the future, I will add an actual Russian 3-pounder to the Minden figure range).

Two of the four stands shown with the battalion gun stand on the flank.
The picture also depicts how I place the drummer on the flank plus an NCO
at the end of the front rank (right-most figure in the first row).

Russian 3-pound battalion guns stands. I had to use the Minden Prussian 3-pound
cannon as a substitute for an actual Russian 3-pounder model.

4th Grenadiers with a pair of battalion guns - not my normal set up.

If you are interested in adding a Russian grenadier battalion to your wargame army, then you will need the following product codes for Minden Russian grenadiers wearing their green coats:

MR-007  Russian grenadier command (officer, ensign, drummer and NCO)
MR-008  Russian grenadiers, rank and file figures (8 figures)

It looks like I will need to either add a second standard bearer to the command pack or add a new product code for a pair of grenadier standard bearers.

I hope that you enjoy looking at these pictures (I apologize for some of them being a little fuzzy and dark) and that they convey the grandeur of the Russian grenadier uniforms.

Saturday, May 19, 2018

Quartermaster Saturday at Schloss Fritz


Schloss Fritz Game Room. An AWI battle is set up on the 6ft x 12ft game table.

CLICK ON ALL PIX TO ENLARGE

Yesterday I finished the first battalion of the new Minden Observation Corps Grenadiers and so I had nothing to paint today, even though I had a lot of free time. Ouch! So I decided to go down into the man cave and tinker around with basing already-painted units and getting new ones ready for the primer spray booth. 

So there was no figure painting today, but catching up on some of the behind the scenes things that I needed to do in order to get my castings turned into painted figures ready for their first tabletop battle. So in effect, I was the quartermaster today working on uniforms, supplies and other logistics for my little metal men.

I based the Russian Observation Corps grenadier battalion  and several Prussian 3-pound battalion guns, then I glued castings to cardboard in preparation for priming and painting, and made some custom flags using the Kronoskaf flags as a template.

Getting the figures ready to paint

Since I have nothing to paint, it was time to get a new regiment ready for the paint table. So this afternoon I picked out 32 of the new Minden SYW Russian Observation Corps Musketeers and glued each figure onto a piece of card using white glue (Elmer's or PVA). Having already painted the OC grenadiers, I want to have a battalion of musketeers for gaming and for marketing purposes.

In case you missed the news, Minden Miniatures recently added SYW Russian Observation Corps grenadiers and musketeers.


Minden Observation Corps Musketeers line up for their new uniforms.

Making New Flags for the Observation Corps

GMB Designs is my go-to supplier of flags for my SYW armies, but alas, they do not make the flags for the Russian Observation Corps troops. So the next best thing was to go to the Kronoskaf web site for SYW information and copy/download a set of OC Grenadier flags.

Kronoskaf Observation Corps Flags

 So the process is to click on the flag image and select "download" if you have an iMac computer (I don't know how the Windows PC system does this function, but it is probably similar.

The next step is to open the downloaded image in Preview, which allows you to futz around with the image a little bit (light exposure, color etc.). Then save the image to one of your files.

Next, open up a new Word document and insert the flag image into Word. Click on the flag image and a sort of square appears around the outer perimeter of the image. Move your cursor to the corner of the image and start pushing inwards to change the size (height and width) of the flag image. Once this is done, then click on the Edit pull-down menu and select "Copy". Finally, move your cursor next to the flag image and click to complete the copy-move function. Now you should have both sides of the flag next to each other, thus forming a single two-sided flag.

Once you are satisfied with the size of the flag, then print it out and cut it out like you would any other paper flag. Swab the backside with white glue and then fold the halves around your flag staff. While the glue is still wet, take old paint brush or pencil (something round) and curl the flag around it to create furls and bends in the flag. (see example below).

Someone once told me that flags flap in the breeze in a diagonal pattern to the flag staff. So never have your flags furled perpendicular to the flag staff.

Tricking out your new flags

The Kronoskaf flags will look to shiny and ordinary and without any depth, shadows or highlights. So my next step is to customize the flags by painting over them with acrylic paint. If you want to keep it simple, using the existing color as your highlight for a white flag, or your shadow for a dark colored regimental flag.

In the colonel's white flag below, I painted over the surface with white paint and then added shading by using a light grey color. This gives you instant depth and dimension and looks much better than using the flag straight off your printer.

For the red regimental flag I used the printer red as my shade color and added lighter reds to achieve the highlights that you see in the photos.


Front view of the Kronoskaf flags after some paint embellishment.


Rear view of the customized Kronoskaf flags.
I decided to take the alterations another step further and add shading and highlights to the decorations that are on the flag. So the sun rays were over painted with a dark yellow and then the sun rays were painted back onto the flag with a brighter yellow paint. The black double-headed eagle received a middle coloring of black mixed with some flesh colored paint = painting the wings in this new color. I decided that the first highlight of black was not distinctive enough, so I mixed up a new highlight color using the black/flesh combination and then adding a small bit of white paint to the mix. This new color is light enough that one can paint lines on the eagle's wings to give the impression of feathers. You can touch up some or all of the decorations in the flag to whatever level you fancy. The two flags above had everything repainted except for the red heraldric shield on the breast of the eagle.

By the time you are finished with all of this, it almost looks like you have a hand-painted flag. My freehand painting of flags is very ordinary to average, but having the actual design on the flag as your guide, you can create what is basically a custom painted flag for your unit.

By the way, I did all of the paint customization once the flags were glued onto the flag pole.

Thursday, February 8, 2018

Painting Tutorial - Do It Like Fritz


From start to finish, how I paint a figure.
Click on all pictures to enlarge.


I started painting a battalion of RSM Russian Grenadiers and I though that it would be helpful and of interest to our readers if I went through a step by step tutorial of how I paint miniatures. I have a list of the paints (names, manufacturer, product code) that I used at the end of this article.


Step One: I start by washing the figures in rubbing alcohol to clean it of any dirt or mould release. The I prime the figure with grey primer. I like grey because it doesn't overwhelm the lighter colors such as your reds and yellows, yet it is dark enough so as to make the lighter colors appear too bright, as you would get with white primer. I used to use black primer for everything, because then all of the black bits on the figure are already painted, which saves time. However, I am now with grey.


Step Two: Now I block in the basic uniform colors. In this example, I paint nearly the whole figure Russian Green. I am not concerned about the paint getting on the areas where there will be red paint. Then, I paint all of the skin areas with an undercoat of red-brown. Flesh looks better with a darker background than it does if you apply dark flesh over the grey primer. It results in a "doll house" look that I don't like. So go with a red-brown undercoat. Next, I apply the secondary base color, in this case, the red breeches, waistcoat and cuffs.
Primed figure on the left, then block in the basic uniform color, then add red-brown undercoat for all skin areas; and finally, add the secondary uniform color - in this case red.

Step Three: After all of the basic colors have been applied to the figure, I do what I call blacking the figure. I paint all of the equipment (muskets, cartridge boxes etc.) and black bits (gaitors, hats, mitres, etc). This can be kind of tedious. I have timed myself on this and find that it takes about 5 minutes to do all of the blacking.

Step Four: Once the blacking is completed, I add the color for the cross belts. This gives the figure the look of having  black lined the cross belt which is a neat effect. Then I paint all of the brown bits (hair, musket stock and fur bags) over the black. This seems to produce a nice effect on the brown coloring. Note also that the musket barrel and mitre front plate are black - when the metallic colors are added, they stand out better with a black undercoat than they would atop of the grey primer.

So the crossbelts, skin and a bit of the white undershirt have now been painted on the figure on the right, below.

For the face, I let some of the red brown color stay uncovered in the eye sockets, moustache and around the nose and neck. A dot of dark flesh on the nose, the chin, each cheek and the forehead are all that you need.

The "Blacking Process". Paint all bits of equipment, hats and gaitors black. Then start adding your basic color for belts, in this case a leather brown color. Note that the flesh color has also been added to the figure.

Step Five: Now I paint all of the metallic bits, in this case, the mitre plate, the gun barrel, the copper buttons and the copper on the cartridge boxes. Metallic colors show off better when there is black underneath them. For example, buttons should always start with a black dot on the button, followed by the metallic button color.


After the Blacking is done and the belting painted onto the figure. I paint the musket stock and hair  a medium brown. Finally, I paint all of the metallic bits: mitre cap, gun barrel, brass buttons and cartridge box facing.


Step Six: Now comes the fun part of the painting: adding the highlights to the basic colors. The three tone color system works well on many figures, but that third step adds more to do and more time. So I usually use only two colors: a dark shade and a highlight.

I have added red highlights to the breeches and waistcoat and cuffs and some green highlighting on the coat. The belts have some leather highlights too. I used to add wood grain to musket stocks but I stopped doing that because nobody is going to see the wood grain anyway.

The figure on the left is the same as the righthand figure in the preceding picture. The figure on the right  depicts the highlighting of the red and the green colors.

Step Seven: Now we are ready to complete the figure. All of the highlighting has been done except for the skin. I do this next. The face is easy - just a small dab of flesh highlight on the chin, bridge of the nose and on each cheek. You can also add a line or two of flesh highlight on the hands.

Part of the last step is painting in the eyes. Many people don't like to paint the eyes, which is ok. Paint the eye socket black and then you are finished. However, I like to paint the eyes so I put two small dabs of white paint in each eye, leaving the center of the eye black.

The finished figure is shown on the right in the picture below.


The figure on the left is the same as the one on the right in the preceding picture. The righthand figure is finished by highlighting the skin and painting eyes. Some people do not like to paint the eyes, which is OK too.

Paint Recipe Used on These Figures

GREEN Uniform Coat:
  Gnarls Green - P3 Paint (93034) = base color
  Leaf Green - Reaper Master Series (09011) = highlight color,
I find that the Leaf Green is a little too bright, so I tone it down by mixing in some Gnarls Green color.

RED Breeches, waistcoat, turnbacks and cuffs:
  Base Color: Blood Red - Reaper Pro Paint (18001)
  Highlight: Fire Red - Reaper Master Series (09004)

BROWN Hair and Musket Stock:
  Base Color:  Ruddy Brown - Reaper Master Series (09109)
  Highlight: Oiled Leather - Reaper Master Series (09110)

TAN/BUFF Leather Belts:
  Shade: Leather Brown - Reaper Master Series (09030)
  Medium : Tanned Leather - Reaper Master Series (09031)
  Highlight: Amber Gold - Reaper Master Series (09032)
I use the shade color, but mix the Tanned Leather and Amber Gold to create my highlight color.

FLESH:
  Shade: Rosy Shadow - Reaper Master Series (09067)
  Highlight: Rosy Skin - Reaper Master Series (09068)
  Undercoat for the shade: Red Brown - IWM (77-713)

COPPER Mitre Plate, Buttons, Cartridge Box Emblems:
  Copper Metallic - IWM (77-722)
  Old Gold - Viejo (70.878)
I mix the copper and gold together to create a sort of brass color. The Russian copper pieces were not the red copper color like on the U.S. Penny, but instead, had a gold/brass tinge to them.

METALLIC GUN BARREL:  Cold Steel - P3 Paints (93075)

WHITE Pom Pom:
  Gray - IWM (77-707)
  Morrow White - P3 Paints (93075)

BLACK Gaitors, Grenadier Helmet, Cartridge Boxes and belting undercoat
  Lamp (Ebony) Black - Deco Art American craft paint (DA067)


***********************************

So that is basically how I paint my figures. It is basically a two-color shade/highlight color system rather than the 3-color triad system. I use it because it eliminates a step in the painting process and reflects my point of view that no one notices the middle color in the triad for the most part. Recently, I have stopped using two colors for my browns - hair, packs and musket stocks - and just go with one color. Black is usually used without any highlight, although sometimes when I feel like it, I will mix up a black highlight by adding some flesh color paint into the black paint.

The key step in my painting process is the blacking phase. It makes the cross belts really pop because it gives the impression of black lining the belt without actually black lining it. Also, it makes the metallic gun barrel and hanger swords and buttons pop.

I hope that this tutorial can help you improve your figure painting. Use some of the tips or use them all as you see fit.

Thursday, January 7, 2016

ANZACs Figures WW1


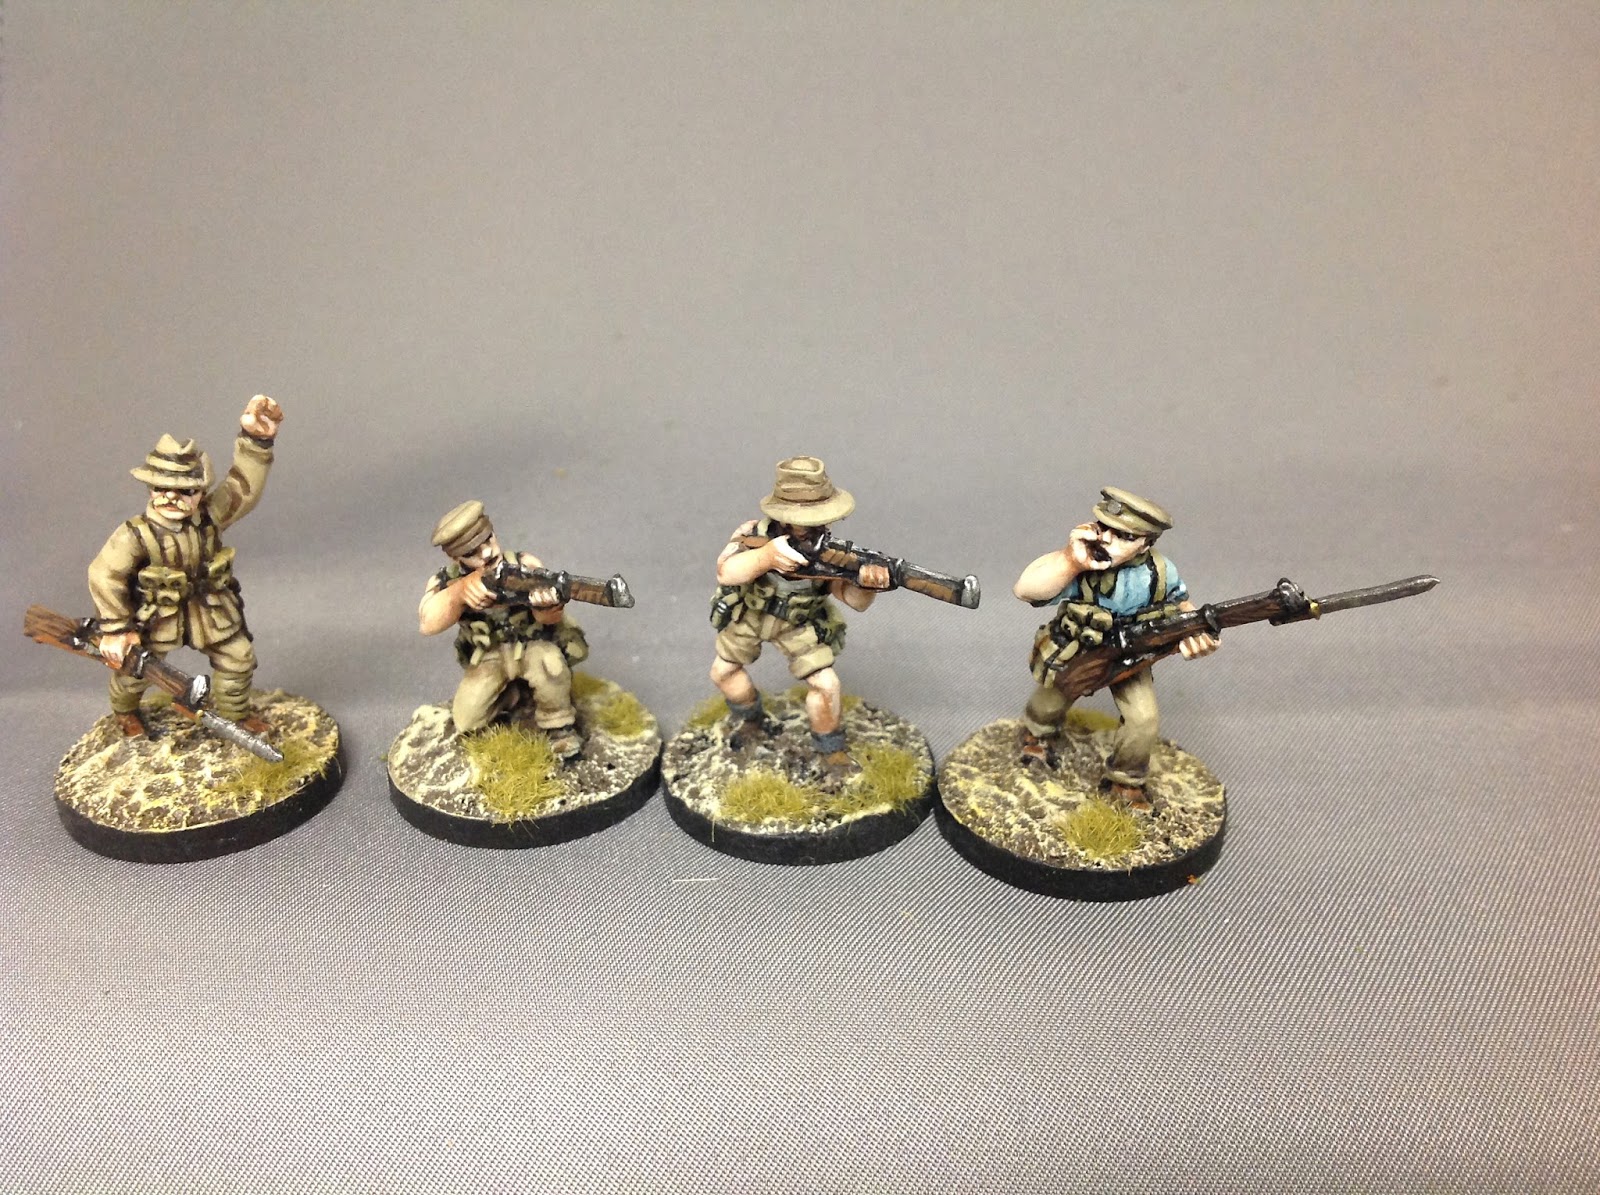
ANZACs painted by Alex Akers. Click on all pix to enlarge the view

Rear view of the first picture.
SOLD!

Here are pictures of the ANZACs (12 pointed) and what I believe are Germans (4 painted). The Lot for Sale also includes some unpainted Anzacs (machine gun crew of 3 figures) and 10 more in various  charging, advancing and firing poses. I'm not sure, but I think that the figures are Woodbine Designs. The entire lot is $95 plus applicable postage and fees.  First come, first serve.

I think that I took some fairly good pictures of the figures, front and back, but I have to say that these are some of the best looking painted figures that I have seen and that my photography does them no justice. I think that this lot is a real bargain.


Anzacs advancing (click picture to enlarge)

Rear view of the previous picture.

Another grouping advancing. I really like the blue shirts and the contrast that they have with the khaki. I wish that I could paint khaki like this.

Rear view of the previous picture.

I am pretty certain that these are Germans from WW2

Rear view of the Germans

As before, if you are interested in any of the figures painted by Alex, then send me an e-mail at

altefritz1740@yahoo.com

If I were a collector of the period, I would keep these for myself.

The Perry Napoleonics are still available. I aplogize for the poor pictures of the Perrys. I tried to clean up and lighten the pictures that were sent to me, but as with the Anzacs, the pictures do them no justice as they are very nicely painted and based.

Finally, I also have some 40mm British Napoleonic Peninsula figures. I'm not sure of the brand, but they are impressive looking figures - these are unpainted. Make me an offer, or I might paint them myself.

Next up, some pictures of two battalions of Minden Hungarian Musketeers that were recently added to my army. I will post pictures of the Hungarians by Saturday.

Wednesday, January 6, 2016

Perry French Napoleonics For Sale


Perry French Napoleonics - plastic 28mm. Click pix to enlarge

French 28mm Napoleonics For Sale
I am posting some pictures of two French Napoleonic battalions, 24 figures each, of Perry plastic figures that are up for sale. The figures were painted by Alexander Akers and I am posting them for sale on my blog for Alex since we seem to get a fairly large amount of page hits on this blog. Alex is asking $5.00 per figure so the full set of 48 figures comes to $240.00 plus applicable postage.

Alex is a really good painter and has a few Golden Demon awards as evidence of his prowess.  Better yet, I can personally vouch for his painting skills as I use Alex to paint some of my own Minden figures to bulk up my Austrian forces.

The figures are well painted and they are attractively based and terrained to give them a nice finished appearance. At $5.00 per figure, this is really good value as I would personally sell them for significantly more if they were mine.

Take a closer look by clicking on each picture to see the well detailed Perry plastics and Alex's nice brushwork and basing. If you are interested, then send me an e-mail at: altefritz1740@yahoo.com and I can hook you up with Alex to make the final arrangements.


Close up of the command stand


Rear view of the Grenadier base.

Grenadier (left) and Voltigeur (right) stands.

Close up view of the Voltigeur base.

Next Item For Sale - WW1 Anzacs for Gallipoli

Alex also sent me some 28mm Anzacs in Gallipoli kit for sale. I will post pictures tomorrow. There are 13 painted and singley based figures and maybe another dozen unpainted. I think that they might be Woodbine Design figures. There are also five figures that look like Deutsch Africa Korps 28mm single figures painted. All of them are painted to a very high standard and are perfect for a small skirmish game force or an Indiana Jones style game in the Middle East.


Saturday, July 11, 2015

Tale of the Table


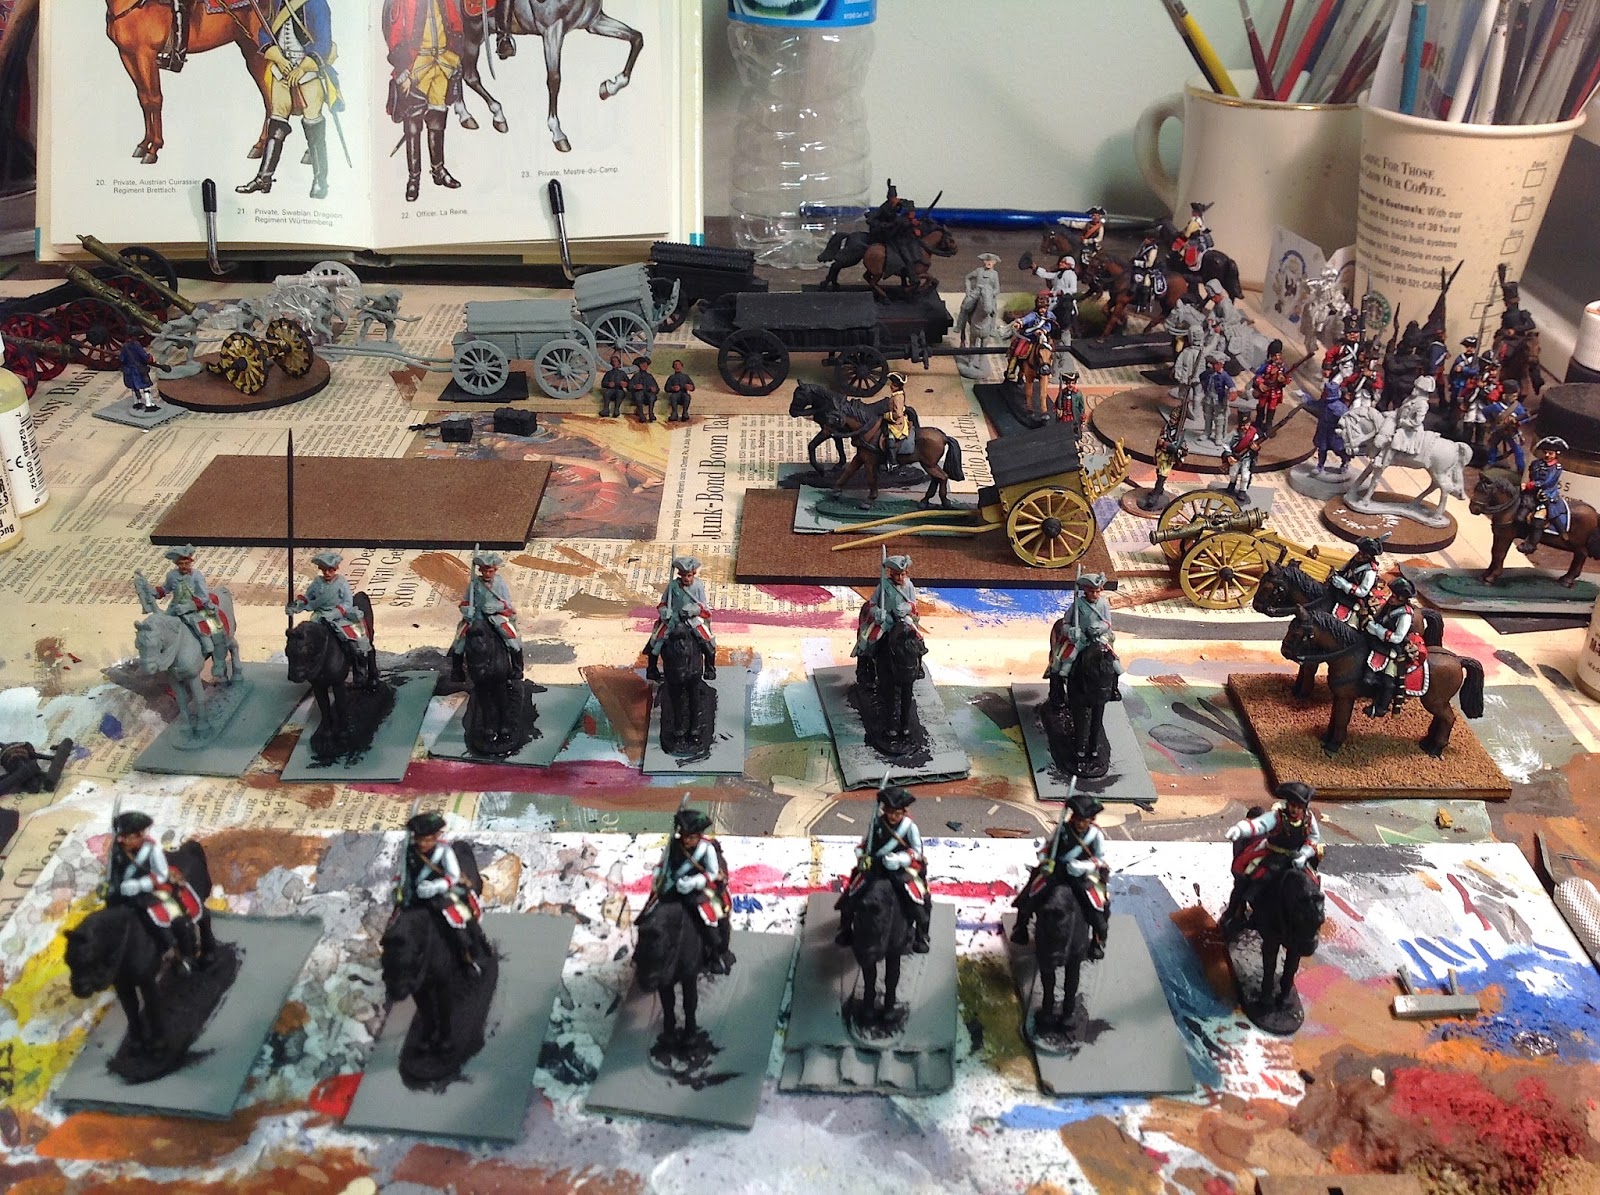
Der Alte Fritz's painting table (definitely a SYW theme going on here)

Here are a few pictures of my painting table in the cellar of Schloss Seewald. It looks like nothing special to speak of, but maybe it really does. Let's take a closer look:

CLICK ON ALL PICTURES ONCE OR TWICE TO ENLARGE THE VIEW


My current project: a squadron of 12 Austrian cuirassiers (Anhalt Zerbst Regiment)
The picture above shows you what I am currently working on, a squadron of 12 Austrian cuirassiers, Minden Miniatures of course. I usually paint a dozen at a time, but this time I have broken the squadron down into two groups of six figures. I had been hitting a painting wall and decided that if I reduced the project into smaller pieces, then I could get my painting mojo up and get these guys finished.

In the middle background, the remains of a project that has been literally pushed to the back of the queue.
The picture above depicts some of the Austrian equipment that I was working on a week or two ago. Behind the yellow Austrian 2-wheel ammo wagon is a Prussian 4-wheel wagon that has been sitting on the painting table for about 2 years. To the right side of the table, you can see a few samples and other one-off figures that I have painted over the last couple of years. To the right of the cannon model is General Knyphausen. Behind Knyphausen is a old Hinchcliffe one-piece casting of Napoleon. I really like the proportions of the Napoleon figure and want to paint him soon, for the fun of it. He has been in primer for about a decade, maybe longer.

Behind Napoleon one can see a Warfare Miniatures GNW Swede covered in blue paint and an RSM Croat reaching for his cartridge (he was painted by Dennis Smail of RSM). Behind the Croat is a French Napoleonic grenadier painted as  one of the Paris Garde (red coat with green facings), a colorful unit that I want to paint someday. You can also see a couple of center company French in shakos also painted as the Paris Garde. These are all Elite Miniatures figures.

Moving on to the round wooden base, we see the Minden Zieten personality figure handing a message to another hussar. There is also a Legion d'Hainault French grenadier painted as  a sort of Grenadier de France soldier. This was painted before the actual Grenadiers de France figures were added to the Minden range.

To the left of the Zieten stand is one solitary Esterhazy Hussar (Austrian SYW) that I painted as a sample figure prior to painting 24 of them on commission. I like the way that the horse turned out, so I saved him to use as a painting reference for future horses. Behind the Esterhazy hussar are two RSM SYW generals that will one day become Austrian generals. Behind the RSM generals are some Minden Prussian cuirassiers including Seydlitz. Next to Seydlitz is a cuirassier, back to the camera, that was painted by Frank Hammond (so I thought that I would save this figure for my own one off collection).

A collection of various wagons, cannon and limber that are gathering dust.
We can see a number of wagons and cannons on this section of the painting table. I'm afraid that they have been parked here for about 2 years and are not likely to move off the dealer lot anytime soon. You can also see my copy of the Mollo SYW book. This was a rarity at one time, but I seem to have collected about 5 or 6 copies over the years. It is still a handy painting guide to have.


On the small round stand is an old RAFM 3-pounder that is now in Austrian service. A couple of RSM artillery crew are waiting for their new uniforms. Behind that are some Fife & Drum artillery pieces: red for French and unprimed Prussian 12-pounder. I seem to have enough Prussian 12-pounders these days, so there is no hurry to paint more.

Way back in the left corner is a Prussian cuirassier officer (RSM) painted by Bill Biles. Bill was my first figure painter when I first started in the hobby. He painted all of my Prussians while I learned to paint working on the Austrians. You can also see a stick of Suren Highlanders that I picked up at a bring and buy and plan to add to my Big Battalion Black Watch regiment.

The Minden French Marshal figure can be seen lurking among the paint pots. I hope that I can paint him one day, but without a French army, there is no sense of urgency on my part.

The shelf of One-Off Figures
To the right of my painting area, are a couple of plastic drawers that contain paints. However, it seems that once a jar of paint goes into these drawers, they never see the light of day again.

On the top of the drawers is a motley collection of one off figures that I have painted over the past 10-15 years. I often try out samples of one figure to get an idea of how to paint it. You can see some Foundry and Crusader Prussians, a Perry Hessian Jager, a Suren British soldier at Fontenoy and a Dennis Mize fantasy warrior princess (Mize was one of the greatest figure sculptors that I have ever seen, in my opinion. His lifelike figures are amazing).

Well, that's a quick tour of my painting table. I hope that you enjoyed it. Leave comments if you want to ask any questions or just care to leave a comment. I enjoy reading the feedback.


h