 |
| Hand to hand combat: 54mm Spaniards versus Roman cavalry during the Second Punic War. |
As I get ready for this year's Historicon convention in Lancaster, PA (July 16-20,2025) I am giving some thought about my approach to hosting a wargame at a convention and I figured that this might be of help to anyone either (1) interested in playing in one of my convention games; or (2) or influencing how you might create and organize a game of your own in the future.
FUN!
It goes without saying that a war game must be fun to play . Why else would we make the investment in time and money to play in the game in the first place?
Here are the essential elements to having a fun convention war game:
1) Fast play and easy to learn rules.
2) A creative scenario with achievable victory objectives
3) Good looking terrain that excites one's imagination
4) Colorful and nicely painted miniatures
5) A game master and players who are good sports and interact well on the table top
So let us take a deep dive into the five elements of a fun convention game:
The Rules: all of my games have easy to learn rules and are constructed to facilitate a fast playing game in terms of time. I find that the players in my games usually have the rules down pat by the second game turn and they can almost run the game by themselves. This leaves me free to roam around the table and answer any questions or provide playing tips relative to what is allowed in the rules.
I do not want any player in my game to fail because he/she did not understand the rules. I want their table top success to stem from their use of period appropriate tactics and, let's face it, good luck with their dice. My easy to learn rules means that the players can concentrate on their generalship rather than worrying about getting gigged by the rules.
Back in the 1990s I had the good fortune to visit the War Game Holiday Center in Great Britain. The venue was created by the late Peter Gilder, but by that time the reins had been handed over to Mike Ingham. The house rules used were Gilder's "In The Grand Manner" (ITGM) set of Napoleonic rules.
At any rate, my first Napoleonic game there was Austerlitz and I played the role of Marshall's Lannes and Bernadotte holding down the left flank of the French army. I had never played ITGM rules, but I was a fairly seasoned war gamer at that time. My experience taught me that a well placed battalion of infantry with secure flanks has the fire power to stop a cavalry attack in its tracks. I was wrong.
 |
"Hey you there! Yes, you. Your Mother wears army shoes. Cowards, don't run away!"
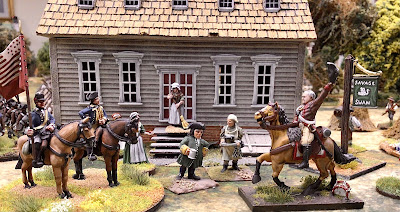
American militia at the Battle of Bunker Hill trying to make the best of a bad situation. |
My misunderstanding of the rules resulted in me watching a whole corps of 16 French battalions routing off the table while the second corps was left holding on for dear life. The ITGM rules enabled a single squadron of 8 to 10 figures slice through a battalion in line like a hot knife through butter. I did not form square. Needless to say, the sun did not shine on the field of Austerlitz for the French that day.
I do not want any player in my game having a similar experience. Never!
I also dabbled in some Napoleonic games using the dreaded Empire rules. They were too complicated for my college educated brain to grasp and understand. Finally I told the umpire "just tell me how many dice I need to roll and what minimal score I need". I couldn't be bothered to try to figure out the Byzantine labyrinth of flow charts and arrows.
 |
| Duke Siefried handing me my head in a Napoleonic In The Grand Manner game. |
Creative Scenarios: in general, it is not that much fun for a player to see lines of figures from end to end on the table top with the objective of simply moving forward and slogging it out. Most players are intelligent and are up for a good challenge when they fight a war game. So why not create a scenario that makes them think a little and maybe think outside the box?
I created a Napoleonic scenario for the 1806 Jena/Auerstadt campaign in which I had a long line of Prussian artillery facing off against a corps of French infantry. It was a rather daunting task and imposing sight for the French players. However, what they did not know is that the Prussians only had one round of ammunition for each gun model. Think about that one for a minute. Then, to add more fuel or folly to the fire, I knew some of the players and so I arranged the teams so that the more passive players commanded the French army while the more aggressive players were Prussians. It took the French about three turns to figure out what was going on and then all of a sudden they attacked with the ferocity of a hurricane. It was one of the most fun games that I have ever hosted.
 |
We played the Napoleonic Battle of Aspern-Essling as a disguised Seven Years War game
in what turned out to be a fun and creative scenario. |
 |
Prussian SYW cavalry (playing the role of Nalpoleon's army crossing the Danube)
trying to establish a bridge head on the Austrian-French side of the river. |
Realistic Game Objectives: If you play on a 6-feet wide game table and the movement rate for infantry in line is only 6-inches, then asking one team to march across the width or length of a table sets an unrealistic game objective. So please, tailor your objectives to the movement rates of your troops. For example, let's say that our infantry can move 12-inches in line formation and that their set on area is one foot into the horizontal edge of the table. That means that if you were unopposed, that you could cross the width of the table, in line formation, in five game turns. So don't make crossing the table in three or four turns one of the victory conditions. The math says that it ain't going to happen.
Jim's Rule of Fours: Do you remember this one? It states that the average war gamer can easily handle up to four combat elements (infantry or cavalry) plus one artillery unit. Anything more than that and two things can happen: (1) the game will bog down because there are too many figures on the table; or (2) the individual gamers will be overwhelmed by the number of units that they have to move and handle each turn, again slowing down the game to an uncomfortable pace. It then follows that if your game has four players per side, then limit the armies to no more than 16 units per side (4 players times 4 units = 16 units). Trust me on this one, it works.
Good Looking Terrain: Now I understand that not every game judge is going to be able to decorate his table top with custom built terrain boards and beautiful scratch-built buildings, but it is still realistic to be able to present a good looking table at a moderate expense. An attractive looking game table is going to catch the eyes of passers-by and some of them may even stop and ask you if they can play in your game.
It starts with a serviceable and good looking game mat, be it a fancy printed mat such as those from Cigar Box Battle Mats (my personal favorite ) or a few yards of cloth (canvas, felt or chenille, etc.). If you choose the economical route of the cloth mat, then get a few cans of spray paint and spray some paint over the cloth to give it a mottled appearance rather than one endless dark green felt color. A little bit of spray paint makes a huge difference. Invest in some lichen and spread it liberally across the table to break up the flatness or sameness of the underlying cloth. I also gather up small rocks/pebbles and twigs while I am walking the dogs and I scattered the rocks across the table top.
Laser cut buildings are a boon and game changer for war game table tops. Invest in several farm houses or other buildings, ones that you can use over and over. They are fun to assemble and paint and make your table top look good. For roads, if you must use pieces of felt cut outs then consider spraying a highlight color on to them. Better yet, buy some fine grain railroad ballast material and shake the material out on the table to form your own roads. When the game is over, simply scoop up the ballast and put it back in its jar.
Or Make Your Own Buildings: Oftentimes the idea of making your own building seems rather daunting and in fact it often is. However, I decided to just pitch in an experiment with different building materials and started to make basic rectangles and boxes from foam core board, card board, balsa wood and bass wood. Once you have made your first building model, you get a better idea of how to make buildings in general and as they say, "practice makes perfect". It really is true. One of my first scratch built houses was nothing more than a square made from foam core board with pieces of balsa wood glued on to represent windows and doors. I painted it and slathered some wall board paste to the exterior and left it to dry. I discovered that the sides of the house had warped from the moisture of either the paint or the wall board paste, or likely, from both. I learned how to use a hot glue gun to assemble pieces, a little mitre box and saw to cut angles in wood and how to make my doors and windows snazzier with nothing more than scoring the balsa wood with a straight edge ruler and the nib of a ball point pen.
The point is, a scratch built building, no matter how simple it looks, matters and other gamers can see that you have invested time to unleash your creative side and they will appreciate your effort.
Nice Looking Miniatures: You do not need to be a professional painter of the Steve Dean or Sascha Herm skill level to put good looking figures on your table. Now I have NEVER seen anyone game with unpainted metal figures, so let's dispose of that old trope right away - it doesn't happen. The more you paint the better you get and over time you will find that your painting skills have improved if you keep doing it. One way to offset a less-than-exciting paint job is to go all out on basing the figures. A good looking base of figures works wonders in the visual department. I've gone into the how to's of how I base my figures on this blog and you can find them through a subject search of tutorials that I have posted.
Good Sportsmanship: You can have all of the elements perfectly in place, but you can still have a stinker of a game experience if you and/or your players have a bad attitude or experience poor sportsmanship while playing. We are all competitive, but remember, it is just a game and it is ok to lose a game or have a rule decision go against you. I have largely stopped using commercially available sets of rules and write my own game rules for a number of reasons, one of which is that it helps keep the lid on any potential rules lawyers. Hey, I am the author of the rules, so I think that I know what I am doing when I make a game judge decision. For the most part, I usually have nice, respectful and happy players in my games so sportsmanship is not a problem. Note that your players often take cues from your attitude and demeanor and they will follow your lead. If you are pleasant and happy go lucky then your game players will likely exhibit the same attitude.
 |
Here is a group of war gamers who have had a lot of fun playing a game.
Aspern-Essling in the Seven Years War was one of my favorite games of all time.
(oh, by the way, my team lost) |
Now we have all had moments when things have gone terribly wrong for us in the game, be it unlucky dice rolling (there is no such thing as "bad dice rolling"), an inadvisable decision that you made or an opponent who is really on his game that day. Our personal morale level drops like a rock and that is completely normal in a game. So don't beat yourself up over it. It happens. Just don't let your mood turn bad and take it out on the game judge or the other players. Don't mutter dark thoughts under your breath that others can hear. Step away from the table for a moment, stop to catch your breath, and tell yourself that you are going to make the best of the bad hand that has been dealt to you.
It is not a lot of fun watching sixteen battalions of your infantry rout off of the table, but you can turn the situation into one of fun (Fritz, come on , really?). One of the most fun things in a war game is watching spectacular failure on your own part. Embrace it and laugh at it. When more and more of my Frenchies were running away i started laughing at them "boo, hiss, come back you cowards" or roll your dice with some flair: "come on baby, give me box cars cuz Mama needs a new diamond ring." And when a handful of dice turn up with lots of snakes eyes, laugh at those dice and have fun with it. Encourage your opponent to join in on the laughter and share in your dice woes. Suddenly you will find that you are having lots of fun. Nothing beats spectacular failure when it comes to fun on the table top.
 |
SYW French (left) and Prussian (right) heavy cavalry clash during the disguised
Battle of Aspern-Essling. The grand melee didn't end well for my Prussians,
but I sure had a lot of fun fighting it out. |
I once played the Battle of Lobositz from the Seven Years War. I had all of my Prussian cuirassiers stacked up in line formation one after the other in about ten ranks deep. In the ensuing melee, I lost the first melee by the matter of one pip on my D6 dice. I knew what was likely to happen: the first unit would rout and run through all of the other units behind it, and then they too would be at high risk of breaking. So I steeled myself for the inevitable and told myself that I was going to try to make the best of it and have some fun with the developing bad situation. I was going to laugh at the Dice Gods. The first regiment routed through the second regiment and the Austrians pursued. The second regiment of cuirassiers didn't stand a chance, and they broke too. And it happened again. The next unit lost the melee but they retired disordered rather than routing like the others. "Come on lads, don't you have the good sense to flee like the others?" Another unit would rout "there they go, bye bye, weeeeeee!!!!" and then I'd mock them and laugh at them. It got so that everyone in the game was laughing so hard at my spectacular failure and I think that I can truly say that it was one of the most enjoyable war games that I ever played.
Remind me one day to tell you the story of Bucket Woman.
ccc


