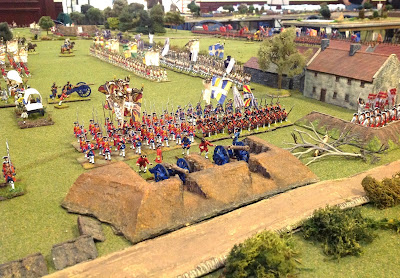
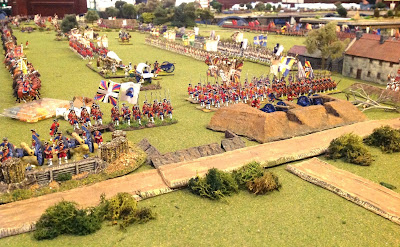
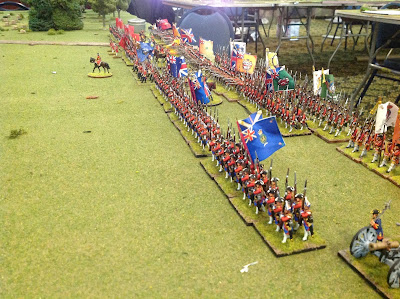
Monday, April 30, 2018

Jung Sydow Garrison Regiment V Pictures


Garrison Regiment V - Jung Sydow


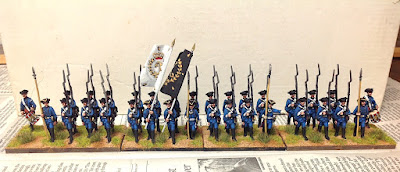
I completed the terrain work on the bases and glued on the flags for the Garrison V regiment, or Jung Sydow, which fought at Kunersdorf. The regiment was raised in 1741 to garrison the fortress of Glogau. During the SYW the regiment garrisoned Zullichau, Crossen, Drossen, Beeskow and Sommerfeld, all of which are in eastern Brandenburg or Pomerania. As a result, the regiment would be in the path of the Russian invasions of 1758 and 1759. The regiment had the misfortune of participating in the 1759 battles at Kay and Kunersdorf.

1st Battalion of GAR V shown with its colours and a battalion gun.

Organization
I will add a second battalion of the regiment in the near future as I get to work on creating a duff Pomeranian theatre Prussian army to fight my Russians. The eastern Prussian army will have 32 figures on 4 bases. I am thinking of adding a fifth stand - the 3-pound battalion cannon - to each Prussian battalion that I paint for the new organizational scheme. The cannon model will move with the battalion and is largely for looks. It will be allowed to fire at targets that are outside of musket range, but once the 8-inch musket range is reached, then the gun is reduced to just adding one D10 die to the unit's dice rolls for small arms firing.

I will have a separate blog posting that goes into more detail on the new Pomeranian Project.


Flags
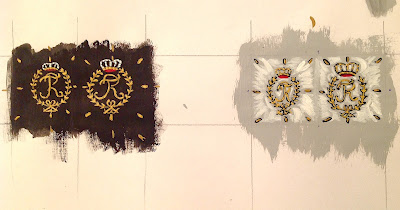
Normally I would order the necessary flags from GMB Designs, however, they do not make any of the Garrison regiment flags. As a result, I had to hand paint my own flags using Kronoskaf as my reference

GAR V flags painted by Der Alte Fritz
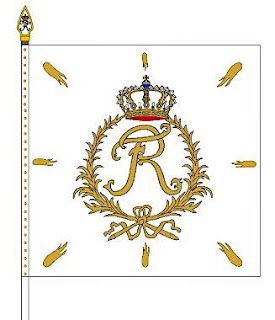
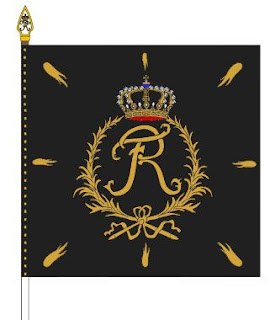
You can compare my brushwork (above) to the Kronoskaf flags (below). Mine are hardly Mark Allen quality, but I gave it my best effort. The most difficult part, for me, is getting the two halves to match up in terms of the size of the emblems. I did the right hand designs first, and then the left hand design second. In both instances, I made the left side slightly smaller. Doh!  Fortunately, it will be hard to tell the difference once the flags are glued to the staff and furled.

I sized the flags to be the same size as the other GMB Prussian flags. I would imagine that the design painting would be easier if I made the flags a little bit larger - provides more area for painting.

Kronoskaf flags:


Thank you for reading my blog. Please feel free to add any comments at the end of this article.

Saturday, April 28, 2018

The Best Maps for Wargamers Ever!


The Battle of Spotsylvania, by David Greenspan
DOUBLE CLICK ON ALL MAPS

I
'm sure that most of my readers will be familiar with the wonderfully animated and detailed maps that were created by David Greenspan and published in the American Heritage Pictorial History of the Civil War, by Bruce Catton.

These were more than maps to me when I was an eight-year old boy who was just starting to get interested in the Civil War (sorry my friends, but there are civil wars but there is only one Civil War and that was the one fought from 1861 to 1865 in the United States).

Each map was a veritable diorama of a particular battle, showing the little men as they moved back and forth across the battlefield. Since I was already playing with toy soldiers, the little figures and the colorful buidings and terrain captivated me like nothing else. Anytime I was reading about a Civil War battlefield I would pull my copy of Catton's book off of the bookshelf and pour over the battlemap to give me a better understanding of what happened. Truth be told though, it wasn't the understanding that compelled me to look, it was another opportunity to look at all of those little soldiers again.

I never got tired of looking carefully at the map and finding some vignette for the first time, be it some soldiers being held prisoner, an artillery battery unlimbering or a column of troops marching toward the sound of the guns. It occurs to me that one could use the Greenspan illustrations as the basis for replication of the terrain for one of our wargames.  For example, I could use the Spotsylvania or Gettysburg terrain shown on the map but use it for a battle in the AWI or SYW eras.

I only recently found a copy of a map that Greenspan illustrated for the Battle of Freeman's Farm from the American Revolution. I know that I had seen this map a long time ago, but I had forgotten that the artist had done some maps for the AWI battles.

The Battle of Freeman's Farm, by David Greenspan

There is not much known about the artist, David Greenspan, but I would like to take this opportunity to thank him for his work and to let him know how inspirational they were to me then, as well as now.

I am sure that everyone reading this will be nodding their heads in agreement as this article stirs up some wonderful memories from a long time ago.

Thursday, April 19, 2018

My Renovated Game Room is Completed - Huzzah!


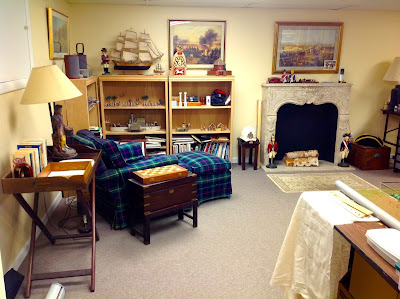
After Picture: The finished game room looking south. The table axis is now horizontal
(or perpendicular to the faux fireplace)

CLICK ALL PICTURES TO ENLARGE

I decided that it was time to spruce up my wargame room with a new coat of paint and to reconfigure the layout and get rid of the clutter that had been accumulated over the years. The finished room is shown in the picture at the top of this page and compares to the old room shown in the picture below.

Before Picture: The old game room layout. Pardon the mess and clutter. The table ran vertical towards the fireplace and there was space to place back tables on each side of the main table. I decided that I didn't need the back tables all of the time.
I decided that I wasn't using my available space (and I have a lot of space as you can see) in the optimal manner and I resolved to do something about it. The room had a cramped feeling to it, due largely to having a pair of back tables that ran parallel to the main game table. The back tables took up a lot of space and left me a minimal amount of open area in the game room.

I decided to get rid of the back tables and turn the orientation of my game table from a vertical axis running from the South Wall to the North Wall (where the fireplace is) to a horizontal axis that is perpendicular to the North Wall. The most noticeable result is that this created a lot of open area around the fireplace and the adjacent corner that I call The Reading Corner, for obvious reasons.

As an added bonus, the new horizontal orientation of the game table also created new open space on the opposite side of the room - the South Wall. Here, I previously had storage shelves and stackable bins to hold all of my wargame buildings and terrain pieces. I kept the stackable bins where they were, but moved the storage shelves to the West Wall and thus opened up an area where I could place an auxiliary table 5ft by 6ft. I plan on using this as a Map Table where I can store the large South Carolina map of 1770-ish that I am using in my 1780 AWI Campaign. I also store my supplies for terraining and grassing the bases in my wargame units underneath this table. When I need to terrain bases, I simply pull the tables apart and work on a 2.5ft by 6ft surface, then push the two tables back together when I am finished terraining bases. If needed, these two tables could be added on to the main game table to form a "T-Shape" game table.

An added benefit of this project is that I was able to remove all of the clutter of half-finished projects and piles of unpainted/ partially painted/orphan painted figures, etc. and move them out of the room. Some of these figures will be chucked down the knucker-hole while the keepers will now be stored in small white cardboard boxes, labeled so that I can identify their contents in the future.

The painting project took about four days of painting the walls a cream yellow color to warm up the appearance of the room, and then to paint the contrasting white trim on the baseboards and doorways. I really like the way that the room turned out.  So come with me as I take you on a tour of the new game room, and then compare it with pictures of the sorry old room.


A Virtual Tour of the New Game Room
The game room is in the basement of my house, so one must take the staircase from the ground floor of the house into the basement (cellar). At the bottom of the stairs, I have stored bins to hold all of my Minden SYW and Fife & Drum AWI miniatures. There is also a 4-tier bookshelf that began life as a neat and tidy collection of books, board games and rules, but had morphed into a disorganized storage place that surely scared me, if not my guest.

So we descend into the basement, pass by the inventory stock and the now-tidy book shelves, and emerge into the open area that is my wargame room. Follow me as I take you on a tour of the game room, starting on the left side (East Wall) of the room, to the South Wall, then the West Wall  and finally the Reading Corner along the North Wall.

Looking towards the entrance hall from the game room.
Finished goods Minden and Fife & Drum inventory bins lay at the foot of the basement staircase.
After passing the entry hallway, we turn to our left and look at the game table, all set up for an AWI game in my South Carolina Campaign. To the left is an oak bookcase and further back are the stackable plastic drawers that hold all of my game buildings.

Walking into the game room and turning left. The next several pictures will walk you
around the perimeter of the  game room from left to right.
 We shall then pass to the left of the game table and take a look at a picture of Olde Bones Apart staring at us with a Mona Lisa like grin. This is actually a poster that I found at a Starbucks Coffee store in Chicago, some 10 to 15 years ago. I had the poster framed for mounting on the wall. Previously, Napoleon was covered over by two storage shelves, which I have moved to the right so as to open up a place for a work table/map table area. I also plan to set up a DVD player in this area.


The south wall holds stackable bins to hold my buildings. To the left of the bins is a table where I can terrain bases. To the right of the table is The Closet of Doom (you don't want to go there), and then the start of the shelves on the west wall where I store boxes of armies and table top terrain items (trees, roads, rivers).


An old Napoleon poster found at Starbucks about 12 years ago gazes over the map table. (6ft by 5ft). The large map is used for my 1780 South Carolina AWI Campaign.


The west wall terrain/army storage shelves to the left,
and then moving to the right towards the Reading Corner.
As we pass along the West Wall, now filled with storage shelves, we gaze upon my favorite partr of the room known as The Reading Corner. The plaid chair is very comfortable to sit in and it had belonged to my father, so it has some sentimental value to me, even though the upholstery is getting a little bit threadbare. The book cases hold my CD player for music and a few shelves of books and several shelves that hold a small part of my toy soldier collection. I wish that the fireplace was a functioning piece. I bought it circa 1985 after graduate school, at a used furniture store, and it has moved with me from house to house over the years. One day I might actually have it installed as the mantle over a working fireplace, but for now it provides a comforting focal point for the room. This part of the room is now more open than it used to be so I have effectively created a nice reading area for the game room.


The reading corner and faux fireplace in the NW corner.

Another view of the Reading Corner and fireplace.


The Painting Table is located to the right of the fireplace and next to the hallway where the Minden/F&D  inventory is stored. I downsized the painting table from a 6ft long by 2.5ft wide  area to a smaller 2ft by 4ft table. I still have plenty of room to paint figures, but less area to accumulate the clutter of partially painted figures or one-off finished figures that always seem to grow on the table
I had wanted to tackle this project back in January, but with so many things to do for preparation of my game and dealer booth for the Seven Years War Association Convention April 6-7th, I postponed the project until after the convention. The initial task, which was quite Herculean, was to move most of the furniture away from the walls so that the painter could do his work. Some of the shelving could be shimmied away from the wall by two people, but in a lot of other cases it required removing things from the shelves and piling them up on my game table and other parts of the basement.

The Olde Gaming Room
So here are several pictures of the old gaming room so that you can compare the old messy barracks to the brand spanking new, in Bristol shape, gaming room.


The faux fireplace and the older/larger painting table. Note the clutter on the floor.

Looking the other direction from the fireplace towards the South Wall. The two shelves to the left of the flag were later moved to the West Wall on the right, so that I could have all four shelves along one wall.

And looking back from the South Wall towards the North Wall fireplace. To the right you can see the entrance hallway where I store the Minden/F&D finished goods inventory.

The old version of the Reading Corner.

And Now for the Transformation of the Room into a New Swan
The following pictures illustrate the mess and discombobulation of the game room during the painting phase of the project.

Everything has been moved away from the West Wall and piled onto the game tables in the center of the room. This shows the white walls before the new cream-yellow paint was applied.

The Painting Table was carefully moved away from the wall so that the painter could do his job. Off to the right, you can see the bookshelves from the Reading Corner and the faux fireplace, which have also been moved back from the walls.

The new Reading Corner begins its rehab.

Tons of stuff is piled onto the game table in the center of the room while the painting work is done.


I think that the room turned out as I expected that it would. Afterall, I have been planning it for a couple of years now. It is now a brighter, cheerier place to be  in the house and offers a quiet getaway place if needed.

Turning the axis of the game table was a great idea. It eliminated a lot of table space that quite frankly I was not using on a regular basis. Less table surface equals fewer places to put clutter. Empty tables seem to attract clutter likes bees to honey.  If I need more table space for a game, it is easy to add another 2.5ft by 6ft folding table to one of the ends to increase the overall length to 15ft. I don't really have that many occasions for the use of a 15ft long table, but it is nice to know that I can do it if I need it. Getting rid of the tables also opened up the space and made it a comfortable place to be even when it is not being used for war games.

On the whole, I am quite pleased with how the project turned out. Please feel free to leave any comments or ask questions in the comments section.


Now I have to come up with a game for the grand reopening of Der Alte Fritz's Wargame Room.

Wednesday, April 18, 2018

SYWA Pictures - Part III Fontenoy

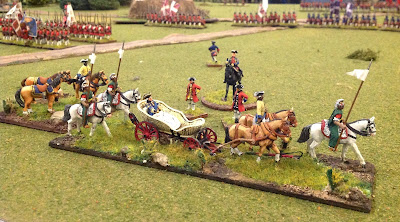
French Marshal Maurice de Saxe riding in his wicker chariot, due to a bad case of the gout.

CLICK ALL PIX TO ENLARGE

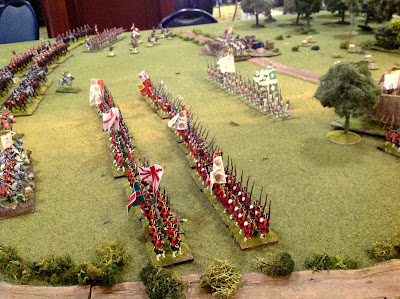
This is the final installment of pictures that I took at the recent SYWA Convention. All of the pictures are of the Fontenoy game hosted by Dannie Fogelman and Richard Goetel. The figures are largely Crann Tara War of Austrian Succession figures, with a few Minden Miniatures as well. This is the nice thing about Crann Tara, Minden and Fife & Drum figures - they are all compatible with one another since they were all sculpted by Richard Ansell.

This was a superb game as the pictures below will attest:


The Irish "Wild Geese" Brigade in French service.

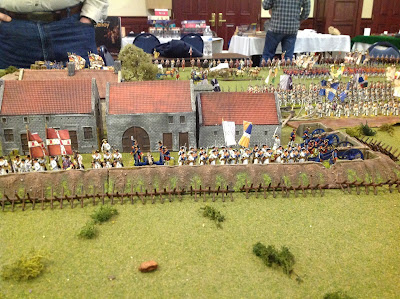
Here is a series of pictures that I took of the French fortifications near and around the town of Fontenoy. Regardless of the rules used, Fontenoy is a tough nut to crack and I wonder if anyone has ever actually capture the town?

French defences surrounding the town of Fontenoy.


French redoubt facing the Dutch attack.

Same redoubt as above.

The famous Redoubt d'Eu which covered the French center on the rise between the
town of Fontenoy and the Bois du Berry wooded area.


One of the British brigades which were part of that "infernal column". Historically, they marched into t
he teeth of the French center and nearly pulled off the victory. I wonder how they did in this game?
Well, that is the end of my pictures from this year's SYW Association convention. Next year's convention will fall on the last weekend of March, unless it is an Easter weekend, in which case the convention moves to the first weekend in April.

These pictures depict but a few of the games that were staged at the convention, all of which were well presented and good looking games. If you have any interest in military history of the 18th Century, then you owe it to yourself to visit our convention.

Next year, my convention game is likely to be the Battle of Kunersdorf to mark that battle's 260th anniversary. The Minden Russian Observation Corps figures will be in production well before the convention so I will be busy with my pot of Reaper Blood Red paint.

Or, I could stage an AWI game.....

Sunday, April 15, 2018

New Minden Observation Corps Musketeers


Here are some pictures of the new Minden Russian Observation Corps Musketeers (see the previou post for the pictures of the grenadiers). Again, I apologize for the slightly blurry photos, but I think that they convey how the figures will look once cast and in production. There is also a musketeer in waistcoat figure (not shown). The figures were sculpted by Steve Barber using the Minden dollies and equipment made by Richard Ansell, so there is a nice similarity/consitency in style. I am pleased that Steve has been able to step in and help get the Russian range going as we have plenty of other figures to keep Richard very busy.

Observation Corps Musketeer Drummer in waistcoat

Observation Corp Musketeer NCO in waistcoat.

Observation Corps Standard Bearer in regulation coat.


Observation Corps Musketeer Officer in regulation coat.

The greens were sent to Griffin Moulds last week so it shouldn't be too long before we have the production castings ready for sale.


New Minden Observation Corps Greens Are Finished -Part 1


We will be adding 10 new figures to our growing Minden Russian SYW range of figures, with 9 new Observation Corps musketeers and grenadiers and one regular line musketeer on their way to Griffin Moulds to have the moulds made and the first spins of metal to be cast.

The Blogger Gremlins are making it exceedingly hard to post pictures in this post so I will split the article into two different posts, the first for the Observation Corps Grenadiers and the second for the Observation Corps Musketeers.

Observation Corps Grenadiers
Here are some pictures of the Observation Corps Grenadiers including an officer and standard bearer wearing their regulation coats and the NCO, drummer and rank and file grenadier wearing their summer waistcoats. Most of the Russians' battles were fought during the summer months, so the rank and file men and NCOs would discard their green wool coats at the baggage train and sensibly wear their long sleeved red waistcoats.

The pictures are not the greatest but I think that they give you an idea of how the figures will look.  I'm sorry that I couldn't get the lads to line up in close order, but the Blogger App is sometimes clunky when it comes to picture positioning.

Grenadier Standard Bearer

Grenadier Officer

Grenadier NCO

Grenadier Rank & File


Grenadier Drummer


Friday, April 13, 2018

SYWA Convention Pictures - Part II Zorndorf


Der Alte Fritz contemplates a game ruling in his Zorndorf game.


The second batch of pictures features the Battle of Zorndorf game that I hosted on Friday and Saturday. Most of the figures are Minden Miniatures with a few RSM and Crann Tara figures sprinkled into the mix. All three of these figure ranges are completely compatible in size and appearance.


Zorndorf Cavalry Melee
I added some new rules for cavalry melees that are designed to speed up the melees so that they do not slow down the game in a convention setting. Essentially, there is only one round of melee now and the attacker either wins or retires back to its own lines.

The charge procedure begins with the Attacker declaring his intent to charge; he tests his morale and if he passes, then his cavalry unit closes in on the Defender. There is a possibility that the charging regiment will fail its morale test, either going Shaken and standing still, or horror of horrors it decides to rout.

If the Attacker passes his morale test, then the Defender tests his morale next. Again, the Defender can advance into melee if it passes his moral test. A Shaken results causes the Defender to fall back a full move and a rout does ... you know how that ends.

Assuming that both sides pass their morale, they move into contact and conduct a round of melee. Morale tests ensue after one round. The Charger must win the melee or else it is considered to have been "repulsed" and it must retire back towards its own lines. In the event of a tie in melee casualties, all ties go to the Defender because the onus is on the Charger to win the ground.

At the conclusion of the melee, I now have a cavalry pursuit table based on the roll of one D10. In most outcomes, the Winner will stay put. There is an opportunity that it will continue to charge and another outcome is that the unit halts, but remains in good order rather than in Shaken order.

Cavalry action on the Prussian right wing (Russian left wing) near the Langen-Grund.

Russians (right) and Prussians (left) cross swords.


The Russians gain the upper hand in the melee as fresh reinforcements arrive .
The aftermath of the cavalry melee: each casualty disc represents the spot where a melee was won - red and green discs for the Russians and blue discs for the Prussians.

The picture above depicts a number of casualty discs on the ground. Everytime there is a melee, a casualty disc is placed on the spot where the melee occurred: red and green for Russians and blue for the Prussians. For example, if the Prussians lose the melee then it falls back and a blue casualty disc is placed on the ground where the swords were crossed. At the end of the game, the side with the most casualty discs on the field is generally the loser of the game.


 Zorndorf - the Infantry Battle

The mainstay of the Zorndorf game is the infantry battle that covers approximately 12 feet of the overall 16 feet of table length that was used in the game. In the first game on Friday, the Prussian did something that I have rarely seen in one of my wargames: they bombarded the Russian infantry for about three game turns before launching their infantry attack. That is a pretty smart tactic.

A view of the whole table, from the Zabern-Grund stream heading towards the Stein-Busche wooded area. Russians are on the left and the Prussians are on the right sides of the table.

The initial Russian deployment with the Zabern-Grund in the foreground and the Stein-Busche near the top of this picture.

Galitzin's Russian Division awaits the attack of Manteuffel's advance guard of the Prussian army.

Minden Russian infantry in waistcoats are "seeing the elephant" in their very first game.


The Russian Observation Corps and Dohna's Prussians fight it out in the Stein-Busch.


Eventually a break occurs in the Russian line and they have to retire.
The Prussians lost the cavalry battle on their right flank, but they broke through the Russian battle lin in the center and won the game. They also had the least number of casualties on the field, as represented by the casualty figure discs. This was one of the victory conditions in the game. Each disc is a Victory Point f(VPs) or the other side. Additional VPs can be earned by capturing cannon and flags, killing a general, and for each melee won. The Prussians won on points 23 to 34, with a low number being the winner.


The Second Zorndorf Game - Saturday

The battle of Zorndorf was played again on Saturday, with the outcome being the same as in the first game: a Prussian victory. The Prussian cavalry won the battle on both flanks of the table and Seydlitz's cavalry was roaming around behind the Russian lines at the end of the game which was bad news for the Russians.


I posted a map of the strategic movements of the armies that occurred prior to the Battle of Zorndorf. The map is courtesy of Jeff Berry (Obscure Battles blog) who creates some wonderful battle maps. The map is printed on foam core board and laminated. I think that it helps the players to give them a strategic overview in order to get the context of the battle and why it was fought.

The Prussian infantry close in to engage in a close range firefight with the Russians.


Bill Protz makes a surprise appearance as the Prussian cavalry commander of the refused right wing of the Prussian army.


Russian horse grenadiers and Cossacks square off against the Puttkamer Hussars.

Seydlitz negotiates the passage of the Zabern-Grund with his Prussian cavalry
and eyeballs the flank of some Russian infantry

Russian infantry is in a bit of a pickle with Prussian infantry to their front
and Prussian dragoons hover on their flank.

Prussian dragoon regiment Meinicke (D3) reforms after crossing the rough terrain of the Zabern-Grund
and prepare to charge the Russian infantry.

I have been painting Russians since August 2017 almost nonstop. I had started with 4 Russian battalions and one squadron of Horse Grenadiers. Over the period August 2017 through March 2018 I painted 8 battalions of Russian infantry, five artillery pieces with crew and limbers, and 10 squadrons (12 figures per squadron) of cavalry.

 Most of the Russian musketeers were part of the new range of Russian infantry that has been added to the Minden figure range. We will soon be adding Observation Corps musketeers and grenadiers probably by June 2018. The figures have been sculpted and they are now at Griffin Moulds, where they will be turned into production castings.