Sunday, March 27, 2016

Austrian Generals Pix


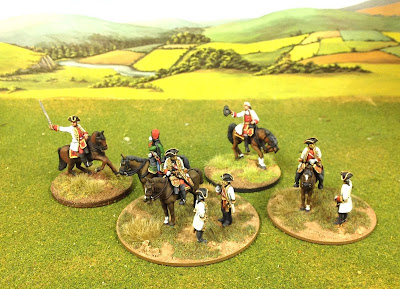
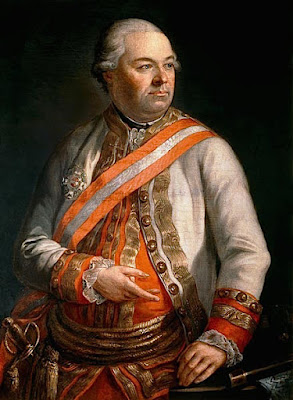
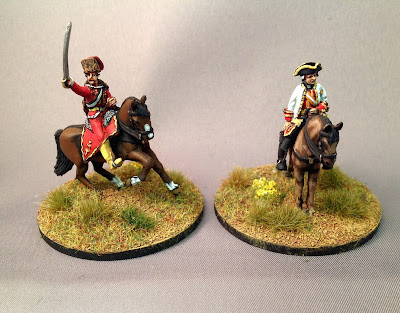
Andras Hadik, as a Marshal
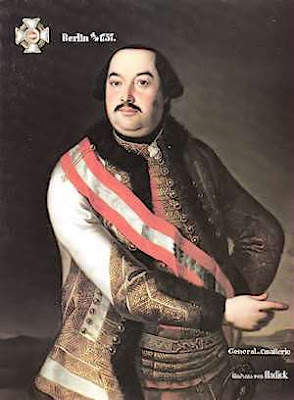
Andras Hadik, in hussar mufti


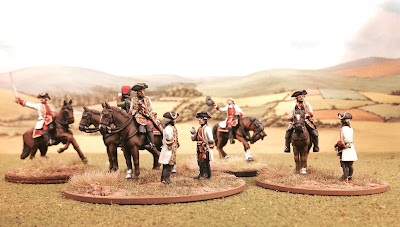
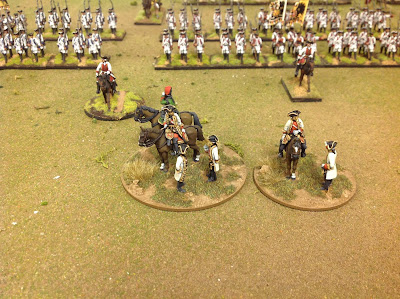
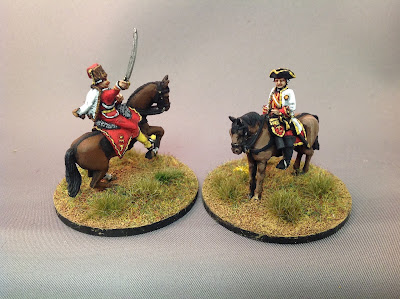
Hadik (left) and Graf Wied (right)
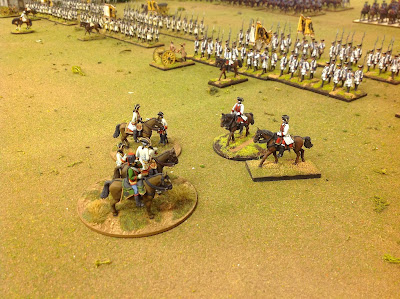
I finished off a couple of Austrian generals that I needed for my games at the Seven Years War Association Convention next friday and saturday in South Bend, Indiana. I needed an Austrian light cavalry commander for my Battle of Kolin scenario, so I used a Minden Austrian hussar officer and mounted him on one of the "Heroic Horses" in the range. I sort of made up the uniform, based on the portrait at the top left of this page. So he is wearing a white hussar pelisse instead of a uniform coat and a red vest and breeches of hussar uniform cut.

Click on all pictures to enlarge the view.

The other picture, top right, illustrates Hadik later in his military carreer after he had been promoted to Marshal in the Austrian army.

The other officer, in the long white coat, is a major general rank and will probably be Graf Wied or Starhemberg at Kolin. I used the von Loudon personality figure from the Minden figure range.


Same gentlemen, different point of view.
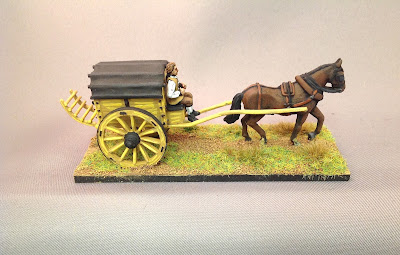
Finally, I needed another 2-wheel ammo cart to use with one of my Austrian infantry brigades. Each brigade of 4 battalions also gets one ammo wagon used to replenish ammunition as it is used up during the game.


Fife & Drum 2-wheel Austrian powder wagon.


xxx

Wednesday, March 23, 2016

New AWI Hessian Sculpts


A couple of weeks ago I received pictures of the greens that Richard Ansell had sculpted for AWI Hessians that will be added to the Fife & Drum figure range. We have Hessian musketeers and grenadiers, both in marching poses and firing line poses. Fusiliers and Jagers will be added in the future.


I will post the pictures of the officers and standard bearers tomorrow.

Undoubtedly, these figures could be used as SYW Prussians as well as for Hessians. 

Tuesday, March 22, 2016

SYWA Convention Preparation

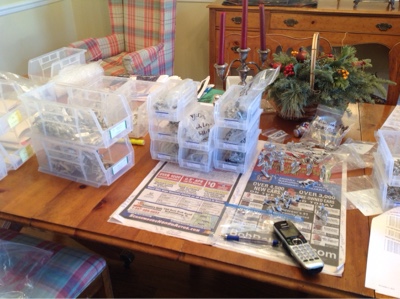
Let the bagging of the figures commence!


Between taking my annual inventory for the tax man and getting my stock ready for the Seven Years War Association convention (March 31-April 1, 2016) in South Bend, Indiana, things have been rather hectic around the old barn these days. It also means that the shipping of orders has slowed down considerably and so I apologize in advance to anyone who has an existing order with me that has not yet been invoiced to you via PayPal. I expect to catch up with everything by this Saturday. ( since I have a full time day job, the only day that I can go to the post office is on Saturday ).

Taking inventory is a time consuming chore that is both necessary and exhausting because it seems to take forever and ever. Just when you think that you have counted everything, then another bag or box of figures turns up somewhere in the basement and you have to count them too. Some interesting things often turn up in inventory taking; for example, what was I thinking when I ordered 300 castings of Maurice de Saxe seated ( to use with the wicker carriage) and why did I order 20 spins (16 figures per spin) of the Prussian cuirassier standard bearer?

A large order of castings arrived in late January and so I wanted to segregate that stock from my 2015 stock so that the sums would apply to the 2016 tax bill. For those of you who are not accountants, the cost of goods sold is calculated thusly:

Beginning Inventory
+ Purchases
- Ending Inventory
= Cost of goods sold

And it follows that your income is calculated as Sales - Cost of Goods Sold - Other Expenses = Income. So you can see how important it is to count your inventory at year end.

Once that task was done ( they don't tell you about all of these things before you start a miniatures company), then it was time to move onto the chore of bagging figures for the convention. Eight figures of marching infantry get placed in bubble wrap, taped closed with clear shipping tape, and then squeezed into a 3-inch by 5-inch plastic bag. Cavalry figures have to be bagged with horses.

I have to label the contents of each bag ( I know, I should print out labels on my computer and just peel and stick the labels on the bags). However, since I am selling 18th Century figures it only seems right that I should use 18th Century production techniques, don't you think?

I realize that I should enter the 21st Century and have a full capability shopping cart system on the Fife & Drum website. As of now, the AWI and artillery ranges are shopping cart capable on the web site, but the SYW range needs to be added to the shopping cart. There is one little problem with the shopping cart: the one that I use from Pow Web has absolutely no way of calculating and adding postage to any of my web based orders, so I'm automatically losing $6 to $10 on every web order since I can't add a shipping charge to the order. So I will likely have to raise prices on web based orders to cover the shipping cost; however, orders submitted to me in the old fashioned way ( you send me an email with a list of what you wish to order) will continue to be charged with the actual postage cost ( unless you reside outside of the U.S., in which case you are only charged a flat postage rate of $10). If there is anyone out there with expertise in web design and shopping carts who can offer some hands on help with this, I'm all ears.

Yes, being in the miniatures business Is glamorous and will bring you fame and fortune. LOL!

Which is to say that I have had very little time to paint figures or do other hobby related things. I am looking forward to the SYW Assn convention in two weeks as it will allow me to socialize with many friends that I have made in the hobby over the years as well as to host two games during the convention: Reichenburg and Kolin, both from the 1757 campaign in Bohemia. The convention Experience makes all of the preparation work worthwhile. I hope to see many of my blog followers there.

Cheers,

Fritz

Saturday, March 19, 2016

Return of Marshal Soult - Part 2


The Battle of Rio Mondego Continues
Well let's see, when we last saw the intrepid brigade of Brigadier Alexander Sinclair at the Battle of Rio Mondego, it was close to being driven off of the front table and back onto the center table in our war-game  (originally played on Saturday March 5, 2016).

As always, click or double click on each of the pictures to see an enlarged view of the action.


Sinclair advanced the 45th (Nottinghamshire) Regiment onto the first table to relieve the beleagured 94th Regiment. The remains of the 94th are off camera to the right of the 45th.

It seemed like the French always drew the first fire card each turn, so the 45th  Regiment  received casualties almost immediately after it crossed the aisle onto the left-hand table in the game.

Eventually the French compel the 45th Regiment to retire back to where they came from. Mermet brought up his battery of 8-pounders to create more discomfort for the Red Coats.


Meanwhile, in the center of the table, the French division of Delabord was coming on in the usual style - l'ordre mixte.


Sinclair forms a new line to protect the road leading to the harbour at Cabo Mondego, where the Royal Navy transports await.
By the time that Sinclair had established a new line of defense on the center table, anchored by a small village on his right flank, it was readily apparent that victory would go to the French.


The Swiss Regiment Arrives (its first battle) - Elite Miniatures painted by John Preece for the collection of Bill Protz

The Swiss Regiment, shown above, entered its first battle as a wargaming unit, and thankfully, they did not come under fire.  They can observe the battle carnage that preceded them, shown via the casualties that are laying on the ground.

It was a fun and well-fought game by both sides, but at the end of the day, Marshal Soult (the Duke of Damnation) and his French prevailed over Major General Pettygree's outnumbered British army. As I mentioned above, the cards were not friendly to the British, who rarely drew the first firing card on any given turn, but sometimes it is just not your day.

My French opponent, General Mermet (Kurt B.) did a masterful job of utilizing his voltigueurs to great effect - they came after the British not just in single companies, but rather in whole clouds or swarms of skirmishers. My previous opponents had never used their skirmishers in such a matter (much to my relief), but Mermet knew what he was doing. On several occasions, I had to waste my first fire bonus on the skirmishers, rather than saving my fire for the columns of advancing formed infantry. The only way to drive them off was to advance towards them, forcing them to fall back. However, this then exposed the British to the fire of the French battalions.

I have no idea what was going on at the other end (right and center sections of our line) of the table. I gather that General Delabord smacked the Royal Horse Artillery around quite a bit and drove off all of the British cavalry. Delabord's French division was following up fast on the heels of the survivors. Pettygree's Red Coat infantry seemed to be holding its own in the center  (off to Sinclair's immediate right flank).


The Butcher's Bill

Here are the roster returns of Brigadier General Sinclair's brigade at the conclusion of the battle, once they were safely aboard the Royal Navy transport ships.


45th Regiment: 34 casualties out of its original strength of 72 figures (47% casualties)

94th Regiment: 48 casualties out of its original strength of 84 figures (57% casualties)

83rd Regiment: 17 casulaties out of its orginal strength of 84 figures (20% casualties)

5/60th Rifles: they were scattered to the winds, maybe 50% losses?

Grant's section of 9-pounders RA: 2 casualties out of 12 figures (17% casualties)

You can see that the 94th took a hard pounding from the French, as it was the unit deployed the furthest forward and was faced off against two or three battalions at a time. It was my plan that they should be sacrificed to delay or stop the French for a few turns in order to buy time for Pettygree's infantry to march down the road to Cabo Mondego. Then the 94th was to fall back to a prepared second line where the other two regiments would take on the French. The 45th came to the aid of the 94th and got mauled as well, losing 47% of its effectives. The 83rd Regt. was held in reserve, but still took 20% casualties.

Post-game, I rolled dice to see what the fate was for the casualties. On a D6, a roll of 1-2 was Dead; 3-4 was Wounded; and 5-6 Recovered. After the Dice Gods spoke their piece, the following results were achieved:

45th Regt. = 6 dead, 6 wounded and 10 recovered. 60 of 72 original figures survived to carry on and the 6 wounded would come back eventually. So killed represented only 8% of the orginal 72 figures.

94th Regt. = 8 dead, 13 wounded and 14 recovered (nice die rolling there!). So the killed represented 10% of the original 84 figures.

83rd Regt. = 7 dead, 4 wounded and 8 recovered or 8% of the original 84 figures died in the battle.

Thus the cumulative brigade totals, after recoveries and wounded, were 22 dead, 23 wounded and 32 recovered or about 9% of the original 240 infantry died at Rio Mondego. The wounded will eventually come back after a couple of months and rejoin their units. Were we to have another battle in a month or two, we would deduct the dead and wounded from the regiments at the start of the game.

We haven't played a BAR Napoleon game in several years and so I was glad to have the opportunity to bring the lads out onto the table once again. I hope that we get another chance to play some more Iberia games in 2016. One of our regular British players moved to Florida and with him went 4 or 5 British and Portuguese regiments, which severely depleted the forces that are available to General Pettygree. So unless some reinforcements arrive soon from Olde Blighty, the Duke of Damnation may soon be taking up quarters in Lisbon. We can't have that.

Never fear, Major General Pettygree and Brigadier Sinclair will march again, so be sure to come back here (probably in June or July of 2016) to see what happens next.
Sunday, March 6, 2016

Return of Marshal Soult in Iberia - AAR Part I


Marshal Soult


Marshal Soult, the Duke of Damnation, gave the British army of Major General Pettygree a bloody nose and a rough handling yesterday at the Battle of Rio Mondego in Portugal.

Map of the Iberian Campaign south of the Duro River - March 1810.

The previous game in our Iberian Campaign had been the Battle of Aveiro, just south of the Duro River and Oporto. Marshal Soult's French army had crossed the Duro and met the British army commanded by Major General Pettygree at Aveiro.

You can read the account of that battle by clicking on the link below:


While that battle was somewhat of a draw, the threat of Pettygree being outflanked and cut off from the south by a French Corps commanded by Mermet, caused the British to make an orderly withdrawal south, where they took up a new position south of the Rio Mondego river. Pettygree was ordered to march to Cabo Mondego where his army would meet up with the Royal Navy and be transported back to Lisbon.  As such, the British mission for the wargame was to retire all of their forces to the port at Cabo Mondego where they would board transports provided by the Royal Navy.

The initial table set up and terrain are depicted in the three following pictures. The advance guard of the British army, commanded by Brigadier General Alexander Sinclair (45th, 83rd, 94th and 3 companies of 5/60th Rifles plus Captain Grant's two-gun section of 9-pdrs of Royal Artillery) was tasked with stopping or delaying the attack of two French division under the commands of Mermet (left wing of the French army) and Delabord (center).

A makeshift earthen redoubt was occuppied by the British 4th Regiment, which was tasked with guarding the two bridges across the Rio Mondego. The river was not fordable in the center table, hence the importance of holding the bridges open until Pettygree's army could pass.

The Coast Road to Cabo Mondego - you can see the main body of Pettygree's army marching toward you. 

General Pettygree (right) watches as the French division of Merle advances on the near side of the Rio Mondego. Brigadier General Sinclair's advance guard of the British army has deployed a regiment (94th Foot) of infantry and two companies of 5/60 Rifles in the copse of trees.

Sinclair elected to deploy one regiment of foot - the 94th (Scotch Brigade) on the lefthand table to delay the French advance. His remaining two regiments (45th and 83rd) were posted in reserve on the center table along with Grant's battery of RA. The 45th Regiment can be seen below, nearest to the table edge, while the 83rd was kept in reserve near the port of Cabo Mondego to keep the road open to the rest of the army.

The port of Cabo Mondego can be seen in the center background. The Royal Navy transports would be waiting here for Pettygree's army.
All of this quiet was soon erupted as the French division of Mermet surged across the table towards Sinclair's position.


The 94th faces off against Mermet's division, deployed in l'order mixte formation with  a center battalion deployed in line, flanked by two battalions in colomns of divisions. Voltigeur's preceded the French attack.

The British countered by throwing their own light company out in front of the 94th, but these lads were chased off by a squadron of French Chasseurs a Chavel.

Things are starting to look desperate for the Red Coats as the left wing of the 94th bends back. Actually, it was trying to create space so that the 45th Regiment could advance on its left flank so as to present a frontage of two battalions instead of one against the French.

You will notice that we left the casualties where they fell during the battle - something that demonstrates the advantage of using single mounted figures on sabots (movement trays). You can follow the course of the battle by looking at where all the casualties are.

Another view of the 94th Foot

Mermet brought up four 8-pounders, but these were initially screened by their own troops.

Mermet also sent several battalions to try to outflank the 94th on its right, which was protected by two companies of 5/60 Rifles. This part of the Rio Mondego was fordable.


I will post Part II of the battle report tomorrow so come back and visit us again.

Friday, March 4, 2016

Austrian Encampment


Charles of Lorraine, with staff, prepares to review the Austrian army. (Click on all pictures to enlarge)

It is the Austrian army's turn to file out onto the parade ground for its annual review of the troops by Prince Charles of Lorraine (the brother of Marie Therese's husband).

Overhead view of the Zittau Camp.

Oddly enough, the chosen camp ground at Zittau looks strangely similar to the Prussian camp at Altenburg, as shown above.

The Hungarian Brigade

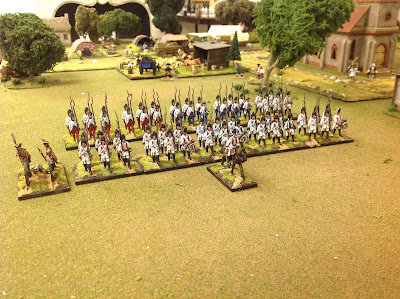
The brigade of converged grenadier companies.
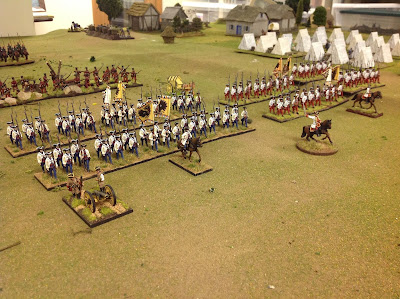
When I paint an Austrian regiment, I also paint a grenadier company of 6 figures per battalion so that I can hive them off and converge them into grenadier battalions, as shown above.


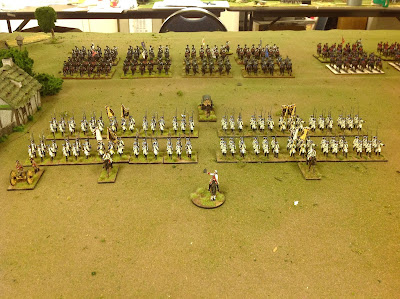
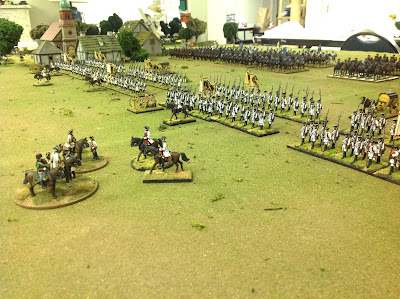
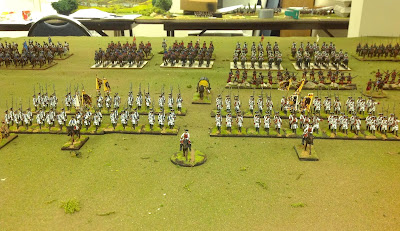
First Austrian infantry brigade.

Second Austrian infantry brigade.

The above picture provides a good view of how I organize my infantry brigades. There are two regiments of two battalions = 4 battalions. Each regiment also gets one 3-pound regimental cannon, although one seems to be missing in this photo. Each brigade also gets one ammunition wagon (2-wheels) to supply it with small arms ammunition throughout the game. Each regiment of 2 battalions also has one inhaber or colonel to command it. Finally, the brigade commander on a 2-inch round base commands the brigade.
Prince Charles and his staff commence the inspection. Graf Wied rides out to present his brigade to the Prince.


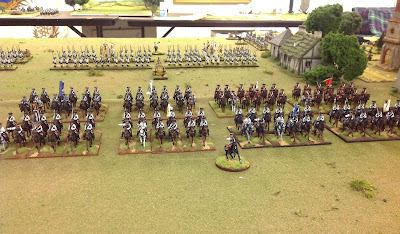
Serbelloni's Austrian & Saxon Cavalry Brigade
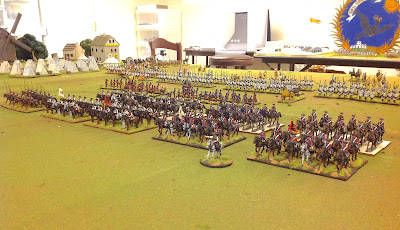
Cavalry are comprised of regiments with two squadrons of 12-figures, or 24 figures in total. I may eventually increase the size to 36 figures or 3 squadrons. My squadrons are not historical, they are organized this way for gaming purposes. An Austrian cavalry regiment usually had 5 squadrons in the field and one squadron back at the depot.


A closer view of Serbelloni's brigade.

Stampach's Austrian cavalry brigade.

The staff toady up to Prince Charles and tell him how great the army looks.


Another view of the staff - that is actually Marshal Leopold Daun on the right.

More toadying of the staff to Prince Charles, for all the good it will do them.


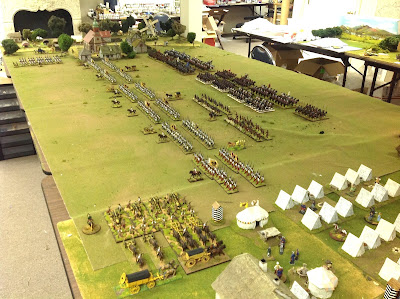
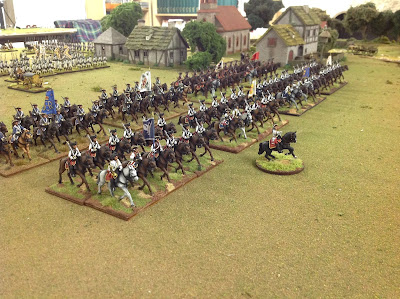
The army is nearly completed and ready to fight at this year's Seven Years Was Association Convention in South Bend, Indiana on March 31 and April 1st.