Friday, May 30, 2008

Butterflies Are Running Amok

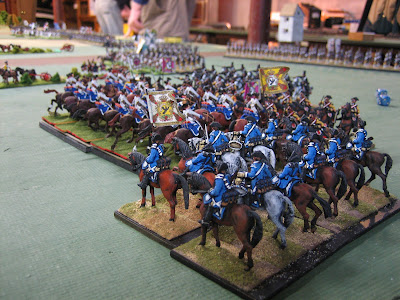
That ITGM Napoleonic game of two weeks ago has had lingering effects on my painting output this past week. I am still basking in the after glow of a great wargame and thoughts of shakos and squares are filling my head. It makes me want to go back to my 1806 Project. So I hauled out some Elite Miniatures French chasseurs a cheval and primed up a couple dozen of those. Then I dabbled with them a bit, painting one elite company trooper in colpack and one regular company trooper in shako. They looked good, but I couldn't motivate myself to paint anymore of them.
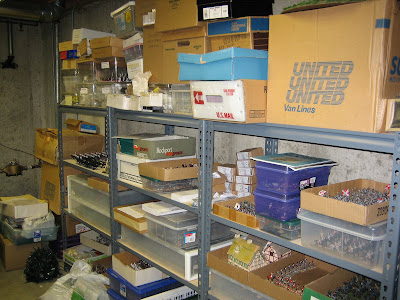
The infamous Closet O' Lead. What wonders lie deep within?

So then I moved the chasseurs off to the side and went to work on some of my Potsdam Miniatures SYW Prussian infantry. I plan to add another battalion of musketeers - IR18 Prinz von Preussen regiment (rose colored facings). I went through the grunt work of blocking in the basic colors of dark flesh, dark blue and light grey, but the drudgery of all of this made me lose interest in painting any more SYW figures for awhile. So what should I do?

I happened upon a rather large and heavy box of lead that has been stashed away in the national archives of Hesse Seewald (think back to the end of "Indiana Jones in Raiders of the Lost Ark" when the government is taking the ark of the covenant off into the depths of some warehouse. Buried deep in the closet o' lead, I found this box of Dave Alsop sculpted 1805-07 Russian infantry (that he had made for Old Glory before his untimely passing away). These are nice figures so I thought that I would prime a couple up and see how they look. The initial results are encouraging and I think that I might be motivated to paint a 60 figure battalion for my (now) 1807 Project.

Updating this entry, I have now completed six of the Old Glory Russians and I like them enough to take a crack at painting a battalion of 60 figures. I am using Elite Miniatures drummers, standard bearers and officers since Alsop never finished the range by adding the command figures. This solution should work out nicely. The first battalion will be the Smolensk Regiment with rose (pink) collar and cuffs and yellow shoulder straps ( I will post some pictures over the weekend) and then the unit will be finished off with a nice GMB Designs flag.

I have enough of the original Alsop figures to build nearly 16 battalions of 60 figures. I doubt that the army will get that large, but it is nice knowing that I already have the necessary figures for this project, even in an expanded version, without having to invest a large sum of money in new figures. Artillery and cavalry figures will come from the Elite Miniatures range of Napoleonic figures.

For organizational purposes, I am considering painting all three battalions that make up a Russian musketeer battalion in 1805. There would be two musketeer battalions and one grenadier battalion in each regiment. A player would then command a brigade consisting of one regiment of three battalions, at a minimum. Perhaps I could also add a single battalion of jagers to each brigade to give the players a nice symmetrical tally of four battalions.

Monday, May 19, 2008

In The Grand Manner Napoleonics


Initial set up with Russians holding a line of defense anchored by two villages. The French advanced from the back table onto this center table. Marshall Murat (left, holding baton) begins to move his infantry corps to attack the center.

The 1809 Campaign against Austria did not go as planned and somehow the Austrians were able to stop Napoleon from crossing the Danube after he captured Vienna. This enabled the Russians to join the coalition and now it is 1810 and Napoleon must fight a combined Austrian and Russian army. That is the context of this particular game. As Davout, I had the command of the largest corps plus a division of elite heavy cavalry (carabiniers and cuirassiers). Our battle plan was to attempt to seize the two villages in the center of the table, hold back on the left flank, and attack vigourously on the right flank. My objective was to turn the enemy's left flank and hook in behind the two villages in the center. It appeared that I had the assets to do it, as can be seen in the picture below.


Davout's command: everything from the cavalry on the left all the way to the box of dice in the center distance. That's about 12 battalions of infantry, a 12 pound battery, a 6 pound battery and 2 regiments of chasseurs. Plus the heavy cavalry division of carabiniers, cuirassiers, lancers and a battery of horse artillery.

I started the battle by having my light cavalry lead the advance on the far right, with chasseurs and lancer to the front, followed by the heavier cavalry to the rear. One reason for this was to push my cavalry as far across the table as possible and occupy ground before the Austrians started to arrive.


Light cavalry and horse artillery lead the vanguard on the right flank of Davout's attack.


French chasseurs a cheval screen the advance and deployment of Davout's artillery.

One thing that I have learned about In The Grand Manner ("ITGM") rules is that you have to eliminate the opponent's cavalry before you can fully commit your infantry to the battle. So Davout went on a search and destroy mission for Austrian cavalry at the start of the game, holding back his infantry battalions. The first two turns left the area to his front completely devoid of enemy troops, but Davout's scouts indicated that they had spied long dusty columns approaching from the opposite table. The Austrians would then arrive on turn 3.


French chasseurs and horse artillery prepare to attack the Austrians.

The Austrian columns were now coming onto the table, and it appeared that they were all in one giant jumble of infantry, artillery and horses. In other words, the Austrian commander was having traffic control problems. Davout decided that he would hurl single squadrons or pairs of light cavalry squadrons ahead in an attempt to catch the Austrians before they could shake out into a battle line. The Austrian light cavalry counter-attacked the French chasseurs. For the life of me, I could not roll a natural six on a D6 die (you need 6's to score a kill in cavalry melee). Meanwhile, my opponent was rolling handfuls of 6's out the wazoo. My chasseurs were toasted en brochette and sent tumbling back through my lines. They disordered 3 squadrons of cuirassiers, which rather scrambled up my plans. So I had to delay a turn while I sorted the heavies out. Meanwhile, I kept sending every light cavalry squadron that I could lay my hands on.


Midpoint of the game: Davout's corps (near) is ready to attack on the right. In the center, beyond the little hill with the trees, is where Murat's corps is successfully assaulting the center village of the Russian defensive position. On the French far left, I have no idea of what is going on, nor do I care at this moment.

The picture above indicates that the French attack is progressing fairly well at this point. Murat is about to capture the village in the center and has the Russians reeling backwards a bit. Russian cavalry reinforcements are arriving in the center.


Russian 12 pound battery (6 models) anchors the defense in the center village.

Boy oh boy do the Russians have a lot of artillery. Their batteries are huge! Six gun models in each one and they seemed to be everywhere. However, there is a way to deal with them, and that is to hurl squadrons of light cavalry into them. This is what the French did with great success.


French chasseurs take out the Russian battery.

It took about three different cavalry charges, but by the third attempt, Murat was able to get a single squadron into the Russian artillery battery, defending the center village. Once in , the French horsemen sabred the artillery crew mercilessly. The Russian crews routed, leaving their guns behind. With the battery disposed of, Murat then hurled two battalions of infantry into the center village, and evicted the Russian defenders. The French now had a foothold in the center of the Russian defensive position.


Final French position in the center at the end of the game day. The small village is occuppied and the artillery and cavalry are moving forward to head off the arrival of the Russian cavalry.


To Murat's right, Davout's forces are closing in on the larger village at the end of the game day.

At around 6pm, we decided to call it a day and finish the battle off on the second saturday in June. This extremely biased report would have you believe that the French were sweeping their enemies off the field, but the real story is somewhat different. On the French left, the Russians were piling up many squadrons of heavy cavalry and threatening to over run the left. Napoleon had just arrived with the Old Guard corps and was chagrined to find that he had to send all of his Guard cavalry off to the left to hold down the flank. He had wanted to send the whole corps up the middle, foot and cavalry together, but enemy successes elsewhere changed his plans.


This is what awaits the French in the center (on the back table): Russian cuirassiers, and lots of them...


...and two batteries of Russian Guard artillery and supporting Guard infantry


A view of the three game tables: each 6ft wide by 28ft long.

I thought that I would end with a picture showing the vast amount of gaming space that we had in this battle. I dare say that it has even more space than what I have seen at the Wargame Holiday Centre in the UK. That is no coincidence, since our host, Kieth Leidy, has been a frequent visit to the WHC and was formerly the US distributor of the Peter Gilder Connoisseur range of miniatures for a number of years. So he has been influenced by the setup at the WHC, which goes by the name of, appropriately enough, The Enchanted Cottage.

Sunday, May 18, 2008

Sharpe & Harper


Sharpe (left) and Harper (right) sculpted by the talented Richard Ansell at 1/56 scale. (click on the picture to enlarge the view - it looks even better, trust me)

The other day I received my copy of Sharpe Practice published by the Too Fat Lardies group. These are rules designed for skirmish level gaming during the Napoleonic wars, but are also suitable for games spanning the American Revolution through the mid 19th Century (think of scenarios involving Harry Flashman). As a little bonus, the first 250 people to purchase a copy of the rules also received a figure of Richard Sharpe and Sergeant Patrick Harper (God save Ireland).

I have not had a chance to give the rules much more than a cursory glance, but they look like they will be a lot of fun, and I look forward to painting some more British riflemen and some French voltigeurs so that I can start playing some skirmish games in the Peninsula. A reading of any of the Bernard Cornwell books in the Sharpe series will be chock full of scenario ideas. A number of people on The Miniatures Page have posted after action reports of games using the Sharpe Practice rules, and I have to say that these reports convinced me to hurry up and order a set of the rules.


Close up of Sharpe and Harper. Sorry about the darkness of the picture. Click to enlarge, but remember that you will be looking at a blowup that is about 5x the actual size of the figures. I have been experimenting with the use of static grass using the method recommended by Frank Hammond, on his Minden Miniatures web site. Thank you Frank! I really like the way the basing turned out using your technique.

I am really enthused about the two figures that are shown on this page. Sharpe and Harper are sculpted by Richard Ansell, who also made the excellent figures for Minden Miniatures (SYW) and many more figures for The Assault Group ("TAG"). The TAG group includes some stunning 1809 Austrians that will take your breath away, they are that good. Ansell is also sculpting a range of Napoleonic figures for a new company called Alban Miniatures. These will include figures for the Peninsula War and I understand that a fair number of British Rifles are almost ready to hit the market. This is very exciting news, as far as I am concerned. Links are provided below if you would like to see more of Richard Ansell's artistry:

http://www.albanminiatures.com/

http://www.theassaultgroup.co.uk

http://www.mindenminis.blogspot.com

What makes these figures the best on the market today (in my humble opinion)? Well, for starters, the figures actually look like real people, only they happen to be in 1/56 scale (I hope that I have the scale correct). The anatomical proportions are correct so that there are no oversized heads or hands, the figures don't have Conon the Barbarian physiques (Heroic Style?) and they don't look like overfed, overweight soldiers who should be staying home at the depot, rather than in the field on a hard campaign. In addition, the attention to detail on these figures is nothing short of amazing.

In conclusion, I simply think that these are some of the finest figures on the market today and I look forward to the future releases of both the Albion and the TAG ranges of Napoleonic figures.

In The Grand Manner Game Preview
Below is a little preview of the In The Grand Manner Napoleonic game that I played in yesterday, at Keith Leidy's house. Keith now has three 6ft by 28ft tables, parallel to one another. What a joy to have so much maneuvering space, in the same manner as the Wargame Holiday Center in the UK. I will post more pictures tomorrow.


French attack on an important village held by the Russians in the center of the table. Der Alte Fritz (Davout) has been pounding the village with a 12 pounder battery and is now moving the infantry in for the final assault.

Monday, May 12, 2008

Weekend Update

My brushes were really burning rubber over the weekend as I completed a 12 figure squadron of Suren Prussian dragoons for the Seven Years War, put the basic colors on 18 Napoleonic Black Watch Highlanders (I'm painting these for someone else) and started on 18 more Jacobites.

The DR2 Jung Krakow dragoons are now up to their full establishment of 600 troopers (i.e. 60 figures)which should enable them to hold their own against the French/Gallian armoured cavalry that they always seem to fight. I have added two squadrons to the Jung Krakow dragoons over the past two weeks, in preparation for our next BAR game on June 7th as well as their use at Historicon.

So what is next, the 10 squadron Bayreuth Dragoons perhaps?

I am nearly done with all of my Prussian cavalry in my projected army, with 2 regiments of cuirassiers, 1 regiment of Garde du Corps and 1 regiment of dragoons. I also have 36 Black Hussars, which will eventually top up to 60 figures, and a dozen Blue Hussars, which will go up to 24 figures.

That said, it was nice to get back to the SYW for awhile. The Napoleonics really turned me off, so I stopped painting them Sunday night and switched over to 18 Lowland Jacobites for the Atholl Brigade. Eventually, I will have two 30 figure regiments in the Atholl Brigade (Front Rank figures). These should paint a little bit faster than the Highlanders because there is minimal tartan to paint on these lads. Most of them are wearing civilian coats and breeches, plus a blanket roll across the shoulder to the waist. I will probably paint the blanket as a plaid, but use browns and greys for the rest of the Lowlanders' outfits.

More later, it's off to work now.

Wednesday, May 7, 2008

Before Rossbach


Suren DR2 Jung Krakow dragoons hitting the flank of the French cavalry at the Battle of the Ritterbruck, earlier this year.

Let us go back to a sunny day in November 1757 at the little village of Rossbach, where Frederick the Great administered a big can of whuppin' to the French and Reichsarmee during the battle of the same name. Prior to the battle, Frederick was taking his mid day meal, with some degree of leasure, whilst keeping an eye on the movements of the French. One of his aides was a very excitable subaltern who had been keeping a closer eye on the enemy's movements. His concerns about the enemy march were met with a look of disapproval from the King. A hole was duly cut into the side of the tent so that various officers could have a look. Finally, Colonel von Kliest of the Green Hussars looked, and exclaimed: "that does it; things are getting serious now!"


Well, like von Kliest, I am looking through the window at the upcoming Historicon Convention and thinking that with all of these Jacobite distractions, etc., that time is running short and the convention will soon be upon us. There is much work to be done in Hesse Seewald before I can run my games at Historicon. Things are indeed getting serious and time is running short.


As much as I enjoy painting those wonderful Front Rank Jacobite Rebellion figures, and as much as I would like to keep painting them to the exclusion of everything else, I have decided that it is time to return to the painting of conventional European Seven Year War figures.


DR2 Jung Krakow Dragoons

Speaking of receiving a cans of whuppin', my unfortunate Prussian dragoon regiment No. 2 gets pounded by the French on a regular basis. This is in no small part due to the fact that the French heavy cavalry regiments seem to feel the need to wear a cuirasse beneath their coat. This also gives them an extra pip on the saving throws (i.e. 1s and 2s kill, everything else saves, whereas dragoons require a 4, 5 or 6 to save). Furthermore, DR2 only has 36 figures in the regiment and the weight of numbers by the opposition works against it on the table top.


What is a poor dragoon inhaber to do? Why recruit more troopers, of course. With that in mind, I have been working on another 12-figure squadron of DR2 this week and I expect to have this unit completed within a couple of more days. I am using the Suren/Willie 30mm Prussian Dragoon castings and the Suren W12 Horse casting. The figures have that thin, elegant look to them that der Alte Fritz likes. However, the production moulds are all shot to Heck and so the figures are rather "rough". The hands resemble blobs of lead, or at best, kitchen oven mits, rather than gloved hands. Details on cuffs, cartridge box and other bits of equipment are not well defined. I have the sense that no matter what I do, I can not make these figures look nice.

The figures will look just fine, en masse, but they are not much fun for me to paint. Once this squadron is completed, I will have 4 squadrons of 12 or 48 figures. I have an additional 12 dragoons that may one day be added to the regiment, but for now, I think that I will resist the urge to paint them. The bottom line is that painting has to be an enjoyable thing to do. When the figures take away from that sense of fun and excitement, then the task becomes a chore, rather than a hobby. If I add another dragoon regiment in the future, I will probably use the Crusader SYW Prussian dragoons.

These are clean castings and easy to paint, with minimal preparation work required. The riders fit perfectly with the horses, which is also a big plus.


Austrian Cavalry

My Austrians cavalry suffers from the same lack of numbers that plagues the Prussian dragoons. I am slowly building up each cavalry regiment to at least 48 figures, so that they will be able to hold their own against my Prussian cavalry (at least in theory, mind you). My horse grenadier, Ligne Dragoons and Birkenfeld Cuirassiers are all 36 figure units. So I have to increase the dragoons and cuirassiers to at least 48 figures before July (Historicon). Thus, 12 figure squadrons of dragoons and cuirassiers are forcing their way to the front of the painting que. The dragoons are already primed, so I will tackle them after the DR2 Prussians are finished, and then get to work on the cuirassiers. In my Historicon game I intend to limit the cavalry regiments to 48 figures. I have two Prussian cuirassier regiments that have 60 figures. The Austrian figures are also Crusader and they are easy to paint. And so I am in the unusual position of finding myself enjoying the painting of Austrians more than that of the Prussians. It all has to do with the figures.

Saturday, May 3, 2008

Prestonpans Battle Report


Prince Charles greets his victorious troops after the battle.

This afternoon, we played a refight of the battle of Prestonpans (Sept. 21, 1745) using our Batailles de l'Ancien Regime ("BAR") rules, with some minor modifications for the Jacobite Rebellion. It was an extraordinarily fast paced game, covering four turns in about two hours, making this a fun scenario for an evening's game down at the wargame club. Both sides had approximately 220 figures with each side divided into two brigades. Randy Frye (Earl of Talisker) and I (Lord George Murray) commanded the Jacobite forces for the Prince, while Bill Protz handled the two Hanoverian brigades on the other side of the table.


The opening deployment at the start of the game. The Earl of Talisker's brigade was deployed on the Jacobite left (bottom of the picture), while Lord George Murray held down the right flank.

The Hanoverian general Sir John Cope was allowed a 12-inch set on from his table edge which placed him just behind the crest of the Prestonpans Moor. He elected not to defend the walled enclosure on his right (Jacobite left). The Jacobites had no particular plan other than to advance as quickly as possible onto the Moor and engage the redcoats in melee.


Turn One: Murray's brigade of Highlanders quickly gain the high ground, while Cope counters by advancing his cavalry brigade in the center.

The normal movement in this game was reduced from 18 inches to 15 inches, but the Jacobites were allowed to toss a D6 for up to six extra inches of movement. I kind of liked the way this worked. Murray was able to hustle his brigade of Stewart of Appin, Frasers and the Camerons to the crest of the hill on the first turn. A small troop of light horse probed around to his right, and you can see that the British 60th Foot is bending back a platoon to protect its flank, above. The Government artillery opened up on the Stewarts, but the cannon balls bounded over their heads to no effect (both sides had Poor rated artillery which has a -1 shooting modifier, plus we only used 3-pdr guns). General Cope moved up his cavalry brigade so that they would be in position to charge on turn 2 and disrupt the Jacobite advance (a good tactical idea).


Turn 2: Camerons refuse to advance, so they get into a firefight with the 60th Foot. British dragoons can be seen advancing on towards the Appin Stewarts in the center.

The troops rated Poor are required to pass a morale test before they may advance within 10" of the enemy. So for the next two turns, the Jacobite attack on the right ground to a halt as the huge Cameron regiment (45 figures) refused to advance into the 60th Foot. Meanwhile, Brigadier General Mosteyn (British cavalry commander) launched his three squadrons against the Appin Stewarts (to the left of the Camerons). The Stewarts lost there nerve and fell back 6" rather than stand their ground and fire at the 10th Dragoons. The 6th and 11th Dragoons likewise decided not to join in on the cavalry charge initiated by the 10th Dragoons. Thus, the Stewarts were able to fall back in good order without being pursued. Still, things were looking bleak for the Stuart cause, from Lord George Murray's point of view on the right.

On the Jacobite left, the Earl of Talisker's brigade of three MacDonnell and MacDonald regiments advanced across the moor and captured the walled enclosure that could have anchored the Government right flank.


Turn 3: Government Cavalry charge into the Stewarts and Frasers of Murray's brigade on the right.

The Government dragoons closed into the Frasers, who lost their nerve and routed to the rear. The Camerons still refused to charge into the 60th Foot, and the Stewarts were looking a bit shaky as well. Gloom and despair for the Jacobites. If the right wing collapsed, then the only unit remaining was the Royal Ecossais (French regulars - 30 figures rated Trained). In the center of the field, the MacDonnell of Glengarry regiment was cut down by half from the opening volley of the 44th and 46th Foot. On the left, Talisker continued to move his Clanranald of MacDonald through the enclosure. Next to them, a mercenary Colonel von Bergmann, from Tradgardland, led the MacDonnell of Keppoch regiment towards the 44th Foot.


The Earl of Talisker (mounted -right) looks on as the Clanranald of MacDonald regiment captures the enclosure on the Jacobite left. At the bottom of the picture, we can make out the pink coated uniform jacket of Colonel von Bergmann of Tradgardland as he directs the Keppoch regiment forward.


Prince Charles and his bodyguard troop of Lifeguards direct the battle from the center. He urges Murray to rally his troops and keep his head on his shoulders.


The Camerons finally charge! And crush the 60th Foot.

At the start of Turn 4, Dame Fortune began to smile upon the Stuart cause as first Murray was able to rally the Frasers (and just barely, by one pip of the dice) and then the Camerons finally decided to charge. The Camerons slaughtered the 60th Foot in the melee, causing the latter to run off the table. The Camerons rolled very well for the D6 melee bonus, rolling a "6", while the 60th was rolling snake eyes and deuces. Bless you God.


Lord George Murray rallies the Frasers.

Both events were actually the result of a mid-game rules adjustment by the Good Mister Protz, who decreed that the Jacobites should henceforth receive a +1 morale bonus if they were attempting to charge. Without this change, the Camerons would still have been cemented to the auld sod. Another Protzian decree decided that Lord George Murray had a bit of charisma afterall, and that he would add a +1 on any morale roll of any Jacobite unit under his command. Without this ruling, the Frasers would have run off the table for good, without losing a single man.


Turn 4 Jacobite Left: Talisker's brigade pitches into the 44th and 46th Foot regiments and drives both off the field.

Things were really heating up on the Jacobite left wing, as Talisker charged all three of his regiments into the waiting Government infantry. The Clanranald and Keppoch regiments combined against the 44th Foot (shown at the top of the picture above), while the remnants of the Glengarry regiment (shown at the bottom, with yellow flag and rampant lion) bravely made a forlorn hope charge into the 46th regiment of foot. They had no chance, given that they were severely outnumbered. Or did they?

Fate was a fickel lady this afternoon, for last 9 figures from the Glengarry regiment charged into 30 figures of the 46th Foot and guess what? They won the melee and the 46th routed, breaking through the 27th Foot standing in the second line as a reserve. The 27th became disordered and then they routed too. How did that happen? Wow.


The Magnificent Seven Glengarry's pause for a well deserved rest after their impossible melee victory. (Perry ECW Highlanders pressed into service with Front Rank standard bearer).

But things were even better to the left of the Glengarry regiment, for Colonel von Bergmann led his Keppoch lads into the 44th Foot, where he personally captured both regimental colours in the hand to hand fighting. The 44th also routed off the table.


Von Bergmann (pink coat) leads the MacDonnells of Keppoch to victory on the Jacobite left, albeit with some significant help from Clanranald regiment to their left (in the camp).

Meanwhile, back on the right-center, the Government cavalry had decided that they had enough and they fled en masse from the field, save for a reserve squadron of the 15th Dragoons. Lord George Murray scanned the field and realized that the only formed troops left were all Jacobites.


The last of the Government cavalry flees, except for the 15th Dragoons formed as a rear guard. The Camerons (bottom) look on.

At the end of Turn 4, there was no formed Government opposition remaining on the field. It was a total and utter rout of Johny Cope's army. Since Edinburgh was already occupped by the Jacobites, General Cope had to ride all the way to Berwick to deliver the bad news to the Hanoverian government. Prince Charles rode around the battlefield to the cheers of his men as the battle concluded.


To the victors go the cheers. Prince Charles thanks his troops for their hard fought win.

So the game was over at the end of Turn 4, all in about 2 hours. The rules modifications that we made seemed to work well and it was quite evident that the best strategy for the Jacobites was to get across the field as soon as possible and close in for the melee. I liked the idea of Poor troops fighting one another and having to pass a morale roll to close. My Camerons wouldn't budge and I was sure that the Frasers would run off the table without losing a single figure. But a mid game act of god saved Murray's bacon today. The rules changes that we made (+1 morale bonus when charging) made sense and made for a better game.

In our next campaign game, the Jacobites will receive another battalion of French reinforcements (Albany Regiment and the Fitzjames Horse) plus some more Highland and Lowland units. The new Scots regiments will probably start as Poor, while the regiments that partcipated in this game will be upgraded to Trained. The Government forces will have more Trained regiments in the next battle as well, so the Jacobites will have a tougher nut to crack. I really enjoyed this game and the rules were spot on for the period. Additionally, we have some growing legends with von Bergmann's and the Earl of Talisker's exploits. Likewise, one wonders what shall become of the Camerons? Will they charge the next time or stand fast? Such questions can only be answered on the table top , aided by the luck of the dice.

Stuart Victory At Prestonpans

I will post some pictures and an after action report of our first Jacobite Rebellion game that was played today. The Jacobites won an overwhelming victory over the Government army, commanded by Sir John Cope. The game lasted 4 turns and as recently as turn 3 it appeared that Cope would crush the rebellion right then and there. However, on the next turn, the Jacobites won every melee and drove the redcoats off the field.

It was a fun game, took only 2 hours to complete, and the rules seemed to work very well for the Forty Five. We did a little bit of tweaking during the game. For example, we added a +1 morale modifier for the Jacobites when they charge in order to improve their odds of passing morale and charging. This coming after yours truly failed to charge on four straight occasions due to horrendous die rolls (one would think that I could roll a "6" on two D6 dice, but I couldn't).

Friday, May 2, 2008

Prestonpans Wargame


The open moor at Prestonpans - site of the first battle of the Forty Five

The plaid painting blitz of the last three weeks has come to an end and now it is time to let the metal lads settle the issue of the Jacobite restoration on the field of battle. It is hard to believe, but I have assembled a force of 63 infantry, 6 cavalry and 4 artillery crew plus two senior mounted officers. We will fight the first battle of the campaign tomorrow, using a scenario that is loosely based on the battle of Prestonpans.

I have set up the game table, as shown above, and you can see that the terrain is fairly open. The picture doesn't show the rise in the terrain in the middle of the table, but this is where the Government forces will deploy. The terrain is rather stark and Old School, but we are here to play test the rules for the Forty Five and I did not want to clutter the field with obstacles and impediments. Hence the simplified terrain.

I am considering having the Jacobites dice to see where they enter the table; either that, or allow them to deploy after the Government troops are set up. This represents the Jacobites' greater maneuverability as they marched around the redcoat flank several times, seeking a more favorable starting position for their eventual attack.

Jacobite Order of Battle for BAR Rules (231 figures)

Lord George Murray's Brigade:
Appin Stewarts (30) - Poor
Frasers (30) - Poor
Camerons (45) - Poor

Earl of Talisker's Brigade:
Clanranald Regiment (30) - Poor
MacDonnell of Glengarry (30) - Poor
MacDonnell of Keppoch (25) - Poor

Prince Charles Stuart's Reserve:
Royal Ecossais (30) - Trained
Lifeguard (5) - Poor
Strathallen's Light Horse (6) - Poor

Government Forces - Lt. Gen. Sir John Cope (217 figures)

Colonel Lascelles Brigade
44th Foot (45) - Poor
46th Foot (45) - Poor
60th Foot (45) - Poor
27th Foot (30) - Trained
2 x 3 pound artillery (8) - Poor

Brigadier Mosteyn's Brigade
10th Dragoons (12) - Poor
15th Dragoons (12) - Poor
11th Dragoons (10) - Poor
6th Dragoons (10) - Poor

There is, of course, no Earl of Talisker. This is a fictional character that I have made up for our Jacobite campaign. He is a laird from the Isle of Skye, home of the whiskey that bears his family name. Likewise, some of the units such as the Prince's Lifeguard (Lord Elco's) and the Royal Ecossais were not at Prestonpans, but we are using them in our stylized version of the battle. Afterall, if I am going to take the time to paint them, then you can be sure that they are going to show up for the battle. The two MacDonnell regiments are actually ECW Scots infantry being pressed into service, while the kilted Black Watch is standing in for the Camerons and the Clanranald regiment. The Royal Ecossais are actually some blue coated American provincials with Royal Ecossais standard bearers painted just for this game. Eventually, we expect to have the actual forces painted for future games.

I don't believe that any of the Government regiments in our OB were actually at the real battle. They just happen to be the British redcoat regiments that we have available for the game.

We are using some minor tweaks to our standard Batailles de l'Ancien Regime ("BAR") rules. The Jacobites will roll a D6 before each melee and the die roll pips determine the amount of modifiers to the melee bonuses. So I hope that I roll a lot of sixes. Since virtually every unit is rated poor, units on both sides will have to test morale whenever an enemy closes within ten inches of them. That could prove interesting if two opponents meet and both elect to run away! We will also use limited small arms ammo chits for the Jacobites in order to encourage them to go in with the sword rather than engaging in a fire fight with the Government troops.

The other interesting thing about this game is that all of the units will be either 30 or 45 figures, rather than our standard 60 figure regiments. This will provide more maneuvering room on my 6 by 12 feet table and probably have some unforeseen effects on the fire dyamics.

This should be interesting and I'm looking forward to the game.