Saturday, September 29, 2018

Russian 4th Grenadiers - Newly Painted


Minden Miniatures Russian Grenadiers in coats.

CLICK PIX TO ENLARGE

A few days ago I finished a new battalion of Russian grenadiers wearing their green coat. These are the new Minden SYW Russian figures that Richard Ansell recently sculpted. A big thank you to Richard and to Griffin Moulds, the latter having turned the greens into production moulds in record time for me.

I think that these figures, the Russian grenadiers in coats, might be one of the most gorgeous units of Minden figures that I have ever painted. The fine details on the figure, the wonderful faces, the body proportions and last but not least, the colorful combination of red and green colors and gold-copper miters make for a beautiful wargame figure.

Russian 4th Grenadiers with view of the Ordanance flag.


In the picture below, the flags were hand-painted using Kronoskaf images as a painting template. Note that the Russian army had organized standing grenadier regiments that carried their own regimental standards.

Russian 4th Grenadiers - Minden Miniatures.
I wanted to pitch in and paint these grenadiers right away, but some recent "life events" kept me away from the painting table. Notably, painting figures is very relaxing for me and helps me to deal with some of the life stresses related to the recent passing of my mother. But I digress and am not looking for sympathies...

I use 32-figure battalions in my Russian units and base them on four stands. This is done so that I can place the drummers at the end of the line, where they should be, and the NCO is also at the end of the battalion line, again, where he should be.

However, four bases creates an imbalance in the symmetrical look of the battalion, noting that the flags are offset from the center of the unit due to having an even number of stands rather than an odd number of stands. My "fix" for this visual problem had been to add a stand of a battalion gun on the flank of the battalion. I use two Russian artillerymen and a Prussian 3-pounder for the actual gun (one of these days, in the future, I will add an actual Russian 3-pounder to the Minden figure range).

Two of the four stands shown with the battalion gun stand on the flank.
The picture also depicts how I place the drummer on the flank plus an NCO
at the end of the front rank (right-most figure in the first row).

Russian 3-pound battalion guns stands. I had to use the Minden Prussian 3-pound
cannon as a substitute for an actual Russian 3-pounder model.

4th Grenadiers with a pair of battalion guns - not my normal set up.

If you are interested in adding a Russian grenadier battalion to your wargame army, then you will need the following product codes for Minden Russian grenadiers wearing their green coats:

MR-007  Russian grenadier command (officer, ensign, drummer and NCO)
MR-008  Russian grenadiers, rank and file figures (8 figures)

It looks like I will need to either add a second standard bearer to the command pack or add a new product code for a pair of grenadier standard bearers.

I hope that you enjoy looking at these pictures (I apologize for some of them being a little fuzzy and dark) and that they convey the grandeur of the Russian grenadier uniforms.

Russian Flags for the 4th Grenadier Regiment


My hand-painted flags for the Russian 4th Grenadier Regiment.
CLICK TO ENLARGE


I finished painting a battalion of Russian grenadiers in their green coats and needed a pair of flags to finish off the unit. Unfortunately GMB Designs does not make the grenadier flags (yet?) so I decided that I would have to make my own flags for the 4th Grenadier Regiment.

Per my usual method for hand-painting SYW era flags, outline Here, I went to Kronoskaf to find images of the Colonel's and Ordannance flags for the 4th Grenadier Regiment.


You can view the history of the regiment, its uniforms and its flags on Kronoskaf.

Der Alte Fritz is on Twitter now -YIKES!


Against my better judgement I decided to open a Twitter account @DerAlteFritz3 to have another outlet for showing pictures of my Minden Miniatures and Fife & Drum Miniatures figures and to talk about upcoming figures to the product ranges.

I can also post updates on new figures, battalions and regiments that I am painting.

There will probably be other wargame related content that I will post every now and then such as a picture of a game that I played in, etc.

If you would like to follow me on Twitter, then great, otherwise don't feel any pressure to do so. I'm just doing Twitter for the fun of it.

Sunday, September 23, 2018

Russian Musketeers in Coats - Newly Painted


The new Minden Russian Musketeers in regular coats plus GMB Designs flags.


CLICK PICTURES TO ENLARGE THE VIEW

The other day I completed the basing and flagging of a new regiment of Minden Russian musketeers wearing their regular green coats.

The product codes used to make this musketeer battalion of 32 figures include:

MR-001 Russian Musketeer Command (officer, drummer, std bearer and NCO)

MR-002 Russian Musketeers in regular coats (pack of 8 figures)

MR-003 Russian Musketeer Standard Bearer pack (2 figures)


Minden Russian Musketeers

For my own wargame army organization I use 32-figure battalions based on four stands, with 8 figures per stand. The two end stands have the drummer set out further from the rest of the battalion and there is an NCO on each flank base. My command stands consist of 2 standard bearers, one officer and 5 rank and file musketeers. In my Prussian battalions I replace one of the musketeers with a Zimmerman figure (wearing grenadier mitre and leather apron and carrying an axe).

So my units have two each of officers, standard bearers, drummers and NCOs for a total of 8 figures. There are also 24 rank and file musketeers (or grenadiers or fusiliers as required). Thus in the case of my Russians, the following packs of figures are needed:

2 packs of MR-001 Musketeer Command (4 figures per pack x 2 packs = 8 figures)

3 packs of MR-002 Musketeers


I really like the way that the Russian musketeers in coats turned out once I had painted them. I am sure that I will be painting more of them. Next in the painting queue: a battalion of Russian grenadiers in regular coats.

Thursday, September 20, 2018

The Best von Zieten Ever Made


Prussian Lt. General Hans Joachim von Zieten - Minden Miniatures - by Richard Ansell

One of the strengths of the Minden and Fife & Drum figure ranges are the individual "personality" figures that Richard Ansell has sculpted over the years. Each figure is different and they demonstrate Richard's master sculpting skills at their finest.

Afew years ago Richard Ansell sculpted a special figure as a commission for one of our Minden customers and that figure was of the Prussian cavalry general Hans Joachim von Zieten.

The customer provided us with the following piece of artwork for Richard to create his version of von Zieten:


From there, Richard sculpted the following Zieten figure and a special one-off horse for the rider:

Zieten green by Richard Ansell
I think that Richard did a superb job of rendering a model that is faithful to the portrait that provided the inspiration for the commission. The animation of both the rider and horse are second to none. The detail on the horse furniture (reins, shabraque, etc.) are amazing to behold and the pictures pale in comparison to holding the actual figures in your hands.

I know that I am biased, but I truly believe that nobody is better at sculpting horses than Richard Ansell. I get inquiries from other companies about the Minden horses all the time as they aspire to have similar horse models in their product ranges.


The figure is one of the most fun, most enjoyable figures that I have ever painted:


Front View

Rear View
I drill a hole in the underside of the rearing horse and placed a metal pin between the belly of the horse and the base in order to give the model more stability. This is an easy procedure to perform and is well worth the extra time spent. I then hid the pin with some tufts of long grass - I defy you to find the pin in the photo.

I am grateful that one of our customers provided the inspiration for such a nifty looking model of a Prussian personality figure. Von Zieten has become one of the most popular models in the Minden figure range, and rightly so.

I like all of Richard's sculpts, of course, but he really goes the extra mile and shines on his personality figures. Guess what? There are a lot more personality figures in the pipeline for both our AWI and SYW figure ranges. Stay tuned to this blog for more information.

Over the next couple of weeks I will be posting about the various personality figures that we have and put the spotlight on them.

Tuesday, September 18, 2018

Over the Khyber Pass - Shalalabad


The 72nd Seaforth Highlanders capture the summit of Haggis Hill.


This past weekend I had the pleasure to travel north to Brown Deer, WI and visit the country estate of Major General William Augustus Pettygree. The good general elected to host a wargame set somewhere in Afghanistan circa 1903.


Overhead view of the battlefield. The British relief column was to march from the
 near end of the table to the hill fort in the distance, and rescue the British garrison on the hill.

The Crown Forces were tasked with rescuing a beleagured British hill fort that was surrounded by angry Pathans who would likely give no quarter. I had the honor, once again, of commanding the 72nd Seaforth Highlanders taking the role of Colonel Archibald ("Archie") Sinclair. I also had the 1st Sikh regiment and a pair of 15-pound rifled cannon under my command. My colleague, Major Benson, commanded the famous 66th (Berkshires) Regiment, two squadrons of British hussars, and the 2nd Sikh regiment.


The 72nd Seaforth Highlanders form up into battle line.

The British garrison in the hill fort appeared to have one regiment of Sikhs and one regiment of red coats. Since the hill fort was far away from where the Seaforths fought, I have no certainty of what happened there on the day of battle.

The property in question - British hill fort commands the Shalalabad Pass.
Major General Pettygree left Colonel Sinclair in charge of the relief expedition. Pettygree gave Sinclair his assurances that he would arrive with the cavalry, the famous Bengal Lancers, at some point during the day. Sinclair was further instructed to watch the flanks and rear areas of the battlefield, as Pathans could suddenly appear at any point on the table.

British wagon laager.

The Seaforths prepare to cross the bridge. They will screen the march of
the Berkshires and 2nd Sikh regiments, which will  make a left turn behind
the Seaforths and march around the flank of the Pathan defenses.

The Pathan defensive positions:

The Pathans occuppied three significant hills across the battlefield and these presented difficult obstacles to the British relief column. The main body of Pathans were located on Hill Number 1 and they would soon be scrambling and screaming their way to the Hill Fort, to slaughted the infidels that garrisoned the fort.

Pathans mill around Hill Number 1. They will attack the Hill Fort.
A smaller group of Pathans defended Hill Number 2. If this landmark could be captured then the road to the Hill Fort would be opened  up.


Pathans atop Hill Number 2, which guards the right hand approach to the fort.
Finally, a large group of Pathan riflemen occuppied Hill Number 3, which was later called Haggis Hill because it was such a grind to capture the summit.


Pathan riflemen occuppy the summit of Hill Number 3, soon to known as Haggis Hill.

A ground level view of the foreboding Haggis Hill.
The Battle for the Hill Fort.


The British hill fort on the left, Hill Number 1 on the right.
The Hill Fort looked to be impregnable from the distance of the British relief force's encampment, but that did not disuade the Pathans, commanded by the notorius Amrahn Khan, from surging up the hill in a frenzy. There was one regiment of Red Coats whose name escaped me, and one regiment of Sikhs plus a couple of Mountain Screw Guns. The garrison had but a little time to erect a shaky wall of mealie bags that formed the defensive perimeter.

From what I could tell, the Pathans never made it over the mealie bags, but I will let the picture captions tell the rest of the story.

Here they come!

The Red Coats defend the mealie bag walls that were erected in the nick of time.

The desperate fight for the Hill Fort. Against all odds, the Red Coats held the fort.
 The Battle for Haggis Hill

Colonel Archie Sinclair was a long time friend of William Augustus Pettygree and a fellow classmate at Sandhurst. It seemed that where ever Pettygree went across the Empire, Archie Sinclair was sure to follow. The two soldiers had shared adventures in the Sudan, in the Raj and across the Khyber Pass and into Afghanistan, their current location.

Colonel Sinclair observed the several hills in front of him, all crammed full of Pathans, and reasoned that he could pin down a large number of them with one of his brigades and march around their flank with his second brigade and some cavalry. At some point during the afternoon Sinclair expected the arrival of Pettygree at the head of a column of the Bengal Lancers.

The first brigade, comprised of the Seaforth Highlanders and the 1st Sikh regiment, would advance towards Hills Number 2 and 3 with the intention of drawing all of the Pathans fire on them. While this fighting was going on, Major Benson would lead the second brigade comprised of the 66th (Berkshires) Regiment, the 2nd Sikh Regiment, and two squadrons of the 10th Hussars, across the open plain to their left. Sinclair hoped that they might get lucky and sneak through the back door into the Hill Fort and relieve the garrison.

And so it was that the Seaforth Highlanders were the first to cross the bridge over the stream in front of Hill Number 3. To their right, the 1st Sikh Regiment would entertain whatever Pathans that they could stir up around Hill Number 2. The Sikh's orders were to protect the right flank of the Seaforths as they attacked Hill Number 3.

While these events were taking place, Major Benson formed his brigade into march column and moved out sharply behind the Seaforths. As Benson approached the stream he ordered the head of his column to make a left turn and march towards the open plain to the left of Hill Number 3. The Seaforths provided a screen that kept the Pathans from shooting into the flank of Benson's column as it marched off to the left.

The Berkshires march onto the open plain to outflank the Pathan defenders of Hill No. 3.


Now you see 'em -- Pathans atop of Hill Number 3.

...and now you don't. Berkshires on the left, and Seaforths on the right make a joint assault on Hill No. 3

The Pathans dropped a surprisingly large number of Highlanders during the early stages of the assault on Hill No. 3. Colonel Sinclair quickly realized that his rifles had little effect on the Pathans, who were ensconced in hard cover. They could be hit by rifle fire, but on their saving throws all they needed was "anything but a 1" on a six-sided dice.

"Well then, let's soften them up with some artillery fire," said Colonel Sinclair to his commander of the Royal Artillery 15-pound rifled cannon. Long range artillery fire proved to be more effective than small arms firing (noting that the saving throws were "anything but a 1 or a 2" on the D6 dice. ) Pathans began to drop in droves as they scattered for cover.

The Highlanders held back for a couple of turns and let the artillery do the damage. Everytime the Pathans lost 10% of their unit strength in a turn, they had to fall back 8-inches. This happened a number of times and the Seaforths eagerly awaited the opportunity to rush to the summit of Hill No. 3. However, the Pathans seemed to win the first movement advantage on numerous turns. Thus they would take casualties, fall back 8-inches, and then return to the hill to fire at the Highlanders. It seemed that no matter what they did, the Pathans would return before they could rush up the hill. It was such a hard grind that the Highlanders began to call the hill "Haggis Hill".

Eventually, Major Benson detached two companies of the Berkshires to assist in the taking of Hill No. 3. They fought in open order, which made them harder to hit. The Highlanders would have used the same tactic but for the fact that they were constantly under the threat of being attacked by Pathan melee soldiers - the Seaforths stood a better chance of winning melees if they fought in close order.

Indeed, a mob of unruly Pathans charged down the hill and into the bayonets of the Highlanders. Then the rest of the companies in the regiment swung around both flanks of the charging Pathans, who were soon despatched to their deity.

Success! Colonel Sinclair leads his men to the summit of Haggis Hill, with support from the Berkshires.
The Pathans continued to fall back and then reoccuppy the hill before the Seaforths could crest the summit. However, attrition from the cannon fire and close range rifle fire whittled the Pathans down enough so that they finally ran away for good.

Out on the right flank of the Seaforths, the 1st Sikh Regiment was having its hands full with the local Pathan tribes. It seems that the Pathans kept finding fire arms, even though they were not so armed. With this handicap, the 1st Sikhs could not hope to capture Hill No. 2, so they held their position on the rear slope of a ridge and kept the Pathans at bay with fire arms. This had the effect of also protecting the right flank of the Seaforths from attack by the Pathans.

The Finale or End Game

Colonel Sinclair was too involved with the action at Haggis Hill to follow what was happening elsewhere on the battlefield. General Pettygree finally arrived on the open plain and drove off the Pathan cavalry, thus opeing the road to the Hill Fort. The fort garrison saw their chance and they scurried down the slopes of the hill to greet their comrades in khaki. Seeing this, the Pathans broke off the fight and disappeared into the foothills surrounding the fort.

The British had won the day, but General Pettygree knew that it was hopeless to try to hold the fort, so he retrieved the garrison and the column returned to their base in Khandahar.

Sunday, September 9, 2018

AWI Campaign Battle - Hobkirk's Hill

Annotated view of the initial set up of troops at Hobkirk's Hill.
(CLICK ALL PICTURES TO ENLARGE)

Turn Eleven of the South Carolina Campaign produced a significant battle near the British base at Camden. With one more game turn left in the campaign (Turn Twelve), the Americans decided to take a large risk and attack the British stronghold at Camden. Baron DeKalb commanded the American army of 6SPs and decided to go for it, knowing that General Cornwallis' army was too far away to come to the assistance of Lord Rawdon, who defended Camden, also with 6SPs.

The Americans had the opportunity to add from zero to three militia regiments, based on a D6 die roll. DeKalb rolled his dice well and added two militia regiments, giving him a total of 8SPs to 6SPs for the British team.
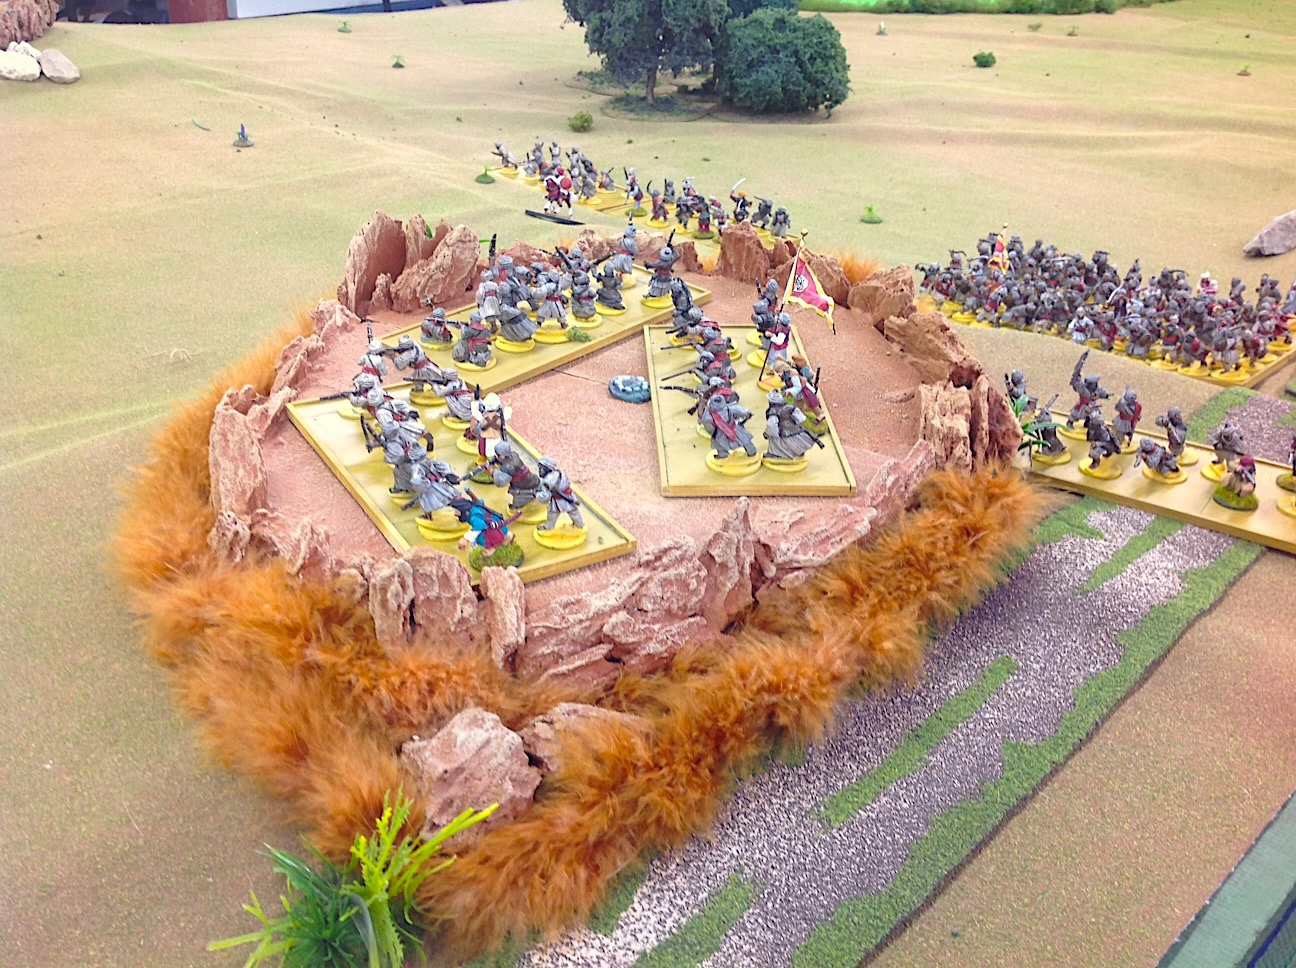
A sort of "Devil's Den" on the flanks of Hobkirk's Hill.

The British commander, Lord Rawdon, was not aware of the militia reinforcements for DeKalb's army, so figuring that he had better quality troops, he decided to attack the Americans, who were deploying for battle just outside of Camden on a small rise of ground known by the locals as Hobkirk's Hill.

DeKalb deploys his American army on Hobkirk's Hill.


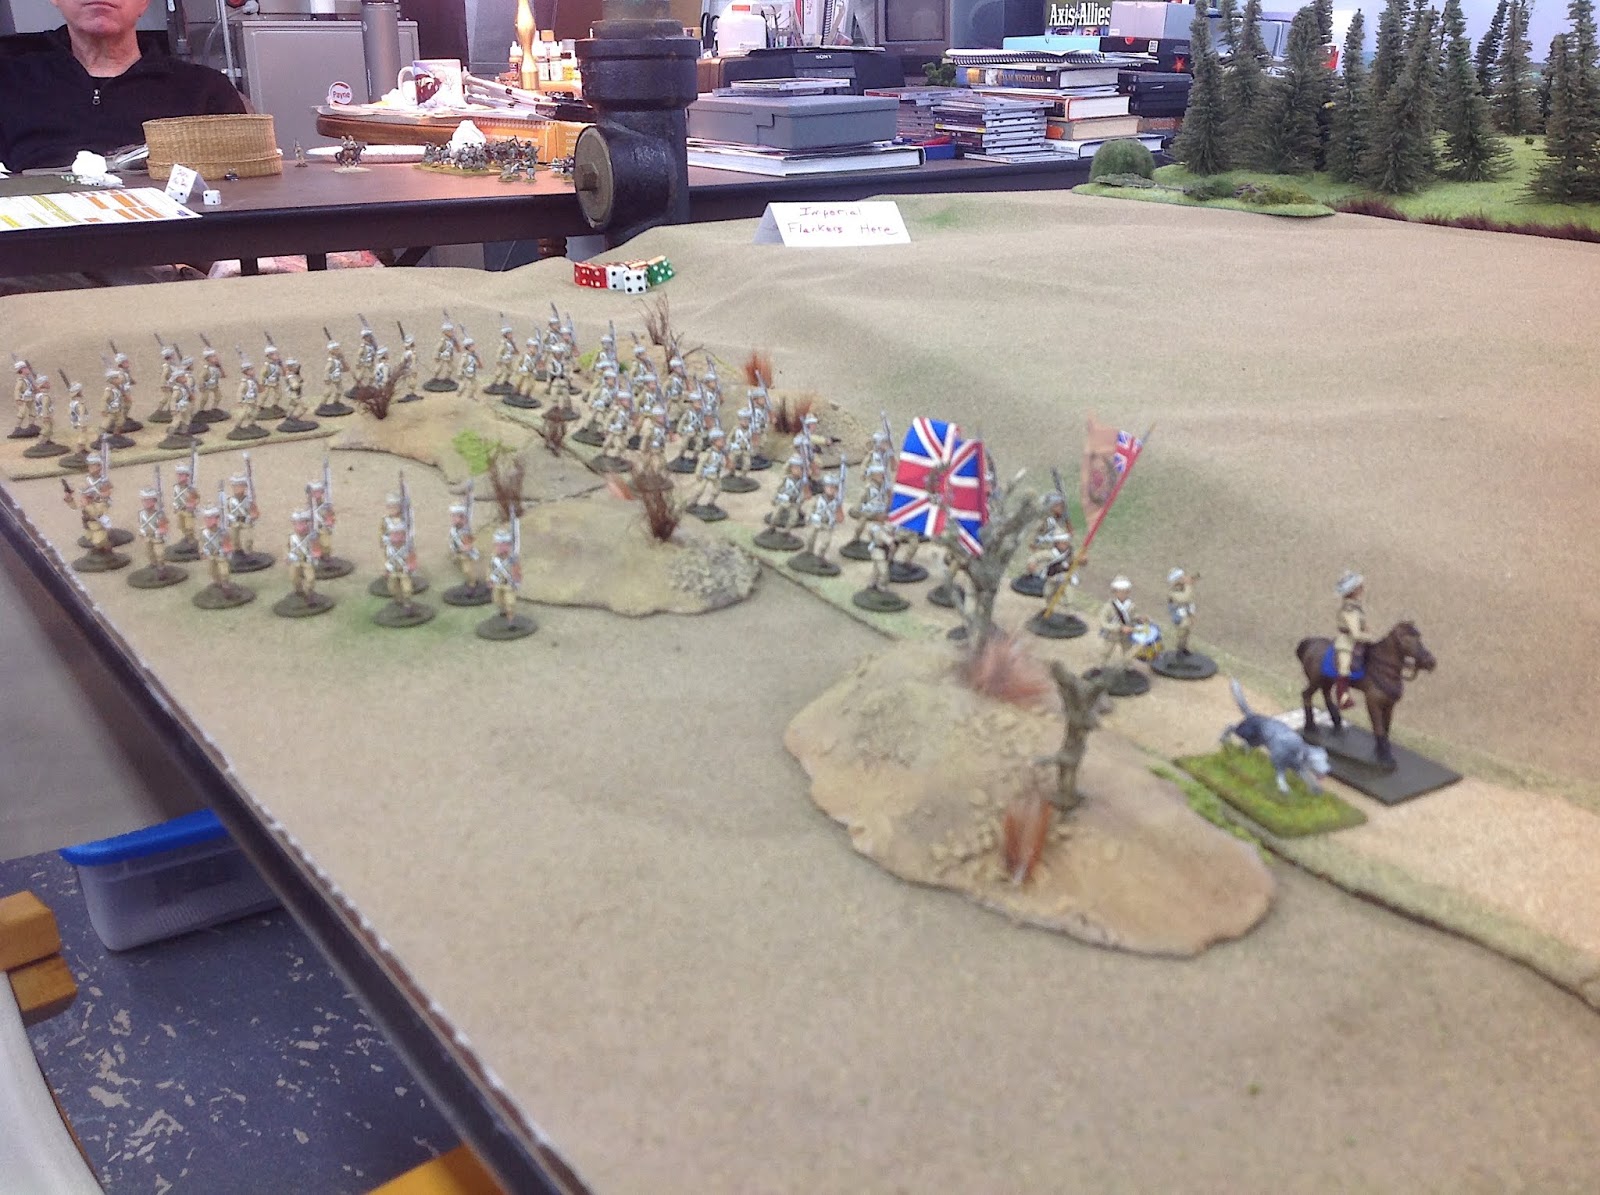
British Order of Battle - Lord Rawdon commanding
Left Wing - Major John Hamilton
Queen's Rangers (provincials)
North Carolina Loyalists (provincials)
55th Regiment of Foot

Right Wing - Lt. Colonel Nisbet Balfour
4th (King's) Regiment
5th Regiment
27th (Inniskilling) Regiment

Reserve Forces -Lord Rawdon
2 x 3-pound cannon
1 squadron of 17th Light Dragoons/British Legion Dragoons
Ferguson's Rifles (provincials)

American Order of Battle - Baron DeKalb commanding

Right Flank - Smallwood
1st Maryland Continental Regiment
6th Maryland Continental Regiment

Center - Lt. Colonel Huger
1st South Carolina State Regiment
2nd South Carolina State Regiment

Reserve Forces - Baron DeKalb
1st Virginia (held in reserve)
1 x 6-pound cannon

Left Flank - Major Caswell
Winnsboro Militia

Additional Raised Militia
Caswell's Mounted Infantry
Spartanburg Militia

The battle commenced with some long range artillery fire from the Continental 6-pounder, which took a bead on the 27th (Inniskilling) Regiment, inflicting 4 casualties over the the first two turns. Some minor skirmish fire (from individual stands of figures) created some smoke but few casualties.

By Turn Three both sides had shaken out into parallel battle lines and were marching into musket range. Balfour's right wing advanced quickly towards Hobkirk's Hill, hoping to catch the Americans in a tangle before they could form battle lines. His right flank was covered by Ferguson's Rifle, however, they were pushed back by Caswell's large militia regiment from Winnsboro. His left flank was hanging in the air because he had advanced faster than his supports in Hamilton's brigade.

Annotated positions of each regiment as the battle lines come into close range.


The American artillery and skirmishers continued to prey on the Inniskillings, who had taken 5 cumulative casualties and routed on Turn Three. Since they ran through the 5th Regiment, located directly behind them, that regiment's morale was downgraded to "Shaken".

On Turn Four things started to go south for Hamilton's brigade on the British right flank as the Spartanburg militia emerged from the woods and delivered a point blank volley into the face of the Queen's Rangers, which went "Shaken". Back with Balfour, the Rifles fired at the Winnsboro militia and made them go "Shaken", but the Inniskillings continued their rout and were removed from the game. Well, that was not a good turn for the British side.


The Spartanburg militia advance to the edge of Gill's Field.
Turn Five: The Americans won the first fire initiative on this turn, so the Queen's Rangers (with bayonets) decided that it would make sense to charge the Spartanburg militia (no bayonets) and dig them out of the woods, which would secure the left flank of the British battle line, commanded by Hamilton.

Queen's Rangers try to charge the Spartanburg militia (left) but are repulsed
and fall back through the North Carolina Loyalist regiment, resulting in both units in Shaken status.

Well at least it seemed like a good idea because the Queen's Rangers should have been able to  slaughter the militia due to the bayonets versus no bayonets situation and all they had to do was pass their morale test. The Spartanburg militia passed its morale and decided to hold its ground and fire another volley into the green-coated QR lads, inflicting 2 more hits. The Rangers went "Shaken" on their morale test, which required them to fall back 8-inches rather than to close and fight with the militia. Hamilton's 55th Foot took a volley from the 1st Maryland Continentals and took two hits. They licked their chops as they were finally able to fire back at the enemy and mowed down 4 of the Marylanders, who went "Shaken" from the effect.


In the center of the battlefield, both sides were in musket range now and the veteran 6th Maryland Continentals advanced down Hobkirk's Hill and fired into the 4th (King's) Foot (of Balfour's brigade). To the left of the 6th Maryland, the 1st South Carolina state regiment also fired at the 4th Foot, which took a total of 2 hits combined from the two American regiments, but still became "Shaken" as a result. Fire not so good, mate. The 4th levelled their muskets and made the Americans pay by receiving back 6 hits!

Smallwood's Maryland brigade atop Hobkirk's Hill. The 6th Maryland, in grey hunting shirts,
 is shown in the foreground, the 1st Maryland, in blue, is in the background.


The 2nd South Carolina state regiment fared no better than its sister regiment, receiving 5 withering hits from the British 5th Foot, resulting in a "Shaken" dice roll. Thus in one turn of close range fire, the British inflicted 17 hits on the Americans, receiving back only 6 hits, and causing two American regiments to go "Shaken".


South Carolina brigade (right) and Balfour's brigade (left) close within close range.
Turn Six: good fortune seemed to favor the Crown Forces, for they won the first fire initiative on Turn Six so they were well-positioned to follow up on the success in the previous turn. Rallies come first in my rules and the 6th Maryland and 1st South Carolina recovered their morale from "Shaken" to "Good". The Queen's Rangers, the North Carolina Provincials and the 4th (King's) Regiment were all restored to "Good" morale status.

The Americans decided that charging would be a better idea rather than standing their ground and getting shot down by British close range musketry. The 4th (King's) Regiment probably thought that it was a bad idea because they were charged in the front (1st Maryland) and flank (2nd SC) by the Americans. The King's Regiment passed its morale test, despite their bad situation and so it was now time to rumble into melee.

Damned if you do, damned if you don't. The 4th Regt. is hit front and flank and rout.

Caswell's Mounted Militia mounted up and began a concealed move through the woods to support the right flank of the 6th Maryland. The Spartanburg militia continued to hold its ground along the fenceline facing the Queen's Rangers. The QR regiment decided that they had seen enough of the Spartanburgers and so they fell back in good order so as to support the 55th Foot. 


The Mounted Militia sneak through the woods looking for an opportunity to charge.


The North Carolina Loyalists decided to try their hand at dealing with the Spartanburg boys by firing at them with a large handful of 6 dice. They whiffed! Old Sparty fired back and knocked off two of the Tarheels, who were confused and "Shaken" by the whole affair and probably a bit embarrassed at being bested by mere militia troops.

Spartanburg militia repulse the North Carolina Loyalists for the second time.

Now it was time to resolve the melee between the two American regiments and the 4th King's Regt. As expected under such long odds, the 4th routed after taking 6 hits in the flank from the 2nd South Carolina regiment. Lord Rawdon now had two routed regiments of British regulars and he had a sour taste in his mouth from the whole business of this fight.

Turn Seven: This looked like it could be the pivotal turn of the game because the the rout of the 4th King's regiment created a gaping whole in the center of the British battle line. Aren't all holes of the gaping variety? Dang nabit, the Americans won the first fire initiative again and so the Spartanburg militia continued to make a name for themselves by firing into the flank of the 55th Foot, hitting 3 figures and adding a fouth hit on the nearby North Carolina Loyalist regiment. The 55th took two more hits from the two Maryland Continental regiments, for a total of 5 hits on the turn. The 55th passed their morale. Huzzah, huzzah for the bully 55th!
The Maryland brigade overlaps the right flank of the 55th Regt.
Back in the center of the field, the 1st South Carolina sought to exploit the gap created by the 4th Foot, but they failed to take notice of Ferguson's riflemen who picked off two of the gamecocks, causing THEM to rout. Now it was the American battle line that had a yawning gap, which is more severe than a gaping hole, from what I understand. 

Balfour's British brigade (on the right) face nothing but open space in front
of them due to the rout of the 1st South Carolina regiment.

The Spartanburgers continued to be oblivious of their mounting casualty list and passed yet another morale test. What would it take to get rid of these pesky militia? In years ahead, historians would tell the tale of Old Sparty and opine that the bullets were flying so fierce that it seemed that they were in a veritable "hornets' nest". As the smoke began to settle a bit on the battlefield, it appeared that Lady Fortune was now flirting with the redcoats. First the Americans and now the British, can't this dame make up her mind?

Turn Eight - The Grand Finale: Things were about to get exciting my friends, and some stupendous events were about to occur. The Americans won the initiative die roll and elected to move first. What's this? thought the British. Why don't those rebels fire at us first? Do they know something that we don't know?

Indeed they did. Caswell's Mounted Militia had been taking it easy at the edge of the woods for several turns now, and nobody (including Baron DeKalb, their army commander) had taken notice of them. Colonel Caswell observed that the time was ripe for a charge into the flank of the British 55th Foot, which he now ordered.


American mounted militia charge out of the woods
and into the flank of the unsuspecting 55th Regt.

The backwoodsmen came charging out of the light woods, screaming like devils (do devils really scream and if so, has anyone actually ever heard a devil screaming?), swords drawn, and they cleaved into the delicate flank of the 55th Foot. The 55th could do nothing more than rout. 

But wait, there's more!

Caswell rode through the redcoats as an appatizer and now feasted on the main course, the Queen's Rangers, who had thought that they might get to sit out the rest of the battle in the second line. They thought wrong. The QR regiment likewise routed off into the yonder and thus served up the dessert course in the form of a pair of Royal Artillery 3-pounders that were in the path of the charge. The artillery crew were cut down to the last man. Finally, with horses heaving and blown, Caswell's glorious charge had run its full course, however, he had almost single handedly wiped out the left flank of the British army, in the form of Hamilton's brigade.

American mounted militia charge into the flank
of the Queen's Rangers, routing them too.


Let's rub a little more salt into the hyde of the redcoats and watch the Spartanburg militia run off the North Carolina Loyalists for good measure.

Turn Nine - the closing act of our little play:  the Americans won the first initiative which allowed Caswell's Mounted Militia another swat at the British piniata. Their foe this time was the 17th Light Dragoons, also known as The Adults in This Room. They had seen enough of Caswell and counter-charged the Americans. Caswell won the melee, 2 hits to none, leaving the dragoons shaking their heads in dismay as both cavalry units fell back from the fight in disorder.

American mounted militia (left) vs British 17th Light Dragoons (right)


Lord Rawdon had seen enough by now. He ordered Nisbet Balfour to fall back and form march column to get away from the American army. Balfour thought that he was winning the battle on his flank when the order to withdraw came. Lord Rawdon brought him up to speed on recent events and Balfour concurred that leaving the scene was a sound idea. As his brigade marched off into the sunset, the North Carolina Loyalists found themselves very much alone on the battlefield. With Hamilton either dead, captured or missing, they missed the order to withdraw and they wisely layed down their arms and surrendered.

Troop positions at the end of the battle.


Conclusion
What an amazing battle Hobkirk's Hill was, with Baron DeKalb's army crushing Lord Rawdon's British army and significantly boosting the American cause in South Carolina. Rawdon had lost three of his 6SPs in the fight and would lose an additional SP as the penalty for being the losing side in the battle. Conversely, the Americans gained an extra SP as a reward for winning the battle, so now DeKalb was the owner of Camden and an army of 7SPs. 

The battle was also notable for the key contributions of two militia units: the Spartanburg militia and Caswell's Mounted Militia. The Spartanburg boys refused to be routed out of their woods, despite losing nearly 40% of their effectives. Their morale was at the highest level all throughout the game and they fended off two better-trained Loyalist regiments during the battle. Caswell's Charge was just simply the silliest thing that I have seen on the tabletop in quite some time. Words fail me on this.

The fate of Lord Rawdon's dwindling force is unknown, as yet. I would imagine that the road back to either Monck's Corner or Charleston would be swarming with American militia eager to take a bite out of the retreating British. The American capture of Camden also puts Lord Cornwallis' main British army in South Carolina out of supply, so he will only have one turn to find supplies again or face the attrition of 1SP per ensuing turn. However, since Turn Twelve will be the last turn of the campaign, the British supply situation is a rather moot point by now.