Friday, January 29, 2010

IR1 Winterfeldt Regt. Completed


Two battalions of IR1 Winterfeldt Regiment - Minden Miniatures (click pix to enlarge)

Last evening I completed the basing and glued all of the flags for the first regiment of my new SYW Minden Miniatures Project. All of the infantry, cavalry and artillery units will be comprised solely of Minden Miniatures. There is a link to the company's web page on the left hand side of this page. ( I still need to touch up the edges of the orange flags with some orange paint, in order to hide the white paper that shows through along the edges).

My plan is to paint both battalions of each Prussian regiment (and each Austrian regiment) that I paint for this project. The regiments will also have a mounted colonel or inhaber. The first regiment in my army is, coincidentally, the first regiment in King Frederick II's Prussian army: IR1 von Winterfeldt. (the "IR" designation stands for "infantry regiment" and the number is the regimental number -- during the 18th century, the regiment was known by the name of the inhaber; they did not use regimental numbers until the early 19th century).

Given that Major General Hans von Winterfeldt was one of Frederick's senior officers, he would more likely be in charge of an independent command or a wing of the army comprising some dozen or more battalions of infantry. So he was unlikely to be in direct command of his own regiment. Christian Rogge was kind enough to research the name of the Lieutenant Colonel von Munchow, as the likely commander of the regiment during the battles and campaigns in which IR1 fought.

Here are a couple more pictures of the regiment:


As you can see, the first battalion of the regiment will carry both the white colonel's color and the orange regimental color. The second battalion will carry two of the orange regimental colors. All of the flags are from GMB Designs and I think that they look very nifty.

Each battalion has 30 figures based six per stand in two ranks. Thus at a 1:20 ratio, the battalion has 600 men. With this organization, I can use either my own "Der Alte Fritz" rules, or Rusty's Rules for Horse & Musket Warfare" or maybe I will even give the new "Black Powder" rules a tryout. The latter set of rules sounds like it might be a lot of fun. The bases measure 60mm wide by 40mm deep and are made from MDF board that I purchase pre-cut from an outfit called Georgo Bases.

I have also completed 12 artillerists and 3 Berlin Zinnfiguren 12 pounders, but I have not based them yet. I have decided to glue the crew figures to the base, but keep the gun models loose so that I can remove them and attach them to the limber teams. I will use the RSM limber teams for my gun sets.

Next on my list will be IR5 Jung Braunschweig, who had Prince Ferdinand of Brunswick as their inhaber. Obviously he was rather busy commanding the allied army in western Germany, so Ferdinand would not have been commanding the regiment in the field. If anyone can dig up the name of the Lt. Colonel of IR5, circa 1757, then please drop me a line or a comment in the comments section of this page.

c

Sunday, January 24, 2010

Frederick's Birthday & the Battle of Winterfeldt


The parade of colours (GMB Designs) past the approving eye of Frederick the Great.

Today, January 24th, is the anniversary of Frederick the Great's birthday. I have posted a picture that I took last year showing the parade of the colours before the King on his birthday. The Potsdam Gardes (Suren figures) line the parade rout on each side as the regimental fahnenjunkers carry their regimental colours past Der Alte Fritz, under his approving eye, for review.

Behind the King, one can see the general staff assembled. The portly fellow just behind the King is the Duke of Bevern, who only yesterday, won a great victory over the Russian army in the Battle of Winterfeldt. So there is much cause for celebration: the King's birthday and a victory on the battlefield to start the new year.

Die Schlacht bie Winterfeldt
The Duke of Bevern was commanding the secondary Prussian army assigned with the task of defending the eastern frontier of Silesia and Poland against a winter attack by the Russian army of Count Apraxin. The two armies engaged one another in the winter snows near the little Silesian town of Winterfeldt. Click on the pictures to enlarge the view of the action, below:


Prussian infantry sets up the defense of the village of Winterfeldt on the Prussian right flank.


The Prussian redoubt in the center.


The Prussian left flank was protected by a series of low hills.

Bevern's battle plan was defend in the center, where he had constructed a great earthen redoubt and also to defend the right flank anchored on the village of Winterfeldt. He was hopeful that an opportunity might emerge to counterattack on his left, where he placed two strong regiments of cavalry: the DR2 Jung Krakow Dragoons and the CR2 Prinz von Preussen Cuirassiers. It appeared the Russian attack was concentrated on the redoubt and on the village of Winterfeldt. As a result, the Russian right flank was dangling in thin air, with no cavalry support. Bevern bided his time, drawing the Russian infantry into the center, before unleashing the cavalry and ordering his left wing commanded, to counter-attack with the infantry.


The Jung Krakow Dragoons (DR2) see that the Russian right flank is hanging out in the air and so they move forward to attack the Russian infantry.


The Jung Krakow Dragoons (right) attack a mixed force of Russian cavalry including cuirassiers, horse grenadiers and dragoons. The first round of melee is a stand-off.


Both sides add reinforcements on the second round of melee, including the Prussian Yellow Cuirassiers, who strike the flank of the Russian cuirassiers and rout them off the field. Weight of numbers gave the Prussian horse a considerable advantage in this melee.

The Russian attack in the center was relentless and soon the Green and Red coated infantry were close to the redoubt. For a moment, it appeared that the Russians would be able to exploit a gap in the Prussian line, that appeared just to the right of the redbout. The sole Prussian infantry regiment of IR42 Markgraf Friedrich, was melting away. The only thing left to stop the Russian advance was a small regiment (3 sqds) of Black Hussars. Bevern quickly ordered the IR35 Prinz Heinrich fusiliers to double quick over to the right of the redoubt to plug up the gap. They arrived just in time, to the relief of the Black Hussars.


Meanwhile, in the center of the battlefield, the Russian grenadiers advance towards the Prussian redoubt and whittle down the numbers of the Prussian infantry who are providing support for the battery of Brummers.


The Russian grenadiers charge home, routing the Prussian IR25 Kalckstein regiment in melee. Meanwhile, the Prussian artillery crew evade the Russian grenadiers. They have captured the redoubt!


The Prussian army commander, the Duke of Bevern, personally leads IR8 von Amstel musketeers in a counter-attack against the Russians occupying the redoubt. In the background, you can just barely detect the shot up remnants of the supporting Russian battalions -- they will probably not be enough to hold the redoubt, for the Prussian left flank brigade and all of the Prussian cavalry are now descending on the Russian flank.


Prussian artillery site their cannon outside of Wintefeldt. The von Kliest Kroaten defend the town against the Russians.


The first of four Russian battalions that attacked the town of Winterfeldt.


The von Kliest Kroaten defend the town, but they were eventually evicted by Russian grenadiers. The fighting surged back and forth as each side fed in reinforcements.

The town is in flame, courtesy of Russian howitzer fire. The counter-attack of the Prussian Heyden Grenadiers evicts the last of the Russian infantry from the town of Winterfeldt. It would be a Prussian victory.

The battle ended with both flanks of the Russian army on the verge of collapse, while a single battalion of Russian grenadiers grimly held onto their hard-won redoubt. It was kind of a strange battle, as Bevern was under the impression that he was outnumbered and was fairly set on playing a defensive battle, but once it was apparent that the Russian right flank was vulnerable, the Prussian counter-attack was swift, sure and severe. Over the the Winterfeldt side of the table, it was simply too difficult to attack an opponent defending a town unless the attacker's forces are overwhelming, when in fact they were not. So the end result was a sort of double envelopment of the Russian army. In retrospect, we should have cut back on the number of Prussian infantry battalions. They had 12 battalions to 11 btns of Russians, 3 battalions of Austrians, and one late arriving Russian battalion. The Russians really didn't stand much of a chance with such balanced armies, and they also suffered from a bad run of cards that often resulted in the Prussians getting the first fire. However, the Russian players gave it their best try and nearly succeeded in capturing both the redoubt and the town of Winterfledt.

Addendum

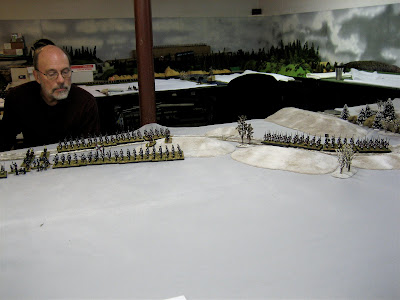
It is always difficult to take good photographs against the white or grey winter table cloths. The game table looked much better than the pictures would otherwise suggest. I am planning on purchasing a winter terrain mat from The Terrain Guy who is located in Texas. Hopefully, the winter mats will have more contrast than what I can get using felt mottled with white and grey paint.

Another game note; we played the game using three different game zones, each having its own deck of cards for movement and firing initiative. This way, each section of the table could play at its own speed and not delay the game for faster groups. On average, we completed 7 or 8 game turns and in each section, we had a decisive result in about four hours of play time.

Thursday, January 21, 2010

Dettingen


George II at the Battle of Dettingen in 1743 (from Wikipedia)

Did the British infantry use the tactic of forming square during the War of the Austrian Succession? This question was posed to me by one of my readers and I promised to do a little bit of research and get back to him with an answer. The question about squares at Dettingen in 1743 arise from a passage in Michael Orr's "Dettingen 1743" from the Knight's Battles for Wargamers series (page 59):

Part of the French cavalry managed to survive the fire of the English squares and to pass through the intervals of the first line. In the second line Huske's were still forming square, the worst possible situation in which to be caught by cavalry. But Brigadier Huske himself took command of the grenadiers, who poured a tremendous fire into the enemy ranks, while the rest of the regiment completed their maneuvers unharmed.

Situation Summary
Briefly, the situation, as I recall it, was that as the Pragmatic Army advanced towards the French position on the other side of the Forchbach Stream, they began to form two battle lines of infantry. The right flank was protected by a woods, but the left flank (the one closest to the Main River) was dangling in thin air as there was a significant gap between the left flank of the left most regiment (33rd Foot) and the Main River. The French Maison du Roi cavalry (9 squadrons in all) held its honoured position on the French right flank, opposite the gap on the British left. The French horsemen noticed the gap and proceeded to move forward to engage the scarlet infantry and overwhelm them.

General Clayton, commanding the British cavalry on the left, also noticed this gap and hurried up the lone regiment of the 3rd (Bland's) Dragoons to fill said gap and purchase some time for the rest of the British cavalry to come forward to support Bland. With 3 squadrons facing off against 9 elite French squadrons, the outcome of this cavalry melee could hardly be in doubt, though Bland's dragoons did their best to make a tough fight of it. Eventually, the Maison du Roi surged foreward into the British infantry on the left, which brings us to Mr. Orr's statement that they were forming square.

My Theory
I believe it was General Bland, himself, who put the first British infantry regulations to paper, and this happened in the early 1750s, after the WAS and before the SYW. My correspondent believes that in the absence of any formal drill regulations , that it was left to the individual regimental colonels to decide what tactics to use against cavalry.

My own belief is that it was more likely that the third rank of a British battalion would simply turn about face and present their muskets to any cavalry that might be bearing down on them from behind. I think that this is what might have happened at Dettingen.

Fortesque indicates that this is what happened (page 99 "History of the British Army, Volume 2):

But now the First and Seventh Dragoons, which had been summoned from the right, came galloping up and fell in gallantly enough upon the French Household Cavalry. These two regiments were, however, repulsed, partly, it should seem, because they attacked with more impetuosity than order, partly because the French were armed with helmets and breastplates heavy enough to turn a pistol shot. The Blues followed close after them, but sacrificing order to speed were, like their comrades, driven back in confusion; and the French Gendarmes, flushed with success, bore down for the second time upon the 21st and 23rd and succeeded in breaking into them.

OK, so we have the French Maison du Roi cavalry breaking through two of the British regiments comprising the first battle line. I am inferring that breakthrough also means that the French had ridden through all three ranks of the 21st and 23rd Foot and now found themselves trapped between the two British battles lines. The doctrine of the day would seem to call for the two broken regiments to about face, if they could, and face down the enemy cavalry, which were now behind them.

But the two battalions were broken for only a moment. Quickly recovering themselves, they faced inwards, and closing in upon the French in their midst shot them down by the scores.

Another Account of the French Breakthrough

I also consulted a very useful book titled, "The Bloody Eleventh, History of the Devonshire Regiment ,Volume I 1685-1815" by Roger E.R.Robinson (1988). It contains an account of the 11th (Sowle's) Regiment at Dettingen:

Bland's squadrons, outnumbered by about three to one, had a bad time of it, but fought with great gallantry. Sowles and the other regiment on their right found the French riding through their line [this suggests that they were not in square - Alte Fritz] . Weight of horse and momentum caused gaps to appear. There was some confusion. But before long order was restored, NCOs 'taking a grip' , no doubt and officers supervising the closing up of ranks. By the time the French were collected and ready to return the way they had come, the men were reloaded and 'gave them another fire'. Only some forty of the hundred and fifty who made the assault got back to tell the tale (page 126).

Robinson then goes on to give the account of how Bland's dragoons had to face a second wave of French Household cavalry and pushed back. British reinforcements arrived including Honeywood's and Stair's Horse Regiments (lated downgraded to Dragoon Guards regiments after the WAS concluded) and the Blues. The Blues and Honeywood's became entangled with one another , their horse were out of control, and the whole lot of them tumbled back into the ranks of the first British infantry line, thereby disordering their own infantry.

Seeing the confusion, the Gensdarmes rallied and came thundering down upon the British foot. Having discharged both their pistols, they threw those weapons at the infantrymen and then swung their swords into their hands. Johnson's , Campbell's and Sowle's bore the brunt of this assault. All three regiments were 'disordered' by this method of attack. A bloody fight followed, during which the staunch redcoats held their ground, turned inwards and gave blow for blow. Few of the horsemen got away: the Gensdarmes were reported 'quite ruined'.

Conclusions
So both Fortesque and Robinson relate stories of the French Maison du Roi cavalry breakthrough, followed by a brief period wherein both infantry and cavalry attempted to recover their formations. The British foot simply did an about face and delivered volleys of musketry into the French horsemen that were now trapped between the first and second infantry battle lines. I believe that this is "the square" that Michael Orr refers to. Perhaps he was equating this to the situation at Quatre Bras in 1815 where the French lancers broke a British square and were subsequently surrounded as the square closed up and the cavalry were shot down. At Dettingen, on the other hand, the French cavalry appear to have been trapped between two LINES OF INFANTRY rather than a square. Like my reader/questioner, I think it unlikely that a square formation was used by any battalion at Dettingen, but certainly the British foot's ability to recover from the breakthrough (and not break and rout themselves), reform, and deliver a punishing fire into the cavalry, has a similar ring to the Quatre Bras situation.

This is only my theory, and it is only based on second or third hand accounts written 200 years after the event. Certainly, both Fortesque and Robinson based their research on contemporary documents, papers, reports and letters from participants in the battle. So there is probably some grounds for believing their accounts.

If anyone has some additional information about Dettingen, please forward it to me or post it on the inquiry that I posted on The Miniatures Page in the 18th Century Discussion chat board. I would particularly like to verify the date when British drill regulations were set to paper.

h

Wednesday, January 20, 2010

Back to the Seven Years War

After spending a considerable amount of time with Napoleonics and the development of my 1806 Project, I think that it is time to return to the Seven Years War for awhile. It is good to switch the painting and gaming projects around because too much of any one thing can result in burnout or disinterest in a particular period.

This evening, I met Monsieur Chevert half way between Brown Deer and Hesse Seewald, near Lac Geneve. There I handed over all of my winter terrain so that the good Chevert could set up the game table for our annual winter warfare in the snow game. Last year, we staged Leuthen and this year we will have a game featuring Russians and Austrians and Saxons against the Prussians, somewhere in Silesia or East Prussia. Our group has built up a force of approximately 15 battalions of Russsians among 4 or 5 players, so that is an impressive group army. No one person has to be responsible for building the whole army when you have individuals contributing 2 or 3 battalions each. The game will be played this Saturday January 23, 2010.

Concurrently, I just sent in my application to the Little Wars Convention, on April 24-25, 2010 for our annual BAR game. This year, we will refight Fontenoy for about the third time. In our previous games, we did not have enough red coats, so we used Prussians vs French in the first game, then Prussians vs Austrians in the second game. This time, we will get it right and have British against the French. As an added bonus, this deadline gives me some incentive to add to my British SYW/WAS army. I find that I often need the incentive of an upcoming game to get my brushes moving and my forces built up.

So far, I have five battalions of infantry: 3rd (Howard's) Foot, 8th (King's) Foot, 11th (Sowell's) Foot, 42nd Black Watch and the 1st Foot Guards. I also have but two six pounders for my artillery contingent and only 36 cavalry (12 x Horse Grenadiers of the Guard, 24 x 1st Horse). My goal is to add to the cavalry contingent (36 x dragoon guards, 12 x Life Guards and 12 x 1st Horse) befor the Fontenoy game.

At the end of March, I will be hosting a game at the SYW Association Convention in South Bend, Indiana. My game will be a refight of the Battle of Mollwitz. We might do a play test of the Mollwitz scenario at Chez Chevert during the month of February.

So there you have, four SYW/WAS games are on the schedule for the first four months of the year. There is much work ahead for me, but I look forward to it.

Saturday, January 9, 2010

IR1 Winterfeld - Minden Miniatures


IR1 Winterfeld Regiment with Minden Miniatures. Click pix to enlarge.

I have spent the past week working on the first of many battalions that will comprise my SYW Minden Project and thought that I would post the first pictures today. As a rule, I don't like to show pictures of serried ranks of unpainted or partially painted figures. I generally only post the pictures after the unit is completed. However, I am breaking my own rule so that I can show you how nice these figures look and also to talk a little bit about my current thinking regarding this project.

As you can tell by the pictures, these are not going to be "big battalions"; well, maybe medium sized battalions as they will be 30 figures strong at a 1:20 figure to man ratio. The figures will be based on five stands measuring 60mm by 40mm and will be affixed to the base in two ranks. Originally I had planned on gluing down a strip of walnut or cherry to the back edge of the base and using that as a "name plate" with the unit's name printed out on my laser printer. While that might look ok with larger 28mm and 30mm figures, the name plate just didn't look right to me, so I left it off the base. How then, will I identify one regiment from another? After awhile they all begin to look the same. The answer lies in the thickness of the MDF wood base itself. It is thick enough whereby I can print the unit's name (e.g. "IR1 Winterfeld") in 6-point font and have plenty of space on the back side of the base to glue on the name tag. With the small font, the name plate is not obtrusive, yet it is large enough to read. Thus a player will know which unit this is on the wargame table.

You will note that I have not yet glued on the GMB Designs flage for the battalion. This is because I have found that a spitz of Dull Cote also fogs over the flags. So I will finish the bases tomorrow, splashing brown ink over the grit, then dry brushing a light coat of tan paint, and then finally applying the static grass. Once the grass dries, then I will Dull Cote the whole battalion before gluing on the flags.

I have another battalion of 30 musketeers primed and ready for painting. My plan is to paint both battalions of four regiments (8 btns in total) and then add two grenadier battalions, a jager battalion and finally for the twelveth battalion, either a Guard battalion or perhaps a lowly garrison or freikorps battalion. At least for now, the plan is to limit each Minden army (Austrians and Prussians) to 12 battalions and 4 cavalry regiments, or enough for a small participation game at a wargame convention.

For the jagers and the Austrian Croats, I will place 3 figures on each base with a total of 10 bases for a light infantry battalion. They will have the same 60mm frontage and I will either use the same 40mm depth as the regular infantry, or go with a 30mm deep base. The light troop bases will have the same frontage as a musketeer or grenadier unit, but only 3 figures on it instead of 6 figures.

Perhaps my readers can leave some comments with regards to basing the artillery. I know that I want to glue the artillery crewmen onto the base. The question is, do I want to also glue down the cannon, or should I leave the cannon free-standing, so that I can remove it from the base and attach it to the limber team? There are merits to either method, but I haven't decided yet. Since I can't set up a poll, leave a comment and let me know what you think.