


 |
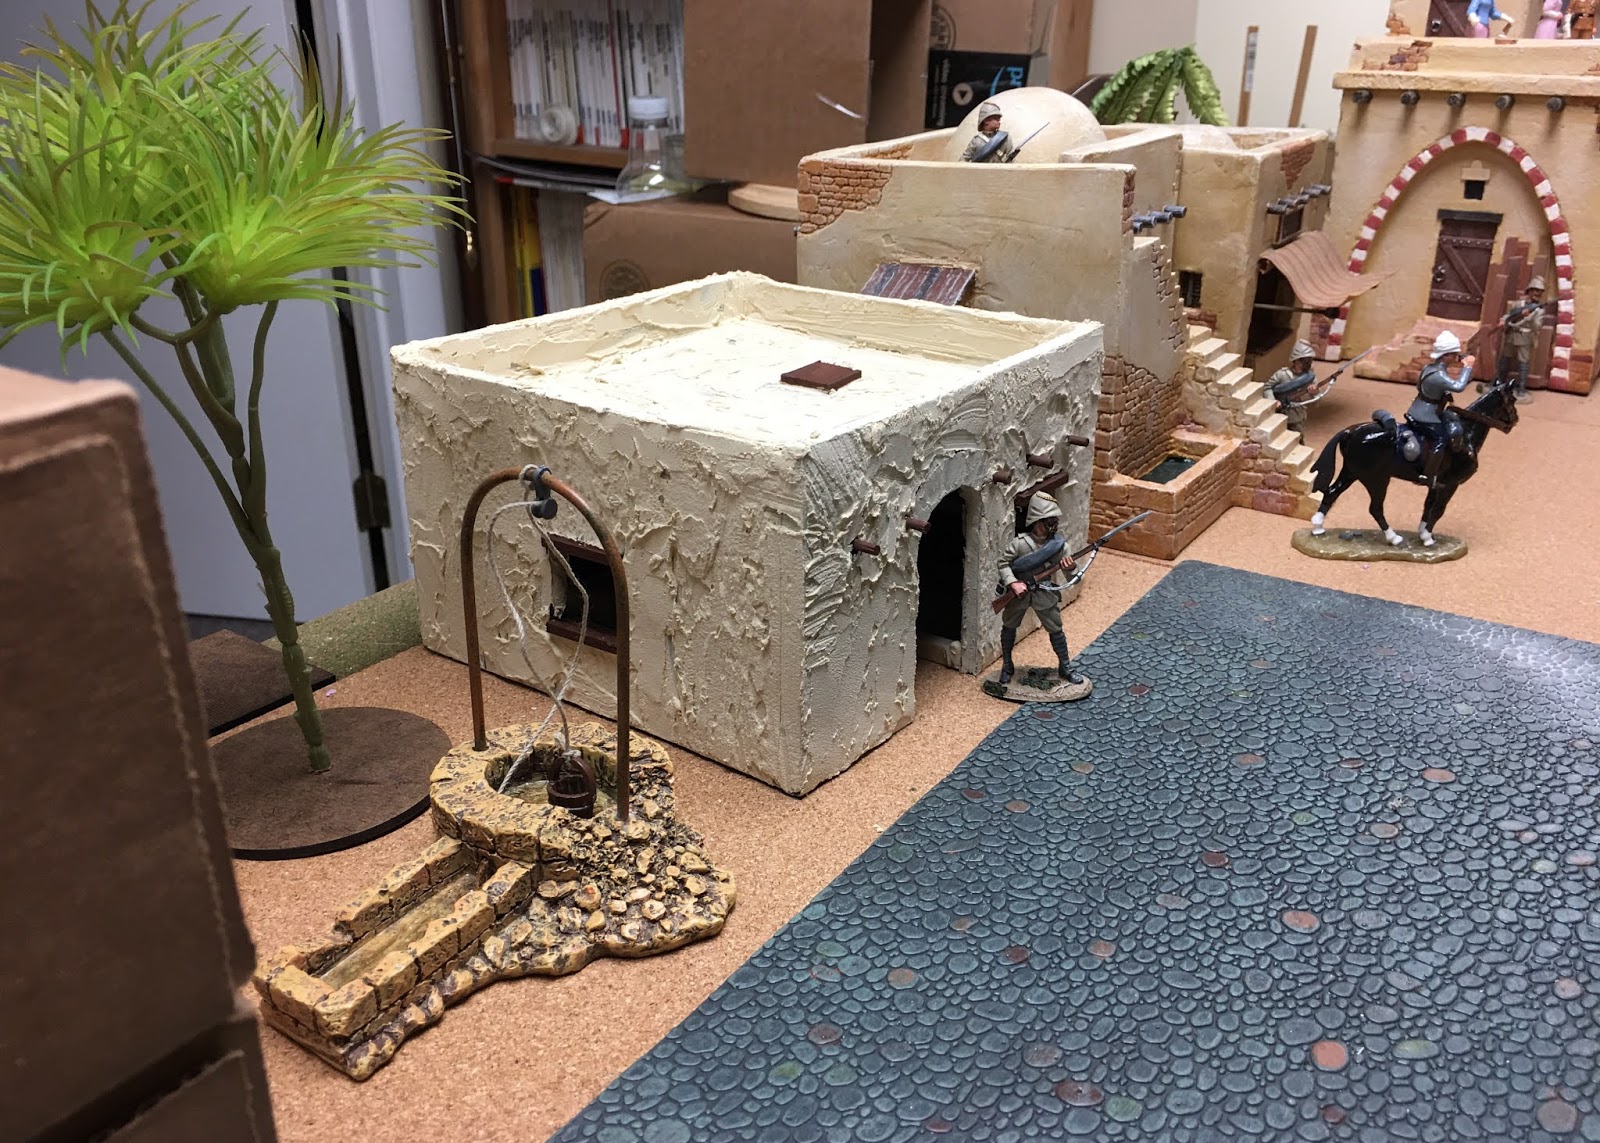
| Building No. 2 in the foreground and Building No. 1 in the background . (Click Pix to enlarge the view) |
I have been working on making Middle Eastern style buildings for my 54mm Sudan Project and finished my second building over the past weekend. I have virtually no 54mm buildings, save for a few King & Country Middle Eastern models from its Desert Village set. These are rather expensive and they have a limited range of choices, so I knew that I needed to make my own buildings to fill up the city of Khartoum.
Building No. 1 - My First Model
I haven't made any scratch built models since the mid-1980s so thought that it would be a good idea to start with something rather simple - a rectangular box-shaped one-story house. I used quarter-inch foam core board for the walls and roof on this model and finished it with a heavy coating of wallboard paste (Red Devil Pre-mixed Spackle Compound). I stir in the desired paint color into the spackle so that (1) I don't have to paint the model after I have applied the goop, and (2) if any of the spackle ever chips off, then it won't reveal a white color.
I used basswood square sticks to make an internal structural skeleton for the house. My primary modeling error was to fix the internal beams and studs AFTER I had glued the four walls together with my hot glue gun. It is much easier if you glue the wood framing onto the pieces of foamcore board BEFORE you glue all of the walls together.
I cut out the windows and doors before applying the spackle mix, but one of the side walls was glued upside down relative to the other walls, so one of the windows sits lower than the others on the model. Doh!
I really went overboard on the internal framing because I feared that the foamcore board would warp after I smeared the walls with the spackle. It turned out that the walls passed with flying colors, but the roof developed a noticeable sag in the middle.
 |
| Building No. 1 - my first try at making buildings. |
The overall result of my first building model was not too bad for a first attempt. My main self criticism is that I applied the spackle too thickly (is that a real word?) over the walls and as a result, the walls have a lot of texture to them, maybe too much for my own taste.
Building No. Two
Having learned a thing or two from the first model, I decided to up the complexity of my next model by building a small two-story building with outside staircase leading to the roof deck.
It took me a bit of pondering to come up with an idea of how to construct the staircase. I did a bit of searching on Pinterest for pictures of scratch built Middle Eastern style buildings and found a good number of pictures showing step by step construction of models. The main ideas that I picked up were that (1) I could make bricks and stone blocks and slabs by carving them into the foamcore board; and (2) that the best method of building a staircase was simple to stack up layers of foamcore blocks to create the staircase. And here I was thinking that I would have to make all of the risers and individual steps. Pinterest made things a lot easier for me.
 |
| Front view at street level. |
Round and pointy barbecue sticks were used to make the ends of the floor joists that you see sticking out of the side of the building. I used one long stick, drilled a hole into the foamcore, and then rammed the stick through the inside of the building and then out through the back wall. I missed my target on a couple of the sticks, resulting in some uneven sticks on the backside of the building. I think that in the future I will just cut off small pieces to a suitable length and glue them into the front and back walls, rather than ram rodding the skewer through the building.
 |
| Rear view and the Side view of the stairway. |
 |
| The side view of the arch windows. |
The final step was to paint the building. I hemmed and hawed and dithered over how to paint the walls. Fortunately, I had the opportunity to chat with Allan Tidmarsh ("Tidders) of the Kingdom of Wittenberg blog whilst on the Virtual Wargame Club (VWC) and he suggested using "chalk paint" to finish the model. This cracked the code for me with regard to finshing the model as the chalk paint looks good, is easy to apply and doesn't warp the foamcore. After the first coat dried, I patched up some of the black bits (the foamcore board color) with splotches of the chalk paint and realized that this was creating subtle texture to the walls.
There were some open cracks on the corners where my glue join was a little bit haphazard, so I slathered my spackle goop to fill the holes. Gee, it's just like filling the holes on a piece of wallboard , imagine that! This created a little more wall texture here and there, but not so much as to overwhelm the appearance of the model (see Building No. 1 as an example of using too much spackle).
Palm Trees
You can see a few palm trees in some of the pictures. These are made from artifical flower arrangement pieces that I bought at Michael's Stores. I roamed through the aisles looking for anything that I thought could remotely be used for wargame terrain. I trimmed the trees to size and then wrapped a Baggie plastic bag around the green palm fronts. Then holding tree and Baggie in my hands, I spritzed the tree trunk with Krylon brown paint. Krylon dries very quickly, which is nice. I still have to terrain the bases of the palm trees, but I have enough palm tree material to make a veritable forest of desert greenery.
What's Next On The Draftboard?
I was very encouraged by my results with Building No. 2 and it has given me the confidence to move on to more complicated models. I have to build a mosque, but I will probably save this one for last. The Governor's Palace in Khartoum is partially completed, but now that I know how to paint it, it should be finished soon.
Here are a few ideas from the professional model makers.
 |
| Bread bakery with oven and bread shelves. |
 |
| A more complicated two story building. |
 |
| This will likely be my next model in my construction adventures. |
 |
| I started working on a copy of this model, but the preliminary cutting of boards indicates that this will be a very large and tall building; perhaps too tall as it is nearly the size of the mosque that I intend to build. |
The nice thing about scratch building models is that your results improve with each successive model. You learn new techniques that simplify the construction and help you avoid some of the construction pitfalls. It is also fun to do and is a nice change of pace from painting hundreds of Dervish, Egyptian infantry and British Camel Corps figures.

A good start to Khartoum - you have certainly captured the look of a middle eastern town.
ReplyDeleteHave you looked into the Alamo buildings from TSSD now MicShaun's Closet they might
ReplyDeletework for you?
Very nice! Those would work for any era in the Middle East. Wouldn’t mind trying my hand at some for my WW2 skirmish games.
ReplyDeleteAgreed! Your buildings seem like an interesting cross between Wells and Gilder, which ain't a bad thing.
ReplyDeleteBest Regards,
Stokes
Looking wonderful, great job on all.
ReplyDeleteThey are looking great, Jim!
ReplyDelete