|
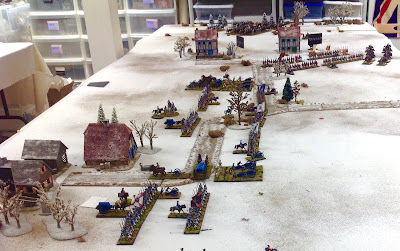
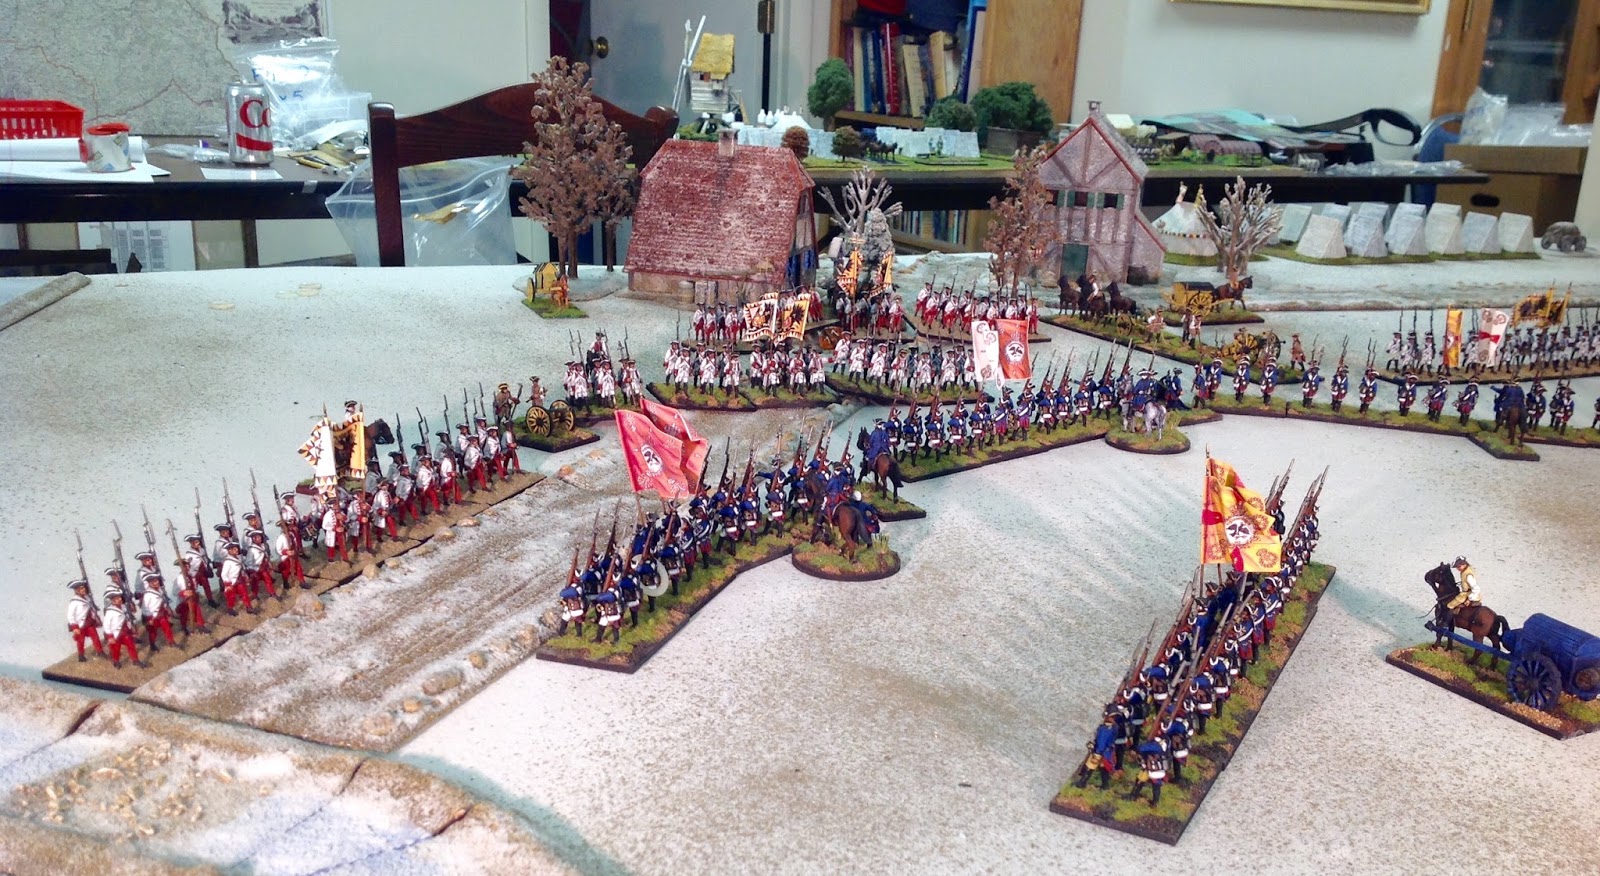
The Battlefield of Leuthen - Austrians on the left and Prussians on the right.
CLICK ALL PICTURES TO ENLARGE |
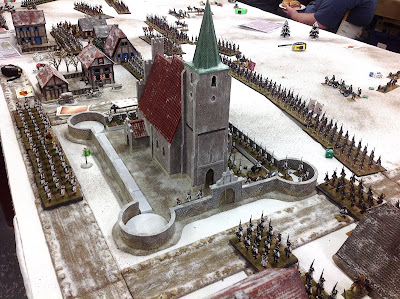
On Saturday December 1, 2018 our group convened in Brown Deer, Wisconsin to fight our version of the Battle of Leuthen ahead of the anniversary date on December 5th. Rather than stage a scenario with the opening Prussian flank attack on the Austrian army, we decided to stage the action around the Prussian assault on the village of Leuthen. The Austrians had regrouped a bit and organized a make-shift battle line around Leuthen. If the Prussians could dislodge the Austrians from the town, then they would achieve a game victory.
There are too many pictures and commentary to put the game report into one blog posting, so I plan on breaking the action down into three segments: the big cavalry action on the Prussian left flank, the assault of the Prussian Guards on the Leuthen Churchyard, and the action on the Prussian right flank.
Without further ado, I will start with a game report on the cavalry action between the Austrians (Graf Lucchesi) and the Prussians (von Driessen) on the Prussian left wing or flank of their battle line. This starts my report for the simple reason that this is where I fought as commander of the Prussian left wing.
The Prussians
The Prussian left wing cavalry consisted of the following:
CR8 von Seydlitz cuirassiers - 5 squadrons
CR10 Gensdarmes cuirassiers - 5 squadrons
CR13 Garde du Corps cuirassiers - 2 squadrons
HR5 Black Hussars - 3 squadrons
Total Prussian cavalry: 15 squadrons
We were missing one of the Prussian infantry players, so Jim H. and I split up the Prussian infantry brigade. So I took command of the IR22 Alt Dessau and IR5 Alt Braunschweig musketeer regiments. I also commanded two 12-pound Brummers.
The Austrians
The Austrian (right wing - theirs) cavalry opponents consisted of the following:
O'Donnel Cuirassiers - 5 squadrons
Stampach Cuirassiers - 4 squadrons
De Ligne Dragoons - 4 squadrons
Savoyen Dragoons - 4 squadrons
Total Austrian cavalry: 17 squadrons
The action began with both sides advancing their cavalry towards the center of the table. I had posted the two Brummers on the Butterberg (a small hill) and I could see that the Austrians intended to charge the guns and take them out of the game. Knowing that my opponent always does this, I limbered up the Brummers on the first turn and disappeared behind the crest of the hill where the IR5 Alt Braunschweig musketeers provided them with protection. I decided that the Brummers would be useless in the melee area, so I sent them off to the center to help the Prussian Guards' assault on the Leuthen churchyard. I also sent the IR5 regiment to the center where it could help with the overall attack. The IR22 Alt Dessau musketeers were stuck amid the swirl of cavalry around the Butterberg.
 |
The Prussian cavalry advance forward with the CR8 von Seydlitz cuirassiers
and the CR10 Gensdarmes leading the way. |
I could tell from the get go that I was likely screwed from the bad deployement of troops on my part. I had the IR22 musketeers on my right front blocking the Prussian Gensdarms from getting into the fight. In addition, the IR5 musketeers behind the Butterberg impeded the advance of the CR8 cuirassiers and the HR5 hussars. Even further behind were the Garde du Corps cuirassiers, who became my de facto cavalry reserve. So rather than having a broad front of cavalry and reserves sweeping forward, I could only send half of my regiments forward while the other two regiments (my best cuirassier regiments) were blocked by my own infantry, thereby delaying their entry into the fray.
 |
| The Austrians on the left and the Prussians on the right close in to melee on the third turn of the game. |
As cavalry actions are want to do, the melees break down into the to and fro of individual squadrons, making it difficult to tell friend from foe. Below is a picture of the huge cavalry melee that developed.
 |
| The cavalry melee really explodes into high gear. |
The initial crash of cavalry seemed to favor the Austrians, who were able to throw more squadrons into the melee at first. I had to sacrifice the HR5 Black Hussars in hope of buying some time for the CR13 Garde du Corps to assist on the left of my forces. The first dozen or so of my dice rolls were exceptionally bad. It seemed that in every melee the Prussians were inflicting 3 to 5 hits per melee while the Austrians seemed to hit back with 8 to 12 hits. My saving throws must have been a little better because after the initial crash of cavalry, the Prussians began to gain the advantage on the cavalry field.
Then just as victory seemed to be mine, the Austrians suddenly picked up steam again and pretty much wiped out the Black Hussars, the Garde du Corps and the Seydlitz Cuirassiers. However, it was a Pyhric victory of sorts as the remaining Austrian cavalry, mostly cuirassiers, were too damaged to be much of a threat to my forces on the right. The solid wall of IR22 musketeers sealed off my flank from the Austrian predators while at the same time, the CR10 Gensdarms vanquished a number of its foes on the right half of my battle area. Obviously my dice rolling had improved considerably during the second half of the game.
 |
| The IR22 Alt Dessau regiment decides that it would be a good idea to turn one of its grand divisions facing left just in case the Austrian cuirassiers prevail in the nearby melee. The right flank of IR22 seems secure with the Prussian Gensdarmes covering their flank. |
With the Austrian cavalry no longer a threat, the Gensdarms turned their attention towards the Austrian infantry battalions that were dangling out in the air to the left of Leuthen (from my point of view). They quickly maneuvered onto the flank of the Austrian infantry and were perfectly positioned to charge down the streets of downtown Leuthen and sweep at least two Austrian regiments out of town. The IR22 musketeers also wheeled onto the flank of the Austrian infantry in support of my cavalry attack. This was going to be fun.
The first initiative card fell to the Prussians and as I eagerly slapped leather and trotted my horses down the road, the umpire decreed that this was not to be. You see, we divide the table into three different game zones - each zone drawing their own movement and firing cards for the first initiative. So my Gensdarms were deemed to have crossed into the middle zone of the table (Leuthen village) and thus I had to wait for a Prussian card draw in the center zone before I could charge. Naturally, when the movement card was drawn in the center zone, it was an Austrian card and so I could not charge until the Austrians moved. They of course changed their front to face my cavalry and so my opportunity for fame slithered out of my grasp. That's the way it goes and I accepted the judgement. C'est le guerre.
 |
| The Prussian Gensdarmes having defeated the Austrian De Ligne dragoons, now ride towards the juicy target of Austrian infantry out in the open near Leuthen village. |
 |
With the Austrian cavalry no longer a threat, the IR22 Alt Dessau regiment advances across the battlefield,
then wheels right to enfilade the Austrian grenadiers at the edge of the village. |
Regardless of what happened with my cavalry, the Prussian infantry held the upper hand in the left section of Leuthen village. Austrian infantry battalions were now taking fire from two directions and there wasn't much that they could do about it. The Austrians were "saved by the bell" in this case, as our house rules call for every game to end at 4PM regardless of what is happening on the table. I really like this concept because it provides certainty to the end and keeps both sides from fighting to the last man. When we stop the game, after time runs out, we have the opportunity to sit around with a cold beverage and discuss the game and tell the stories of what happened.
Part II of the game report will feature the attack of the Prussian Guards on the Leuthen churchyard.
Part III will follow the action on the Prussian right wing, or it might be included in Part II.
In either event, I have little clue as to what happened in the other areas of the table as I was too involved in my own game on the left. My opponent, Bill P., and I were both exhausted by our play and we mutually collapsed to our chairs at the same time. There were still a few squadrons of cavalry capable of fighting, but neither of us had the energy to keep on going. Thankfully, 4 o'clock rolled around just in time.