


 |
| Scenic divider placed on the vertical axis of the game table |
Today's fox is a tutorial on how I make mountain or hill terrain pieces for my game table. I know that everyone says this, but making these terrain pieces is easy and does not require much model making skill. It just requires taking the initiative to try it out.
Making Scenic Dividers for my Game Table
As part of the terrain that I have been building for my 54mm Sudan Project, I decided to make some "end caps" of terrain to place on the ends of my game table. These were made for several reasons:
1. to provide a background for taking better photos of my games
2. to get rid of that "end of the world" feeling where the table edges just drop off
3. the pieces can also be used in the middle of the table to divide the table into two parts so that separate games can be played on each side of the scenic divider. This is a concept that I have borrowed from the model railroad hobby.
4. the pieces can be used on any part of the table in the event that you don't want to use them at the edge of the table.
My original terrain pieces were the parts of a two-piece mountain connected by a stone bridge. I had seen this in the Wargaming With Silver Whistle blog and really liked the idea so I built my own version of it.

 |
| Stone bridge made from 1/2-inch thick black foam core board connects the two hills. |
 |
| Another view of the original two-piece terrain model |
After awhile though I decided that the terrain pieces needed to be 6 feet wide in order to cover the width of my 6 feet wide game table. So I built two more terrain sections.
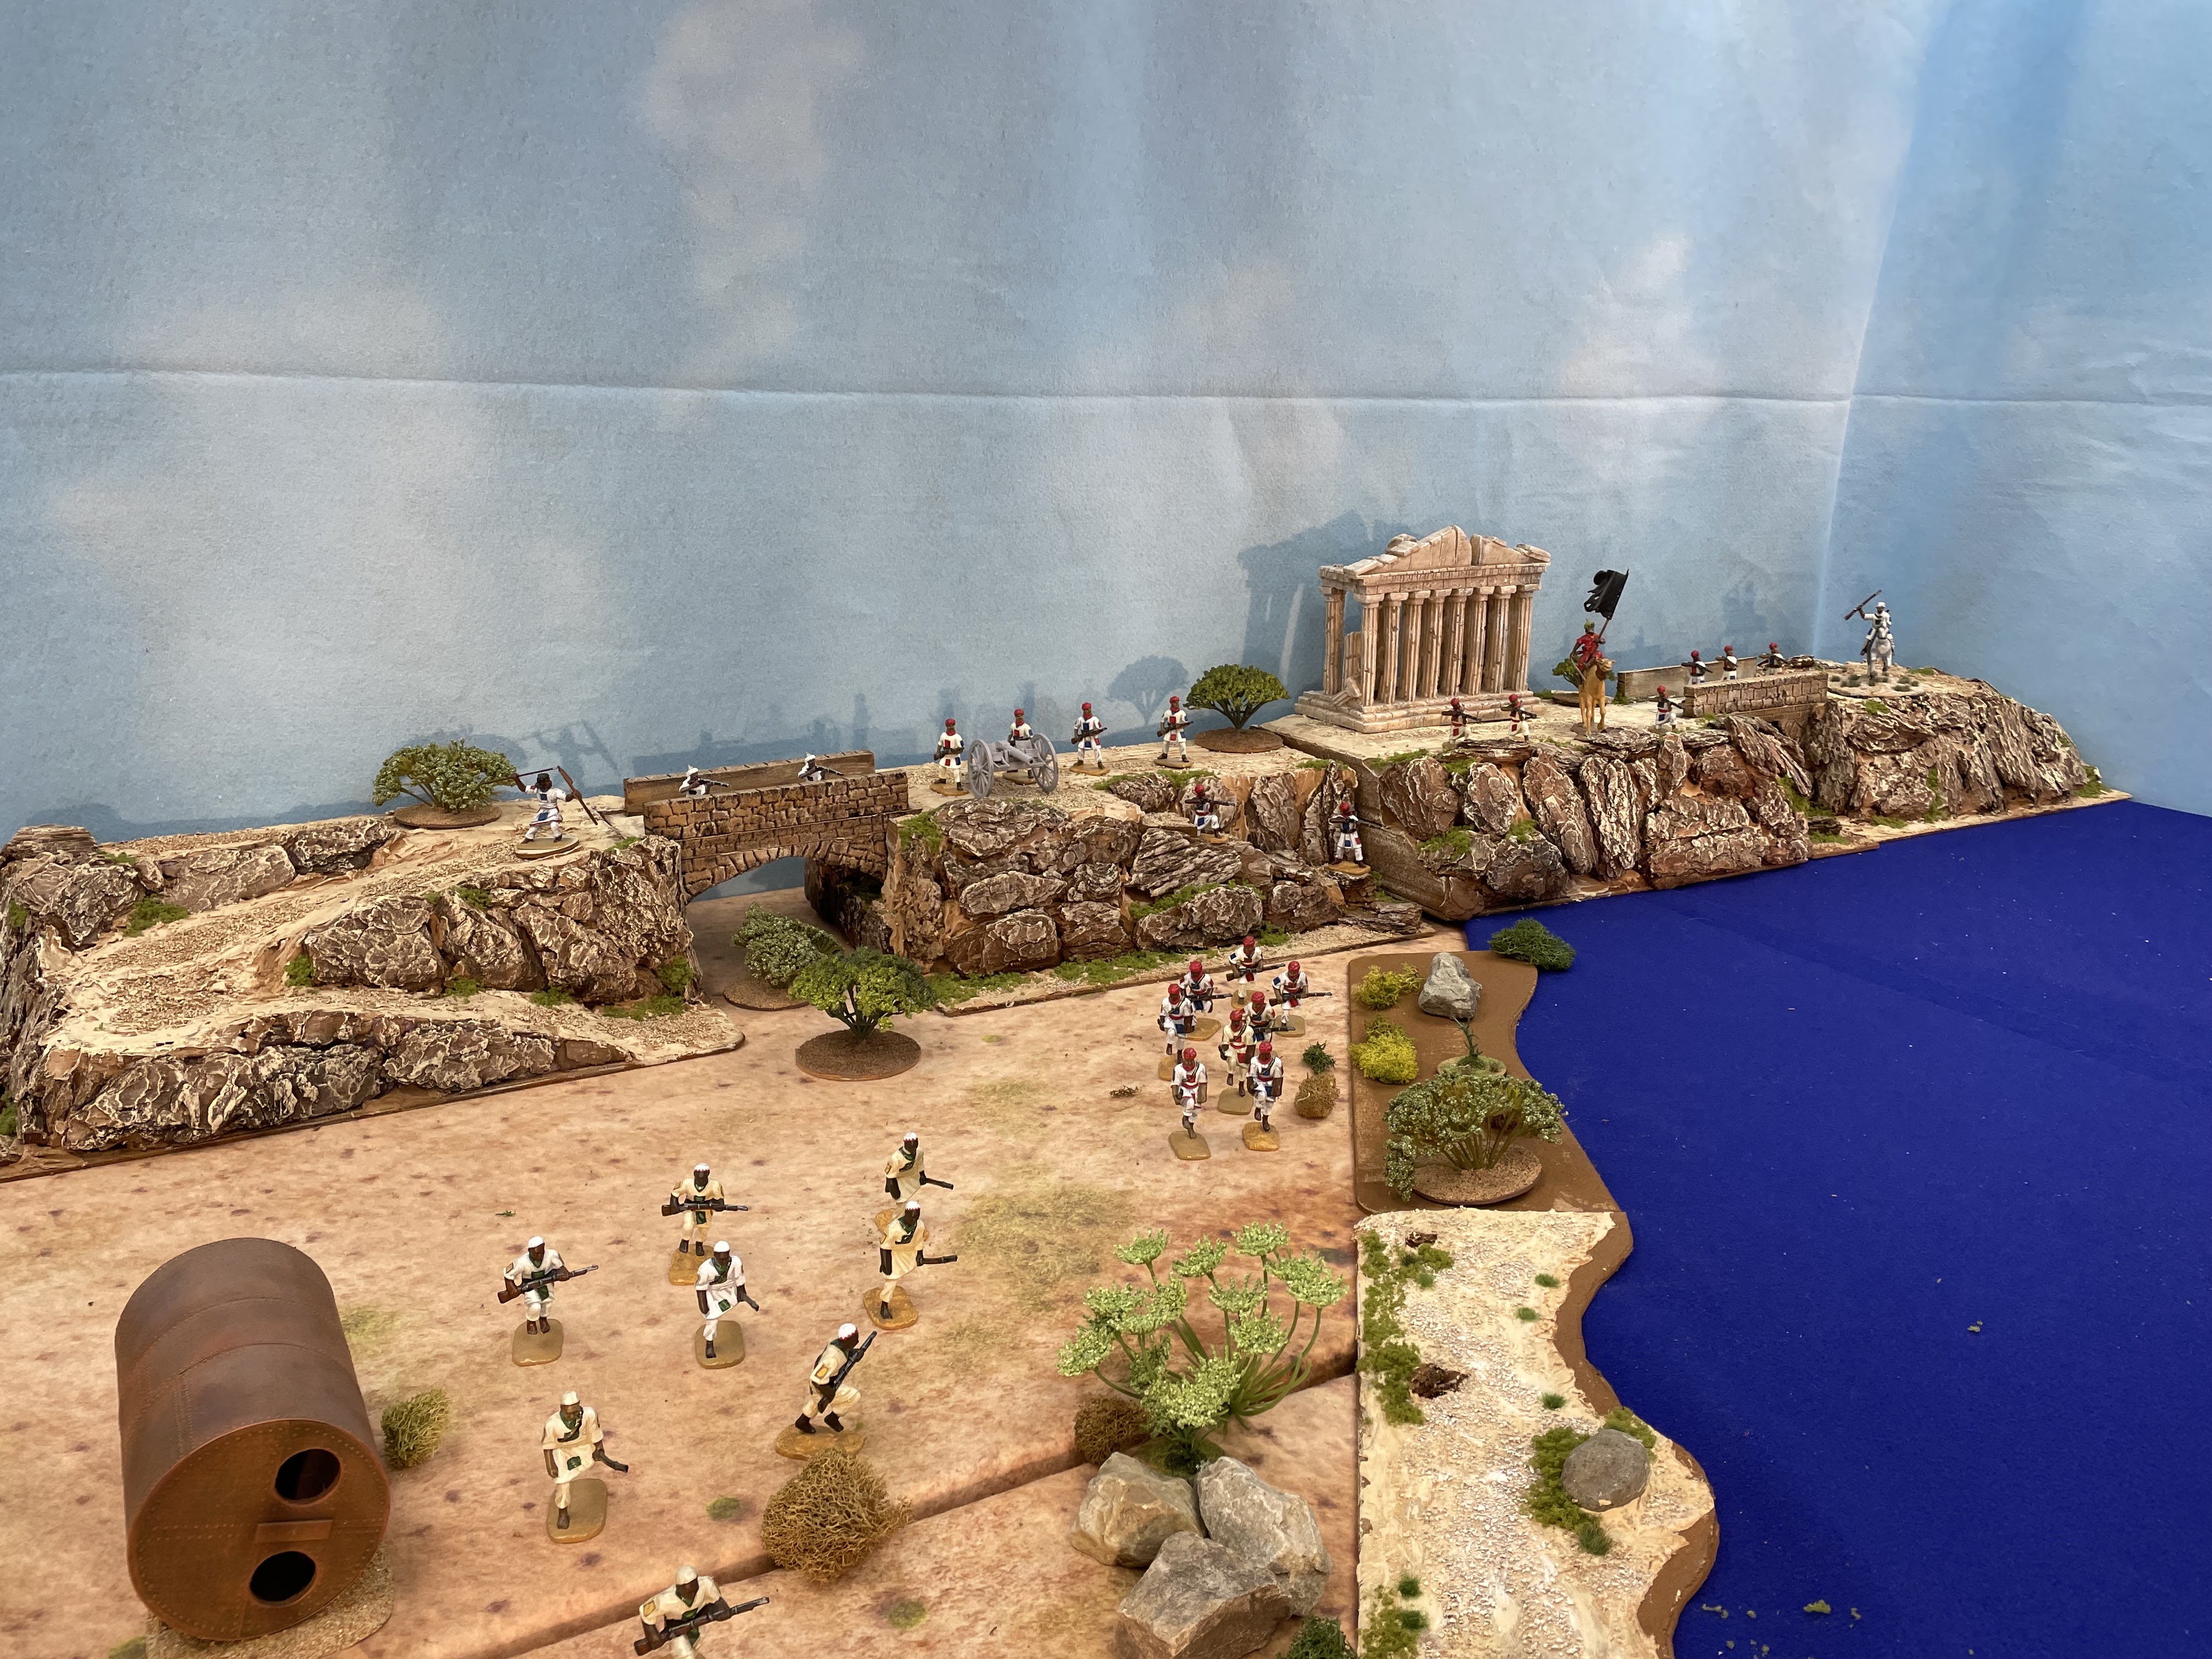 |
| The new modules extend the entire end cap of terrain across the full width of my table . |
 |
| The original model featured a road leading up to the bridge that crossed a ravine. I decided that the modules needed a second exit or access to the mountain top, so I built a stone staircase on one of the new terrain pieces. |
Having built one 6 foot length of scenic dividers, it made sense to make another side for the other table edge, so I have been working on some new pieces these past couple of days.
How to do it
For the base, I use cork place mats purchased from Target Stores and these measure approximately 16-inches long by 12-inches wide. These provide a sturdy base for the hill module.
Next, I glue pieces of 2-inch thick pink insulation foam board that I purchased at Home Depot. These come in 8 feet by 4 feet sheets. I recommend bringing some kind of knife to cut the sheet into smaller sections so that they will fit inside your car. I used a standard box cutter knife, make a cut, and then put one foot on one side of the cut and pull the other piece upwards so that the foam board snaps into two pieces.
 |
| Work in progress photo showing the various stages of construction. |
 |
| Various types of "grab it glue" that are used to glue the foam board to the cork mat and to glue the tree bark to the sides of the foam board. The middle tube of Loctite "Power Grab" is the best option because you can squirt a more precise amount of adhesive to the material. It does not require a caulk gun. I also found that it had the best "stickiness" of all of the different grab adhesives, making it easier to glue pieces together. The other options shown require a caulk gun to push the adhesive out of the nozzle. |
 |
| Cork placemats used for the base. Place the smooth decorative side face down on the bottom so that the rough cork side is face up. I bought these at Target Stores. |
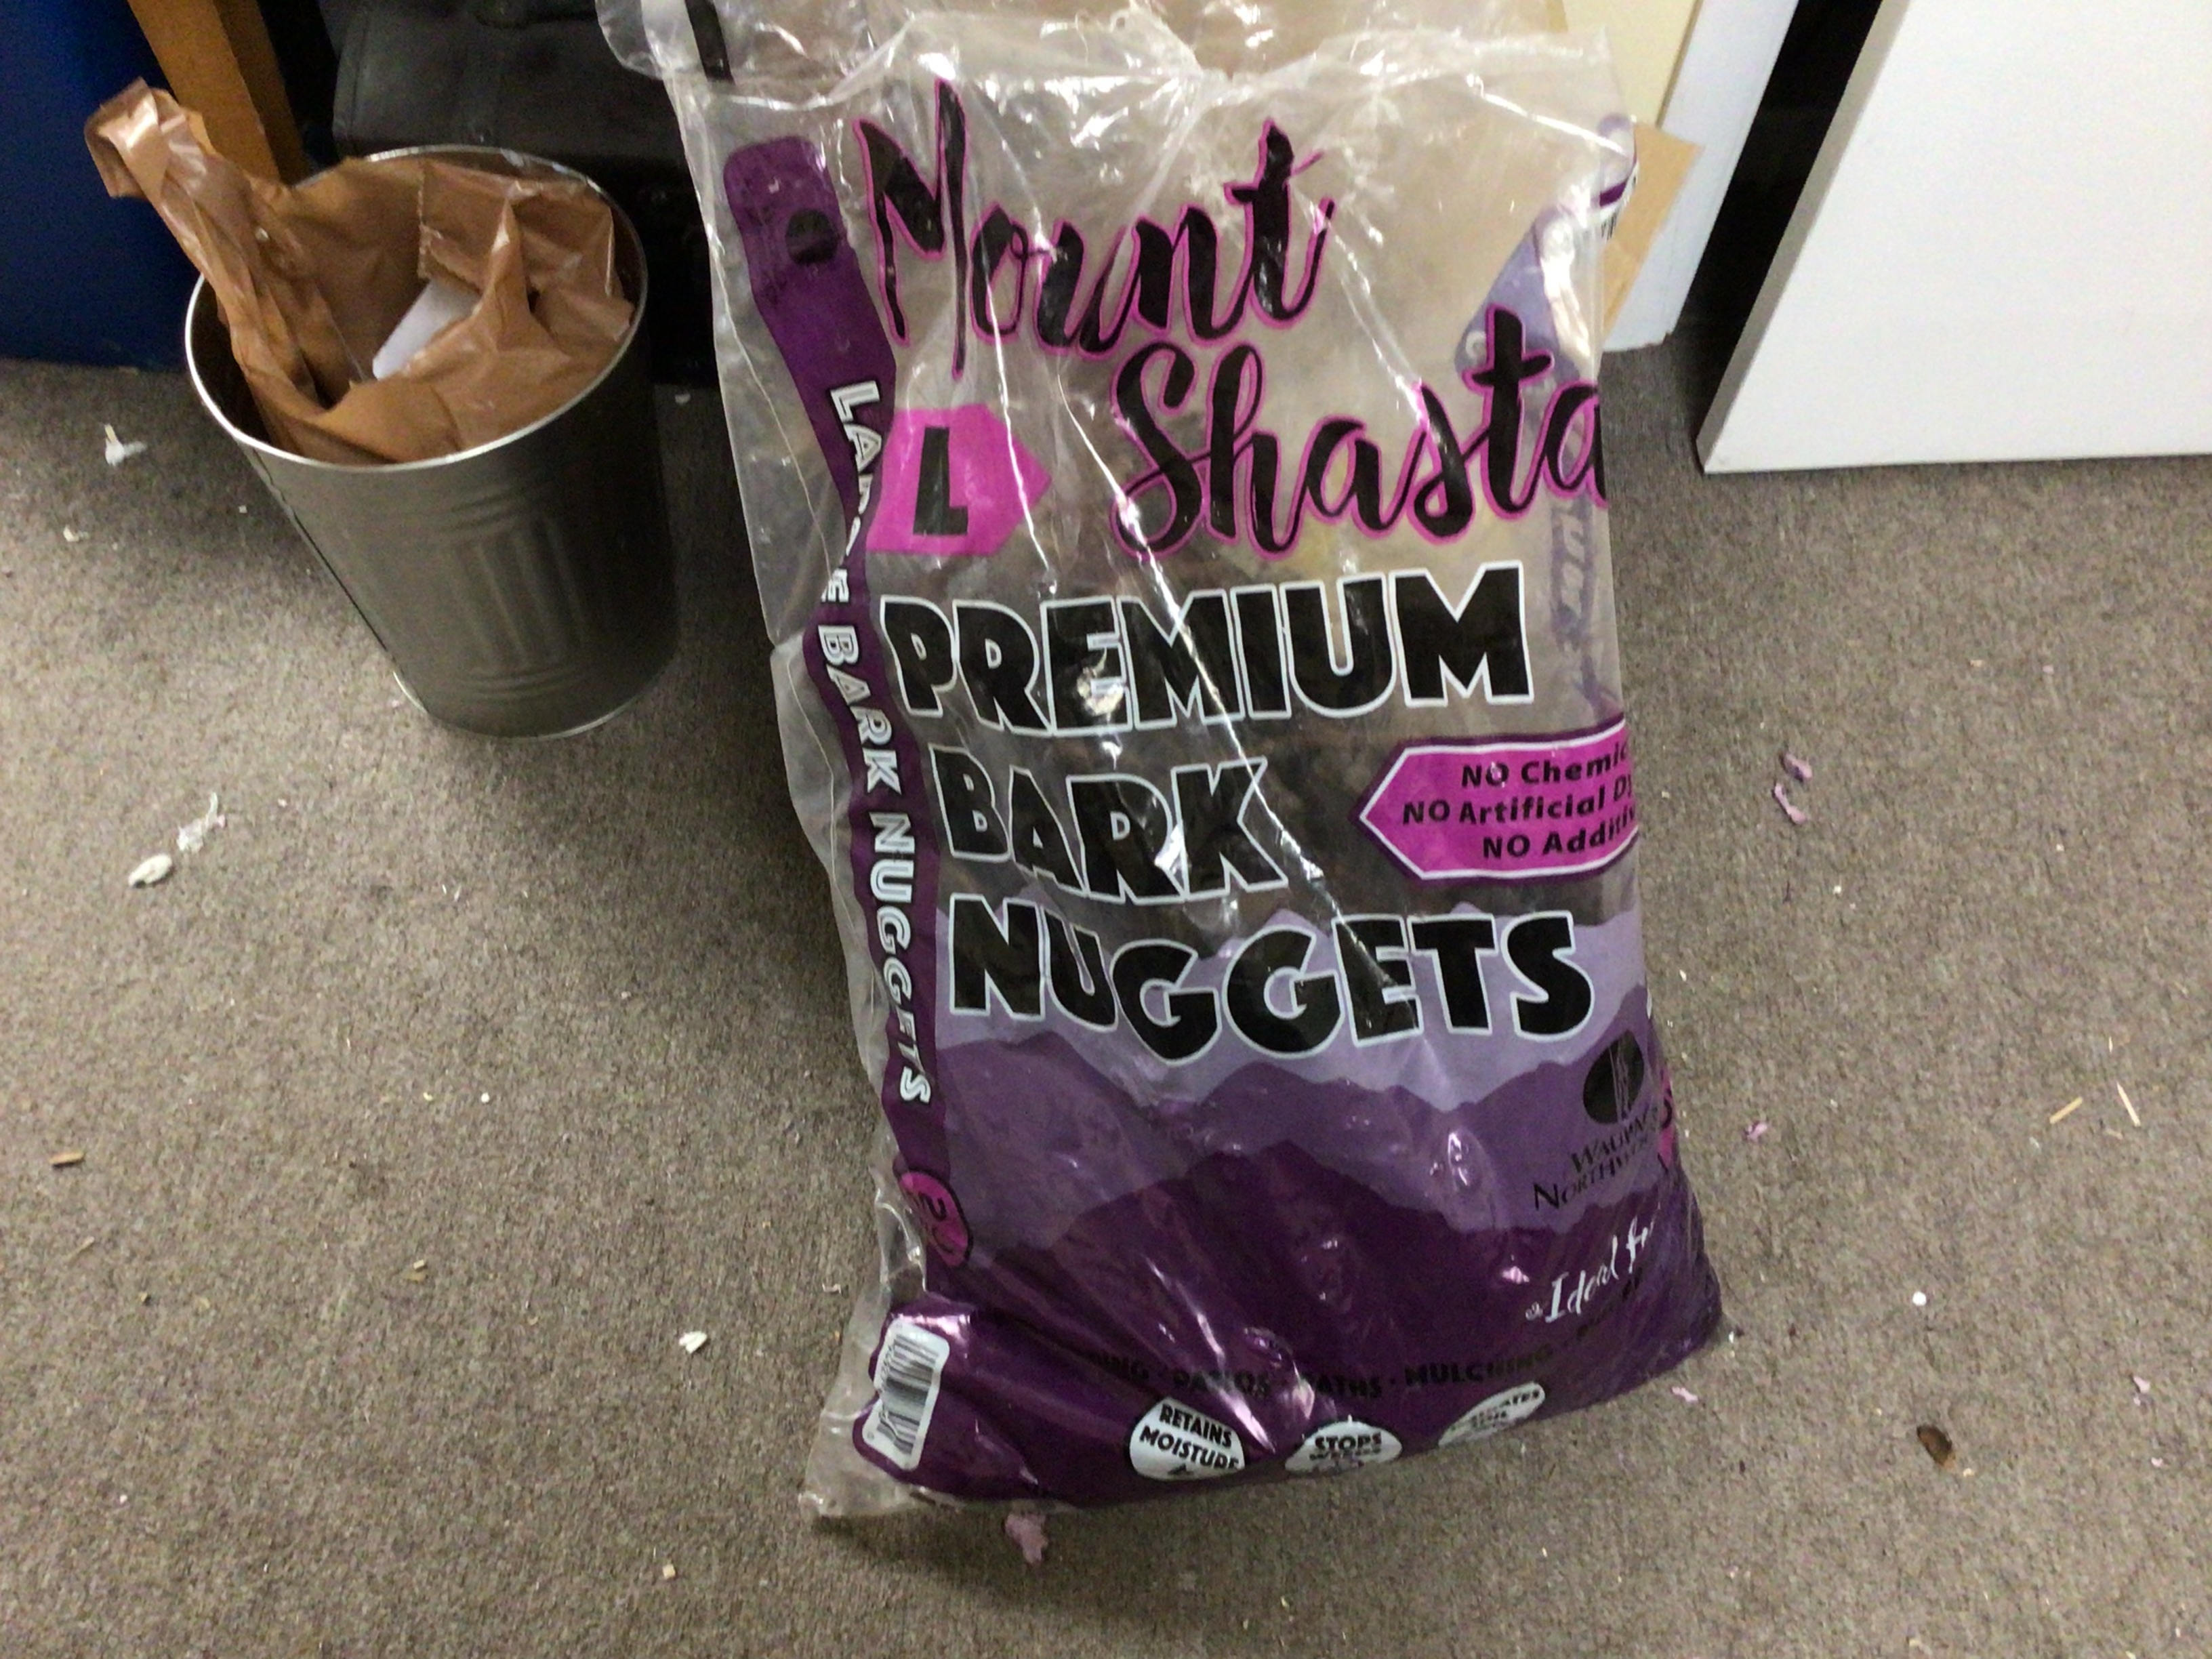 |
| Large bark nuggets used to make the rocks on the mountains. I purchased this at a local home and garden store. |
 |
| Gluing pieces of the foam board together. I used common white Elmer's Glue for this task. Place smaller dots of glue on the board rather than smearing the glue over the entire surface. Otherwise, the pieces will slip around after you press the halves together and result in a lesser bond than if you use dots of glue. |
 |
| Let the glue set overnight. Weight the pieces down with something heavy such as a gallon of white glue or some books. |
 |
| This picture shows the pieces of tree bark glued to the sides of the foam board. You can also see the cork mat base for the terrain piece. |
I wanted to have a stone bridge connecting the two terrain pieces. So I cut notches into each piece and measured and sized the bridge pieces to fit between the pieces. I also cut out a piece of cork mat to make a small terrain piece base to cover the gap between the two pieces. The bridge is made from pieces of 1/2-inch black foam core board.
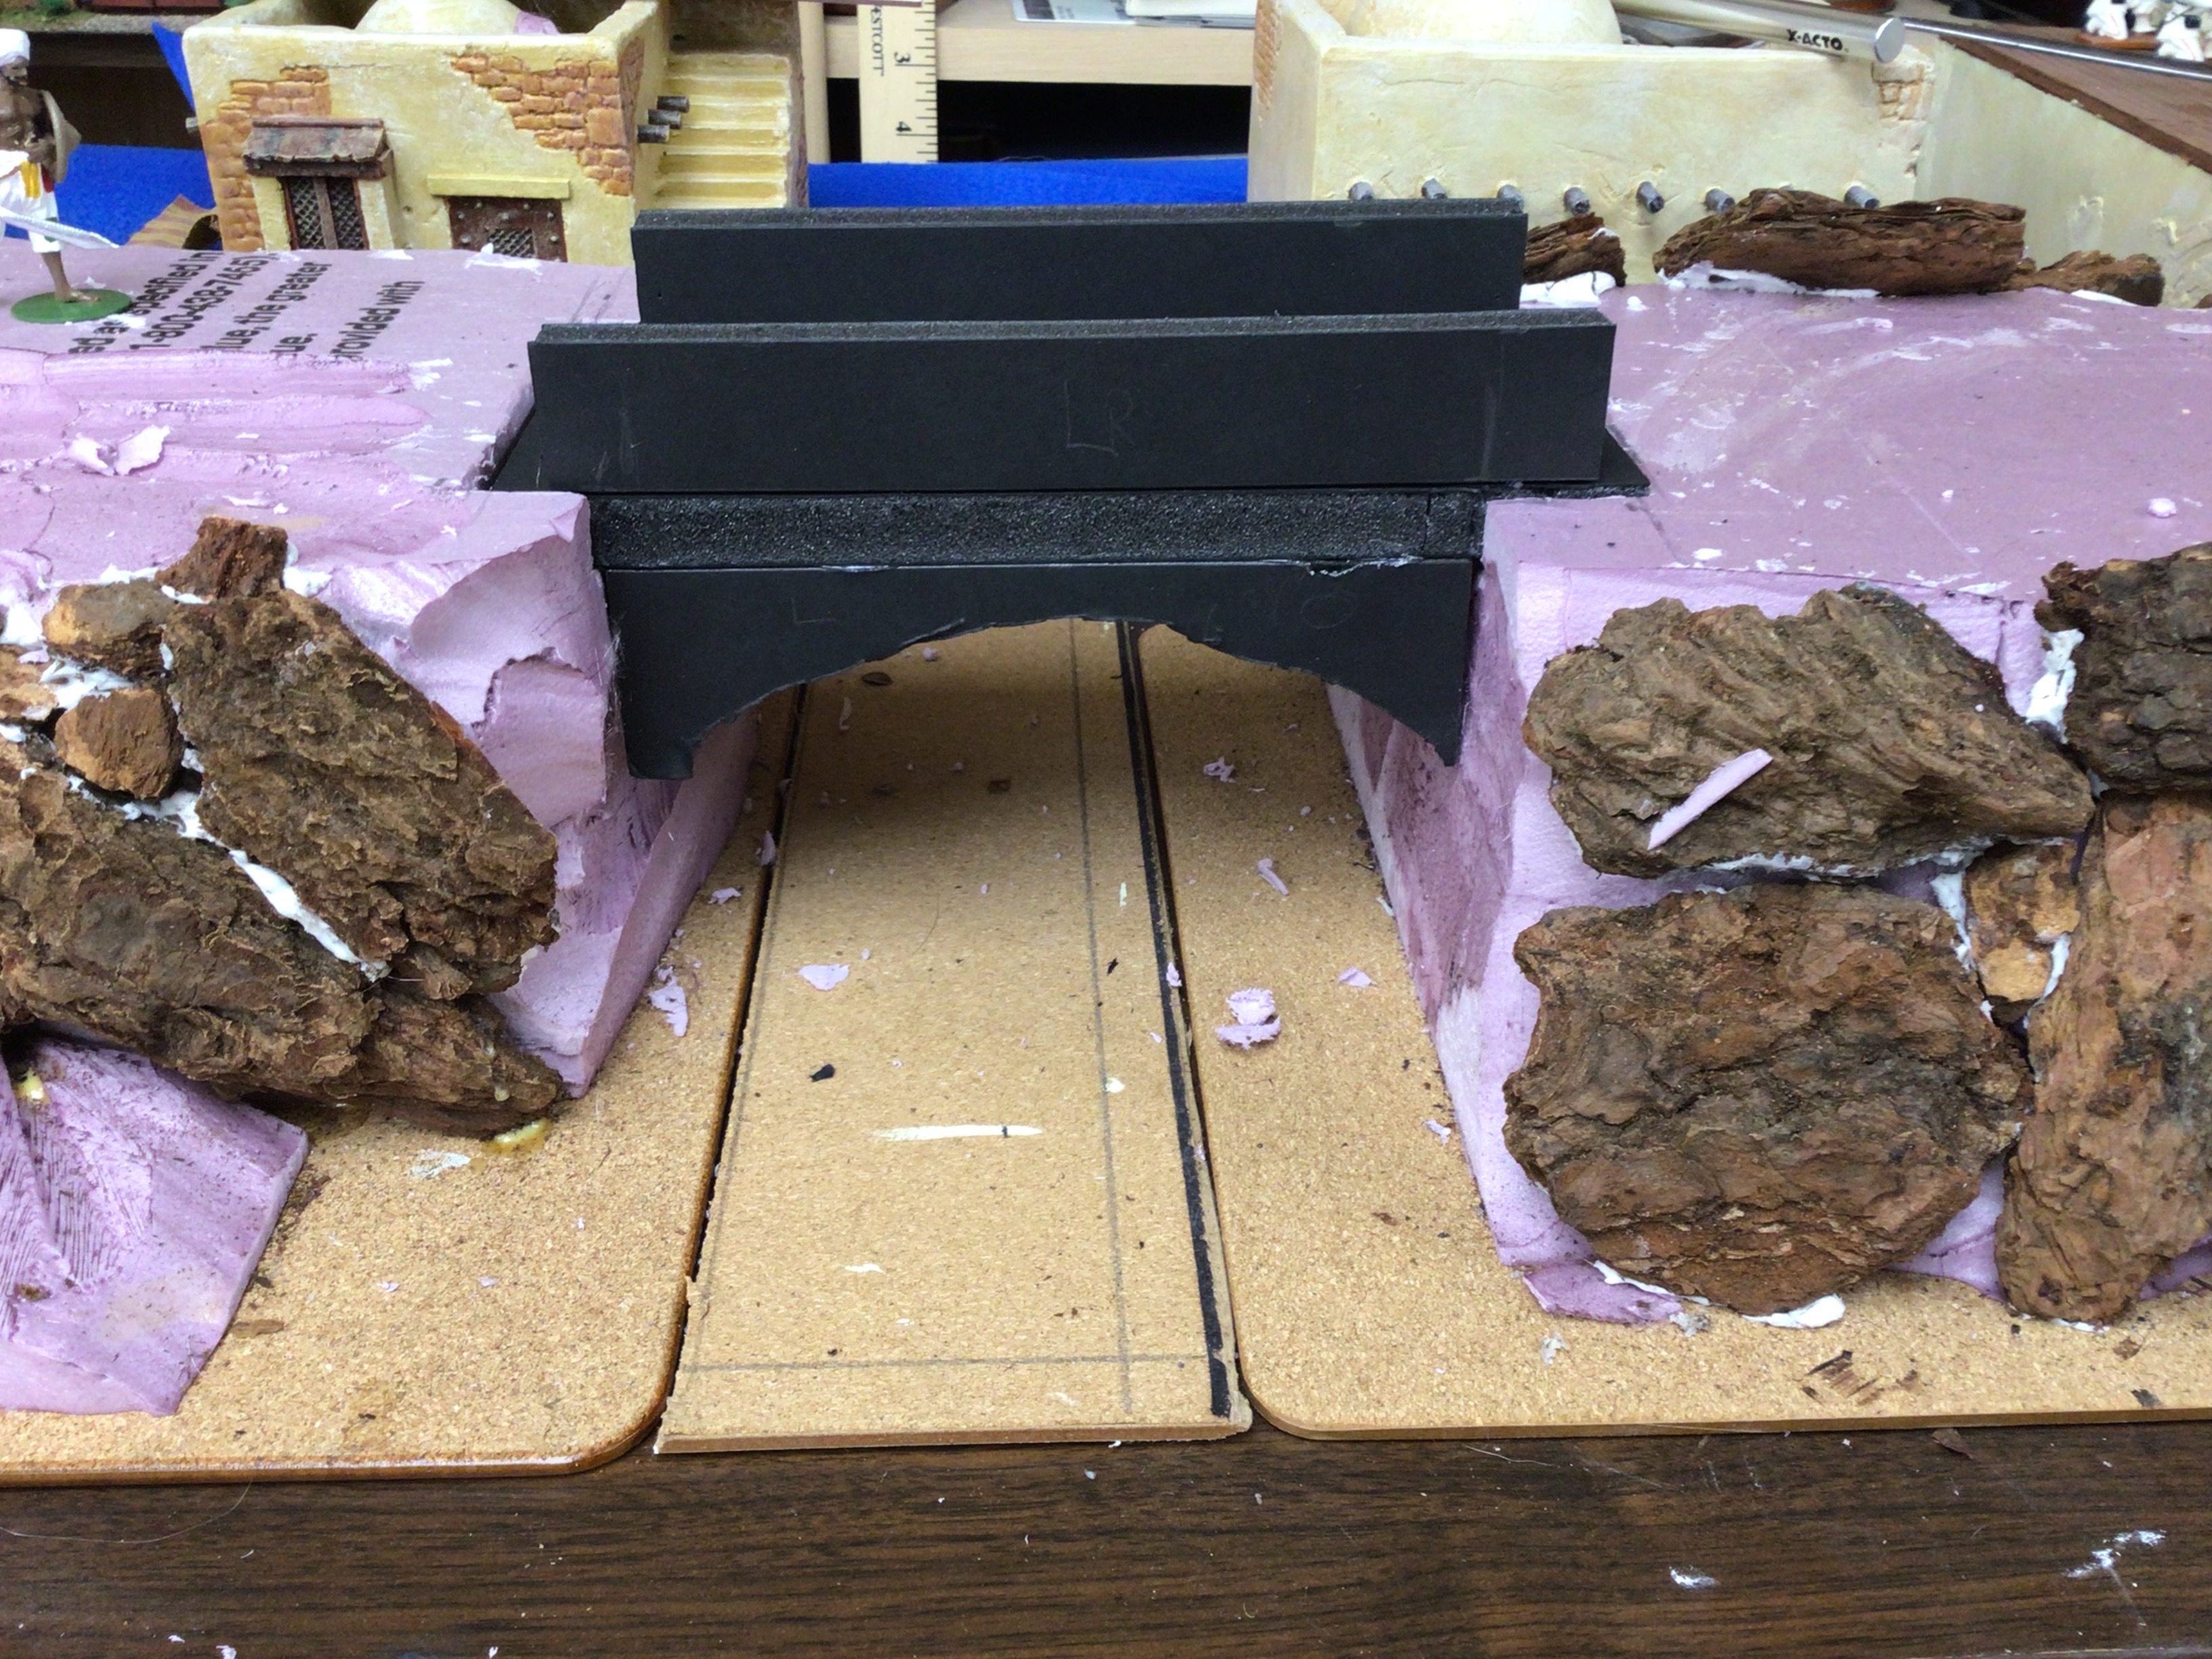 |
| The bridge connecting the two halves of the terrain model was made from 1/2-inch thick black foam core board, purchase at Blick's artists' supply store. |
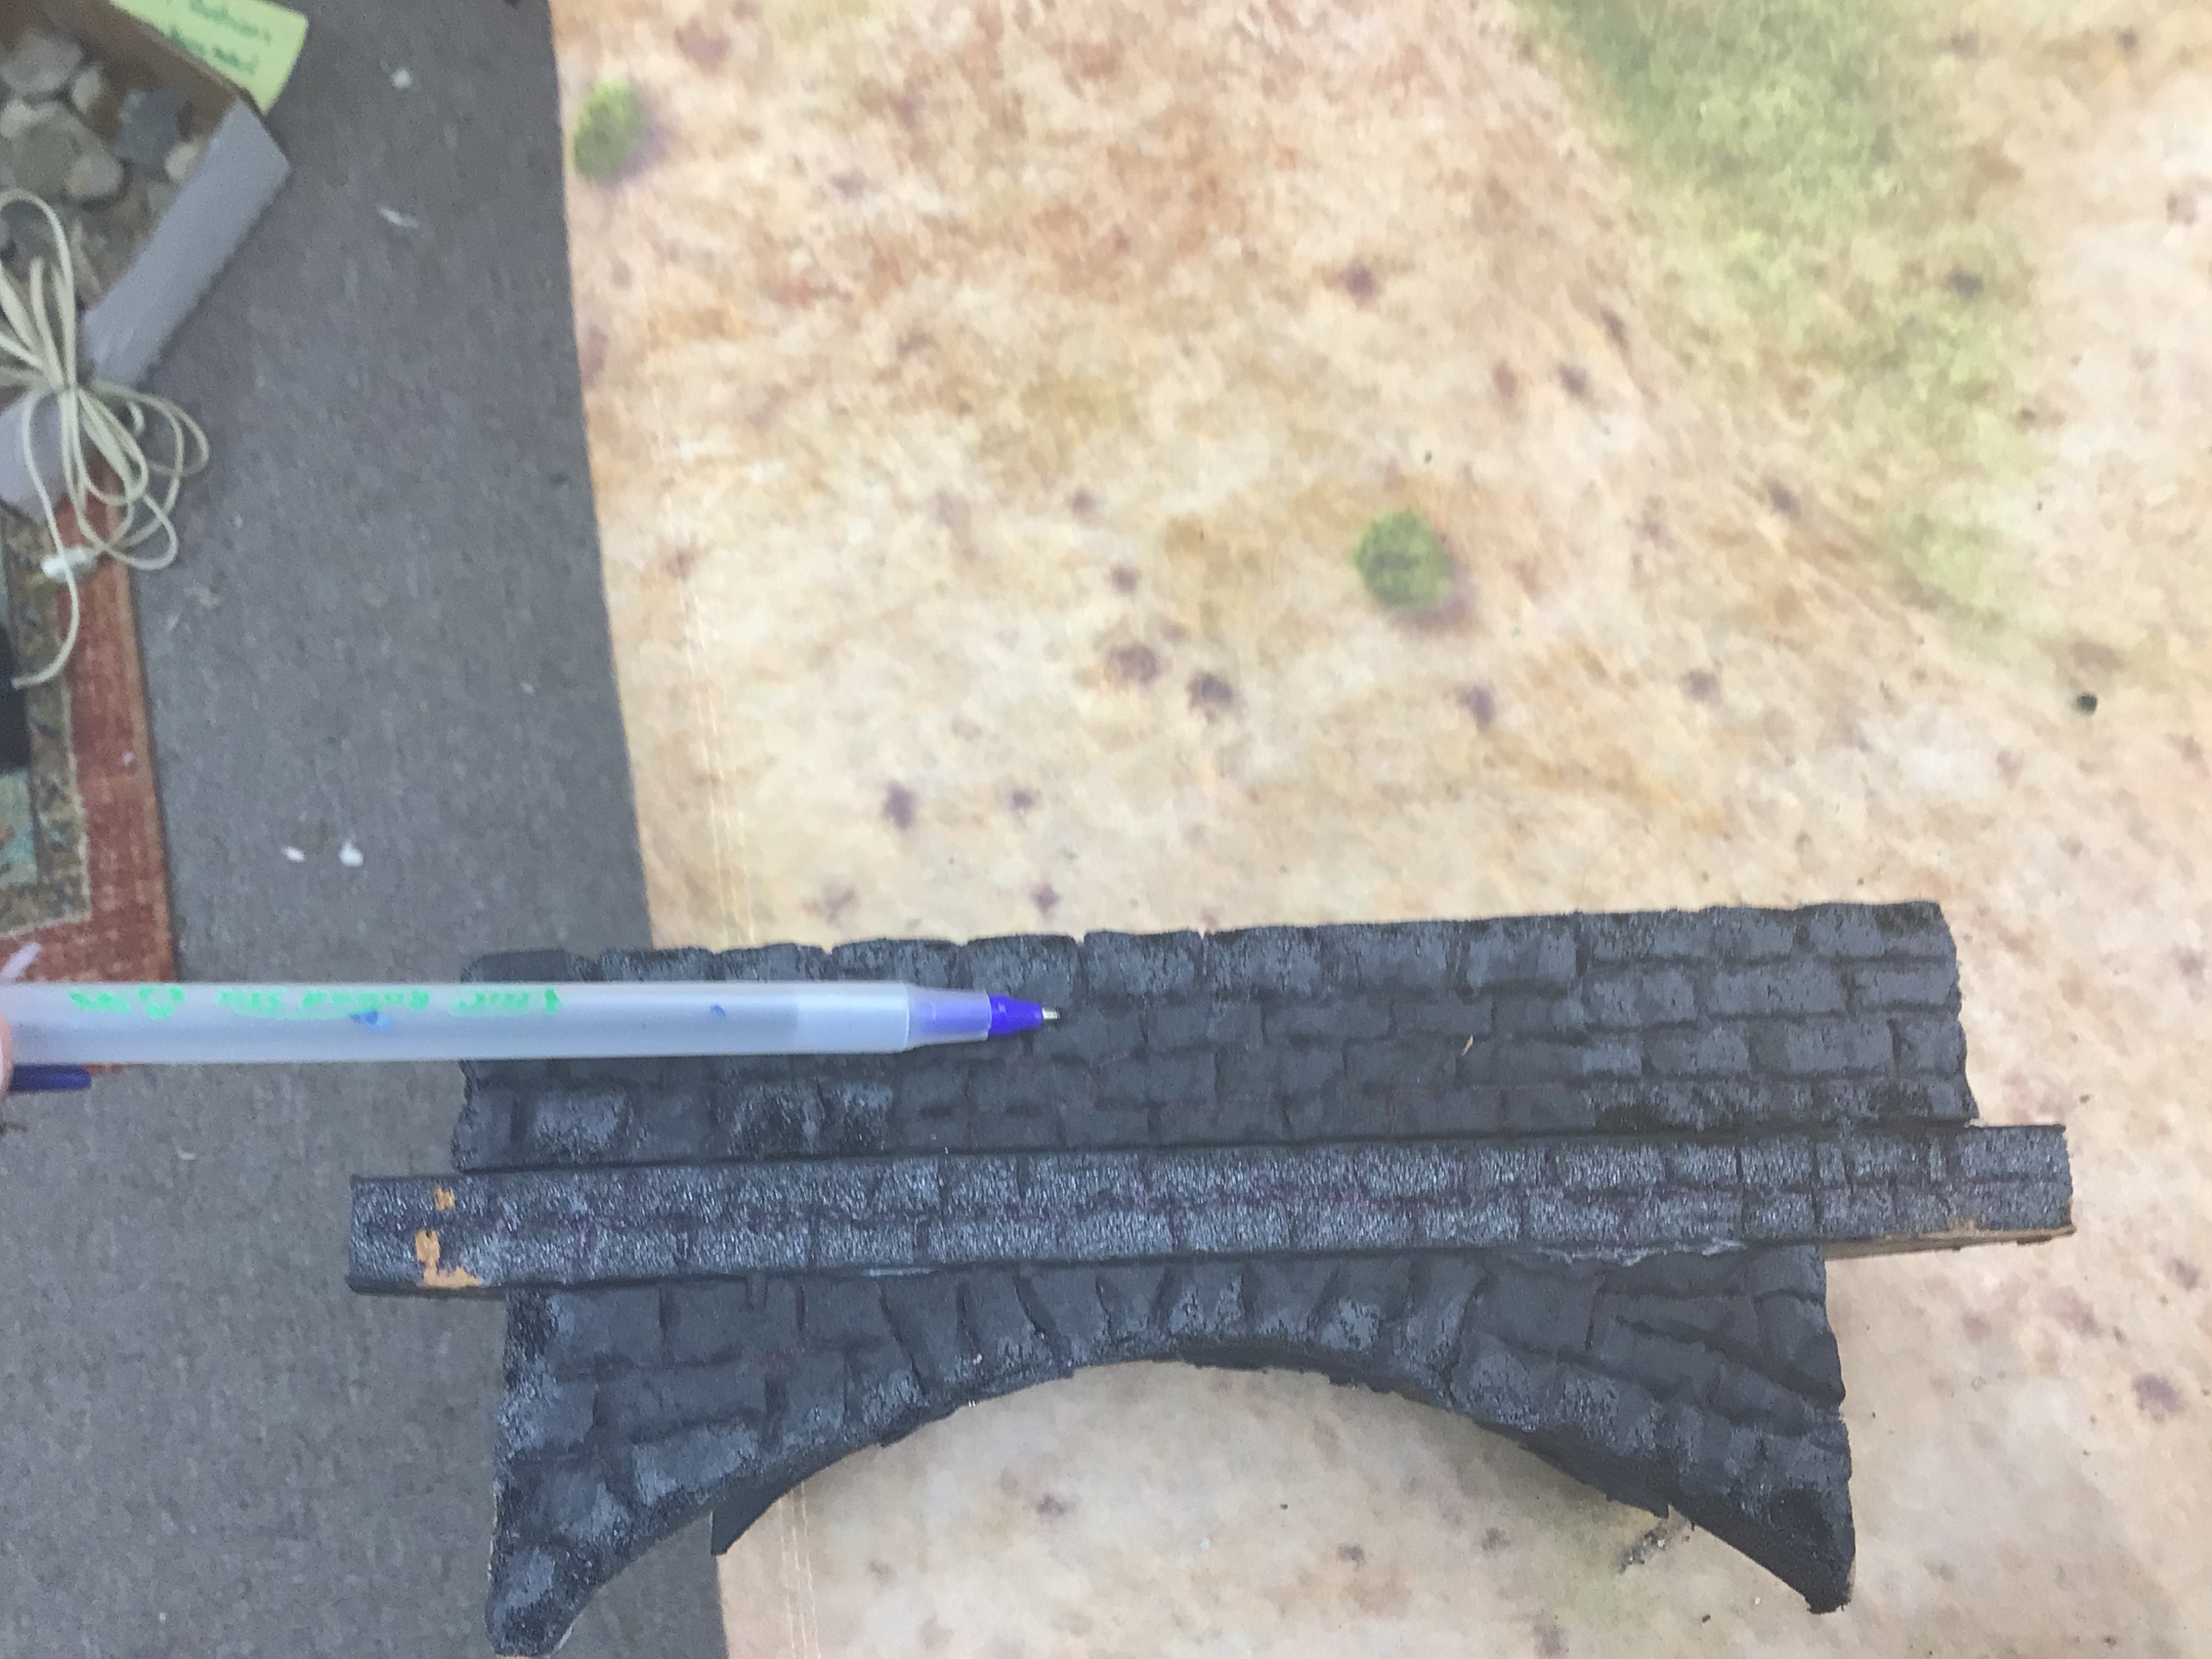
The pieces of the bridge are hot glued together and reinforced by sewing pins that are pushed through the foam core board for added bonding strength. The I take a pen or a wood barbecue skewer stick and score the lines of the rocks that make up the bridge. The bridge will be painted a dark color, brown or grey, and then highlighted using the dry brush method of painting.
 |
| A picture of the two parts connected by the foam core bridge. Next step is to mix some paint into a pot of wall board paste. I like the Red Devil Pre-mixed Spackle Compound brand of wall board paste. Mix in the color of paint rather than painting over the surface otherwise, if pieces chip off then the exposed spackle is the color of the paint, rather than white |
I trowel the wall board paste over the roadway and the top flat surfaces of the two hills. While the paste is still wet, sprinkle in some medium grade Woodlands Scenics railroad ballast (use sparingly). Once everything has dried over night, I then use a dark brown color and paint over the surface of everything. After the paint has dried, then I dry brush a light cream color over the surface to bring out the highlights of the tree bark, which now takes on the appearance of rock. Grey paint might be a better option color pallet to use for most climates such as Norther Europe or the Eastern U.S. I wanted a desert look so I use the cream color for the highlights.
Refer to the pictures at the top of this blog thread to see how the finished terrain modules look after the dry brushing. I also added some bits of course green flock on the base and between some of the rocks. Use the green flock or grass sparingly. Just a little bit of green gives the needed visual "pop!".
Making a Mountain Dice Holder
Getting back to my second set of scenic dividers, I thought it might be a good idea to turn some of the mountain pieces into dice holders. I bought clear plastic boxes at The Container Store or Bed, Bath & Beyond. Place the boxes atop the foam board, upside down, and then use a Sharpie or Magic Market pen to outline the box onto the foam. Then use a hot knife foam cutter to cut the center of the shape out of the foam board.
Cautionary note: on the first piece I used a box cutter, but the blade is only one inch long, so I had to finish cutting out the center using a small hack saw blade. This is not very efficient plus it results in a jagged cut inside the foam. It is better to use your hot knife foam cutter for this job. I used the first method and was gnashing my teeth over the difficulty of cutting the center piece out of the foam. Then I realized that my foam cutter tool could do the job in a few minutes and make a nice smooth cutting surface. Doh!
Finish the mountain dice tray holder in the same manner as you would for the other terrain pieces. The pictures below show the dice tray painted and dry brushed, but I intend to add some tree bark pieces around the base of the module.
 |
| Work in progress picture of my dice holder hill. |
 |
| The second dice holder is three pieces of foam board high or six inches in total height. The other dice holder used two pieces of two-inch foam board or four inches of height. I think that the four inch height looks better. |

A fascinating tutorial, Jim! And something I must try myself in an 18th century European context. Love the dice holder tray idea too. Thank you for sharing this how-to guide.
ReplyDeleteKind Regards,
Stokes
Great tutorial I especially like the dice holder hill !
ReplyDeleteExcellent modelling ideas Jim.
ReplyDeleteWillz.
As for "table dividers" I always liked the idea of having "profile" mountains: here's one of my old blogposts: https://snv-ttm.blogspot.com/2015/10/making-mountains-4.html
ReplyDelete