Sunday, October 27, 2024

Carthaginian Army in 54mm - Progress So Far


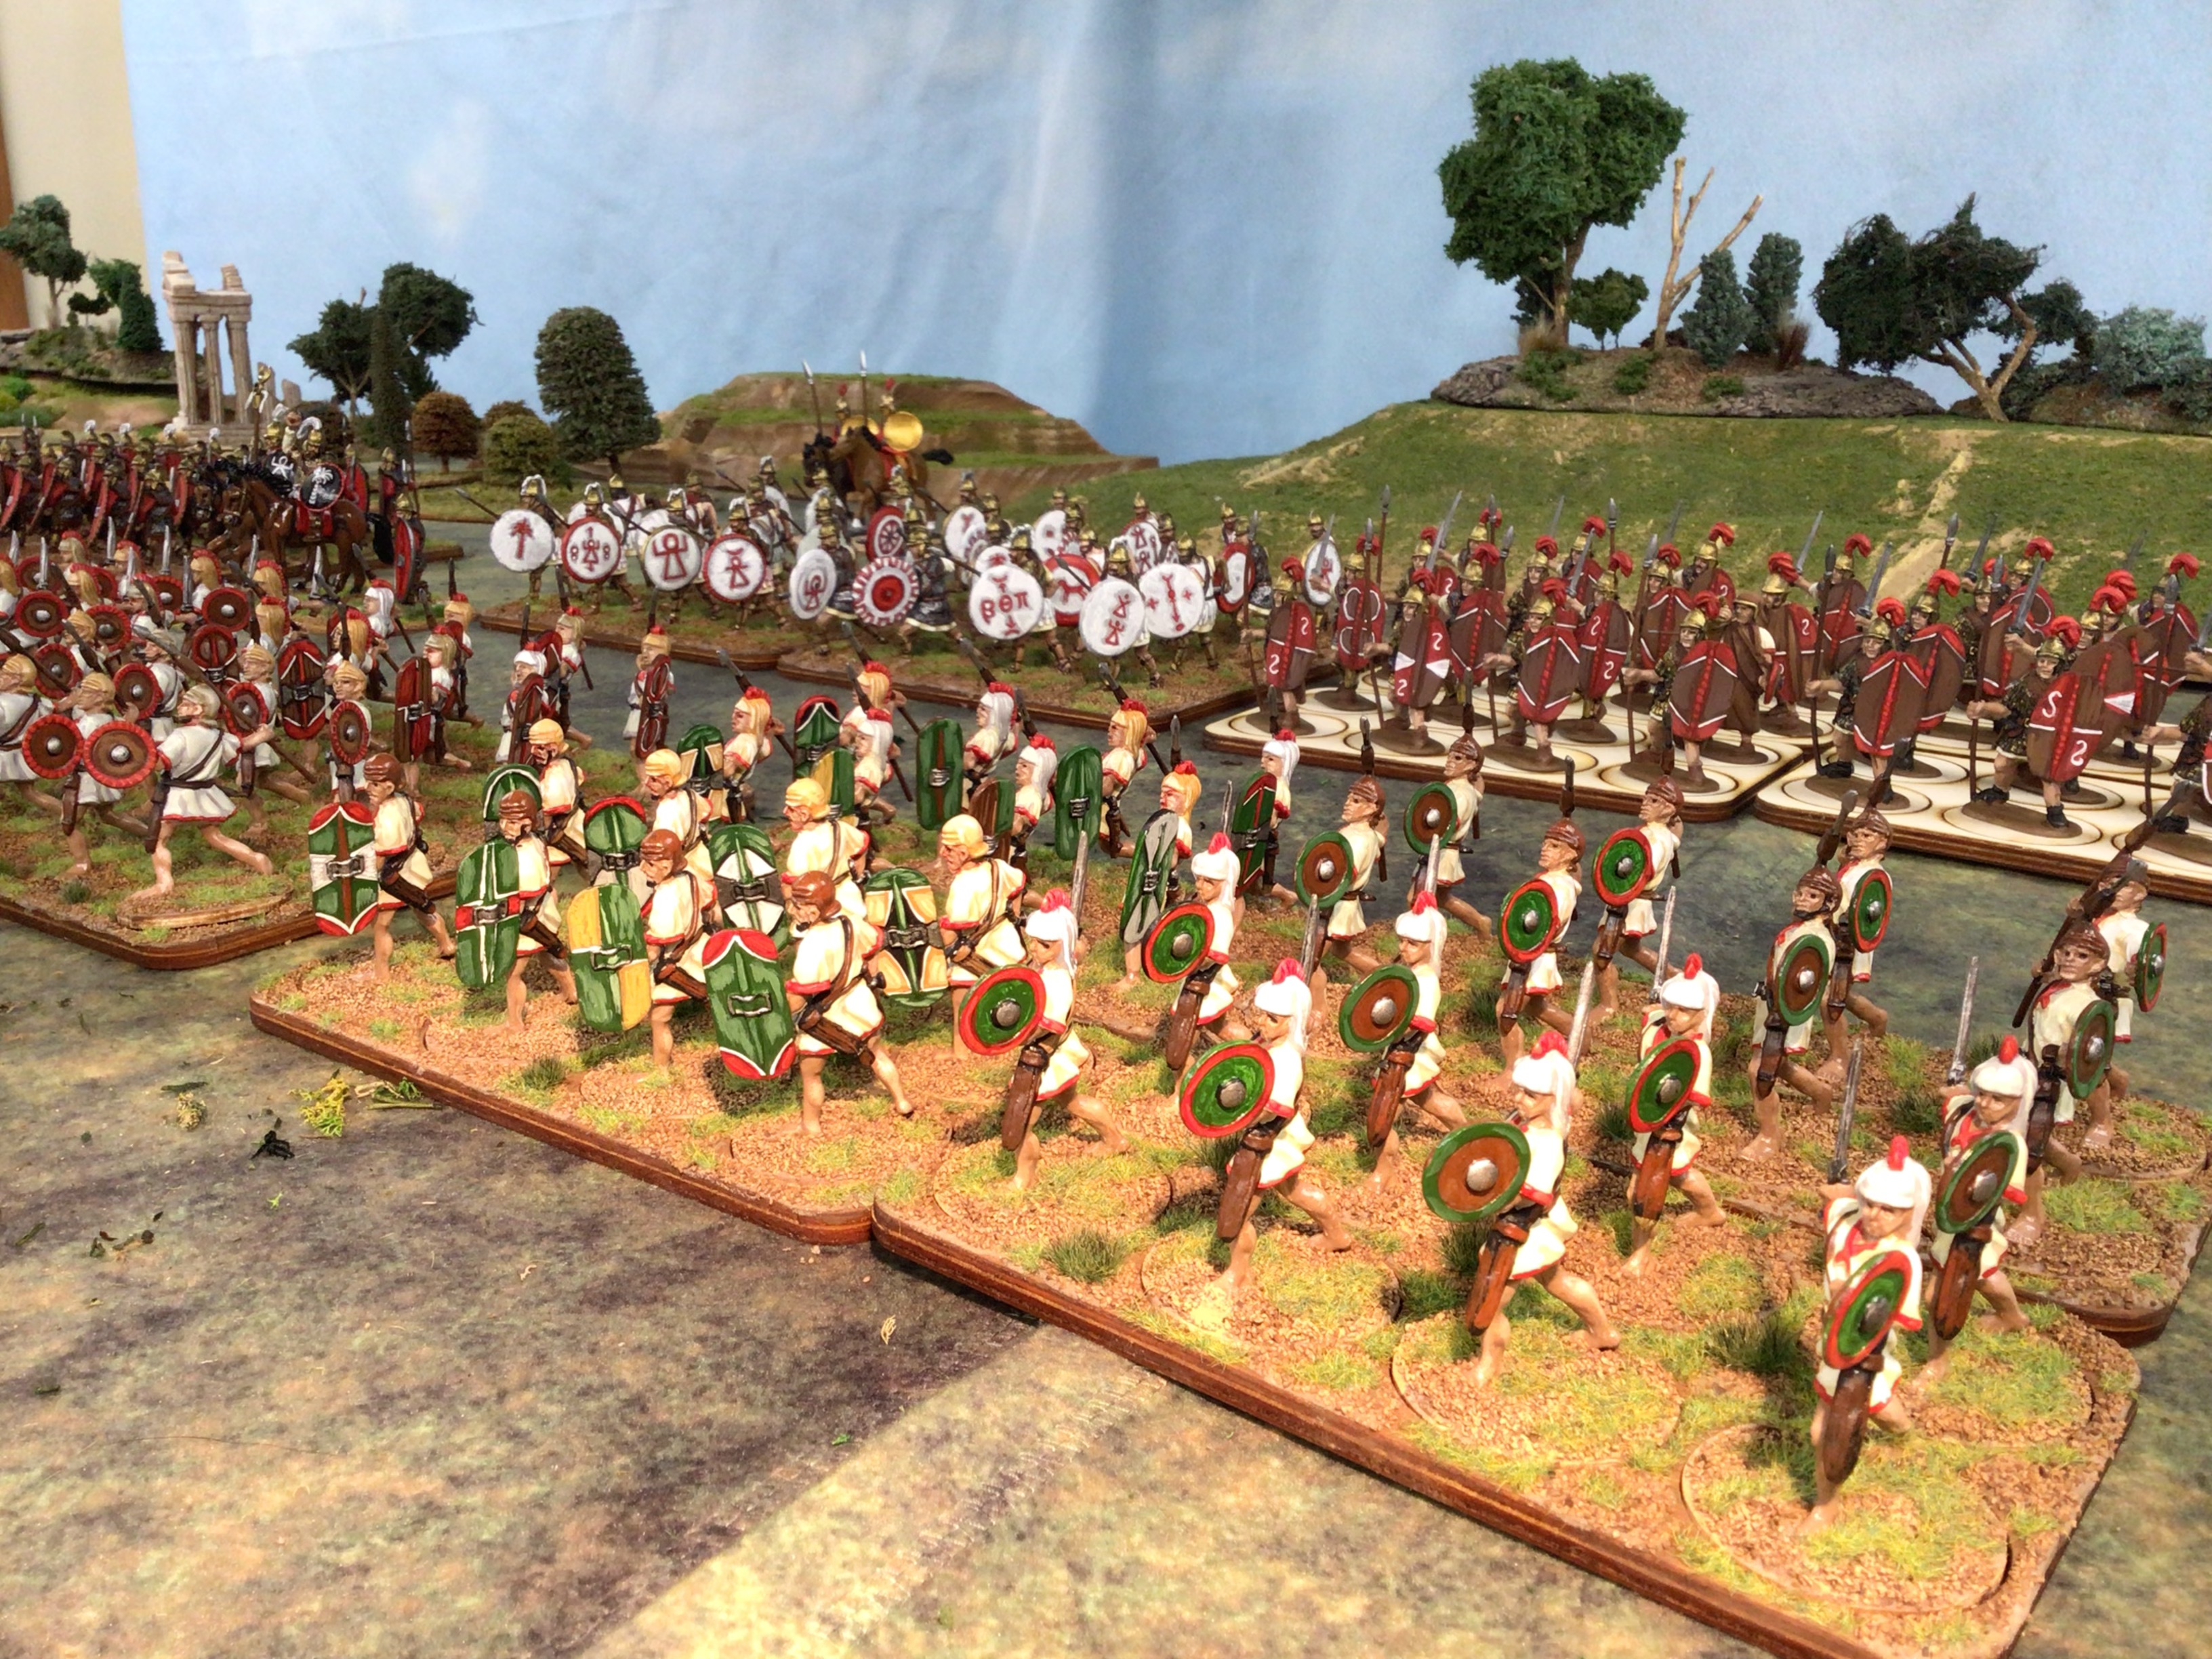
A portion of my 54mm Carthaginian army shown above.

Click on pictures to enlarge


Well now that I seem to have jumped into the Second Punic War Project with both feet, I thought that it might be time to post some pictures of my 54mm Carthaginian army. If you follow me on Facebook or are a member of The Virtual Wargames Club then you have probably seen these pictures, but for everyone else, here is a preview of what I have.

Note that I commenced painting 54mm Romans and Carthaginians back in September 2022 with the plan to run a Hannibal game at Historicon in 2024. However, a side trip to Gettysburg on the way home sidetracked this project as I shifted my focus to the ACW and Pickett's Charge game for 2024. Now that all of that is in the rear view mirror I am refocused on the 54mm Hannibal project.

Hannibal's army of the Second Punic War was largely of a mercenary nature comprised of "allies" from Gaul (Celts), Spain (Celt-Iberians), Numidians and Lybo-Phoenicians (Lybians). There were very few actual Carthaginian citizens in any Carthaginian army.

Hannibal army commander command stand.

John Jenkins Designs 60mm Hannibal and Carthaginian infantry.

My Hasdrubal command stand. The two figures on the stand indicate that
he is one command level below the army commander.


The Celts

I use infantry units of 32 figures and cavalry units of 16 figures in my armies. All of the figures are plastic figures made by HaT Industries ("HaT"). I copied some of the shield patterns off of pictures that I found on Pinterest.


Celtic infantry


Celtic cavalry

The Spanish

My Spanish contingent consists of two infantry units of medium/unarmored troops and some heavier Celt-Iberians wearing chain mail.


Celt-Iberian heavy infantry


Spanish infantry - Caetratii with small round sheilds.

Spanish Scutarii

Balearic slingers. These are metal figures made by HaT


Spanish Cavalry. These figures are out of production and very hard to find, but
I was able to find another box of 8 cavalry on eBay from a seller in Australia.

Libo-Phoenicians (Libyans or Africans)

The heavy infantry core of Hannibal's army came from the countryside around the City of Carthage. While they were not deemed to be citizens, they had a close connection to Carthage and I would not rate them as "mercenary troops." 

African infantry in Hannibal's army.


African heavy infantry - the backbone of the army.


HaT also makes figures that it calls "Carthaginian Cavalry", but I don't know what their origin would be, but they appear to be small in numbers in the various subjective orders of battle that I have seen for Hannibal's army.


HaT Carthaginian Cavalry. I bought these painted figures on eBay. Decently painted
and look better once they are based (see the second rank).

Libyan light infantry


Numidian Cavalry

These light cavalrymen from North Africa were perhaps the finest cavalry in Hannibal's army. They also defected during the final Zama campaign, which tipped the scales in the Roman army of Scipio's favor. Had they all stayed with Hannibal, then he might well have won the battle of Zama.


Elephants

The elephant contingent in Hannibal's army. Each elephant also has one stand of light infantry.

A pair of war elephants and their supporting light infantry. The infantry
serve to protect the elephants from Roman Velites (light infantry).
All figures shown above are 54mm HaT plastic figures.

So there you have it, all of the components of my 54mm Carthaginian army. Most of the figures were painted two years ago. Recently I added a 32-figure unit of Celt-Iberian infantry and five elephants.

My plan is to add two more Celtic/Gallic infantry units and another Celt-Iberian heavy infantry unit. I will also add another African heavy infantry unit. The idea is that each player will have four elements of foot or cavalry or elephants to command in the game.

More on the Romans at a later day.


ccc 

Friday, October 25, 2024

More Carthaginian Elephants


HaT 54mm Carthaginian war elephants


Click the pictures to enlarge


The past couple of days have seen me working on repainting a pair of HaT 1/32 scale (54mm) Carthaginian war elephants and getting them based. I also assembled three more elephants that are still on the painting table.

The following two pictures provide close ups of the individual elephants after they have been based on MDF board. Note the Carthaginian light infantry skirmishers protecting the elephants from attack by the Roman light Velites.


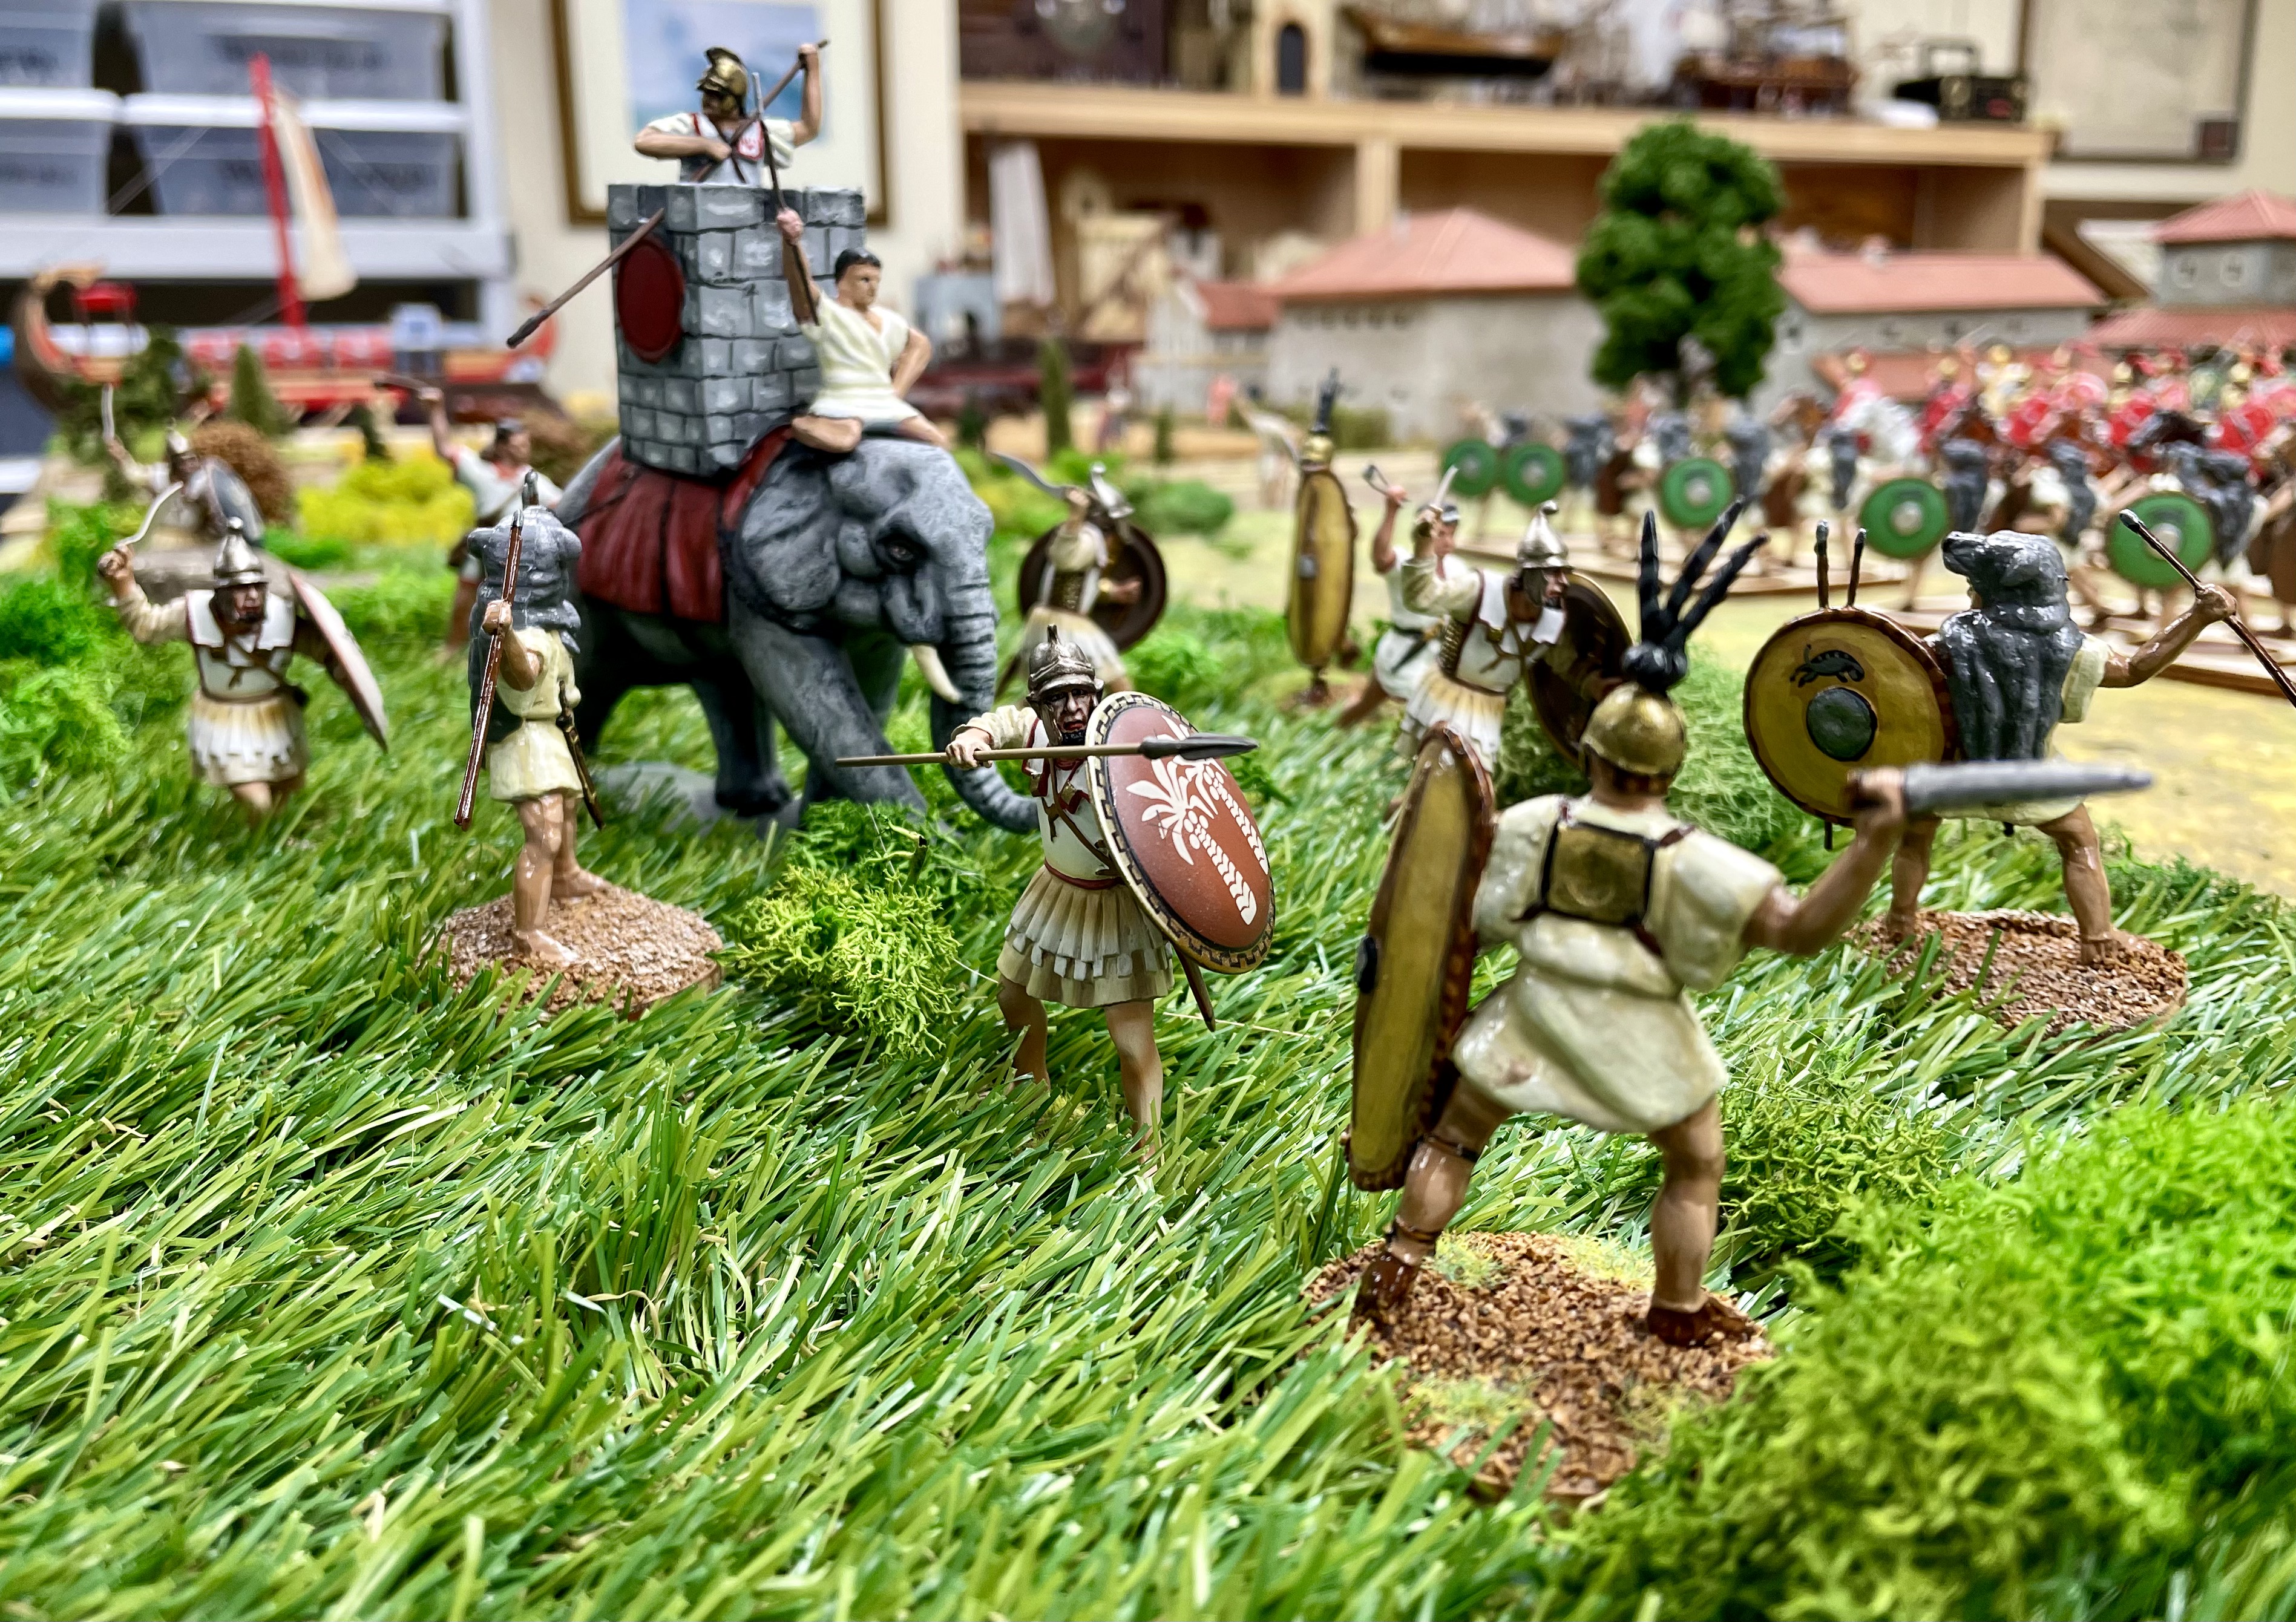
Roman elite plans on chucking a spear into the hyde of the elephant.
Some Carthaginian skirmishers have a different idea. The elephant and Romans
are HaT figures and the two Carthaginian soldiers are from John Jenkins Designs.


Close up view of the elephant being defended on the ground and from
the howdah (the wooden tower) where the soldier has a very long spear
that is capable of reaching any Romans on the ground level.


There is nothing like a bunch of elephants that identifies a war game as one from the Punic Wars of Rome versus Carthage. The beasts are fun to paint, add some color to the overall look of the game, and I imagine that they will cause a lot of interesting situations and tales on the war game table top.

I will have five elephants once I finish the remaining ones on my painting table, however, I would imagine that four would be enough in a game.

Does anyone care to share some rules ideas on how to use elephants in an Ancients game? I'd appreciate some input because I have no idea of how to write rules ideas for them. I plan on writing my own rules for my Punic Wars Project, something along the lines of what I used in my Khartoum game for hand to hand combat. The rules have to be easy to learn so that they can be used in a convention setting.


ccc

Tuesday, October 22, 2024

Whoa Nellie!


HaT plastic 54mm Carthaginian war elephant and Roman Elite. The Carthaginian 
figures are 60mm metal John Jenkins Designs figures.


Click on the pictures to enlarge

I had purchased three already-painted Punic Wars elephants on eBay back in 2022 and I decided that it was finally time to repaint them and add them to my 54mm Carthaginian army. These figures are fun to paint, so much so that I assembled and primed two more new elephants, from the box, and will be working on them this week. This will give me a total of five elephants which should be enough relative to the size of my planned Carthaginian army. I have a sixth elephant that I could paint and add to the armada of elephants. I am thinking of "brigading" two elephants together plus twelve light skirmishers into one game "command" for one player. But for now, I think that four elephants is sufficient.

One of the weaknesses of elephants is that they are vulnerable to attack by light infantry skirmishers who are nimble enough to "hit and run" attack the beasts. As a counter-measure, the Carthaginians would usually surround their elephants with their own light skirmishers who would engage the Roman infantry, thereby enabling the elephant to advance into the formations of heavier Roman infantry.

The elephants proved to be rather ineffective because once the Romans got over their initial fear of the elephants, they were able to develop tactics that effectively neutralized the elephants as a threat. These included attacking the elephant with light infantry rather than waiting for the elephant to close with the regular infantry, and opening up gaps or lanes between the Roman cohorts and herd them through the Roman line where they could be eliminated by the regular soldiers. Also, in some cases, the Romans were able to panic the elephants and cause them to run amok in every direction.

Hannibal brought something like 30 elephants with him from Spain, but all but one elephant died while crossing the Alps. Elephants seem to have been used more often in the battles fought in Spain. Hannibal is reported to have had some 80 elephants at the battle of Zama, but these were largely untrained animals that were easily scared in battle and rendered ineffective by the Roman army.


Carthaginian light infantry protect the elephant from the attacking Roman
light infantry Velites.

Here is a "before" and "after" comparison of the elephants:


Elephants, as purchased on the left, and after repainting on the right.

The elephant, as purchased, had a basic war gaming standard paint job.

The same elephant after I repainted it.

I still have a little bit more work to do on the repainted elephant, namely painting a design on the red shield on the side of the tower and painting the metallic color on the chains that hold the howdah onto the back of the elephant.

I have two more "repaint" elephants on the painting table and two more new out of the box elephants are in primer and are ready to be painted. I am looking forward to getting all of the elephants painted and based. They should look spectacular.


ccc


Thursday, October 17, 2024

Roman Civilians in 54mm

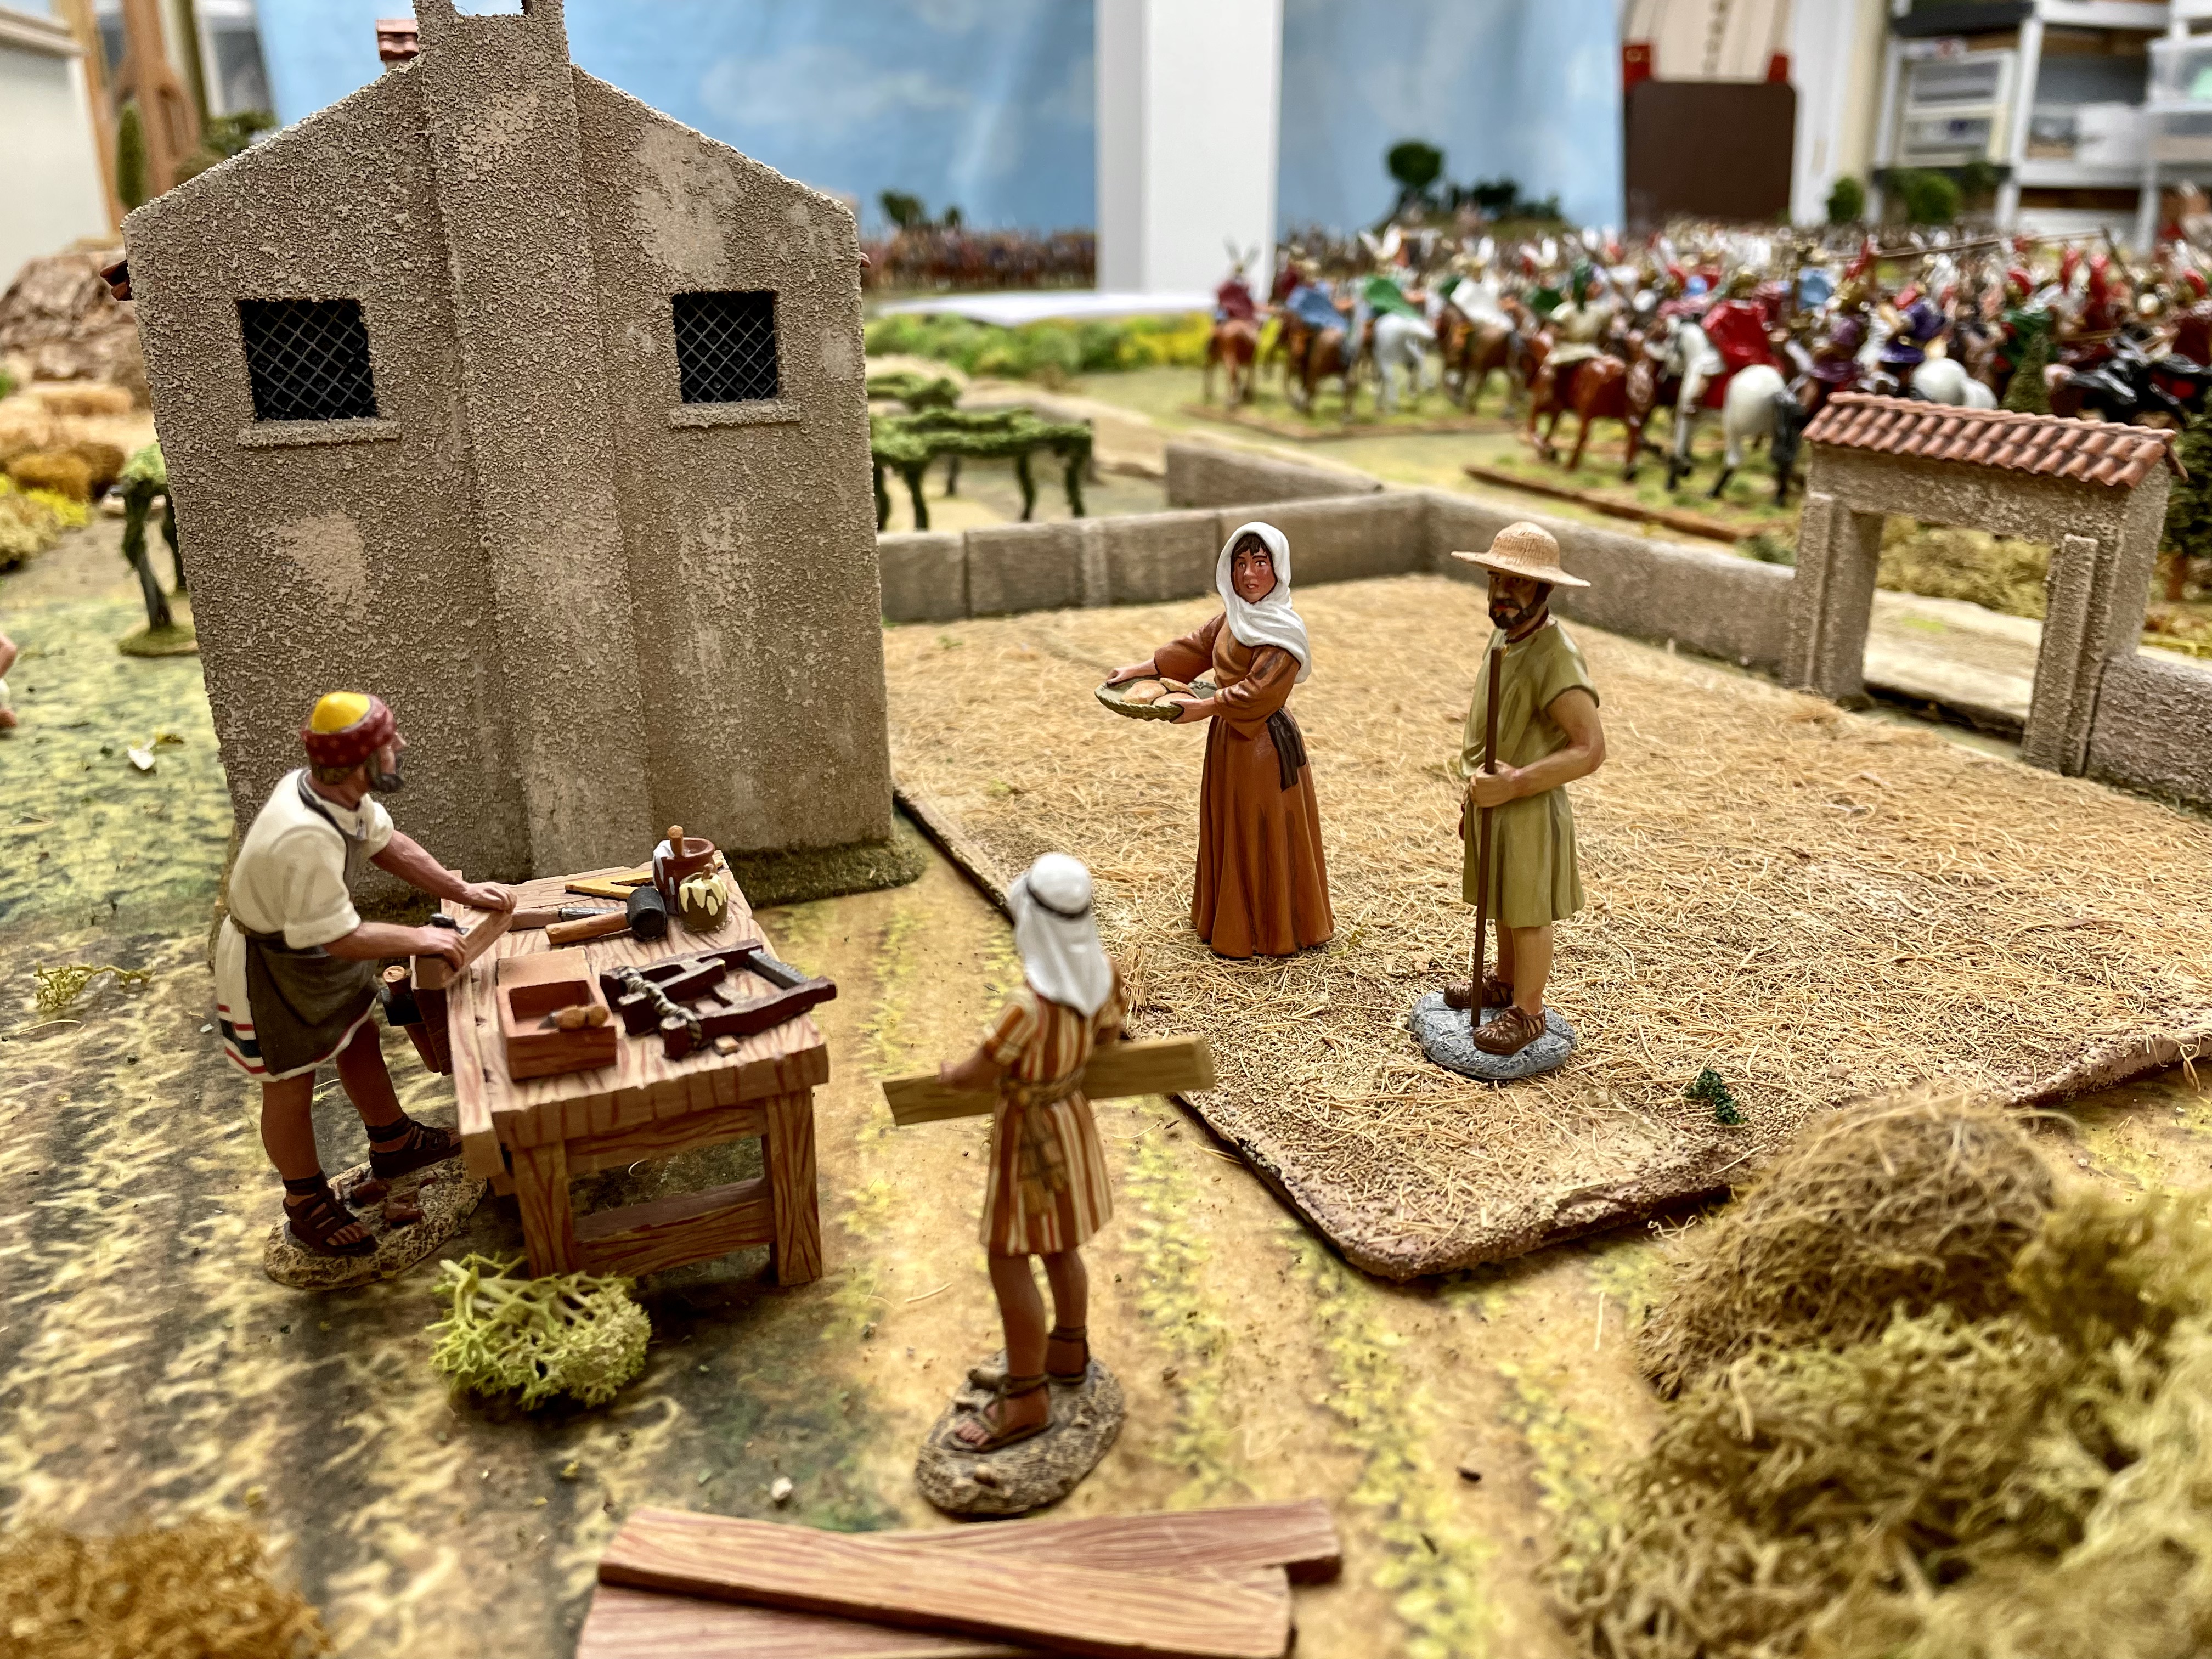
A Roman farm in th Italian countryside

Click on the pictures to enlarge your view

Last year I was going to run a Roman vs Carthaginians game at Historicon 2024, but that project was superceded by Pickett's Charge from the American Civil War. I had already painted a large number of 54mm plastic Romans and Carthaginians in 2022 and so I have more than a good start on building the forces for a Hannibal game at Historicon 2025. I will be posting a lot of other pictures about the military side of the project, but today I want to present some of the civilians and vignettes that are likely to be seen "roaming" around the table (see what I did?).

I like to position villages, forts and farms in the corners of my game tables. There they are out of the way of the battle and allow me to present various vignettes of the eye candy variety. First we have a farm in the Italian countryside. The farmer is not rich by any means, but he has enough resources to work a small farm and have a few slaves to help with the hard labor.

The Italian Farm

The farmer and his wife converse with the carpenter in his employ . 
These are 60mm King & Country figures.

The farmer inspects that harvesting of the hay or wheat crop in his fields.
 He also has a grape vineyard, shown in the background.

The farmer takes some of his harvest to a nearby town market.

Overhead view of out Italian farm,

Another view of the farm,

The Italian Town

Another corner of my game table depicts a midsize town that has a river port from which the farmers in the area can ship their grain to Rome.

A view of the town with a ship floating into the dock area.
Roman soldiers do their drills on a nearby parade ground.


The boat turns out to be a Roman warship.


Wide angle view of the town  central plaza or forum, and the dockside area.

The Dock Area
I have collected a number of Playmobile Roman Greek warships and will eventually paint and covert all of them. The first converted ship is shown getting ready to land at the dock, but a small cargo vessel appears to be blocking access to the docks.


A small cargo boat unloads some fruit and grain as well as something
that looks like contraband. Roman soldiers keep an eye on things.

An entrepreneur sets up a market stall along the docks.


Here are more pictures of the activity quayside,


We can see some of the farmer's grain stacked up on the dock awaiting transport to Rome.


Roman soldiers guard the warehouses where the valuable merchandise is stored.
An antiquities trader seems to have attracted a lot of attention.


A Roman Centurian is interested in what is going on with the cargo ship.
He wants it to heave off so that his warship can land at the dock.

The Town

The farmer has delivered his goods to the dock, gotten a receipt from one of the traders, and now his is looking to quench his thirst at the local Tabaran.

The local wine tavern.

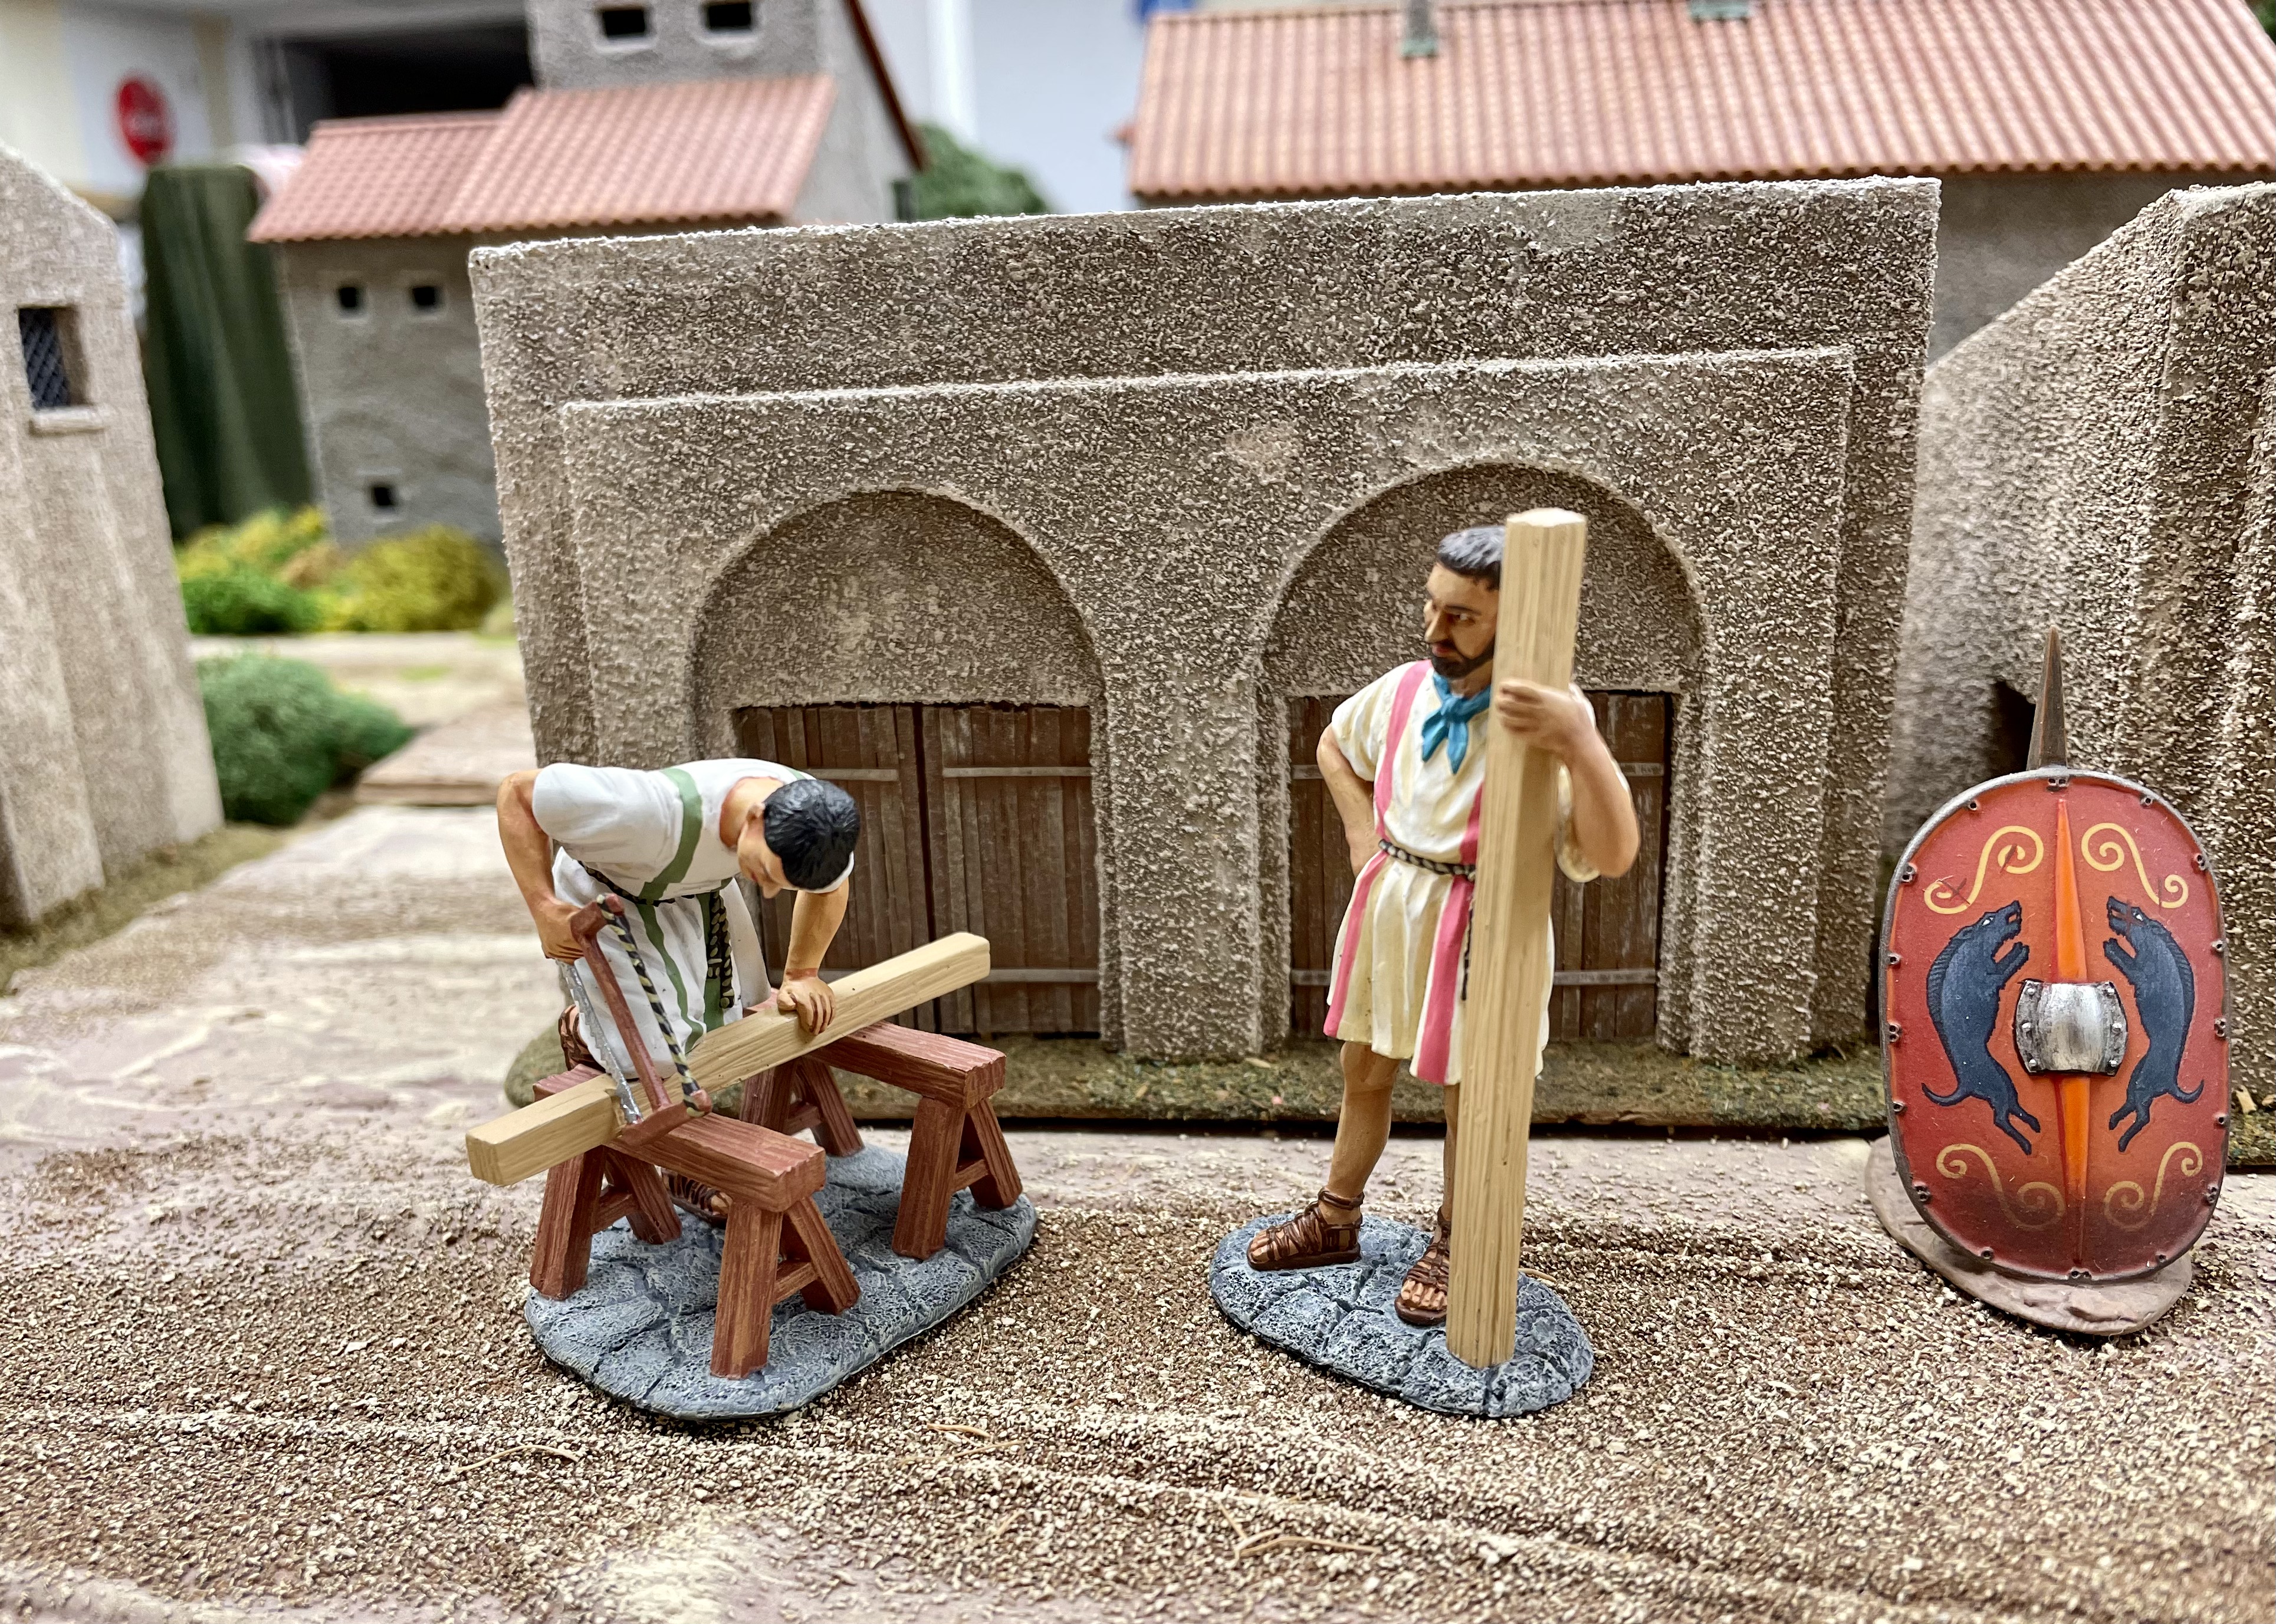
Some carpenters ply their trade in the town.

A rich landowner rides in style into the town. The wagon driver has to stop
at a checkpoint before he can enter the town.

A view of the town's forum, the center of life and activity in the region. A 
visiting Senator, with military escort for his safety, roams the forum stopping
to speak to some of the citizens to catch up with the local scuttlebutt.

The Military Post 
The town is large enough to merit the establishment of a military post to protect the citizens and ensure the free flow of commerce.

A very important person arrives at the camp.

The legatus legionis waits at his tent. He wants to finish his business so 
that he can take up other pursuits.

It is good to be a legatus in the Roman army.


---but trouble looms on the horizon as some of the Unfriendlies appear.


Most of the civilian figures in these pictures are made by King & Country and the soldiers are largely from John Jenkins Designs. Both ranges are 60mm in size.

I will be posting pictures of the Roman and Carthaginian armies in the near future.

ccc

Wednesday, October 9, 2024

Battle of Antietam: Hooker's Attack


Antietam diorama in 1/72 scale. This is an amazing piece of work and
regrettably I can not recall the name of the individual's work so that I can give him credit.


CLICK PICTURES TO ENLARGE


I have been watching Bill Molyneaux's Battle of Antietam wargame on YouTube in recent days and it has gotten me interested in developing my own scenario for the opening battle in the Miller Cornfield. The game will be conducted using the large 54mm toy soldier figures that I painted over the past year for my Pickett's Charge game.
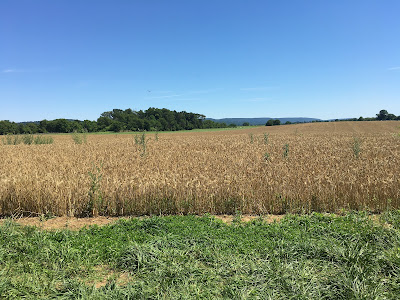

The Miller Cornfield at Antietam in June.

The Confederate Texas Brigade counter-attacks through the Miller Cornfield
Figures from my former 28mm ACW set of armies.
.


Miller's Wheatfield? 54mm figures.


Here are a pair of links to Bill's YouTube battle of Antietam, Parts 1 and 2

Antietam Part 1

Bill's War Game World


Confederate artillery battery fires at Union troops in the Cornfield.
54mm Britains Deetail figures


Confederate artillery at Antietam, also known as "Artillery Hell".
Britain's Ltd. 1/32 scale soldiers

Antietam is a huge battle, but it can easily be broken down into a series of individual corps actions over the course of the day:

(1) Hooker's opening attack through the Miller Cornfield

(2) Mansfield's XII Corps supporting attack for Hooker's attack 

(3) Sumner's Union II Corps attack

(4) Union VI Corps attack by Sedgewick 

(5) French & Richardson's attack on the Sunken Lane

(6) Burnside's IX Corps attack across "the bridge"

(7) Arrival of A.P. Hill's division saves the day

Each of these phases of the battle could be developed into a fun and interesting scenario that reduces the scope and the number of wargame figures that one would need rather than trying to fight the whole, larger battle.


I decided to gin up a scenario for Hooker's Attack In The Cornfield suitable for my 54mm ACW figures. The Union attack by Hooker's I Corps is one of the iconic pieces of fighting in the Civil War and appears to be evenly matched so that either side, Union or Confederate, could win the game. Presenting the game at the regimental level would be a huge undertaking in the number of troops that would be needed and, more importantly, would require more table space than I have in my basement wargaming room.

So I decided that one of my 30-figure regiments would stand in for one brigade of soldiers. With approximately 3 brigades per division in Hooker's I Corps, and 3 divisions, I would need 9 of my painted "regiments" to represent the Union side.

The Confederate side is a little more difficult to understand because brigades were scattered all over Stonewall Jackson's battle line, rather than finding all of the brigades in a Confederate division deployed in an orderly side by side formation. 

Here is the order of battle for the Confederate forces on the left wing of the army, commanded by Stonewall Jackson. Some of the original brigade commanders have been replaced either from becoming a casualty during the fight, or in the cases of J.R. Jones (for Jackson) and Lawton (for Ewell), elevated to division command. Ewell was back in Richmond, VA recovering from his leg amputation suffered at the Battle of Groveton while Lawton was elevated to replace Stonewall Jackson when the latter moved up to wing command. Note: each battery of artillery will be represented by one cannon model with crew.

Stonewall Jackson's Left Wing Command

Jackson's Division (J. R. Jones commanding)

Jones's Brigade (Grigsby commanding)

Starke's Brigade

Taliferro's Brigade (J. Jackson commanding)

Jones' Brigade (Penn commanding)

Division Artillery (6 batteries)

Ewell's Division (Lawton commanding)

Early's Brigade

Hays' Brigade

Lawton's Brigade (Douglass commanding)

Trimble's Brigade (James Walker commanding)

Division Artillery (6 batteries)

Reinforcements - Hood's Brigade

Wofford's Texas Brigade

Law's Brigade

Ripley's Brigade (from D.H. Hill's division)

Thus Stonewall Jackson's command begins the game with 8 brigades of infantry and 12 batteries of artillery, represented by 12 cannon models. You could make the arrival of Hood's two brigades and the detachment of Ripley's brigade from D.H. Hill's division to Jackson's command optional.

*********************************************************

Hooker's Union I Corps

Hatch's Division (Doubleday commanding)

Hoffmans' Brigade (replacing Doubleday)

Gibbon's Iron Brigade

Patrick's Brigade

Phelps' Brigade

Division Artillery (4 batteries)

Rickett's Division

Duryee's Brigade

Christian's Brigade (Lyle commanding)

Hartsuff's Brigade

Division Artillery (2 batteries)

Meade's Division

Seymour's Brigade

Magilton's Brigade

Gallagher's Brigade (Anderson commanding)

Division Artillery ( 3 batteries)

So Hooker's I Corps will have 10 brigades of infantry, each represented by one of my "regiments" of painted figures. There will be 9 cannon models, each representing one battery in the I Corps.

The Game Table and Battle Map

I based my scenario and game table map using the map that I found on Wikipedia, which I believe uses the map created by The American Battlefield Trust. I hope that I got the citation correct. I enlarged this map as much as I needed on my desktop computer and put a piece of light see-through tracing paper over the screen. Then I traced the terrain features onto the paper and used the drawing to create my game table map.


Here is a crude map of the Cornfield terrain features that I will transform into a table top map. The Union I Corps attack will  deploy in the north at the top of the map and attack south towards the "V-shaped" intersection of the Hagerstown Pike (running north to south) and the Smoketown Road (running diagonally from NE to SW). Where the two roads meet lies the iconic Dunker Church which was a landmark that became the focus of both armies during the battle.

Map depicting the terrain for my table top layout.

Other terrain features are the North Woods at the top of the map; the East Woods at the right side of the map; the West Woods on the lower center left part of the map. The Miller Cornfield is in the center of the map surrounded by the North, East and West Woods.

Here are two photos of the Dunker Church, one taken just after the battle and the a more contemporary image.


Contemporary photo of the Dunker Church after the battle. Confederate casualties are shown.
Union forces wouldhave attacked from the right and moving to the left in this picture. You can
just barely make out the position of the Hagerstown Pike by the location of the fences.

The Dunker Church at Antietam National Military Park
Sharpsburg, Maryland. Photo: NPS
The Hagerstown Pike is in the foreground.

Brigade Deployments

Brigade deployments are shown in the map below. Union brigades are in blue and Confederate brigades are in red.


I haven't finalized the map of my game table layout, but I would imagine that on the lefthand side, I will not have Nicodemus Heights on the table. The righthand table edge will probably be at the eastern edge of the East Woods. My game table is 6ft wide by 15ft long and I can, and probably will, use a parallel table measuring 5ft wide by 12ft long so that I can have more table width. The Hagerstown Pike will probably mark the edge of both tables with the aisle running in between along that road. And then imagine that the map will tilt or rotate several degrees to the right. Of the two game tables, the smaller 5ft by 12ft table will be on the left side of the maps above and the larger 6ft by 15ft table will be on the righthand side.

Here is the math with respect to the width of the tables:

Each regiment of mine is 15 to 18 inches in frontage. I don't have the exact measurements in front of me because the figures are packed away into their storage containers at the present. But my recollection from my Pickett's Charge set up was that a brigade of two regiments in the front and one supporting regiment in a second line took up approximately 36 inches of space. 

Another table layout to consider is to play the game out on the horizontal axis. A 15ft wide by 6ft deep front table could encompass the entire Miller Cornfield and the East Woods. The back table would have most of the West Woods, the Dunker Church and the intersection of the Hagerstown Pike and the Smoketown Road. I find myself leaning towards this option because (1) I can place the entire frontage of Hooker's attack on one table and (2) the fighting in the West Woods and the Dunker Church are really not the focus of my game.

Comments on deployment, below, relate to the table option of playing the game on the vertical axis with two parallel game tables.

Union Deployment
In my Antietam game the brigade will now be represented by just one of my painted regiments and three regiments will now represent the three brigades of one division. So Doubleday's Union division, comprised ob Gibbon and Phelps' brigade in the front, supported by Patrick's brigade in the second line, will take up a frontage of approximately 36 inches or 3 feet. This includes a little bit of spacing between units so that the brigades are not lined up end to end in a perfect linear formation with no maneuvering space. Next to Doubleday, we have Rickett's Division comprised of the brigades of Duryee, Hartsuff and Christian. Meade's third division has the brigades of Magilton, Anderson and Seymour and it would be lined up behind Doubleday's and Ricketts' divisions on the tabletop. Thus a two division frontage takes up 6ft, which is the width of my primary game table.

Now I am going to make a slight change to the Union order of battle that will facilitate the play of the game. You will note that one of Meade's 3rd Division brigades, Seymour, is located far away from the rest of the division as it is deployed in the East Woods whereas the other two brigades are positioned in the North Woods at the start of the battle. At the same time, one of Meade's other brigades, Magilton, managed to slide its way into the front line of the ICorps' attack. So I am going to give Rickett's 2nd Division the brigades of Magilton, Duryee and Seymour and Meade's 3rd Division will now own Anderson, Hartsuff and Christian. This places brigades under a command closer together and thus easier to manage during the game.

Just kind of eyeballing things, Doubleday's 1st Division on the right of the I Corps line will have Gibbon's brigade and Patrick's supporting brigade deployed on the smaller 5ft by 12ft table on the left table. Phelps' brigade will be on the larger 6ft by 15ft right table, just above the Cornfield. Rickett's Division will see  Duryee lined up north of the Cornfield, with Magilton's brigade behind him; while Seymour's brigade will start in the East Woods. 

Thus the larger righthand table will have Phelps, Duryee and Seymour in the front line and taking up a frontage of 54 inches out of a total of 72 inches of table width. This should allow room for Union artillery to deploy and give the infantry some space to maneuver on the table. Magilton will line up behind Duryee. Meade's three brigades will form a third battle line behind Magilton.

On the smaller lefthand table we will deploy Gibbon's Iron Brigade on the front line with Patrick's brigade deployed behind him. This table has 60 inches of width with only one brigade in the front occupying 18 inches of space. This provides a lot of maneuvering area for Patrick to move forward and line up to the right of Gibbon and present a two brigade frontage on the smaller table.

So far it looks like we will have plenty of table space for the opening attack on the Cornfield. Of course, the Confederates have a say in all of this too.

Confederate Deployment

The Confederates will have three player commands in the game consisting of Jones' Division on the left and Ewell's (Lawton) Division on the right, with Hood's Division in reserve. As with Hooker's Union I Corps, I need to make some adjustments to the CSA order of battle to keep proximity of brigades in a division. The main problem is that Lawton's Division has Early's brigade is deployed on the far left while the rest of Lawton's Division is deployed on the center and right of the table. So I will add Early's brigade to Jones' Division (deployed on the left table) and transfer Starke's brigade to Lawton's Division. Thus the CSA has two division commands on the front line with a third division command under Hood in the rear. Since Hood only has two brigades (Wofford and Law) I will add Ripley's brigade to Hood's division.

Conclusions and Summary

I am looking forward to setting up my game tables and giving this scenario a go. I will use my 54mm ACW armies and employ the set of rules that I used in my Pickett's Charge war game at Historicon. I have never set up a game where a regiment/battalion takes the place of a brigade so I am keen on seeing how this mechanism works out.


ccc