


 |
| Antietam diorama in 1/72 scale. This is an amazing piece of work and regrettably I can not recall the name of the individual's work so that I can give him credit. |
I have been watching Bill Molyneaux's Battle of Antietam wargame on YouTube in recent days and it has gotten me interested in developing my own scenario for the opening battle in the Miller Cornfield. The game will be conducted using the large 54mm toy soldier figures that I painted over the past year for my Pickett's Charge game.
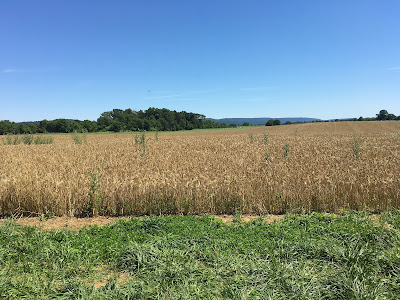 |
| The Miller Cornfield at Antietam in June. |
 |
| The Confederate Texas Brigade counter-attacks through the Miller Cornfield Figures from my former 28mm ACW set of armies. |
 |
| Miller's Wheatfield? 54mm figures. |
Here are a pair of links to Bill's YouTube battle of Antietam, Parts 1 and 2
 |
| Confederate artillery battery fires at Union troops in the Cornfield. 54mm Britains Deetail figures |
 |
| Confederate artillery at Antietam, also known as "Artillery Hell". Britain's Ltd. 1/32 scale soldiers |
Antietam is a huge battle, but it can easily be broken down into a series of individual corps actions over the course of the day:
(1) Hooker's opening attack through the Miller Cornfield
(2) Mansfield's XII Corps supporting attack for Hooker's attack
(3) Sumner's Union II Corps attack
(4) Union VI Corps attack by Sedgewick
(5) French & Richardson's attack on the Sunken Lane
(6) Burnside's IX Corps attack across "the bridge"
(7) Arrival of A.P. Hill's division saves the day
Each of these phases of the battle could be developed into a fun and interesting scenario that reduces the scope and the number of wargame figures that one would need rather than trying to fight the whole, larger battle.
I decided to gin up a scenario for Hooker's Attack In The Cornfield suitable for my 54mm ACW figures. The Union attack by Hooker's I Corps is one of the iconic pieces of fighting in the Civil War and appears to be evenly matched so that either side, Union or Confederate, could win the game. Presenting the game at the regimental level would be a huge undertaking in the number of troops that would be needed and, more importantly, would require more table space than I have in my basement wargaming room.
So I decided that one of my 30-figure regiments would stand in for one brigade of soldiers. With approximately 3 brigades per division in Hooker's I Corps, and 3 divisions, I would need 9 of my painted "regiments" to represent the Union side.
The Confederate side is a little more difficult to understand because brigades were scattered all over Stonewall Jackson's battle line, rather than finding all of the brigades in a Confederate division deployed in an orderly side by side formation.
Here is the order of battle for the Confederate forces on the left wing of the army, commanded by Stonewall Jackson. Some of the original brigade commanders have been replaced either from becoming a casualty during the fight, or in the cases of J.R. Jones (for Jackson) and Lawton (for Ewell), elevated to division command. Ewell was back in Richmond, VA recovering from his leg amputation suffered at the Battle of Groveton while Lawton was elevated to replace Stonewall Jackson when the latter moved up to wing command. Note: each battery of artillery will be represented by one cannon model with crew.
Stonewall Jackson's Left Wing Command
Jackson's Division (J. R. Jones commanding)
Jones's Brigade (Grigsby commanding)
Starke's Brigade
Taliferro's Brigade (J. Jackson commanding)
Jones' Brigade (Penn commanding)
Division Artillery (6 batteries)
Ewell's Division (Lawton commanding)
Early's Brigade
Hays' Brigade
Lawton's Brigade (Douglass commanding)
Trimble's Brigade (James Walker commanding)
Division Artillery (6 batteries)
Reinforcements - Hood's Brigade
Wofford's Texas Brigade
Law's Brigade
Ripley's Brigade (from D.H. Hill's division)
Thus Stonewall Jackson's command begins the game with 8 brigades of infantry and 12 batteries of artillery, represented by 12 cannon models. You could make the arrival of Hood's two brigades and the detachment of Ripley's brigade from D.H. Hill's division to Jackson's command optional.
*********************************************************
Hooker's Union I Corps
Hatch's Division (Doubleday commanding)
Hoffmans' Brigade (replacing Doubleday)
Gibbon's Iron Brigade
Patrick's Brigade
Phelps' Brigade
Division Artillery (4 batteries)
Rickett's Division
Duryee's Brigade
Christian's Brigade (Lyle commanding)
Hartsuff's Brigade
Division Artillery (2 batteries)
Meade's Division
Seymour's Brigade
Magilton's Brigade
Gallagher's Brigade (Anderson commanding)
Division Artillery ( 3 batteries)
So Hooker's I Corps will have 10 brigades of infantry, each represented by one of my "regiments" of painted figures. There will be 9 cannon models, each representing one battery in the I Corps.
The Game Table and Battle Map
I based my scenario and game table map using the map that I found on Wikipedia, which I believe uses the map created by The American Battlefield Trust. I hope that I got the citation correct. I enlarged this map as much as I needed on my desktop computer and put a piece of light see-through tracing paper over the screen. Then I traced the terrain features onto the paper and used the drawing to create my game table map.

Here is a crude map of the Cornfield terrain features that I will transform into a table top map. The Union I Corps attack will deploy in the north at the top of the map and attack south towards the "V-shaped" intersection of the Hagerstown Pike (running north to south) and the Smoketown Road (running diagonally from NE to SW). Where the two roads meet lies the iconic Dunker Church which was a landmark that became the focus of both armies during the battle.
 |
| Map depicting the terrain for my table top layout. |
 |
| Contemporary photo of the Dunker Church after the battle. Confederate casualties are shown. Union forces wouldhave attacked from the right and moving to the left in this picture. You can just barely make out the position of the Hagerstown Pike by the location of the fences. |
 |
| The Dunker Church at Antietam National Military Park Sharpsburg, Maryland. Photo: NPS The Hagerstown Pike is in the foreground. |
Brigade Deployments
Brigade deployments are shown in the map below. Union brigades are in blue and Confederate brigades are in red.

I am looking forward to setting up my game tables and giving this scenario a go. I will use my 54mm ACW armies and employ the set of rules that I used in my Pickett's Charge war game at Historicon. I have never set up a game where a regiment/battalion takes the place of a brigade so I am keen on seeing how this mechanism works out.
ccc

That was a very interesting accountant nt of the scenario design process, I'm glad someone else still uses tracing paper! Using Regiments as Brigades (or Divisions!) is time honoured tradition and it generally works very well. I'm quite flexible with unit scales, as it is often the only way to fight historical battles in a sensible amount of time and space.
ReplyDeleteI, and no doubt a long line of others, look forward to seeing this one Jim. Making a brigade-level game with your larger figures/regiments makes perfect sense and will look fabulous.
ReplyDeleteRegards, James