Wednesday, June 23, 2021

Fredericksburg Is A Hard Road To Travel


This was Lelia and I after sitting in traffic somewhere in Northern Virginia.
(Day of the Dead candles from a Mexican restaurant in Shepardstown, WV)

Last evening my daughter Lelia and I returned home from a week long visit to Civil War battlefields in the Eastern United States. It was a great way to have some father-daughter time together. It was even more joyful to see how Lelia looked at things for the very first time, such as the Gettysburg battlefield or the nation's capital building and mall. She had never been to Washington DC before.

Along the way there were many moments of fun, but also a few moments of terror, desperation and frustration. The terror consisted of driving through the mountains of Pennsylvania, along the Pennsylvania Turnpike, in a blinding rain storm with limited visibility. The desperation was fighting our way through the horrible traffic around WDC and Fredericksburg. If I never see Fredericksburg again, I'm good. Drivers in Northern Virginia seem to take great delight in such things as forcing you off of the road in a lane merger or speeding up to prevent you from changing lanes.

The frustration was sitting at a two hour dead stop somewhere in the middle of Ohio, waiting for a vehicle accident to be cleared away. Frustration was also symobolized by the idiotic GPS system that kept sending us back to Jumonville Glen over and over and over and over again. Sheesh! At one point the GPS tried to steer us onto I95 heading north from Fredericksburg towards WDC on a late Sunday afternoon. I knew enough not to get into that one, but I still got stuck in a 45 minute wait to travel the one mile needed to get onto US17 and freedom.

Flippin' Jumonville Glen

We made it a two day drive from Chicago to Gettysburg, stopping near Cleveland, Ohio at the end of the first day. One the second day, I thought that it would be a good idea to visit Fort Necessity and Fort Ligonier for a couple of side trips along the road to Gettysburg. 

I should mention that my car has its own GPS navigation system that works just fine, but it has a feature called Apple Car Play that allows the evil Siri to take over the navigation system and inflict her own sense of macabre evil on us unsuspecting travelers. Once Siri and Google Maps takes over, it is seemingly impossible to turn it off and get back into the onboard vehicle GPS system. It might work out OK other than the fact that Siri decided, quite frequently, that "something is wrong, please try again". After hearing this for the umpteenth time, I very nearly chucked my iPhone out the window.

So the first indication of trouble came when I decided to get off of the Penn Turnpike and visit Fort Necessity. The national park has built a reproduction of George Washington's ramshackle fort and has a good visitors' center. I thought that this would serve Lelia as a good introduction to the French and Indian War. Apparently, Jumonville Glen is a part of the Fort Necessity National Battlefield Park and no amount of coaxing or persuasion could compel Siri to give us directions to Fort Necessity. We kept going around and around and ending back at Jumonville Glen. OK JG, I'm done with you (as Joe Pesci might say).

Lelia and I after waiting all afternoon to get proper directions to Fort Necessity.


Finally I decided that enough is enough and gave up on finding Fort Necessity and move on to Fort Ligonier. Guess what? We had wasted so much time trying to find the former that the latter would be closed by the time we got there (at 3PM according to my iPhone). As it turned out, the actual closing time of Fort Ligonier was 5PM and we could have made it with time to spare.

I didn't need Siri to find my way back to the Pennsylvania Turnpike so there we went and had fun driving through all of the tunnels. The next mission was to exit the turnpike at the road to Chambersburg and then on to Gettysburg, where we would spend two nights and three days. I made the right exit, but the evil Siri (Siri, I hate you) told me to take a left turn off of the turnpike rather than a right turn. My sense of direction told me that I should make a right turn, but then I hadn't yet become wise to the teasing and taunting ways of Siri.

So against my better judgement, I took the left turn instructions, and after several miles on some small country road, the GPS directed me to turn into a residential neighborhood and make all manner of twists and turns. Ultimately Siri sent me back to the Pennsylvania Turnpike. Well I might not be the sharpest knife in the drawer, but even I could figure out that it was time to implement the George Costanza Method of GPS Travel. If Siri told me to go in one direction, I would go in the opposite direction. If she told me to make a left hand turn, I would continue to go straight on down the road.

My sense of direction got us to Chambersburg with relative ease now that I was no longer listening to Siri. Chambersburg is a larger city than I remember and I kept thinking that it was about time that we reached the intersection with US30, which runs directly into Gettysburg as the Chambersburg Pike. Lelia was sure that I had no idea of what I was doing, but I held my ground and told her that I was driving south no matter what because eventually the road had to intersect with US30, and it did. The lesson here is to follow your instincts and your familiarity with the history of the battlefield. Siri is not your friend.


We finally crested one of the ridges to the west of Gettysburg and this is what we saw:

McPherson's Ridge and Barn. The ground of the first day's battle of Gettysburg.

Hall's Maine Battery and the equestrian stature of General Reynolds.


The statue of Sam Elliott, erm, I mean John Buford


The Chambersburg Pike at McPherson's Ridge.
It was the best damn ground that I've seen all day.

Seeing McPherson's Ridge at last, I turned to Lelia and said, "this is good ground to fight." She replied, "it's the best damn ground that I've seen all day."

Oh, I forgot to mention why Fredericksburg is such a pain in the neck to drive through. We were doing the Four Battlefields In One Day Tour (Fredericksburg, Chancellorsville, The Wilderness and Spotsylvania Courthouse) and at the end of the day I decided to retrace my steps and return to Warrenton (where we were staying) via US17. 

Bad move Bonzo.

Had I looked at a map, I would have driven west on the Orange Turnpike to Culpepper and then jogged north into Warrenton, probably an easy 30-minute drive. We would have passed through Brandy Station along the way too. Not only was it more distance to go back to F-Town to pick up US17, but we also got stuck in a traffic jam trying to cross the Rapahanock Bridge. A simple one mile distance took us 45 minutes to traverse.

Still, we had a lot of fun and that's what it is all about. I will post four or five more posts about our trip so that I can devote individual posts to our visits to the respective battle field sites.


Wednesday, June 16, 2021

The Freeman's Farm Table Top Is Set And Ready To Go


Battle of Freeman's Farm table top. Two British commands enter the table in the center.
Morgan's riflemen await in the woods.

Click on all pictures to enlarge.

After quite a few adjustments to my Freeman's Farm table top terrain, I have finally settled on what looks right to me. This is the game that I will be hosting at the upcoming Seven Years War Association Convention on August 5th through 7th, 2021 in South Bend, Indiana.

I usually make a first pass at setting up my game terrain and lay out the troops to make sure that the terrain is playable - that is, it has sufficient room to maneuver the troops without causing traffic jams. I might find that there is not enough flank space to move the figures or there might be too many building or terrain obstacles to use in a game. Sometimes what looks good in a static display does not translate very well into a playable game. Playability is important in any wargame, but it is even more so when one is designing a game to host at a wargame convention.

One key element to consider: if you plan on having some troops arrive on the table several turns down the road, you want to make sure that the movement rates in the rules allow enough time for the troops to actually close with the enemy and have it on the table top. It does not make for a good game experience for a player. 

Another consideration is that there are enough troops to spread around for each player to game with. Freeman's Farm is a relatively small battle. For example, if there are 10 units per side it will be difficult to divide the units into four commands on one side. In this example, I would divide the troops into three commands consisting of one command with four units and two more commands of 3 units plus one cannon.

You may recall my theorem called "Jim's Rule of Fours" which states that the maximum number of combat units that a wargamer can comfortably handle is four. An experienced player can probably handle more, but if one player has six units in his command and the other players have four elements, then the game pace will slow down because the one player is moving more stuff each game turn than the other players. So I try to keep wargame player commands at no more than four combat elements. Elements are regiments of infantry, cavalry and batteries of artillery.

With all of this in mind, let's take a look at the British commands in my Freeman's Farm game.

The center of Burgoyne's army at Freeman's Farm was commanded by Brigadier General Hamilton and consisted of four British regiments: 9th, 20th, 21st and 62nd; two batteries of Royal Artillery, and some small groups of chosen men to act as sort of skirmishers to scout ahead of the brigade. 

The British left wing of the army consisted of ALL of the elite troops in Burgoyne's army: converged grenadiers and light infantry from the British regiments, converged Brunswick grenadiers and a light battalion, and various units of scouts or chosen men.

I could probably divide the entire British army into two commands for the game: Fraser's and Hamilton's brigades, but then I end up with a game that has a 12 foot long table  and only four or five players in the game (2 British and 3 American players). However, I am sure that the convention manager would not appreciate allocating a 12 foot by 6 foot table to a game that only allows for four players,

So some adjustments are necessary for this convention game.

I decided to divide Hamilton's brigade into two regiments of British infantry (larage 40 figure units) and a cannon model and a handful of light infantry scouts. That gets me to four elements for the two players that command Hamilton's brigade. 

Simon Fraser's Advance Guard has two large elite battalions of 48 figures each: British grenadiers and light infantry that were converged from their parent regiments. Both battalions are large enough to be divided into two sections of 24 figures, thus giving this player 4 elements. There were also some Indians and Canadian light troops that I could add to each command, but I am running out of space on this flank to employ all of those troops. This means that I will have to shift the terrain in the center to the British left which will create more space for Fraser's brigade on the right side of the British army.

This gives me three players on the British side, so far. There were also some Brunswick troops involved in the battle, but they were late arrivals to the battlefield and I wouldn't want to give the Brunswick command to one player, and then have that player sit around for something like six turns before he could start moving troops.  One thought is to feed some of the Brunswick regiments into the battle when the British players start losing regiments due to battle attrition. This isn't quite how Freeman's Farm was fought, but the idea makes for a more playable wargame.


Simon Fraser's advance guard of grenadiers and light infantry arrive on the table on the left flank of the British army.

A part of Hamilton's British Brigade

The other half of Hamilton's British Brigade


The American army has some similar problems with regard to breaking it up into "wargamer commands" and I will dwell on this in another blog post, shortly.

I will likely end up with six players in the game, three per side, and then feed in fresh units to players whose commands get all shot up and depleted, or rout. I might be able to stretch it out to four players per side, but this would be difficult to pull off and still give each player 3 to 4 command elements.


What do you think? Comments are appreciated.S

Sunday, June 13, 2021

2nd New Hampshire Regiment At Saratoga


The 2nd New Hampshire Regiment at Freeman's Farm.
Fife and Drum Miniatures.

Click on all pictures to enlarge.

The Saratoga Project continues to advance at a rapid pace with new units being added at a pace of one week for each new regiment of figures. The British and Brunswick contingents are largely completed and so I am now pointing my brushes towards the American side. This past week I finished the 30-figure 2nd New Hampshire regiment.


The 2nd NH Regiment in a more bosky setting surronded by trees.

Close up view of the regiment. Click the picture to enlarge the view. Look closer at the second stand from the left and notice that in the front rank the officer, drummer, and soldier in the "at the ready" position have all had head conversions to give them round hats instead of tricorn hats.

On the third stand from the left, in the second rank, the figure with the ram rod is a head conversion. The gentleman in the red waistcoat is from the Armed Civilian pack. In the front row, the soldier biting the cartridge is a conversion of one of the British light infantry figures.

Some of the other figures in the regiment include those from the American Militia CA-001 pack wearing round hats; British Guards skirmishers wearing round hats with feather. I wanted approximately half of the regiment to wear round hats.

2nd NH Regiment standing in front of a Grand Manner log cabin and a blacksmith shop scratch built by Ed Phillips.

The 2nd New Hampshire Regiment is missing its colors, which will be supplied by GMB Designs (the best looking flags bar none - of other commercial or professionally-painted flags). The regiment actually lost its colors earlier in the Saratoga Campaign when they were captured by the British at Fort Ticondaroga in 1777.


Here are some pictures of the colors carried by the 2nd New Hampshire during the 1777 campaign season. Thanks to Bill Nevins and Ken Marshall for creating these flag images. Please feel free to download and use these flags on your regiments.


I have been on a head swap frenzy these past several weeks. I wanted to have more round hats in my Continental regiments because this style of headgear was commonly used. I liked how they look so much that I will be adding Continentals in Round Hats to the Fife and Drum Miniatures range in the near future, avialable in both regular uniform coats and hunting shirts. Stay tuned to my blog for more information about these new figurs.

Next on the painting table: the 1st New Hampshire Regiment in dark green coats and overalls, with red waistcoats and facings. They are a rather smart looking regiment.


Tuesday, June 8, 2021

Another Head Conversion


The officer from the CA-002 Armed Civilians pack gets a new chapeau.

Click the pictures to enlarge.

I needed one more officer for the 2nd New Hampshire regiment that I am painting for my Freeman's Farm game at this year's Seven Years War Association convention on August 5th through 7th in South Bend, Indiana.


Side view of the converted figure.

The officer holding a pistol, from the Armed Civilian pack, looked like a good candidate for a easy head swap. When the head is sort of out there by itself, with no weapons or hat or pole arms to complicate things, then it is very easy to do a head swap.

As stated in the previous post, I used an Exacto fine tooth mitre saw to do the surgery and a small pin vise to drill holes in the torso and the new head. A pin was cut from a piece of wire and inserted into the torso, adding a small snake of green putty around the pin to secure the join and to make a neck if needed. Any excess putty is scraped off and then Bob's your uncle, you are finished.

The 2nd NH regiment is completed, save for the terraining of the base and the addition of a GMB Designs flag. The flag is on order so the regiment will have to operate without its flag for awhile. My recollection is that they lost their flag at Fort Ticonderoga when the British captured the fort (and some flags).

Friday, June 4, 2021

Heads Will Roll - Converting Figures


Fife and Drum Miniatures Continentals have shed their tricorn hats and taken up round hats.

CLICK ON ALL PICTURES TO ENLARGE

I spent part of the week converting some of my Fife and Drum AWI Continentals by swapping out cocked hats for round hats. The Fife and Drum figure range currently does not have Continentals wearing round hats, noting that such head gear was commonly used during the American Revolution.

I resolved to address this short fall by converting my own figures. This involved lopping off the tricorn/cocked hats of the Continentals, lopping round hats off of some of the civilian and British figures, and then swapping heads on the figures.

I cut off the heads using a fine-tooth Exacto small mitre saw. This gives a nice clean cut of the head from the torso. By this I mean that once the head is removed, the torso has a nice flat surface on the neck line. This means that one doesn't have to file the torso flat.

The next step is to drill a hole in the torso and another in the head that you want to attach to the torso. I use a "pin vise" which is nothing more than a hand drill with tiny drill bits - perfect for working with miniatures. Before drilling, I take a sharp Exacto blade and create a dimple in the metal to serve as a guide for the drill bit. The drill easily cuts through the metal and creates a nice hole into which I will put a pin that I make by cutting off a tiny piece of metal from a piece of wire.

I put the pin in the torso, making sure that it is not sticking up too high - we don't want a figure to have a long neck. I test the head join by placing it atop the pin that is in the torso and make sure that the join will work. Once satisfied that the head will sit "just right" on the torso, I put a tiny ball of green epoxy putty into the torso hold, add a small drop of glue, and then push the pin into the hole. If I need to build up the neck on the figure, I will roll out a length of putty and wrap it around the pin.

Now it is time to join the head to the torso using the same method of attaching the pin to the torso: a small ball of putty goes into the hole under the head, add a drop of glue, and then place the head on the pin on the torso. You have about a minute to work the head into position before the glue sets. You might want the figure to be looking off to the side rather than the conventional straight ahead position.

The six figure conversions that I made.

Comparison of the original figure (left) and the converted figure (right): drummer, officer with pole arm, and ram rod.

(Left to Right) Cocking musket, at the read, and standing firing.

The first couple of attempts were a bit dodgy, but after doing several head swaps I had figured out how to do them in an acceptable manner. I might do some conversions with the master figures and add them to the Fife and Drum Miniatures range. What do you think?


Monday, May 31, 2021

In Memorium


Private John Purky


My father's older brother, John Purky, fought in WW2 and was killed in action January 16, 1945 while serving with the Sixth Infantry Division on Luzon, in the Philippines.

He received the Purple Heart and the Silver Star, the hard way; his citation is shown below


The citation states that Uncle John volunteered to lay communication wire to an adjoining battalion over 2,000 yards of terrain. I think that he was in the Signal Corps, as some of his personal pictures show a Wire Team Section and a Radio Section. He died from enemy fire while carrying out his volunteer mission.

Here are some images of the two medals. I have had these stored away in the family archives vault and forgot that we had them.


Silver Star (left) and Purple Heart (right).

Obviously I never met my Uncle John since I was born in 1952. He was quite the musician, having learned how to play the trumpet, saxaphone and the clarinet and some of his letters to my grandmother talk about him getting together and jam with some guys from another section. He sounds like he was quite a guy and I am sorry that I never got to meet him.

Rest in Peace John Purky. You are not forgotten.

Sunday, May 30, 2021

von Breymann Brunswick Grenadier Battalion


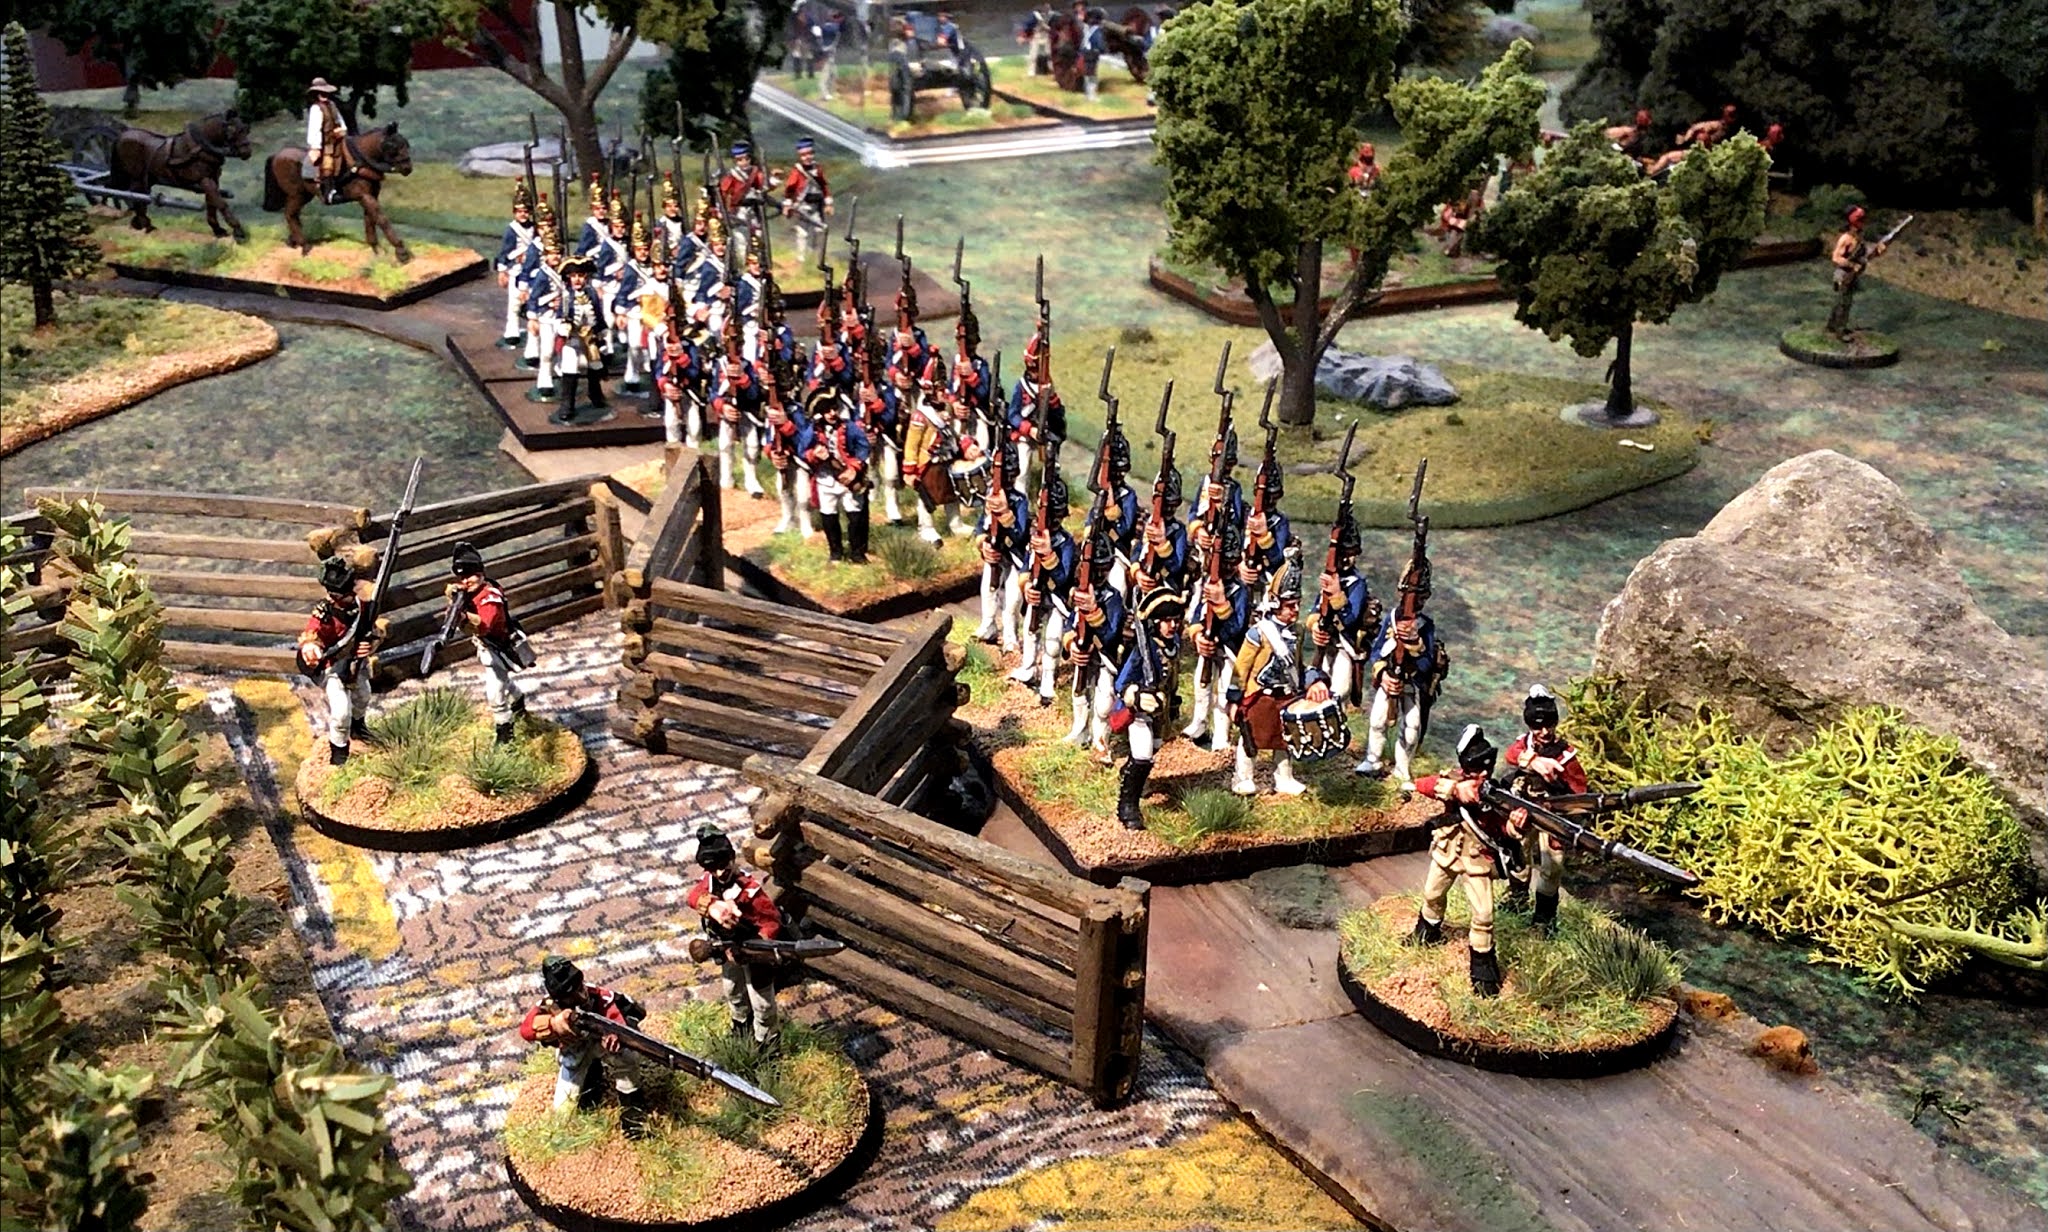
Brunswick Grenadier Battalion von Breymann on the march.
Fife and Drum Miniatures.

I have been working on the painting of the von Breymann battalion of converged Brunswickk grenadiers that fought with the British during Burgoyne's Saratoga Campaign. The battalion was comprised of the grenadier companies of the Brunswick regiments Specht, Retz, Riedesel and Prinz Friedrich. They numbered over 500 soldiers at the start of the campaign, but with normal attrition and the losses at the Battle of Bennington, their number had been reduced to about 350 men by the time of the battles of Freeman's Farm and Bemis Heights.

My plan was to paint twelve each of the four grenadier companies for a total of 48 figures. I divided the numbers into stands of six figures, so that the Specht company would have two stands of six figures and the same set up for the rest of the grenadier companies. This allowed me to work on 12 figures at a time on the painting table, which seems to make the task go faster because you feel like you are done after finishing twelve figurs.


The von Specht Grenadiers


As of today, I have painted three of the grenadier companies: Specht, Retz and Riedesel for a total of 36 figures. I may leave it at that and have them fight at their reduced strength at Freeman's Farm, etc. I used the Fife and Drum Miniatures Hessian grenadier figures for my Brunswickers. This involved a minor bit of conversion work consisting largely of filing off the top of the gaiters and removing most of the gaiter buttons with a flat file. Since the figure pose used covered the lapels of the coat, I did not have to remove buttons on the lapels - Brunswick coats only had four buttons on the lapels.


Three grenadier companies on the march, protected by British flank company men.
Fife and Drum Miniatures.

It takes a bit of time to file down the gaiters on the Hessians in order to make them Brunswickers, but I think that the effort paid off when one looks at the results in these pictures.