Tuesday, May 20, 2014

Minden SYW Austrians


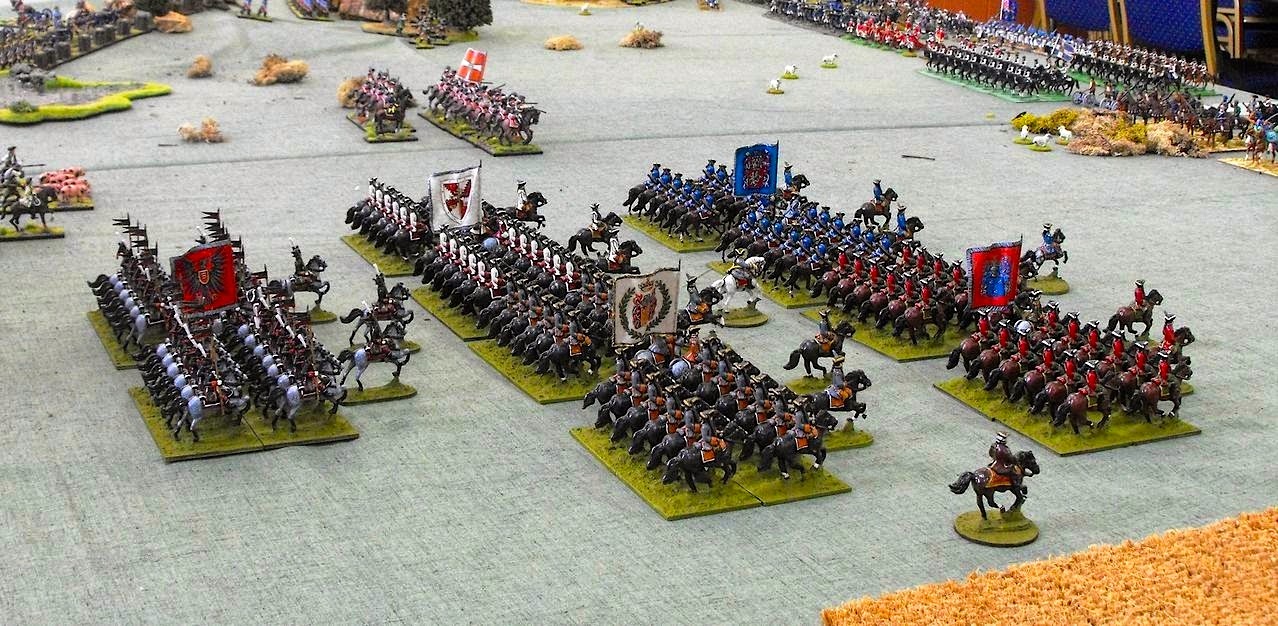
Austrian cuirassiers (left) and Prussian CR1 cuirassiers (right) close into melee. Click pix to enlarge.

I thought that it was about time to show some pictures of the "Other Guys" in the white coats, who serve for She Whose Name Cannot Be Mentioned on this blog.
Charles of Lorrain (leaning over), Hadik (in hussar mufti next to Charles) and von Loudan (in the front next to the grenadiers) as painted by Leuthen Studios.

Charles of Lorraine (center) discusses tactics with his staff. A lot of good that will do him, but at least he is giving it a try. Von Loudan is in the back right waiting for history to tap him on the shoulder.
Austrian artillery battery with a pair of 6-pounders in the right foreground and a pair of 12-pounders in the left background. Minden artillery crew, Berliner Zinfiguren cannon and limbers, RSM limber horses and riders. Von Loudan, in the background, supervises the battery while a battalion of Hungarian grenadiers provides support.
Same battery, but viewed from the rear.


Thursday, May 15, 2014

Minden & Fife & Drum Shipping Procedures

I want to bring everyone up to date on my shipping and payment procedures for Minden Miniatures and Fife & Drum orders, as I occasionally get some anxious emails from a few new customers.

1) I receive your order via email.

2) within a couple of days, I will pick your order, pack it and send you a Paypal invoice only when I am ready to ship your order. I don't want to collect your money until the order is ready to ship.

3) your receipt of a Paypal invoice is your acknowledgement that I have received your order.

4) usually, I can only go to the post office on Saturday to mail your package, as I have a full time job during weekday business hours and can't go to the post office.

5) once I have received your payment, I will then mail your package.

6) orders shipped outside the USA usually arrive within 5 to 10 business days, but sometimes it takes 3-4 weeks, not often, but sometime.

7) if your order has not arrived within 4 weeks, then I will send you a replacement order for free and with no extra charge for postage.

8) it is important that you provide me with your shipping address so,that I,can mail your package. I would estimate that close to 50% of orders do not include the shipping address. Paypal provides me with the address that they have on record for you, but sometimes Paypal has the wrong address, so please, please, please include your shipping address with each order.

9) sometimes I make a mistake and provide the wrong number of figures, I.e you got two drummers and one NCO when in fact you ordered the opposite. In that case, I will ship the replacement figures for free and you can keep any extra figures as a result.

10) all international orders ship at a flat rate of $10 per package. 


I hope that this clarifies my shipping and payment procedures.  Let me know if you have any questions and I will do my best to address your concerns. 


Jim

Wednesday, May 7, 2014

The Annual Ayton Conclave - 2014

A swarm of Spencer Smith cavalry advance across the battlefield. Don't these figures look wonderful? (photo taken by Iain Burt)
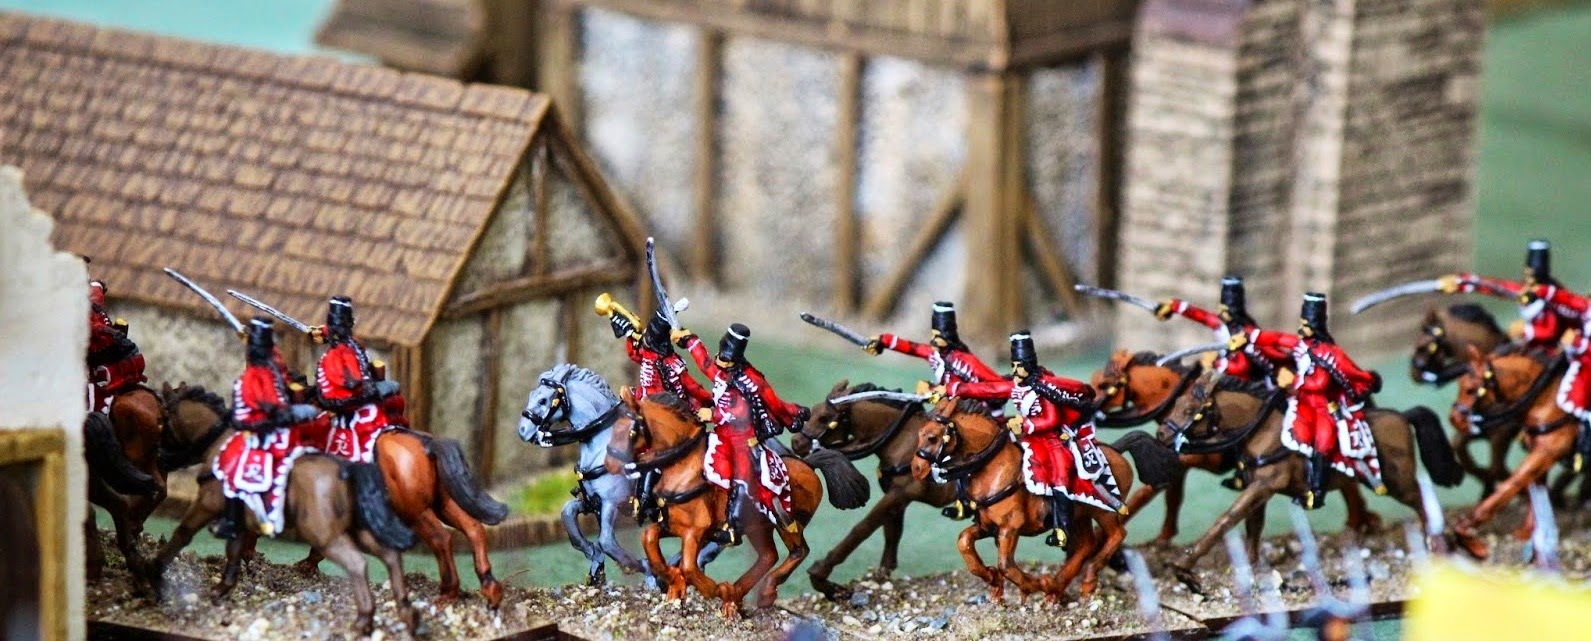
Prussian style hussars from Minden Miniatures at last weekend's Ayton 2014 game in Yorkshire. (picture taken by Mike Whitaker).
  (click on all pictures to enlarge)


Last weekend (May 2nd and 3rd) there was the annual meeting of the Loose Association of Wargamers in Ayton in Yorkshire to play another in the series of Imaginations games. Henry Hyde, editor of Miniature Wargames, created the scenario, set in the 18th Century, and a dozen or so gamers brought their own fictional armies to cross swords, or is it dice, on the table top. Noted wargamer and bon vivant, Peeler, organized the logistical side of things by once again securing the public hall in Ayton for the game, helping people make hotel reservations, and personally seeing to it that the local public house was well stocked with beverages.

As usual, the two fictional countries (or are they?) of Grenouisse and Grandprix were at odds with one another as they vied for treasure and bragging rights over the weekend. The wargame was set in the 18th Century and featured 28mm figures from virtually every manufacturer in the Tricorn Figure Space: Spencer Smiths by the hundreds, Wargame Factory WSS plastics, Old Glory, Foundry, Perry, RSM, Front Rank, Minden Miniatures and Fife & Drum Miniatures, and I'm sure that there were many brands that I have not mentioned. The point is, each person can paint whatever he feels like painting and he shows up at the game with "what he brung" (sic).

The first pictures from the event were posted by Mike Whitaker on his Trouble At The Mill blog - click on the link below:


If you click on the link to Henry Hyde's massive picture file, you will get a real appreciation of how big this game was. The link to Henry's blog provides more of the story including some You Tube videos of the weekend that really provide a nice flavor of how the weekend games played out. By Henry's count:

Grenouisse: 1,768 infantry & cavalry + 45 guns + 8 fortress gund

Grandprix: 2,032 infantry & cavalry + 60 guns.

Henry's Wargame Blog

Henry's Ayton Picture File

Now I don't want to leave you with the impression that this is all Henry's production because many hands were involved in the weekend production. However, Henry's blog seems to be the most convenient repository of pictures, videos and information about the weekend.

If you can, look at the You Tube videos for a few moments and what you will come away with is a picture of a lot of wargamers being polite, not caring who won or lost, and above all, simply having a grand old time of it. There is much to be said for this.

I have been watching the build up of forces over the past six months as orders for Minden figures have been flowing in from the UK with a mind towards building armies for the event. One gentleman order have a dozen amusettes, for what purpose I can only guess, while another bought about 24 Prussian standard bearers in one go. What for, I wondered. Why nothing less than a regiment of pike armed warriors, which strikes me as a very creative idea.

Ideas are already bubbling to the surface for next year's gathering in Ayton and it appears that something in the late 19th Century (1880 - 1899) is the favorite for the theme of the game.

Thursday, May 1, 2014

Book Review: Wargaming In History Volume 9

My own, well-thumbed through copy showing a little wear and tear on the corners of the dust jacket. The picture on the cover depicts the Battle of Lobositz.

I received my copy of Charles S. Grant's latest wargame book, Wargaming In History - Volume 9 (SYW),  last November (2013) and I have been remiss in not getting around to giving it a review. The book covers the first battles of the Seven Years War in 1756 and 1757 and include Lobositz, Reichenberg, Prague and Kolin, so this book dovetails nicely with Volume  4, which covers Hastenbeck, Rossbach and Leuthen. Taken together, Volumes 4 and 9 virtually cover the whole opening campaigns of the SYW.

Grant usually begins his books by giving the reader a peek into the structure and organization of his famous VFS and Grand Ducy of Lorraine armies as well as any new ideas or tweaks that he has developed for The Wargame Rules. Volume 9 starts with a discussion of rules changes covering the use and deployment of grenadiers and his new cavalry organization (the same number of figures as before, only now they are organized into two squadrons). Additional comments regarding "dead ground" and how it is handled in the rules is also discussed.

Next part, the pictorial section covering the Grant wargame armies, is usually my favorite section of the book. This time, Charles does not fail to please as he provides pictures of some new elements, such as Sappers Pompier (firemen), the artillery train and siege park (with some rather stunning pictures of the whole siege park), various support wagons and camp scenes. The reader will find a lot of useful ideas that are worth stealing, um, er, I mean, borrowing, for one's own armies.

Part III - Lobositz

The battles of Mollwitz (1741) and Lobositz (1756) are probably the signature Grant family wargame battles/scenarios, as they were the ones featured in the original version of The War Game. While I have only played Mollwitz a few times, I never get tired of playing Lobositz. The book begins with the historical background to the battle accompanied by some of  Christopher Duffy's maps, a complete order of battle for both sides of the conflict and some present day pictures of the important Lobosch Hill. From here, Grant lays out the wargame scenario for fighting Lobositz, complete with game maps so that the reader can copy the scenario to his own tabletop. Included are victory conditions for both the Austrians and the Prussians.

Finally, we get into the meat of the game with a battle report of the scenario, as played by Grant and his  daughter, Natasha (commanding the Prussians). The battle played out over the course of two days and encompassed 30 game turns before reaching resolution.  I am happy to report that Natasha led the Prussians to victory.  I count eleven color pictures of the battle in progress and the large "Wargame Rules" battalions look very splendid indeed. How could one not be inspired to try the Lobositz scenario after reading this chapter of the book.

Part IV Reichenberg

The next scenario covers the battle of Reichenberg, fought on April 21, 1757, between von Bevern's Prussian column and the Austrian general Konigsegg. As many of you probably know, Frederick invaded Bohemia in the spring of 1757, descending into the province with four separate and converging columns of the Prussian army. Their objective was to link up near Prague and fight the decisive battle of the war and hopefully end it right then and there.

This was a smaller battle than one usually finds during the SYW, with 14,000 to 16,000 soldiers per side. The battle occurred as a prelude to the battle of Prague and is one that does not get a lot of mention or coverage in either the history books or in the wargaming forum. Thus Reichenberg will be a new battle for many of the readers, which makes the book worth the purchase for this reason alone.

This time, Charles and Natasha switch roles, with Charles commanding Bevern's Prussian army and Natasha conducting a fighting retirement from the defensive position at Reichenberg. Again, I am happy to report that the Prussians won the wargame, just as they did the historical battle.


Part V - Prague

Prague is a significantly larger battle than the previous two scenarios in the book, and so Grant describes how he approached the task of boiling the battle down to a suitable action on the wargaming table. The scenario focuses on the far right flank of the Austrian army, as it shifts the facing of its battle line to counter Frederick's attempt to march around the Austrian flank. This scenario involves a lot more cavalry than either of the previous scnearios, and some of the pictures of the massed regiments of horse in hand to hand combat are truly stirring stuff. The battle follows the familiar format of presenting the historical background, the order of battle for the historical forces, a description of how Grant reduces the forces to create a "doable" tabletop game, and finally, a description of the actual wargame augmented by lots and lots of pictures. As with history, the Prussians won Prague again, but the Austrians gave a good account of themselves and it was certainly no cake walk for the Prussians.

Grant reports that his new grenadier and cavalry rules received a good work out in this game and that they produced the intended results. Dividing the cavalry regiments into smaller squadrons seemed to have the desired effect of creating more ebb and flow to the cavalry melees and so I am tempted to apply some of these ideas to my own rules and armies and see what happens.

Part VI - Kolin

I have refought Kolin on a number of occasions (at least 4 times, if I recall correctly) and the battle is a large one that includes a number of problems in its transference to the tabletop. Charles rightly focuses the scenario on the Austrian right wing, near Krechor village, rather than trying to set out the terrain for the entire frontage of the Austrian position atop several hills. Grant gives us two different Kolin scenarios: one is the larger attack on the Austrian right flank and the other is a smaller scenario that involves the fighting in and around Krechor village (called "Clearing Krechor"). The latter scenario will probably interest the majority of gamers as it is a smaller action that requires fewer miniatures to play, thus making the game a doable event for most wargamers.

Part VII - Cavalry
The next section of the book covers aspects of cavalry in the mid 18th Century augmented with 13 colour plates drawn by Bob Marrion - wonderful plates and very useful as uniform painting guides.

Part VIII - More on Cavalry & Grenadiers
In this section, Charles provides more detail about the changes in the cavalry organization that he is now using for The Wargame Rules. While the regiments still retain the 24 troopers and 4 officers organization, he now divides the regiment into four squadrons of 7 figures. He then explains how the changes affect a cavalry charge in the rules so that you can implement the changes into your own games. There are also sections regarding "the first volley" and the new organization of grenadiers in the rules. This section is also sprinkled with more pictures of Charles' grenadiers in their converged battalions.

Conclusion
Well there you have it - a rather comprehensive review and overview of Wargaming in History - volume 9. I heartily recommend adding this book to your collection if you have an interest in the Seven Years War. You get orders of battle for all four of these important battles, ideas for converting the OOBs into wargame scenarios, after action reports, and lots and lots of colour pictures of big battalions of Minden Miniatures, RSMs, some Eureka Miniatures, and probably several other brands. If you buy Volume 9, I would also recommend buying Volume 4 so that you can tack on Rossbach and Leuthen scenarios and have the whole 1757 year in wargaming.

Thursday, April 3, 2014

Cavalry Pose Ideas

Prussian Garde du Corps painted by Leuthen Studios. Minden figures.

I was having a conversation with some friends about our favorite figure poses, so the topic naturally turned to cavalry poses. The consensus seemed to be that light cavalry should be charging and waving their swords while the heavy dragoons and cuirassiers should be on trotting horses, swords shouldered, getting ready to prepare for the charge.

Warnery describes the Prussian charge thusly:

“The troopers of the front rank raise their swords to the height of their faces, the arm extended in tierce, the point against the eyes of his enemy, and the hand a little turned, that the branch or guard of the sword may cover his own; they must raise themselves a little in the stirrups, the body forward, and aim to place a thrust with the point against the man or the horse opposed to him; in a word, he must do his best, either by thrusting or cutting, to disable his enemy; thus the shock or charge is soon finished.” (Warnery E von. Remarks on Cavalry. Constable London 1997)

*************************************
The Kronoskaf SYW Project describes a similar drill for the French cavalry

Aligned, ready for the charge, cavalrymen carried their sabre to the shoulder, sword knot at the wrist. When the charge was sounded, cavalrymen set off, starting at the walk, Then a second bugle call made them pass to trot; a third at the canter. At 90 paces from the point of impact, cavalrymen pointed their sabre (arm raised at eye level, almost fully extended, wrist in tierce) with the point slightly inclined downward and they raised themselves on their stirrups, crouching forward. They passed at full gallop at 20 or 30 paces from the enemy. Finally, it was the shock.


***************************************
Also from Kronoskaf:

To conclude, here is Frederick II's conception of the cavalry charge. The young Comte de Gisors, son of the MarĂ©chal de Belle Isle, went to Silesia in September 1754, at the invitation of the King of Prussia. During one of their conversation, Frederick exposed to him his vision of a cavalry charge:
“I put my officers in front, out of the rank, because being in the rank they are simple cavalrymen and obliged to let themselves be carried away by the torrent of the squadron. I put others behind to fall on those who would like to flee. I do not let any interval between my squadrons, because squadrons separated from each others present as many flanks to the enemy. I make them charge at full gallop because fear lead poltroons froward, certain as they are, inasmuch as they stop in the middle of the charge, to be crushed by the next squadron. I want that the impetuosity of their charge forces the enemy to give way before they could melee with him…”


So am giving thought to adding a heavy cavalry pose to the Minden range, one that would have the trooper raised slightly in his stirrups, leaning forward, with his sword at eye level pointing straight ahead to simulate the final charge. This might require several additional heavy charging horse poses as well.

This would enable the collector of Minden figures to pose his cavalry either at a standing position with swords drawn, at the trot with swords shouldered, and finally at the charge with swords on point.

So, I'm wondering what everyone thinks about this idea? Are these poses that would interest you enough to buy, or do you prefer the existing (and somewhat standard) shouldered sword at the trot pose?

Please feel free to state your opinion in the comment section of this post. There is no right or wrong answer, so anything is on the table for consideration.

Tuesday, April 1, 2014

Half A Million Visitors Milestone Is Surpassed!


On March 31, 2014 the 500,000th visitor to the Der Alte Fritz Journal blog paid a visit.

When I started this blog on August 28, 2007, I had little idea of where this blog would go or the many paths that it would lead me, but I have to say that writing this blog is one of the most enjoyable activities that I do in my spare time.

Here is a link to my first blog posting:


I am very appreciative of the support that everyone has given me and I especially enjoy reading all of the comments that readers post on the blog. The comments are probably my favorite aspect of this blog as it gives me some insight into what you are thinking.

Hint, hint: please feel free to leave comments on this blog. 8^)

Another interesting thing can be found by clicking on the tiny "Sitemeter" icon at the bottom of each page. Sitemeter tracks statistics on the number of visitors, the number of page views, where the visitors come from. Clicking on the little map in Sitemeter shows me where the last ten visitors have come from, in terms of their country location. It is fun to see how many different countries are represented in my blog readership. I have the feeling that I could visit almost any civilized country in the world and probably find a viewer of the Der Alte Fritz Journal.

There have obviously been a lot of changes for me since 2007, the most obvious ones being the start of the Fife & Drum range of AWI figures in 2010 and the subsequent acquisition of the Minden Miniatures range from Frank Hammond in 2013. I want to thank Frank and sculptor Richard Ansell for having the idea for creating a range of figures in 1/56 scale and I cannot think of a better historical period for this concept than the Seven Years War in the middle of the 18th Century. To me, Richard's sculpting style has been the perfect antidote to the trend of oversized, caricature figures with over sized heads and hands and, as one person put it, "strong faces".  

I think that the pendulum is swinging back the other way towards more realistic figure poses and body proportions. All figures, even the caricatures, are good for the hobby because they give us a lot of choices, but to have those choices and have realistic looking figures, well that is a combination that is hard to beat, as far as I'm concerned.

And finally, this blog is all about having fun with historical wargaming and having respect for your fellow gamers. In my minds eye, people such as Hal Thinglum, Bill Protz, Charles S. Grant and Dean West (among many others too numerous to mention on one page) set the tone for me, my blog and how I present myself at conventions and in public forums. I only hope that I have been able to live up to the standards embodied by these fine gentlemen.

At the end of the day, if a gamer comes up to me at the end of a convention game and tells me what a good time he had playing in my game, then that is all that I can ask for. It is what keeps me coming back to do it again.

Best regards,

Der Alte Fritz


Sunday, March 30, 2014

Battle of Lobositz at the SYW Association Convention


Battle of Lobositz at the SYW Association Convention
This year's Seven Years War Association ("SYWA") Convention was held in South Bend, Indiana on March 28th and 29th and if I recall correctly, we have been holding this convention for well over 25 years in a row.

This was my first opportunity to field my Minden Miniatures SYW Austrian and Prussian armies at a convention, and what better place to stage a refight of the Battle of Lobositz in 1756 than at the SYWA convention? Drawing inspiration from Charles S. Grant's scenario from his recent book: "Wargaming In History - Volume 9 - Lobositz, Reichenberg, Prague and Kolin", I found that Grant's Lobositz and the size of my painted armies were a perfect match.

I boiled the orders of battle down to the following forces:

Prussian Army

6 btns of musketeers
2 btns of fusiliers
1 btn of grenadiers

3 x 12-pound cannon
2 x 3-pound cannon

4 regiments of heavy cavalry


Austrian Army

6 btns of musketeers
2 btns of converged grenadiers
2 btns of Croats (light infantry)

2 x 6-pounders
1 x 12-pounder
1 x 3-pounder

3 regiments of heavy cavalry

The Rules
I used my own Fife & Drum rules for this game, using a 1:20 figure to man ratio. Thus infantry battalions were 30 figures, cavalry regiments were two squadrons of 12 figures, and artillery , well, I'm not sure what it is, I just try not to put too many guns on the table top.

The rules are printed on one side of a regular 8.5" by 11" sheet of paper. The mechanics of firing, melee and morale are the same, so the players tend to pick up on how the rules work within a turn or two during the game. I don't want a player to perform poorly for the reason that he didn't understand the nuances of the rules. I want my players to concentrate on their tactics with the assurance that the rules are not going to cause them to lose the game.


The Potted Historical Background  Paragraph :)
The background to the battle is well known to many of my readers, but a brief overview follows:

It is 1756 and Frederick II of Prussian has invaded Saxony in a pre-emptive strike to knock the Saxons out of the war before the Austrians can mobilize their forces. Frederick had the Saxons bottled up in their encampment at Pirna, and he chose to utilize starvation as a means of forcing their capitulation. In the meanwhile, the Austrians commanded by Marshal von Browne, have advanced up the Elbe River in Bohemia and await the arrival of the Prussians . Von Browne has a very strong defensive position with his right flank anchored on the Lobosch Berg, a dormant volcano covered in terraces and thorns - suitable places for the Croat light infantry. The Austrian left flank is safely deposited behind the marshy Morellenbach stream while the center is occuppied by most of von Browne's cavalry. It is an unusual deployment, by 18th Century standards, but the ground suits Browne's deployment perfectly.

As the Prussians emerged from the valley, they see a portion of the Austrian army deployed on the field to their front. However, a thick fog shrouds the Austrian left behind the Morellanbach. Frederick sends some of his cavalry to probe the center and find out what is out their. This gradually grows into an ever larger cavalry battle until nearly all of Frederick's cavalry is engulfed in the meleel.

Meanwhile, on the Austrian right, the Croats fight a deadly duel with Bevern's battalions of musketeers. It is hard fighting, but eventually the Croats are forced to flee the Lobosch Berg and hightail it back to Lobositz. With the Loboshberg lost, von Browne orders his right and center to retire behind the Morellanbach and that is essentially the end of the battle. The Prussians were rather surprised at how steady the Austrian infantry had become, compared to its performance in the two Silesian Wars in the 1740s.

The Story in Pictures (click all pix to enlarge the view)


Opening view of the Prussian center and right flank (cavalry), anchored by an artillery battery atop the Homolka Berg.

Prussian left flank with Croats ocuppying the Lobosch Hill.

Danger lurks where Croats appear.

Austrian left flank deploys behind the marshy Morellanbach stream.

Frederick supervises the siting of the Prussian 12-pounders on the Homolka Berg.

A closer view of Frederick: vignette painted by Leuthen Studios.

The game begins!

Grand cavalry melee breaks out in the center of the field.

The Prussian cavalry numbers begin to tell as the Austrian cuirassiers are pushed back. The Prussian center - infantry- now begin their advance on the town of Lobositz, hoping to cut off the Austrian right from the rest of the army.
An overview of the action late in the contest. Austrians begin to retire through the town of Lobositz, while the Prussian attack in the center tries to reach the road ahead of the Austrians. At the top of the table we see the Austrian left retire back across the Morellanbach.
As the Austrian cede the Lobosch Hill, the Prussian right presses the attack, but they are too late to catch the Austrians.
The Post Mortem

I have run the Lobositz scenario about 4 or 5 times now, and I have to say that this was one of the best game scenarios that I have ever had on my watch. There was considerable "back and forth" in the cavalry melee that seemed to capture the historical action to a "T". Using Charles S. Grant's advice, I divided my cavalry regiments down from one 24-figure regiment to two 12-figure "squadrons". This created a lot more units buzzing to and fro during the cavalry battle and I really liked the way that this played out. A squadron would pitch into an enemy squadron and fight its melee, then either retire or advance depending on its losing or winning the battle. Another change that I made to my rules was to allow cavalry to reinforce an on-going melee. Previously I did not allow this in my games. I liked the way that this worked out too.

All of the players seemed to enjoy themselves and have a good time playing the game. Every figure on the table was a Minden Miniature, save for a couple of RSM limber riders that I used on my own limber teams. This type of game takes a lot of effort to put on, but when you have a great group of players and the game turns out better than expected, then you have a winning combination that makes it all worth while.