


 |
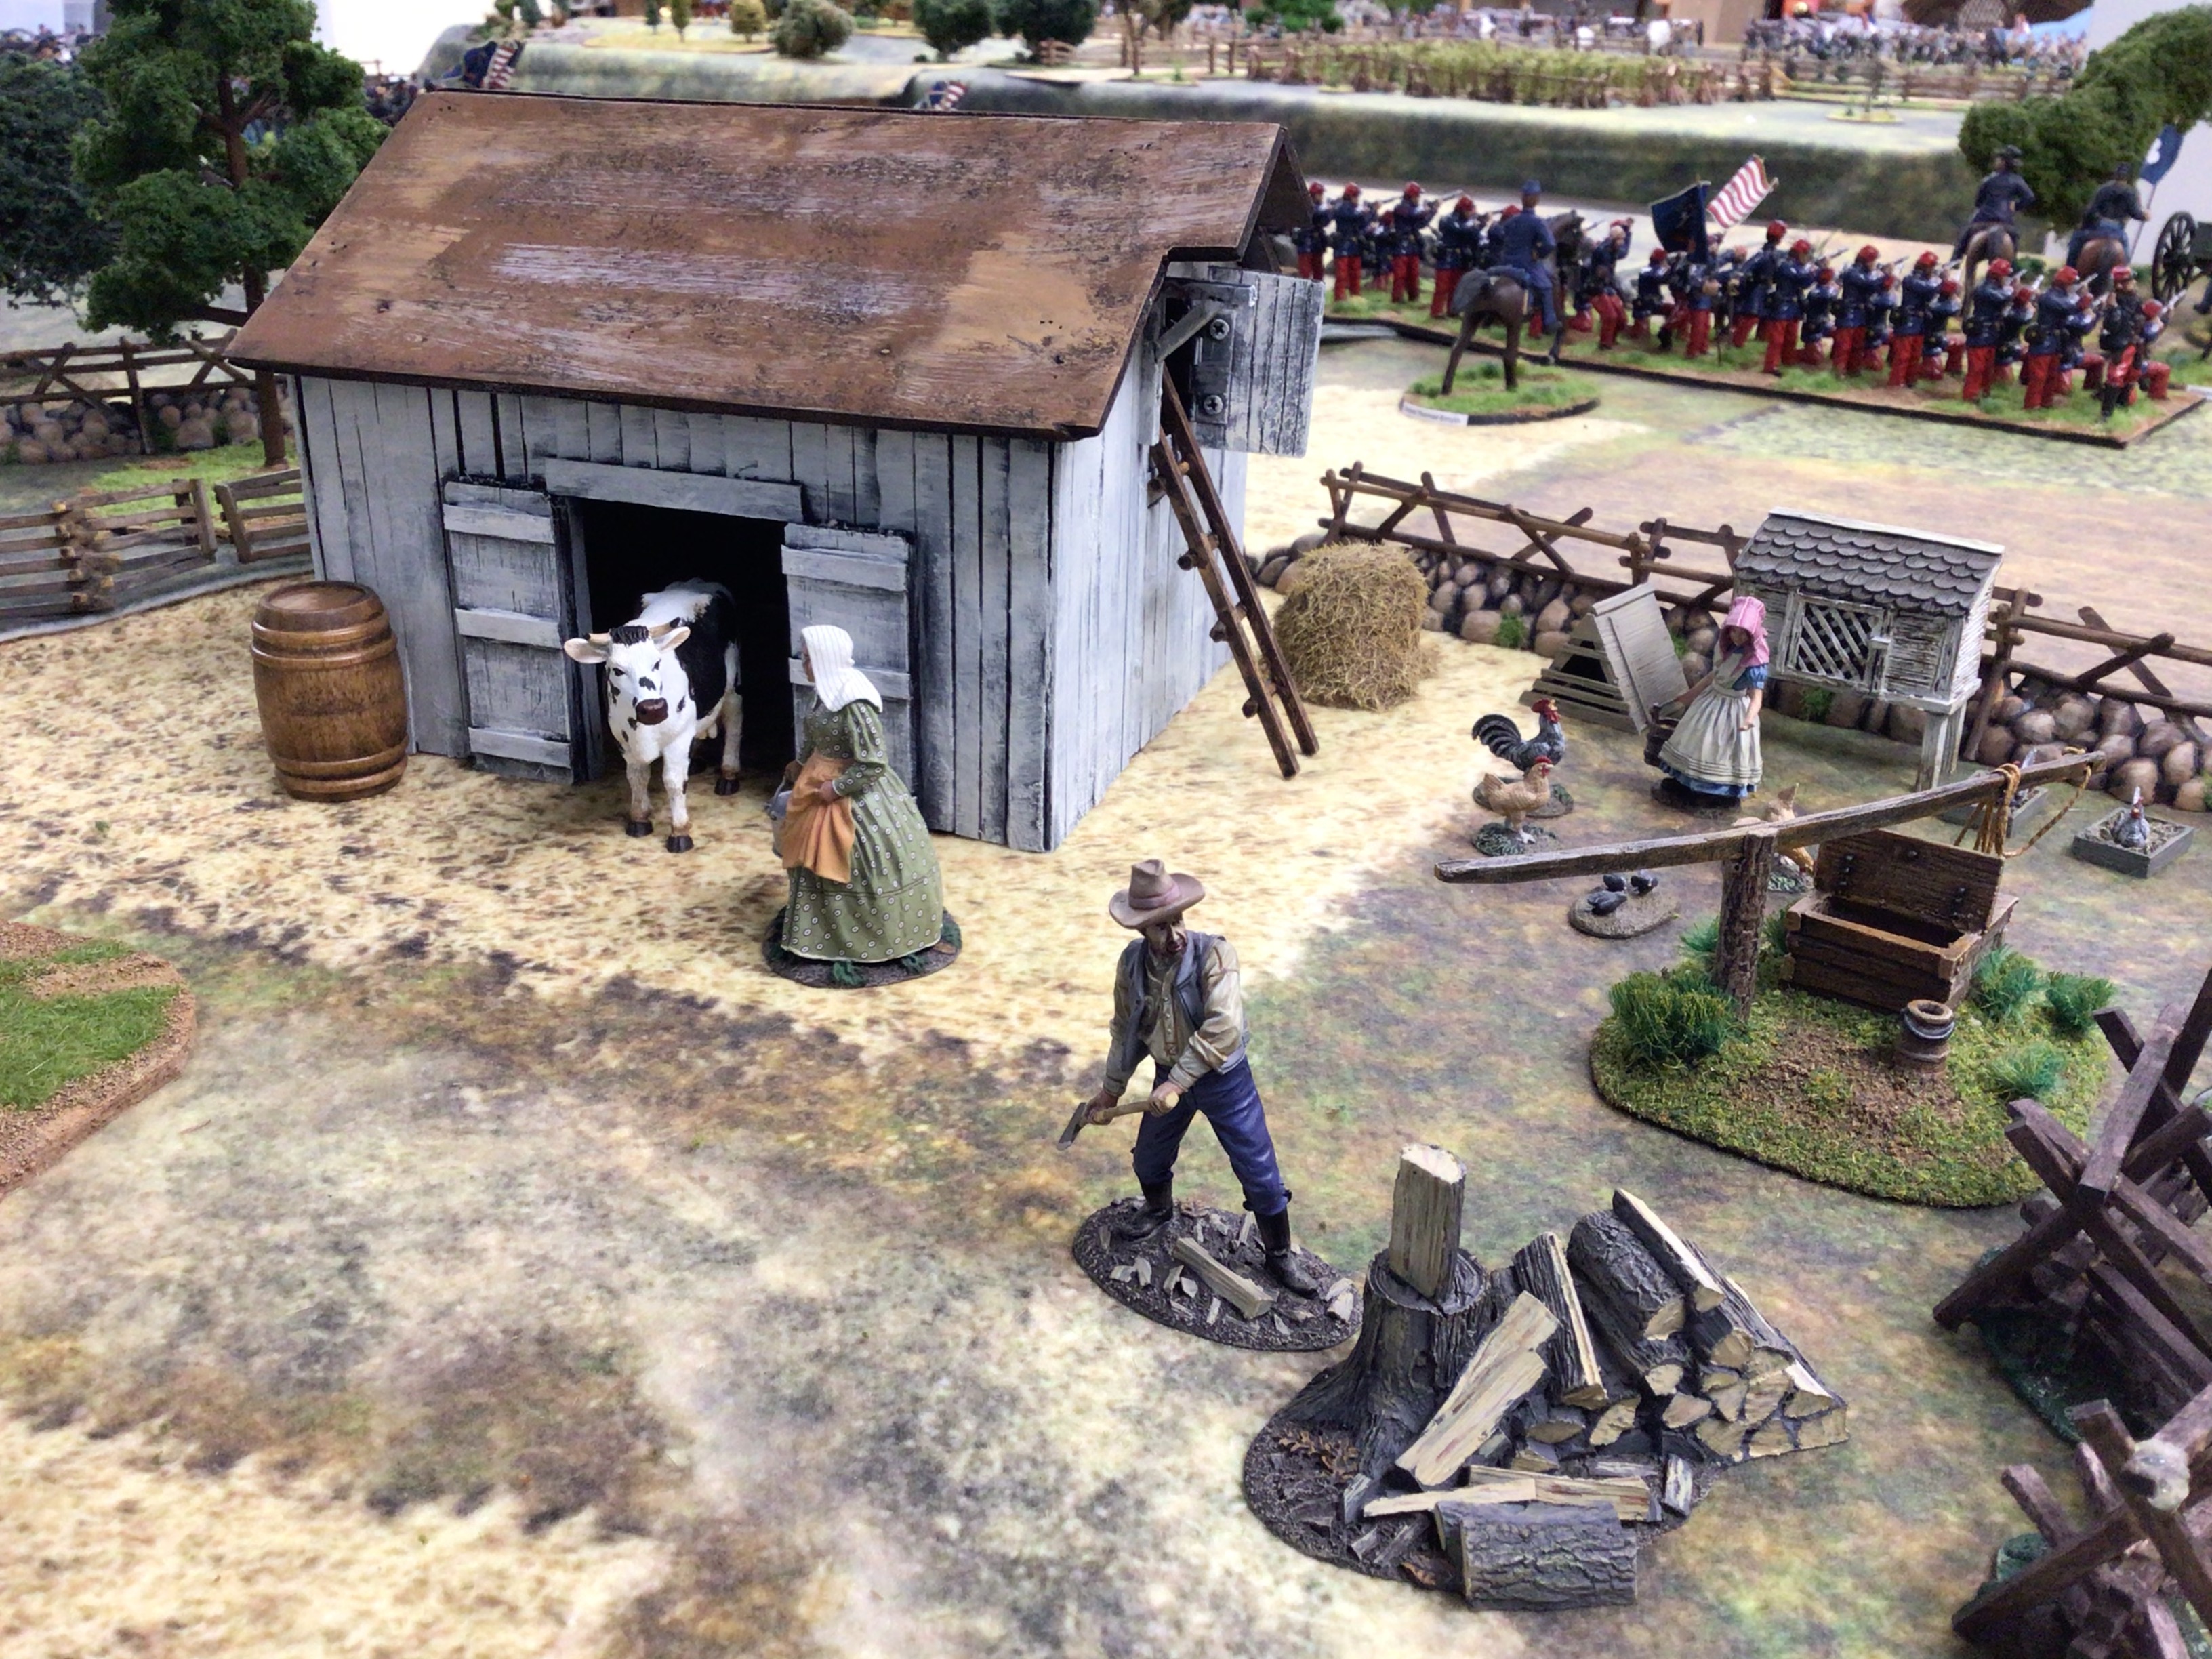
| Scratch built small barn. Figures from Wm. Britain. Cigar Box Battle mat. |
After doing some conversion work on BMC plastic models of the Leister House, I decided to try my hand at making a barn from scratch. Having made a number of houses and boats for my Khartoum game last year, I have the minimum skills necessary to make a barn from foam core and balsa wood. I am not so great at employing the mathematics of miniature architecture and my tools are limited to Exacto tools, a pin vise, and a miniature mitre box with saw.
 |
| Side view of the barn with a hinged hay loft door and ladder. |
 |
| The rear area of the barn. A couple of wagon wheels have been added to provide some "junk" detritus around the building/ |
I made a template of the side elevation of the Meade Leister House model and used this for the sides of the barn. I chopped down the height of the barn so that it would be lower than the roof of the house. Once the end pieces were cut from foam core, it was a simple matter to decide how long to make the barn ("6-inches") and the parts were glued together with wood glue and sewing pins.
The next step was to find lumber to make the walls of the barn. Initially I was resigned to the idea of cutting out planks from cardboard cereal boxes, but then I looked into my box of junk wood offcuts from previous model building and I found some small craft sticks that look like coffee stirrers from Starbucks. I only had one pack of 50 sticks and did a little bit of measuring to determine that I would need more than 50 plank pieces for the whole building. However, digging deeper into the box of offcuts, I discovered another pack of sticks that were narrower than the other 50 sticks. I found that alternating the two sizes would provide me with enough wood to clad all the walls of the barn.
I cut the planks first, and then slathered the sides, one side at a time, with wood glue and then placed the sticks onto the side of the barn. I would attach a wide stick and then put two narrow sticks next, followed by another wide stick. I should note that one should cut out any windows and doors that will be on the model prior to attaching the lumber to the walls.
Next, I added some "doo-dads" to the building. These included a hinged door on the hayloft opening; a bracket for rope and pulley to haul items up to the hayloft, a ladder for the hayloft, and finally a pair of larger doors for the barn entrance. I used a small hinge on the hayloft door so that the door could actually swing open and close. In retrospect, I probably wouldn't do this on other models. The amount of time to make the door and hinge isn't worth the final result. Thus I didn't make hinged doors for the main barn doors.
Then the roof was added and glued to the building. I used pieces of foam core to make the roof. I temporarily painted the roof brown, but it is my intention to come back later and make roof shingles from tree wrap. The next step was to prime the model black. I use black primer on building models so to enhance the use of dry brushing to paint the model.
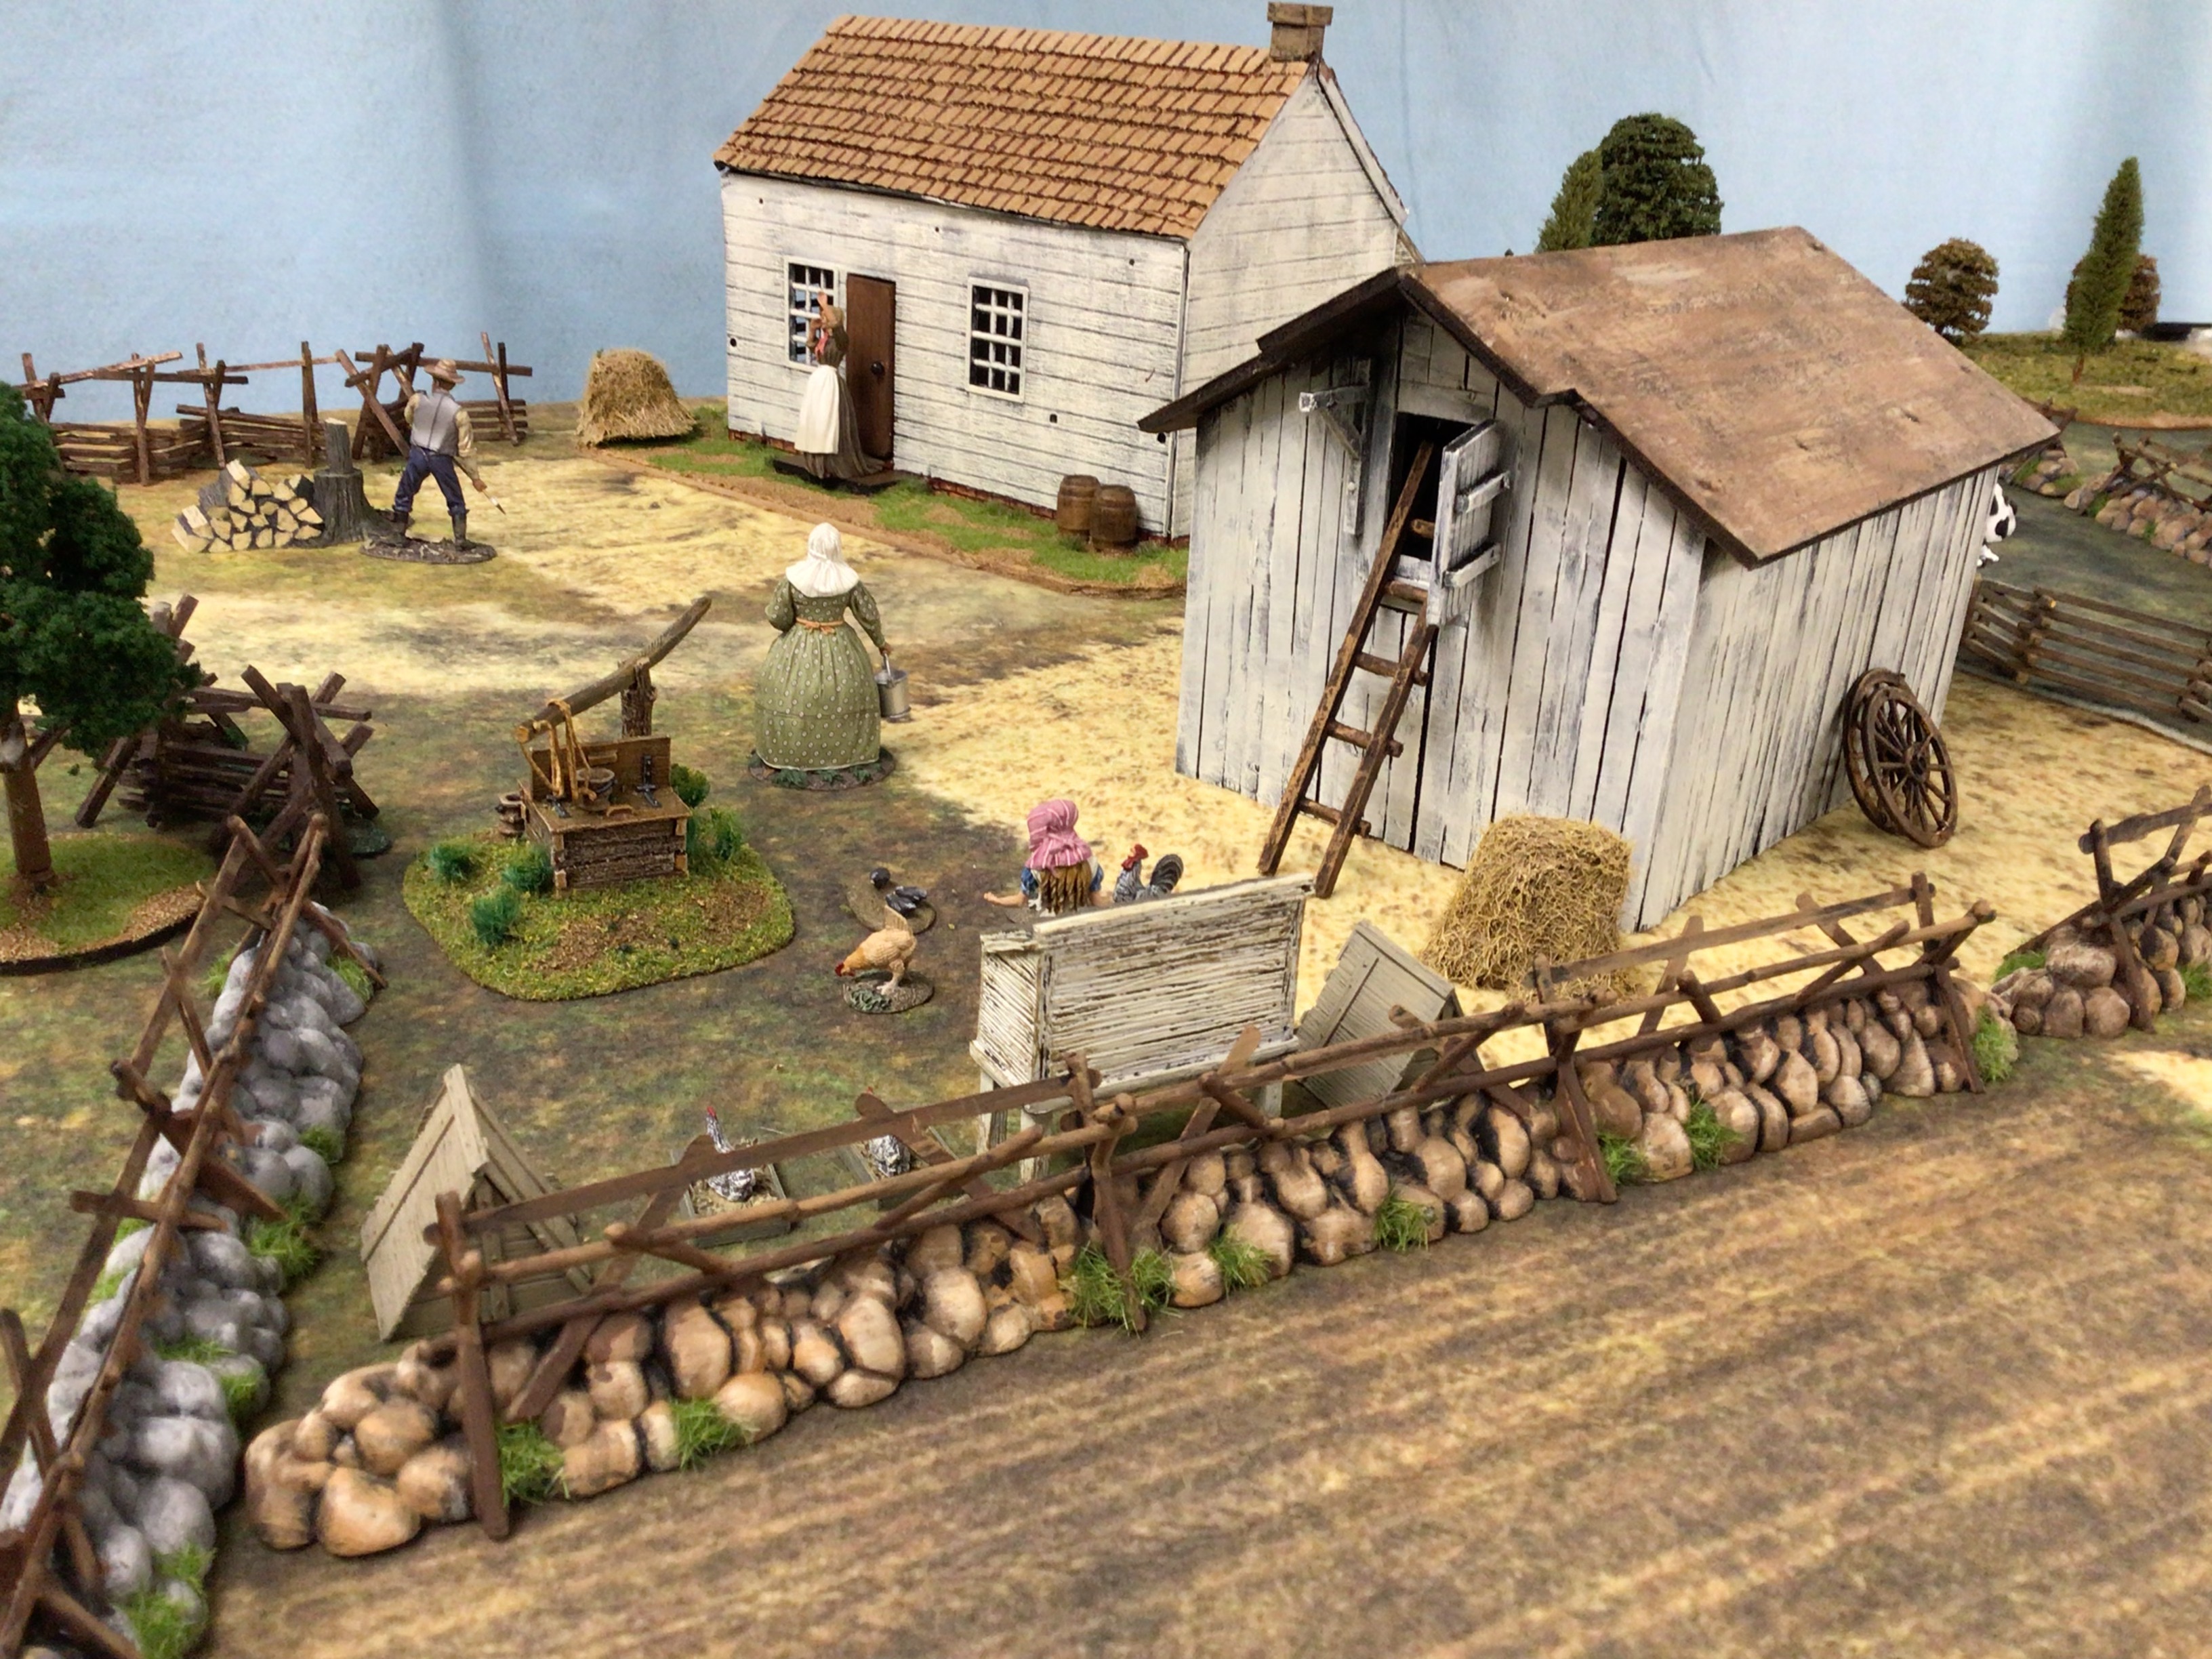
The final step will be to glue the barn to a larger base and add some terrain and grass to finish things off.
 |
| The four walls are constructed from foam core material and the corners are reinforced with sewing pins and wood glue. I used craft sticks purchased at Michael's Stores to make the plank sides of the walls. I mixed in some thin and wide sticks to give some variety to the appearance. |
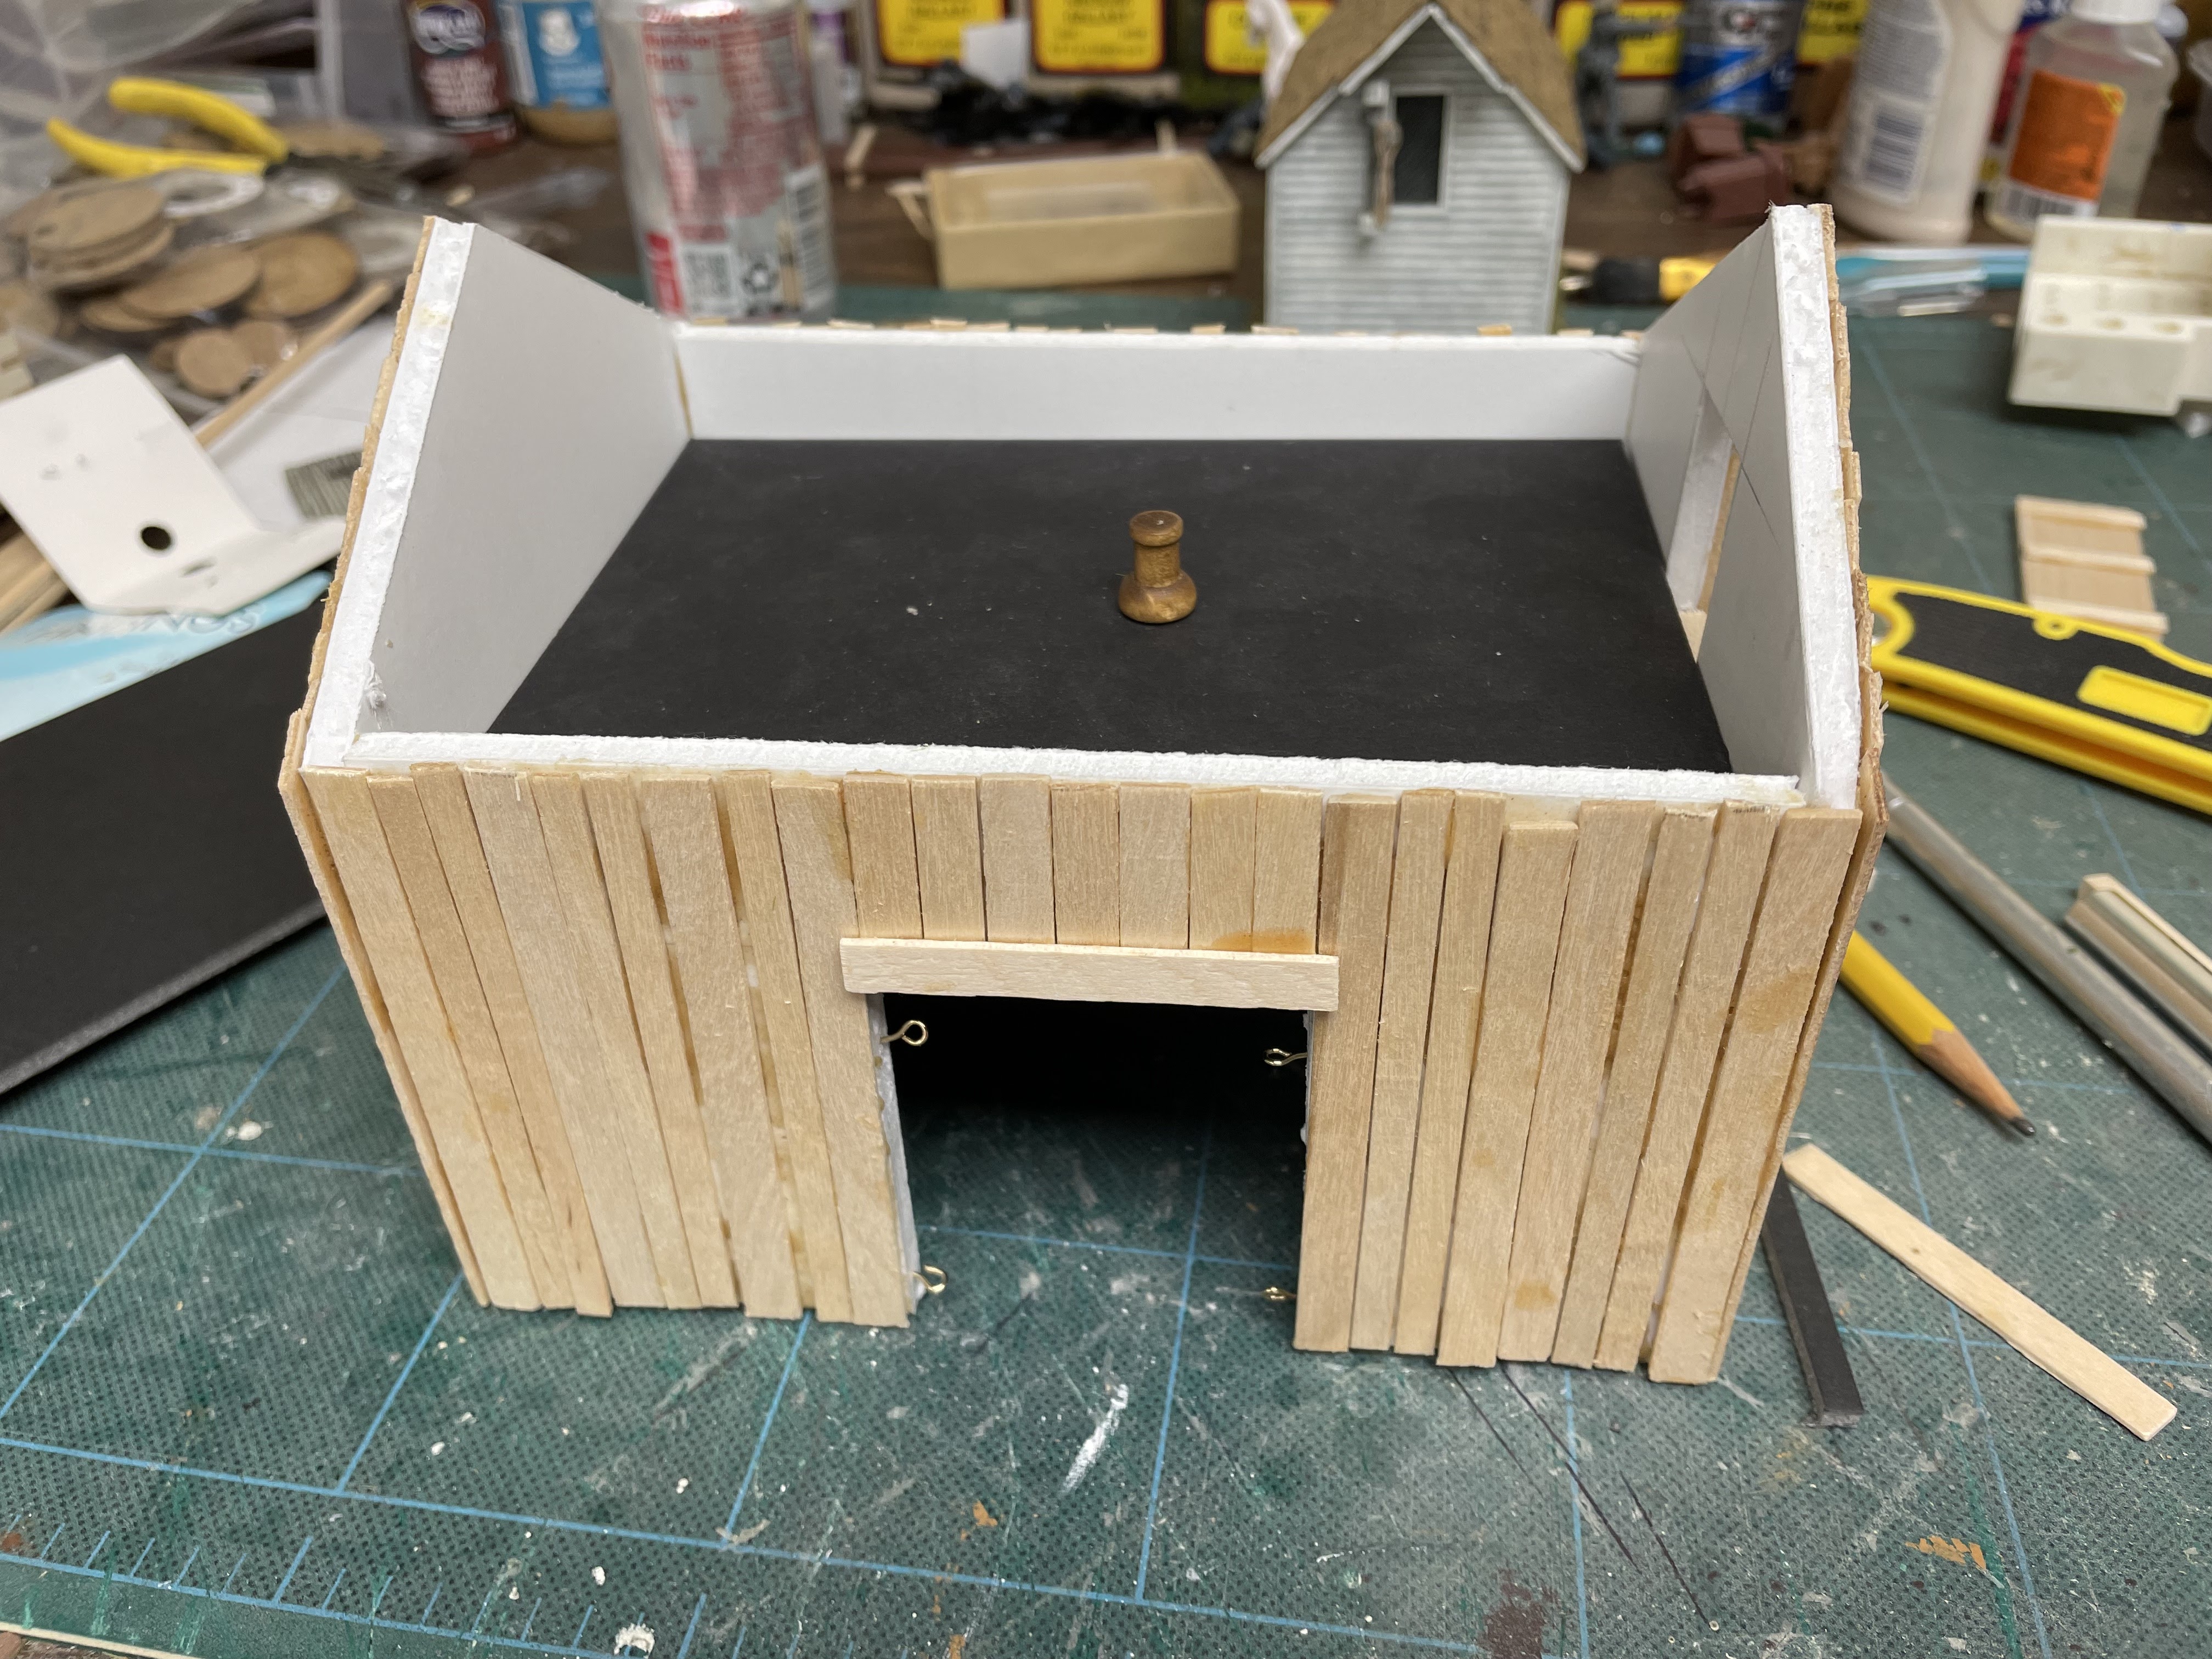 |
| A piece of black foam core is added to the interior to give more strength to the barn walls. I briefly thought about having a lift off roof, but then my sanity returned and I discarded that idea. |
 |
| Attaching the swing door to the hay loft. |
 |
| The hay loft door is installed and actually has a hinge allowing the door to swing open. On the left side is a bracket to hold a rope and pulley. |
 |
| Adding the roof made of 1/8-inch foam core. I used wood glue to attach the roof and used sewing pins to hold down the roof sections. |
Once all of the pieces were assembled, and allowing the wood glue to dry overnight, I sprayed the barn with black primer and then painted it with three shades of grey and finished the painting by dry brushing some "Antique White" craft paint.
I also made a ladder from bass wood leading from the ground to the hayloft door. The finished model will be glued to a base and some small accoutrements such as the ladder, some barrels and a couple of wagon wheels around the outside.
I may build another house but I'm more or less done making the necessary buildings for my Pickett's Charge game.
Finally, here is another photo portrait of some noted personalities such as Hancock, Warren and Custer.
 |
| Back row, left to right: some artillery crew guy, Winfield Hancock, George Custer, Governor Warren, and some other guy on the right end of the row. The names of the seated characters have been lost to history, maybe one of my ancestors. |

Nice work!
ReplyDeleteKind Regards,
Stokes
They look superb to me.
ReplyDeleteLovely barn, a really nice build.
ReplyDeleteThat's a smashing building! I really like the photo all picture also
ReplyDeleteGreat barn build...
ReplyDeleteImpressive miniature carpentry skills; I really like the white wash paint too, how the wood grain comes through a bit.
ReplyDelete