 |
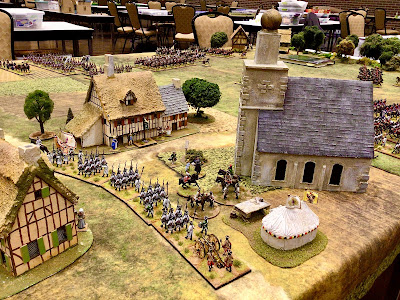
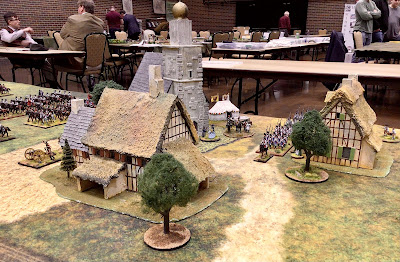
| The Austrian headquarters located within the town of Mollwitz. Houses were made by Ian Weekley and I made the church model. |
I was in a bit of a bind for putting a game scenario together in time for this year's annual Seven Years War Association convention in South Bend, Indiana. Then it occurred to me that there was a ready-made game scenario in the classic wargame book "The Wargame" by Charles Grant (sr.). So I decided to do the Battle of Mollwitz which was Frederick of Prussia's first battle and first victory (of sorts, ahem).
The scenario provides each side, Austrian and Prussian, with 13 combat elements plus some artillery. The interesting thing about Grant's Mollwitz scenario is that the two armies are mirror images of each other. The Austrians are strong in cavalry with 6 regiments, but only 7 infantry battalions, whereas the Prussians are weak in cavalry with only 3 regiments, but they are strong with a robust 10 battalions of infantry. The Prussians also outnumber the Austrians in artillery, but I reduced the number of guns to 4, compared with 3 guns for the Austrians. My artillery rules are bloodier than Grant's when it comes to effectiveness on the table top so the reduction in guns was a necessity.
 |
| My Mollwitz game table set up. A copy of "The Wargame" is displayed in the front foreground. Austrians (left) and Prussians (right). Compare to the map below. |
The scenario proved to be a good cracker of a game with the forces deployed such that each side's strength was facing the opponent's weakness. Thus the Austrians started the game with 6 cavalry regiments on their right flank, facing only 3 Prussian cavalry regiments across the field.
 |
| The Austrian army deployment is shown at the top of the map (white rectangles) and the Prussian deployment is shown on the bottom of the map |
Given the superiority in numbers of infantry units for the Prussians versus Austrians, the outcome of the game is determined by the success of the Austrian cavalry. If they can quickly defeat the Prussian cavalry, the Austrian cavalry will be poised on the left flank of the Prussian battle line. However, the Austrians must win the cavalry battle before the Prussian infantry closes in on the Austrian infantry.
I ran the Mollwitz game twice, once on Friday morning and once on Saturday afternoon. The Austrians won a slight victory in the first game, but the Prussians returned the favor in the second game, giving the Austrian infantry a good thrashing. In both games, the Austrian cavalry successfully drove off the Prussian cavalry and then made a pivot to their left to place them in a position to roll up the entire Prussian army.
Here are some pictures of the initial deployments of the armies. Austrians on the left and the Prussians are on the right.
 |
| Prussian infantry marches onto the battlefield. |
 |
| The Austrian infantry marches onto the battlefield |
 |
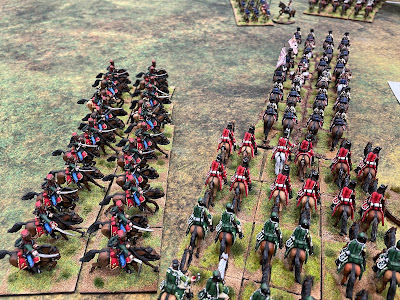
| The Prussian cavalry (right), while outnumbered, pitched into the Austrian cavalry. |
 |
| Austrian cavalry numbers would soon have a telling effect on the outcome of the melee. |
 |
| Austrian hussars gain the flank of the Prussian cavalry. |
 |
| The Prussian's Bayreuth Dragoons (in white coats) are flanked but they died hard and took a lot of Austrian horsemen with them. |
 |
| Here's something that you hardly see in an 18th Century wargame: the Prussian Guards are forming squares! |
 |
| The town of Mollwitz |
 |
| Prussian right wing infantry march onto the table. |
 |
| The Bayreuth Dragoons wearing white coats. Prussian dragoons wore white coats up to 1745, when they switched to blue coats. |
 |
| Marshal Schwerin leads his powerful brigade of grenadiers (in line formation) and IR15 Prussian guards on to the field. |
 |
| A young King Frederick II of Prussia awaits his very first battle with much anticipation. |
 |
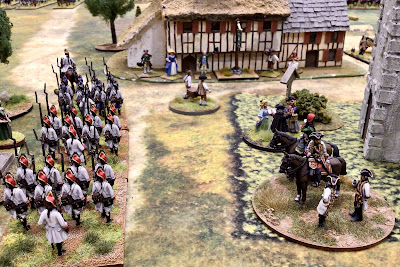
| Austrian general von Neipperg watches a unit of converged Austrian grenadiers marching through the town of Mollwitz |
 |
| An Austrian infantry brigade deploys on the left wing of its army. |
Game II on Saturday
The second game was run on Saturday afternoon and it would result in a very convincing Prussian victory, although for awhile it looked like the Austrian cavalry was going to have a glorious day because it ran all of the Prussian cavalry off of the field and it rode down the Prussian grenadiers and two battalions of the Prussian guard before running out of steam.
 |
| Austrian hussars charge into the flank of Prussian hussars and a regiment of Prussian cuirassiers. It was a short and bad day for the Prussian cavalry. |
The Prussian cavalry commander looked across the field at the Austrian cavalry and he decided that it would be more prudent to seek protection behind the Prussian guards. The large Bayreuth Dragoon regiment (36 figures versus 24 for normal sized cavalry regiments) deployed into line formation to provide a screen for the Prussian cuirassiers and hussars to march away. However, the Austrian army won a string of first initiatives in the card draws. Since they elected to move first, the Austrian horsemen were soon charging into the flanks of the Prussian hussars and cuirassiers. The Prussian cavalry did not have a chance of surviving.
Then miraculously, Austrian dragoons and cuirassiers teamed up to run down a battalion of Prussian grenadiers and one of the guard battalions in the flank. It was all a very exciting thing to see. I am unashamedly biased towards the Prussians, but I was enjoying the sight of an excellent Austrian cavalry battle on this flank. Alas, the Prussian infantry made much headway against the Austrian infantry and soundly defeated them before the Austrian cavalry could make its impact felt on the far end of the table.
Some Final Thoughts
I really really really really liked the Grant Mollwitz game scenario and found both games generated a lot of excitement and unexpected events. The deployment of unequal amounts of cavalry on one end of the table and a similar inequality of infantry on the other end of the table made for some great table top battles. The scenario all comes down to whether or not the Austrian cavalry can work around the Prussian army's left flank before the Prussian infantry can do the same to their infantry counterparts at the other end of the table.
I recommend giving the Grant Mollwitz scenario a try. The scenario is time-tested over several decades going back to the 1970s when the book The Wargame was published.


Two cracking games there Jim! I must say I'm rather biased towards the Austrians, so enjoyed the first result more than the second;).
ReplyDeleteMy sentiments exactly! :-)
DeleteCheers,
David.
Fantastic looking game Jim, with loads of 18th century eye candy. Thanks for sharing my favorite game.
ReplyDeleteWillz.
quite splendid!
ReplyDeleteGreat looking games Jim
ReplyDeleteAn excellent pair of games, everything about them is superb, apart from the outcome of game two!
ReplyDeleteA small battle (compared to other of the WAS) in a really impressive style represented. I love your large units.
ReplyDelete