


 |
| A typical Dhow boat used throughout the Mediterranean, Middle East and India areas of the world. (I didn't make this model) |
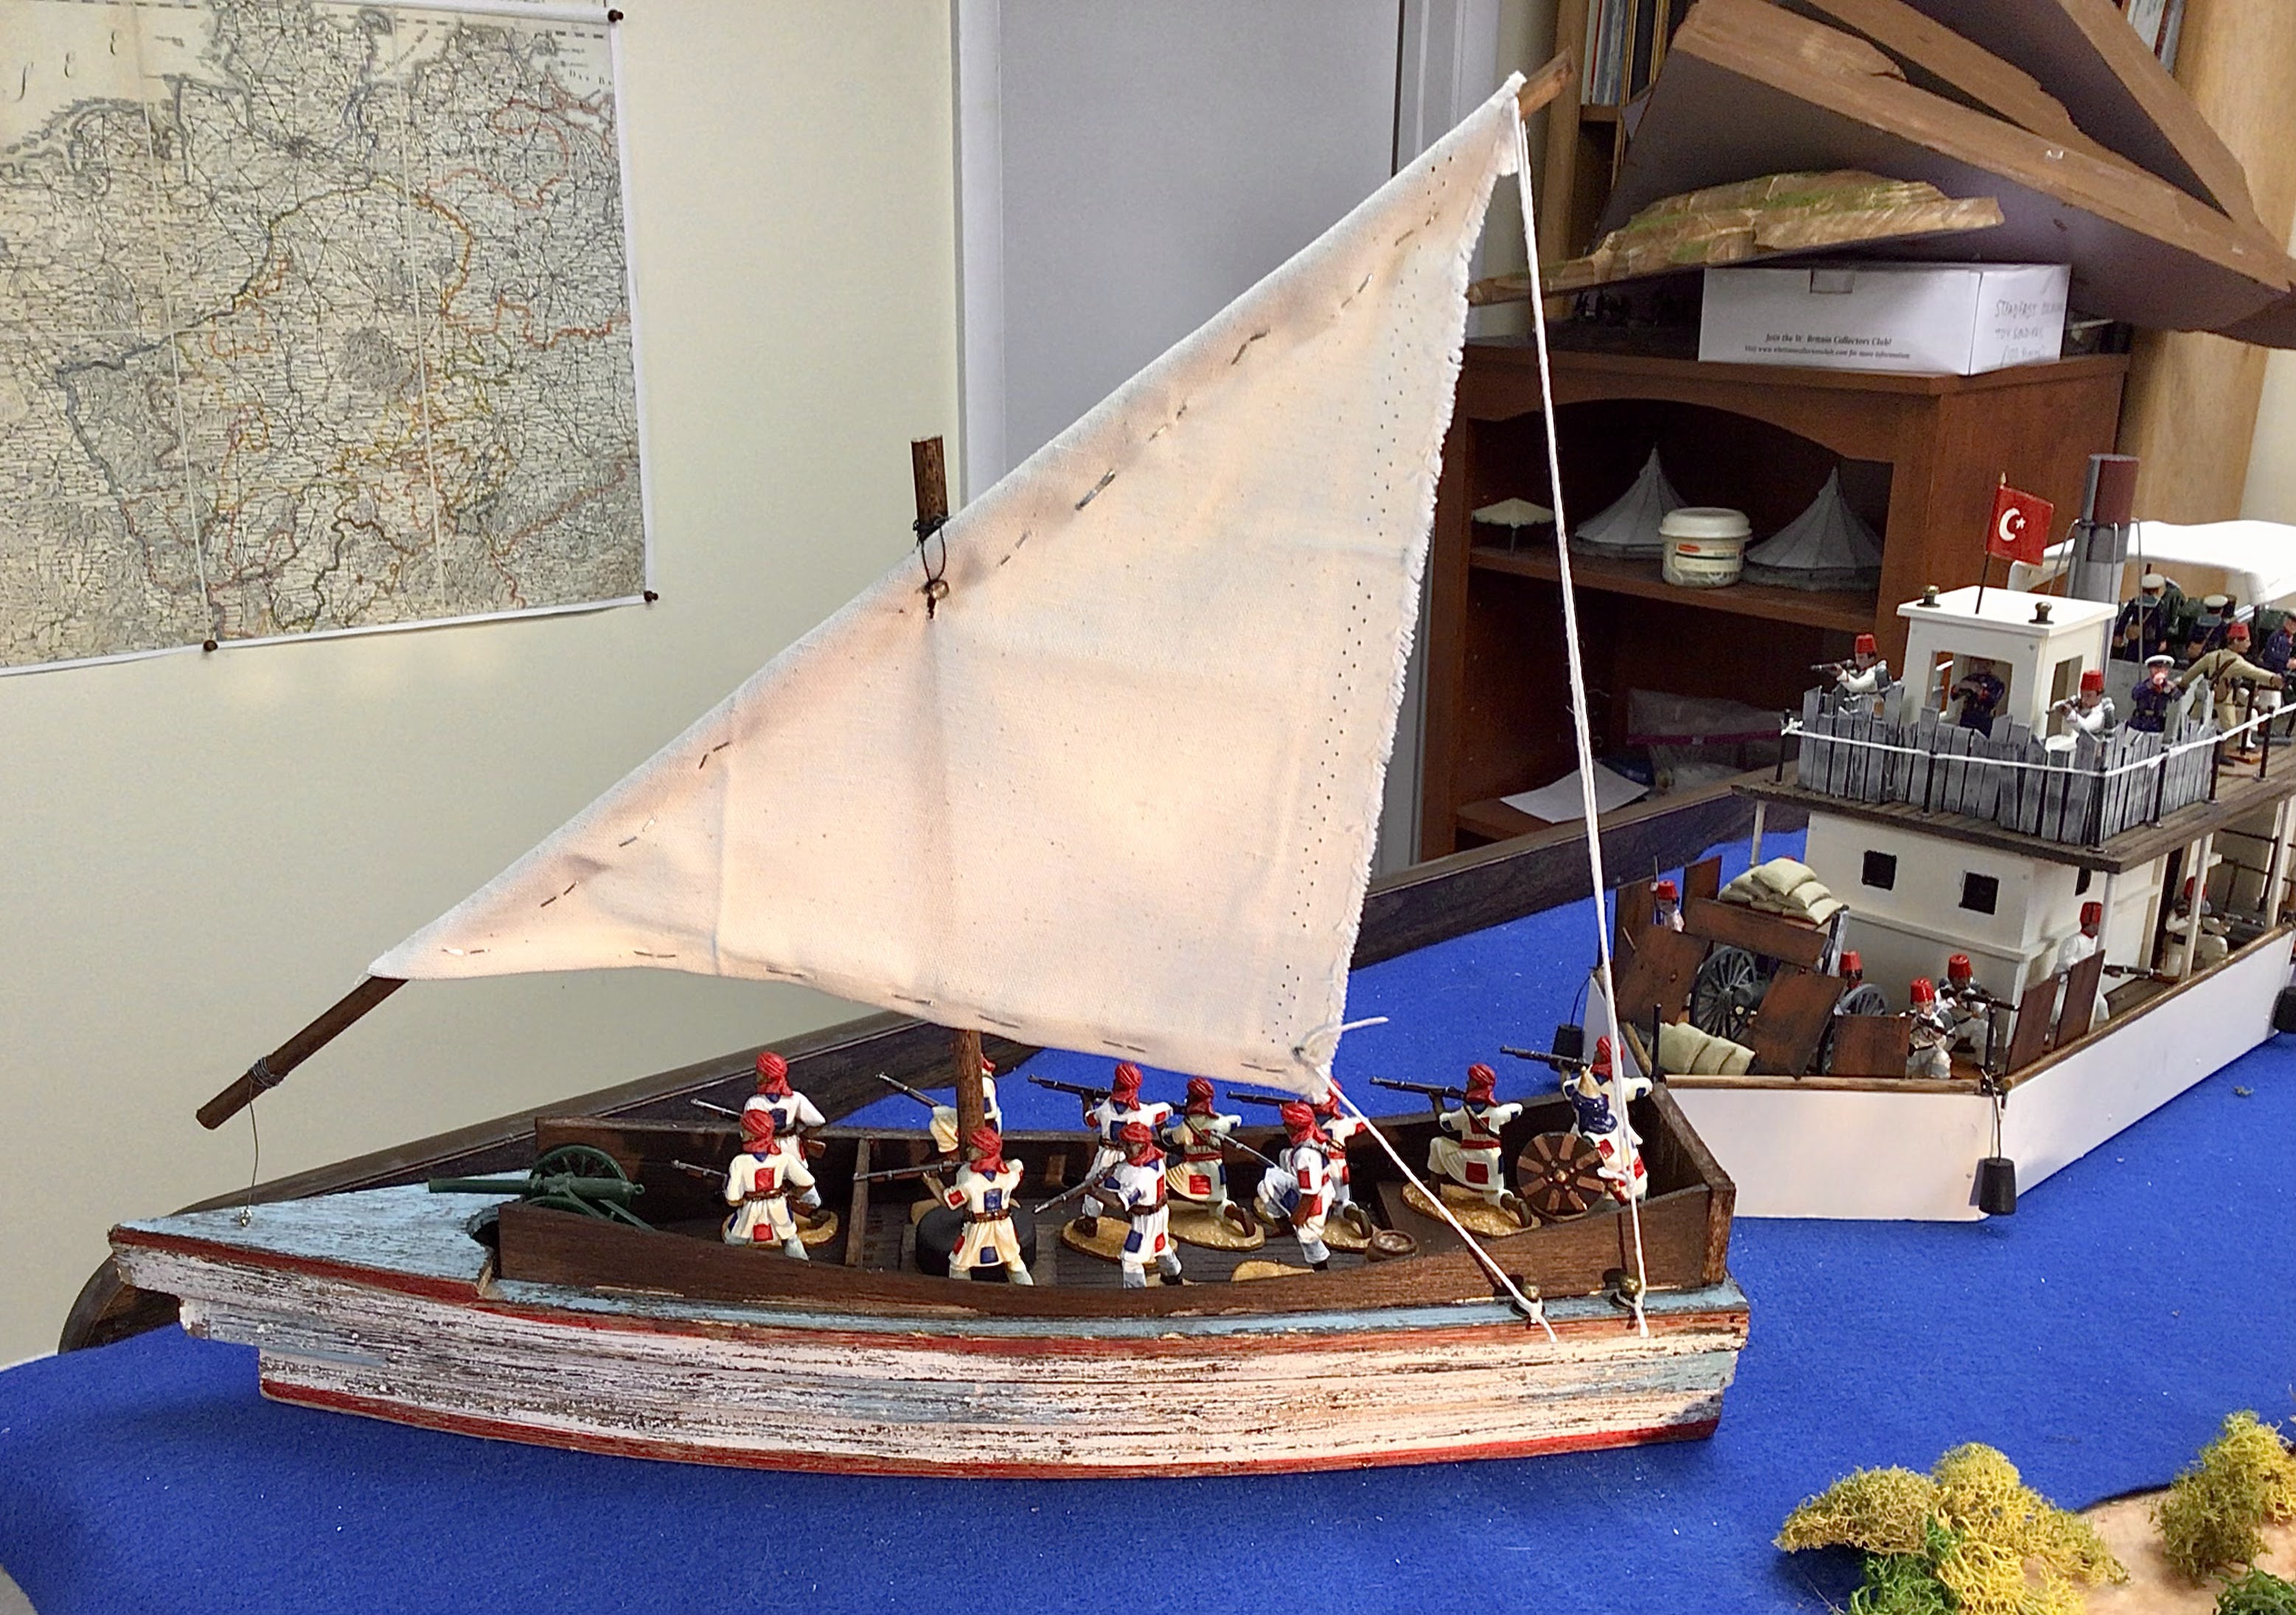
It was inevitable that once I built one boat that I would want to build some more. I decided to build a Arabic river dhow for two reasons: (1) I already had an available hull and (2) the Dervish needed some boats too. Actually, maybe there is a third reason: I foresee some sort of "Limeys & Slimeys On The Nile" type of game in my future. Oh, and a fourth reason is that dhows are relatively easy to build compared to a paddle wheel boat. More on that later.
So I was kind of in between projects in my overall Khartoum Project for Historicon 2023 and I was looking for something to do, one that did not involve a lot of preparation work. I remembered that I had a boat hull sitting around that I intended to convert into a dhow one day. Well Pilgrim, today is that day.
The shabby looking, weathered and beat up boat was an item that I bought at Hobby Lobby two or three years ago. It's one of those things that you see in a store or flea market and think "I could use that for something one day." When you see these things you must buy them right there on the spot because if you hesitate and walk away, you will surely change your mind and then the item will not be available when you decide that you want to buy it after all.
You can see a close up of the hull in the picture below:

FYI, I found the boat in Hobby Lobby's "Home Decor" section of the store. If you can't find one at the store, they are also available online through HL's web site. They are currently on sale at only $9.99 each which is quite a bargain.
I really like the weathering that the model comes with. It is primarily white in color but also has some red and light blue bits on it. The weathering gives the hull a nice "beat up" appearance which I also like.
Here are some pictures of the finished model:

Constructing the deck
I built a floor base out of foam core board and cut it to fit snuggly inside the hull. Then I cut out a deck using 1/4-inch balsa wood. The balsa was scored with the sharp end of a shish kebob skewer to suggest deck planking. Then the balsa was stained with Minwax Walnut color stain.
In the process of cutting out the shape of the balsa wood deck, I placed the hull on top of a piece of 4-inch wide balsa wood and traced the outline of the boat onto the wood. Since I was cutting the wood in the direction of the wood grain, it was very easy to cut out the shape with a No.2 Exacto knife blade. I looked at the two off cut pieces of balsa and envisioned them as sidewalls on the deck of the boat.
The side walls were fitted to the inside dimensions of the deck and I cut out some shims to place between the two sides of the hull to hold the pieces in place. I ran a bead of Liquid Nails paste on the inside wall, placed the offcut on the wall, and inserted the shims to hold the curve of the wood in place. I also pressed the pieces together with my fingers and counted to 60. The glue join was good and would likely not come undone. However, just to make sure, I used some tacks and hammered them into the interior sides for more strength. I left the shims inside the boat overnight and removed them the next day.
Making a mast
The main mast was made from a piece of round dowel rod. I think that it was a 3/4-inch diameter rod. It looked ok for the mast, but was probably too big around for the yard arm, so I used a 5/16 diameter dowel rod for the long yard arm (is this the correct term? I don't know for certain). In the future, I will use the smaller 5/16ths diameter dowel rod for both pieces.
I drilled holes into the foam core board and the balsa wood deck to accommodate the mast, making sure not to make the hole too large because I want a snug fit of the dowel into the hole. I also placed a ring grommet underneath the deck, on the floor of the hull, to use as a guide for when the mast is inserted into the holes on the deck and foam core board. My original intent was for the mast to be removable, but I changed my mind about this later.
The yard arm for a lateen sail (the triangular sail on a dhow) appears to be approximately the same length as the hull of the boat and the mast looks to be about half the length of the yard arm. I couldn't find any information to confirm this, but this is what eye-balling it informed me.
The final bit of mast support was to make a 1.5-inch square piece of balsa that I glued to the deck (with an appropriately sized hole in the middle of the square) and then I placed a plastic bottle cap from a water bottle on top of the square balsa piece. The bottle cap has a hole drilled through it and then I coated it with black spray on primer. The sum of the snug hole in the deck, the grommet seating in the bottom, and the square balsa/round bottle cap on the deck create enough support so that the mast does not tip over once the sail and yard arm are attached.
Making the sail
This proved to be the most difficult part of the model to make. Again, I could not find anything online that would indicate the relative proportion of the sail to the mast etc. Some basic high school geometry probably solves the size of the sail problem. You already know the length of the yard arm (13" in my model) and you know the height of the mast, so you have two sides of a right triangle and so the geometry should yield the answer to the length of the sail. I was having some problems with the calculations, so I resorted to the not so great "eyeballing it" method. It all worked out ok in the end, but the maths took me longer than they should have.
Another thing to consider is the type of material that you will use for your sail. I used some natural color canvas that I bought at Michael's Stores or Hobby Lobby. However, when you cut the cloth, the cloth will eventually start to unravel unless you hem the edges. This would be easy peasy if you owned a sewing machine, but I don't have one so I had to resort to other methods. My method is to fold the edges of the cloth over by half an inch, staple the hem in place, and then add super glue to fix the hem. After the glue dries, the staples can be removed because the super glue has hardened and cured.
So I cut the sail one half inch larger on all three sides so that I can fold the edges over to hem the cloth. On the yard arm side of the sail, I made sure that I let enough space to thread the dowel rod through the sail.
Attaching the yard arm and sail to the mast
This was a bit of a challenge, attaching the yard arm to the mast. As you can see in the picture below (someone else's model, not mine) a lot of rope is used to attach the parts. This was not a level of detail that I wanted to get into. After all, this is supposed to be a simply model for war gaming purposes, not a work of nautical art.
I solved the problem of having to use rope cords to attach the sail to the mast, by pushing the dowel rod through the hem of the sail (sort of like on a curtain rod). Next, I hammered a small tack to the mast to use as a sort of coat hook on which to hang the sail. I cut a hole in the sail so that it could hook onto the tack on the mast. Next, I cut pieces of white cord to make rigging that ties down the fore and aft ends of the yard arm to the deck. Another short piece of rigging attached the third corner of the sail to the boat deck. I used small push pins (pushed into the hull) to provide a place to attach the rigging to the boat.
Now all three corners of the sail are tied down to the boat in some manner. This is why I gave up on the idea of having the mast removable. With all three corners of the mast secured, the sail is securely in place and nicely stretched out. We don't like to have droopy sails now, do we?
 |
| A professional model illustrates how the sails are connected to the mast and yard arms. |
 |
| Here's a view of my rigging system |
Well that is about it on how I made my dhow. I have three more hulls on order from Hobby Lobby and so hopefully I will have a larger Dervish fleet in another week or two. Dhows are so much easier to make than other types of boats. Once you have the mast and sail techniques nailed down, and you have a ready made hull from Hobby Lobby, then it doesn't take much time to replicate the technique over several more boats.
As I said earlier, it is inevitable that there will be a Sudan naval battle game. This could be one of the games that I run at Historicon 2023.
Oh, did I forget to mention that this whole Khartoum in 54mm Project will be seen at Historicon in July 2023? (Just making sure).

If you're going to do any campaigning in the Middle East, the Levant or East Africa, the occasional dhow, or similar vessel, is just about a must. For my own 'In Darkest Aithiops' campaign, I added 6 such vessels - built from balsa on simple, rather inconsistent 'cartoon' designs - to my collection of war gaming fleets.
ReplyDeleteYour model looks very handy!
Cheers,
Ion
Nice. Shows the benefits of 'see it, buy it, worry about what you are going to use it for later.'
ReplyDeleteSuper model
ReplyDeleteNice job on the dhow! I especially like the lateen sail. I bought one of those boats and I did not like the stepped hull so I filled in the gaps with wood putty. It was a lot of work!
ReplyDelete