Showing posts with label Russian Observation Corps. Show all posts

Monday, December 31, 2018

A List of the Figures that I Painted in 2018


Vignette of Frederick the Great grabbing the flag of the von Bulow regiment at Zorndorf


Here is a list of all of the wargame units that I painted in 2018, all of which are Seven Years War figures. Click on the links to go to the blog post that covers each unit that I painted.

Los Rios (Austrian) 2 x 32 figure battalions   November 15, 2018
Lacy (Austrian) 2 x 32 figure battalions    October 12, 2018

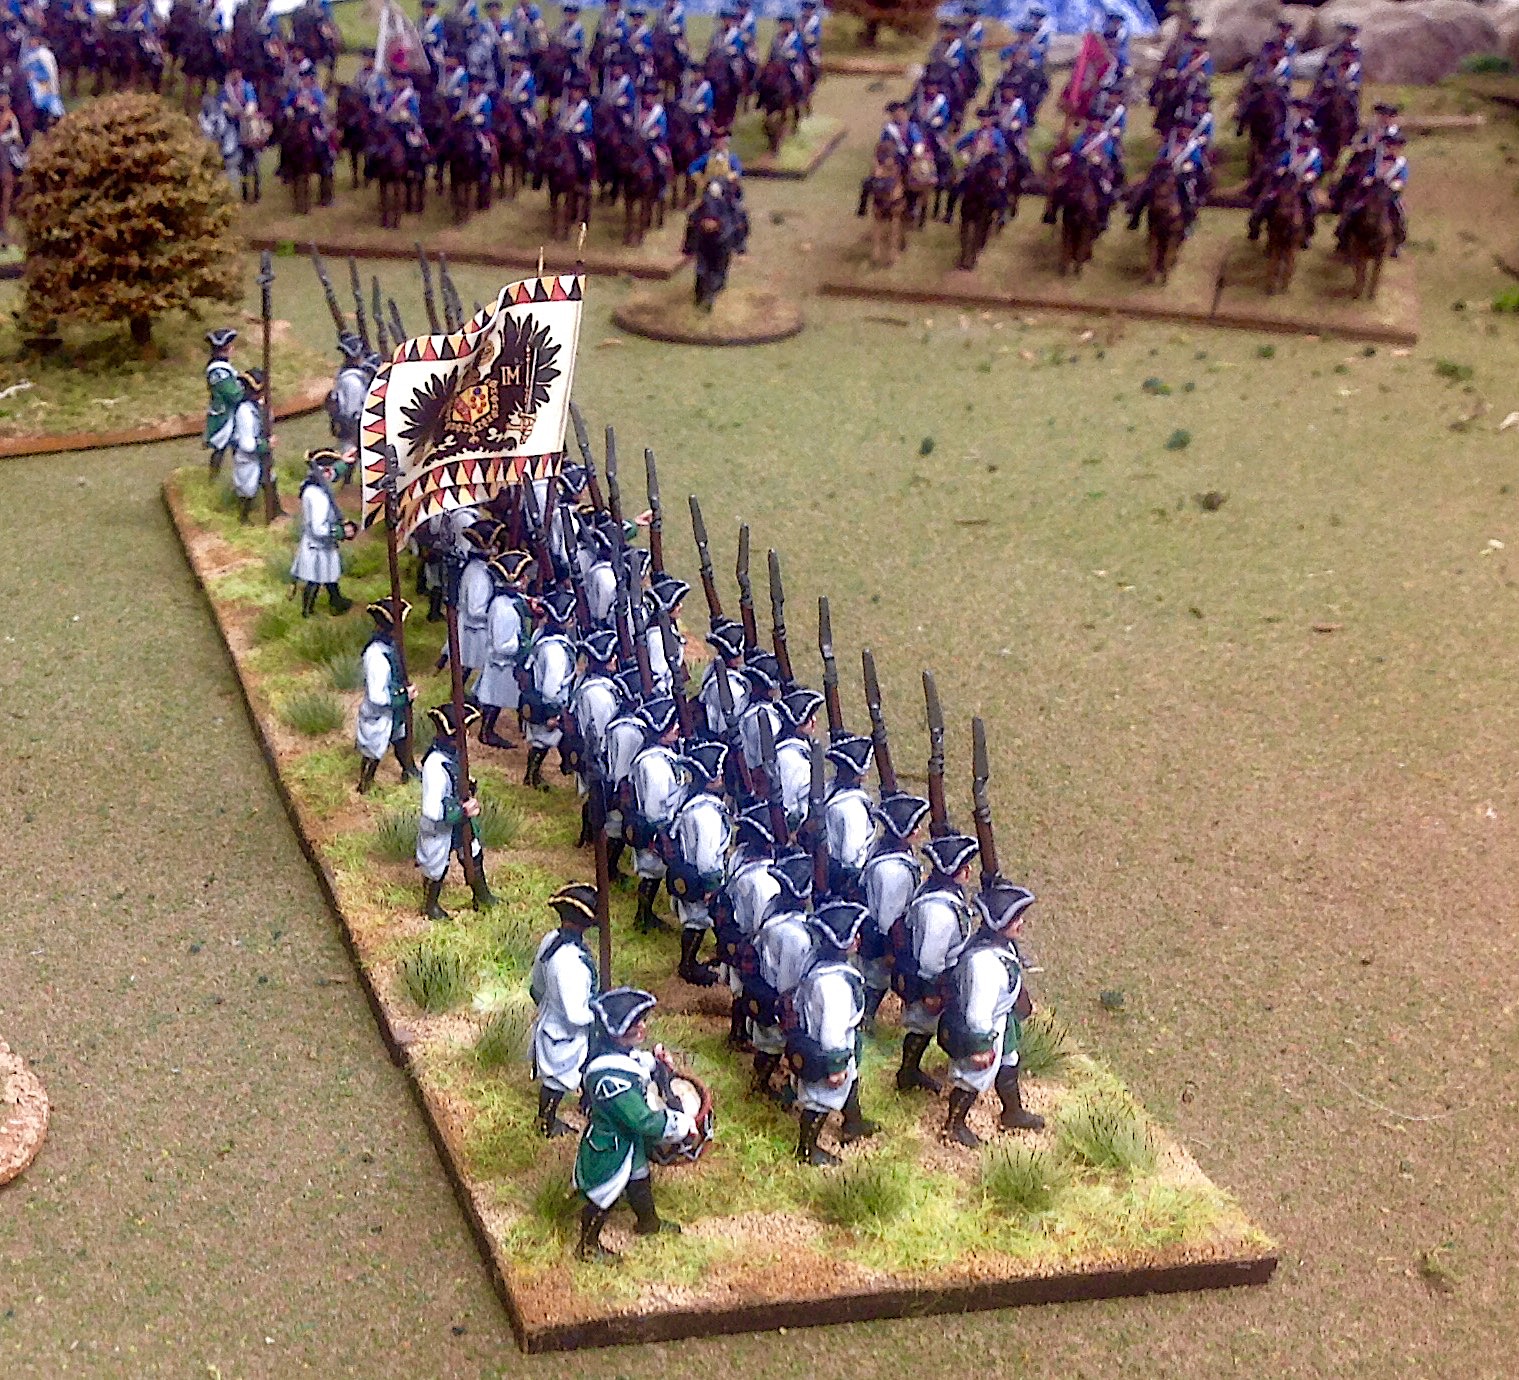
The Austrian Musketeer regiment Lacy, showing a new basing style that I am contemplating.


Russian 4th Grenadiers 1 x 32  September 29, 2018
Perm Musketeers (Russian) 1 x 32   September 23, 2018


2nd South Carolina Regiment (AWI)   July 25, 2018

2nd South Carolina Regiment (AWI)

IR2 von Kanitz Musketeer Regt. (Prussian) 2 x 32 figure battalions   July 18, 2018
Manstein Grenadier Battalion (Prussian) 1 x 32 figure battalion  June 30, 2018

Manstein Grenadier Battalion

Von Kanitz Musketeers

Observation Corps Grenadiers (Russian)   May 21, 2018

Observation Corps Grenadiers


IR46 von Bulow Fusilier Regt. (Prussian) 2 x 32 figure battalions May 12, 2018  and June 8, 2018 
IR35 Prinz Heinrich Fusiliers (Prussian) 2 x 32 figure battalions    May 4, 2018
Jung Sydow Garrison Battalion (Prussian) 1 x 32 figure battalion   April 30, 2018

Von Bulow Fusiliers


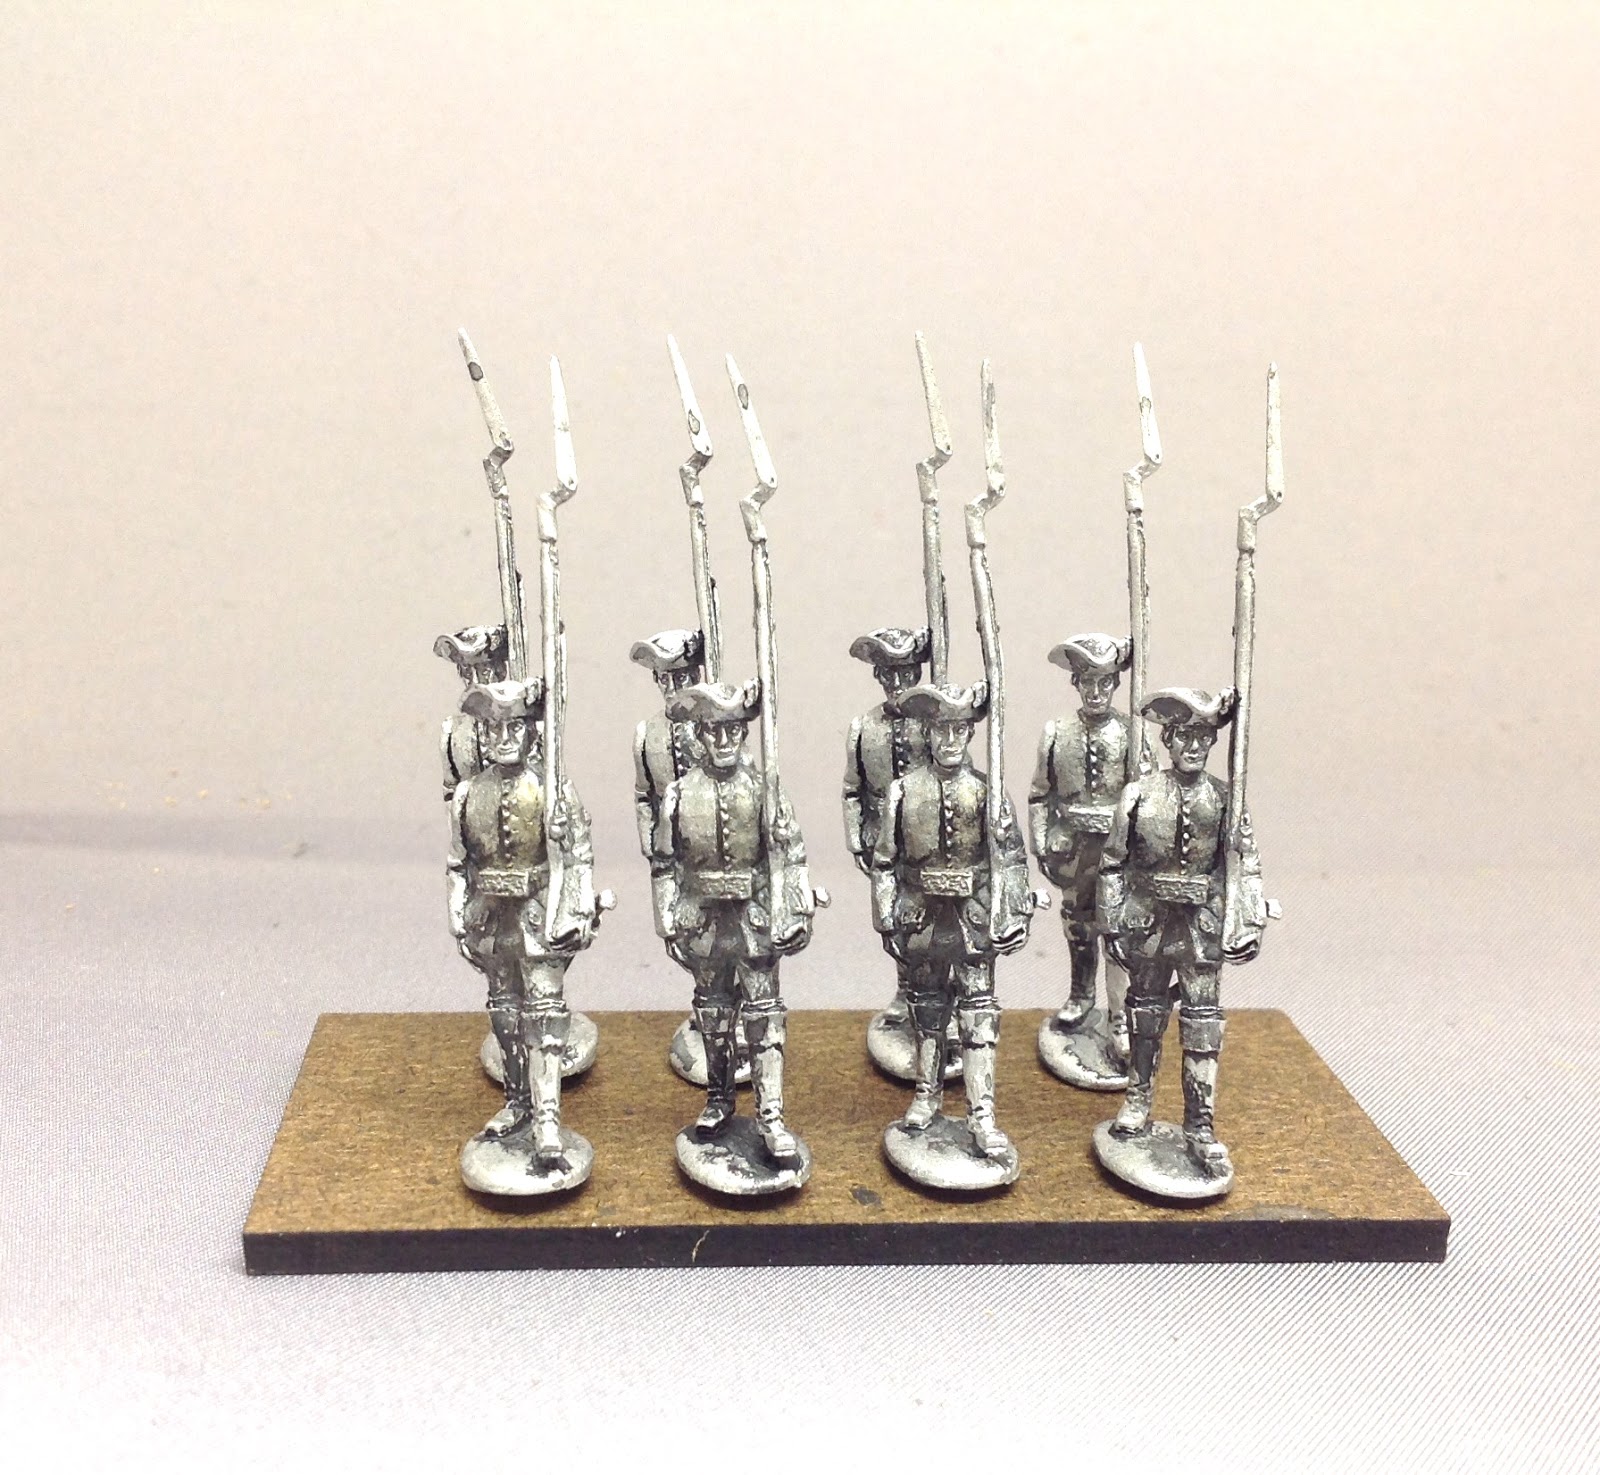
Observation Corps 5th Musketeers (Russian) 1 x 32 figure battalion  January 30, 2018
Permski Regiment (Russian) 1 x 32 figure battalion January 14, 2018 
Narva Regiment (Russian) 1 x 32 figure battalion  January 6, 2018

Russian Observation Corps Musketeers


I also painted 4 Russian artillery pieces, each with 4 crew plus limber teams of 4 horses, 1 rider and 1 limber. Here


Russian artillery battery with limber teams

If my math is correct, the total number of figures painted in 2018 was 652 figures. There are probably more than that if I include some vignettes that I made and some samples that I painted for the Fife & Drum on-line webstore and catalog.

Now in some of these instances, I posted the date when I flagged and based both battalions of a Prussian or Austrian battalion. So for example, the IR2 von Kanitz Musketeer Regiment indicates 2 x 32 battalions = 64 figures. I did not paint all 64 figures at one time, but rather, over the course of several weeks. My painting pace is approximately one unit of 32 figures per week, although I do not paint every week. I wish!


Tuesday, May 29, 2018

Making Flags from Kronoskaf


Colonel's (left) and Regimental (right) colours of the
3rd Regiment of Observation Corps Musketeers, shown with
Minden standard bearers for the Observation Corps.

Click on all pix to enlarge

Yesterday I made my own flags for the 3rd Regiment of the Russian Observation Corps Musketeers using the flag images that are available on the Kronoskaf web site. If you are unfamiliar with Kronoskaf and you have an interest in the Seven Years War, then you owe it to yourself to click on the link below and visit the site.


The link takes you to the home page of the site. Click on the link called "Armies" and then select from the list of countries that are available for articles. In this case, click on "Russia" which will take you to the page of articles on the Russian army of the SYW. There is a list of combat arms such as cavalry, artillery and ordanance, infantry (with subcategories for musketeers, grenadiers, Observation Corps, light troops, etc.).

The Observation Corps flags can be found Here

Regimental flag of the 3rd Regiment Observation Corps Musketeers.
(Kronoskaf flag image)


I have had some success taking the basic flag image, creating a two-sided flag, and then embellishing the flag with hand-painting the emblems and designs on the flag. The end result is a hand-painted flag that looks very nice. I have posted the original Kronoskaf flags on this thread so that you can compare them to the ones that I hand-painted.

Reverse side of the Observation Corps colours.


The process is as follows:

  1. click on the flag image and download the image to your computer. I use an Apple system so my procedures apply to the Apple world, but I would imagine that Windows based systems use similar procedures.
  2. open up you Downloads file and select the desired flag image that you want to customize
  3. click on the image and using your cursor, outline the flag but cut off the flag pole and finial part of the image.
  4. click on the Tools drop down menu and select "crop".
  5. save the edited image under a new file name.
  6. Open up a new Word document and insert the new flag image in the document.
  7. click on the flag image - there will be a sort of arrow in each corner of the flag, use your cursor to click on one of these and use to resize the flag to a serviceable size. I find that 1.5" square or slightly larger is a good size for each side of the flag.
  8. once you have sized the flag, then click on the flag agains and select "Copy" from the Edit drop down menu.
  9. clikc your cursor next to the flag image in your Word document and select "Paste". You will now have both sides of the flag next to each other, creating a two-sided flag.
  10. Now you can print off your flag on a color printer
Once the flag is printed, then cut out the flag and double check to make sure that the size of the flag fits with your miniature standard bearer figure.
  1. glue the flag to the flag pole with white glue (I use the "Elmers" brand of school glue). I spread the glue across the paper using a tool called a "clay shaper" which you can buy at a craft store such as Michael's or Joanna Fabrics. It has a paint brush style handle with a synthetic rubber tip - use one of the tools that has a flat edge. Using this tool, you don't have the problem of glue drying on a paint brush after you are finished using it because the glue wipes right off with a piece of tissue or even your finger tipe.
  2. press the halves of the flag together and use a small paint brush handle or a pencil to shape furls into the flag. Note that flags tend to flap and furl on the downward diagonal axis away from the flag pole. Many gamers tend to use a furl that is parallel to the staff. Don't do this - it is unrealistic and does not look as good as a flag that is furled on the diagonal axis.

Now you are ready to paint the surface of nearly the entire flag image.

  1. start with the "field" of the flag and paint the surface with an acrylic paint color that is similar to the color on the printed image. In the case of my Observation Corps flags, I used a P3 brand green paint called "Knarls Green" as my basic shade color. Paint all green areas green, but leave a very slight amount of green near the flag emblems unpainted and let the original color show through. Later in the process I will add highlights to the colors on the flags.
  2. All of the cloud designs on the flag are painted over with a light grey paint (IWM brand "Light Grey" or a similar craft paint was used on my flag).
  3. The black double headed eagle is next. I take some basic black paint and mix in some white paint until I get a dark grey/light black color. I paint strokes of the dark grey on the feathers to add a dimension/depth to the eagle. Later, I will go back and mix up a slightly lighter version of the dark grey and paint some highlight strokes on the wings to really make them "pop" and get noticed.
  4. Red areas are painted with a Reaper brand "Blood Red" color and then highlighter with Reaper "Bright Red". If you want even more depth to the red, add a second highlight (your third variety of red) of "Fire Red" Reaper paint to the red bits.
  5. Now to the gold sunburst image that is behind the eagle. I paint the whole sunburst P3 "Rucksack Tan" as the base shade color. Next I paint strokes of P3 "Mouldy Ochre" color to highlight the basic rays of the sunburst. Finally, I mix some white paint into the Mouldy Ochre paint to create a highlight color and carefully add strokes of this color over the Rucksack Tan strokes. Be sure to leave some of the shade color on the edges of the highlight brush strokes. I wasn't entirely satisfied with the highlighting of the yellow bits, so I took some Reaper Master Series "Candlelight Yellow - 09408" and put dabs of this color on the tips of the sunburst rays.
  6. Next I outline the yellow bits on the edges of the central emblem of the flag. I think that it is St. George, but I'm not sure and it doesn't really matter. The lines are so tiny that I only used the P3 Mouldy Ochre paint color and did not bother with shades or highlights for the lines. There are some white bits on St. George so I dabbed some white paint on these but tried not to touch up the tiny St. George image too much because sometimes too much is "too much" in appearance.
  7. Now I work on the flames that are in each corner of the flag. These are red on the regimental flag. I paint the whole flame Reaper Blood Red and then add the Bright Red and Fire Red highlights to the flames.
  8. Time to paint highlights onto the green field of the flag, using Reaper "Leaf Green" color, paint brushstrokes of the colors on every bit of the flag that is where you would expect to see lighter colors such as the top part of the furl. The recessed portions of the furl are left untouched (i.e. in Gnarls Green). Now if you are really confident in your highlighting skills, then add some white paint to the Leaf Green paint color to create an even lighter highlight and add a few brushstrokes of this mix to the raised areas of the flag which you have already painted Leaf Green. Use this second highlight color sparingly.
That completes the repainting of the regimental flag for the 3rd Regiment of Observation Corps Musketeers. The colonel's white color is done in a similar manner on the emblems and designs of the flag. For the field, I often leave the field in the white color from the printed image, but add a few brushstrokes of light grey here and there to some of the folds and creases of the flag where you would expect to shade the white. Use the grey sparingly. I few lines are all that you need. Again, too much will overwhelm the visual impact.

Colonel's Colour - 3rd Regt. Observation Corps Musketeers
(Kronoskaf flag image)


As you can see from the images of my painted flags, you have basically hand-painted your own flag. All that you have done is paint over the printed image with your own acrylic paint. The effort takes about 1 to 2 hours per flag, but I think that it is well worth the time spent.


zz

Saturday, May 26, 2018

Free Puppies!

Ha! Made you look.

I posted pictures of the Observation Corps Grenadiers, that I painted and based on my blog the other day, and I have to say that I'm a bit perplexed. I have a general idea of the number of visits that the average blog posting will generate, but for some reason, the OC Grenadier post barely generated any look sees. Either people are getting tired of all of my Russian blog posts, or else this particular one fell under the radar screen. Hence the "Free Puppies" post heading today - I wanted to see if anyone was out there.

Well, I'm not going to stop posting pictures of my Russians, 'cuz that's what you do when you are in the miniatures business and are marketing one of your new products. Also, they are a key element of my Kunersdorf Project for 2019 so I'm afraid that I will be given the Russian army some love over the coming months.

So as a public service, and in case you missed the previous OC Grenadier post, here they are again:

Minden SYW Observation Corps Grenadiers


With the long Memorial Day weekend upon us, I suspect that web traffic might be down a little bit as most people get together with family and friends rather than spending all their day on the internet. On the other hand, maybe readers want to get away from it all for a few moments, so I will be actively blogging over the holiday.

Observation Corps Musketeers
Something as equally adorable are the new Minden Observation Corps musketeers that I finished painting the other day. I ran out of wood MDF bases, so I can't base and flag the unit until I visit my FLGS and purchase some more.


Minden SYW Russian Observation Corps Musketeers. Click pix to enlarge.

A better view of the full battalion.
I have to say that the Russian infantry in summer waistcoats are the easiest to paint figures that I have ever worked with. Everything on them is either red or black and there is a minimal amount of equipment that one needs to paint, because these guys are traveling in light gear on a hot summer day.

Aside from my having a Kunersdorf and Pomeranian Army projects, why Russians, you might ask.

Why the focus on the Russians
For starters, I like the color combinations of the green/red regulation uniforms because they look nice and they are a change of pace from painting dull white coated Austrians or French, or dare I say, even painting battalion after battalion of Prussians. Heresy, I know, but I like to branch out a little bit on my painting table.

Second, the Russians were the toughest foe, bar none, that Frederick the Great had to deal with during the Seven Years War. In fact, Frederick never defeated a Russian army nor did any of his subordinants in other battles. Even a rabid Prussophile like me will have to admit that Zorndorf was  at best a draw than it was a Prussian victory. I can't put Zorndorf in the win column for Fritz. It was a battle that Frederick did not have to fight, because he could have achieved the same objective of evicting the Russians from Prussian territory simply by maneuvering across the Russian line of supply. This he had achieved when he crossed to the east bank of the Oder River and then marched behind the Russian army, stationed at Zorndorf.

Third, the Russians have an interesting variety of troop in addition to the conventional infantry/cavalry/artillery that every SYW combatant has: exotic Cossacks and Kalmucks, Observation Corps infantry wearing those rediculous cavalry boots, Horse Grenadiers wearing mitre hats, and more varieties of artillery equipment than you can shake a stick at.

Fourth, the Russian military command were quick learners when it came to developing tactics that could stop or neutralize Frederick's oblique order tactics.

To my way of thinking, if you are interested in refighting the battles of Frederick the Great then you need to cross swords with the Russians in your table top battles.

What's next?

AWI Battle of Kingston AAR
I fought and concluded the next battle in my South Carolina Campaign yesterday, the contest between Cornwallis and Gates at Kingston, South Carolina. I will post a lot, and I mean lots, of pictures over the weekend, so stay tuned to this blog.

As a teaser of sorts, here is one of the pictures that I snapped during the game. This was also the inaugural battle in the new Man Cave:

Americans (or rebels depending on your point of view) man some wolf pits
dug to slow down the inevitable British assualt on Gates' Continental army.
The battle of Kingston may well have decided the outcome of my South Carolina Campaign series of games.


Monday, May 21, 2018

Observation Corps Grenadiers Painted!


The new Minden Russian Observation Corps Grenadiers.


My first battalion of Russian Observation Corps grenadiers is completed and I am really impressed with how they turned out. Kudos to Steve Barber for sculpting some gorgeous models in his first go at sculpting in the Minden style. I'm going to let Steve work on the Russian horse grenadiers next, in both regulation uniform and Summer waistcoats.

Click on the link to the Fife and Drum web store if you are interested in purchasing Russians for your own armies.


The first picture above shows only three stands with 24 total figures. This was done in order to fit enough figures into the photo shot while still being able to see the close up details. The second photo below, depicts my now-standard 32-figure battalion. A battalion gun with two crewmen will be added  to visually balance the appearance of the line.


Here is the 4-stand version of the grenadiers that I will regularly use in my games. T
he  battalion gun still needs to be added to the grouop.


The Observation Corps grenadier flags are from the Kronoskaf site, as detailed in my previous blog post. They were embellished with some hand painting of the details by me.


In one of my earlier blog posts, I mentioned that after years and years of trying to figure out how to represent battalion guns and to use them in a game, I came up with a workable system.

The battalion gun will operate as a regular cannon that uses the artillery tables in my Der Alte Fritz rules. This will only apply to "long range" firing. Once the battalion moves within musket range, the cannon ceases to use the artillery tables and instead, simply adds one more D10 die to the musket firing. My rules give each battalion 1 x D10 for every four figures that are firing. So for example, if the grenadier battalion had 24 figures left from its original 32-figure strength, then it would get 6 x D10 for musketry. However, it would also gain an extra D10 for having the battalion gun. Once the battalion loses a whole stand of 8 figures, then the battalion cannon will be removed from the table for the remainder of the game.

I like that the battalion gun adds a sense of symetry to my 4 stands of 8 figures. This arrangement makes it difficult to place the colours in the center of the battalion, but adding the extra stand for the battalion gun moves the colours to the center of the battalion. Fritz likes symetry!


The next unit in my painting queue is a battalion of the Observation Corps musketeers. 

I am back to painting Russians for these two units so that people can see what a battalion of the figures look like once they are painted. After the musketeers are painted, then it is back to painting Prussians for my Pomeranian Army.


Saturday, May 19, 2018

Quartermaster Saturday at Schloss Fritz


Schloss Fritz Game Room. An AWI battle is set up on the 6ft x 12ft game table.

CLICK ON ALL PIX TO ENLARGE

Yesterday I finished the first battalion of the new Minden Observation Corps Grenadiers and so I had nothing to paint today, even though I had a lot of free time. Ouch! So I decided to go down into the man cave and tinker around with basing already-painted units and getting new ones ready for the primer spray booth. 

So there was no figure painting today, but catching up on some of the behind the scenes things that I needed to do in order to get my castings turned into painted figures ready for their first tabletop battle. So in effect, I was the quartermaster today working on uniforms, supplies and other logistics for my little metal men.

I based the Russian Observation Corps grenadier battalion  and several Prussian 3-pound battalion guns, then I glued castings to cardboard in preparation for priming and painting, and made some custom flags using the Kronoskaf flags as a template.

Getting the figures ready to paint

Since I have nothing to paint, it was time to get a new regiment ready for the paint table. So this afternoon I picked out 32 of the new Minden SYW Russian Observation Corps Musketeers and glued each figure onto a piece of card using white glue (Elmer's or PVA). Having already painted the OC grenadiers, I want to have a battalion of musketeers for gaming and for marketing purposes.

In case you missed the news, Minden Miniatures recently added SYW Russian Observation Corps grenadiers and musketeers.


Minden Observation Corps Musketeers line up for their new uniforms.

Making New Flags for the Observation Corps

GMB Designs is my go-to supplier of flags for my SYW armies, but alas, they do not make the flags for the Russian Observation Corps troops. So the next best thing was to go to the Kronoskaf web site for SYW information and copy/download a set of OC Grenadier flags.

Kronoskaf Observation Corps Flags

 So the process is to click on the flag image and select "download" if you have an iMac computer (I don't know how the Windows PC system does this function, but it is probably similar.

The next step is to open the downloaded image in Preview, which allows you to futz around with the image a little bit (light exposure, color etc.). Then save the image to one of your files.

Next, open up a new Word document and insert the flag image into Word. Click on the flag image and a sort of square appears around the outer perimeter of the image. Move your cursor to the corner of the image and start pushing inwards to change the size (height and width) of the flag image. Once this is done, then click on the Edit pull-down menu and select "Copy". Finally, move your cursor next to the flag image and click to complete the copy-move function. Now you should have both sides of the flag next to each other, thus forming a single two-sided flag.

Once you are satisfied with the size of the flag, then print it out and cut it out like you would any other paper flag. Swab the backside with white glue and then fold the halves around your flag staff. While the glue is still wet, take old paint brush or pencil (something round) and curl the flag around it to create furls and bends in the flag. (see example below).

Someone once told me that flags flap in the breeze in a diagonal pattern to the flag staff. So never have your flags furled perpendicular to the flag staff.

Tricking out your new flags

The Kronoskaf flags will look to shiny and ordinary and without any depth, shadows or highlights. So my next step is to customize the flags by painting over them with acrylic paint. If you want to keep it simple, using the existing color as your highlight for a white flag, or your shadow for a dark colored regimental flag.

In the colonel's white flag below, I painted over the surface with white paint and then added shading by using a light grey color. This gives you instant depth and dimension and looks much better than using the flag straight off your printer.

For the red regimental flag I used the printer red as my shade color and added lighter reds to achieve the highlights that you see in the photos.


Front view of the Kronoskaf flags after some paint embellishment.


Rear view of the customized Kronoskaf flags.
I decided to take the alterations another step further and add shading and highlights to the decorations that are on the flag. So the sun rays were over painted with a dark yellow and then the sun rays were painted back onto the flag with a brighter yellow paint. The black double-headed eagle received a middle coloring of black mixed with some flesh colored paint = painting the wings in this new color. I decided that the first highlight of black was not distinctive enough, so I mixed up a new highlight color using the black/flesh combination and then adding a small bit of white paint to the mix. This new color is light enough that one can paint lines on the eagle's wings to give the impression of feathers. You can touch up some or all of the decorations in the flag to whatever level you fancy. The two flags above had everything repainted except for the red heraldric shield on the breast of the eagle.

By the time you are finished with all of this, it almost looks like you have a hand-painted flag. My freehand painting of flags is very ordinary to average, but having the actual design on the flag as your guide, you can create what is basically a custom painted flag for your unit.

By the way, I did all of the paint customization once the flags were glued onto the flag pole.

Thursday, May 17, 2018

Russian Observation Corps Grenadiers - Painted


New Minden Russian Observation Corps Grenadiers.


I have finished painting the two packs of the new Minden Miniatures SYW Russian Observation Corps Grenadiers: MR-015 Grenadier Command Pack (5 figures) and MR-016 Grenadier Pack (8 figures). Obviously the pictures of painted figures give a better indication of how the figures look as compared to pictures of black washed figures.

I plan to use these figures in a 32-figure grenadier regiment. After that, I will paint some sample Observation Corps Musketeers.


MR-015 Command Pack (5 figures)

MR-015 Command Pack - rear view

MR-016 Grenadier Pack (8 figures)


MR-016 Grenadier Pack - rear view


bbb

Wednesday, May 9, 2018

Minden SYW Russian Observation Corps Figures Have Arrived


The new Minden SYW Russian Observation Corps ("OC") figures arrived from Griffin Moulds yesterday. The figures include OC musketeers and grenadiers, both in their summer kit of sleeved waistcoats. The officers wear the regulation coat. Both groups of figures have a command pack of 5 figures and a rank & file pack of 8 soldiers. There will also be packs of two extra standard bearers for both musketeers and grenadiers.

The Observation Corps figure packs are being offered at $10.00 for the command packs, $4.00 for the spare standard bearer packs, and $16.00 for the pack of rank and file soldiers. The Observation Corps figures will be priced at the old Minden prices for a limited time, through June 30, 2018, afterwhich they will be sold at the regular Minden prices.

The new figure packs are now added to the Fife & Drum Miniatures web store.

Click on the link HERE to go to the Fife & Drum Miniatures web store to inspect and purchase figures from our new SYW Russian range of figures.

Here are some pictures of the new figures, blackwashed to photograph better:


Observation Corps Musketeer Command (MR-013) pack with five figures.


Observation Corps Musketeers (MR-014) pack with eight figures.

Observation Corps Grenadier Command (MR-015) pack with 5 figures.

Observation Corps Grenadiers (MR-016) pack with eight figures.


Regular Line Musketeers in Summer kit (MR-005b) pack of eight figures.


****

Sunday, April 15, 2018

New Minden Observation Corps Greens Are Finished -Part 1


We will be adding 10 new figures to our growing Minden Russian SYW range of figures, with 9 new Observation Corps musketeers and grenadiers and one regular line musketeer on their way to Griffin Moulds to have the moulds made and the first spins of metal to be cast.

The Blogger Gremlins are making it exceedingly hard to post pictures in this post so I will split the article into two different posts, the first for the Observation Corps Grenadiers and the second for the Observation Corps Musketeers.

Observation Corps Grenadiers
Here are some pictures of the Observation Corps Grenadiers including an officer and standard bearer wearing their regulation coats and the NCO, drummer and rank and file grenadier wearing their summer waistcoats. Most of the Russians' battles were fought during the summer months, so the rank and file men and NCOs would discard their green wool coats at the baggage train and sensibly wear their long sleeved red waistcoats.

The pictures are not the greatest but I think that they give you an idea of how the figures will look.  I'm sorry that I couldn't get the lads to line up in close order, but the Blogger App is sometimes clunky when it comes to picture positioning.

Grenadier Standard Bearer

Grenadier Officer

Grenadier NCO

Grenadier Rank & File


Grenadier Drummer