Saturday, December 31, 2016

Review of the Grant series on "Refighting History" - Volumes 2 and 3.

Refighting History - Volumes 2 and 3 (click picture to enlarge)

I received copies of Volumes 2 and 3 of Charles S. Grant's new wargaming series: "Refighting History" as Christmas presents this year and I have had many enjoyable hours reading and rereading both books.

Volume 1
Volume 1 in the series covered Fighting Withdrawals in the Seven Years War and included several small actions at Asch, Hoyerswarda and Pretsch, all occuring in 1759.  The opening shots in the book are packed with lots of eye candy: picture after picture of Grant's wargame armies and an overview of the philosophy behind The War Game rules. The book concludes with an in depth analysis of Prussian Horse Artillery and the addition of horse artillery rules to Grant's evolving rules, The War Game (which have been modified so extensively that they should no longer be considered as "old school" rules).

The next two volumes cover some of the important battles of the War of Austrian Succession that were fought in the Prussian-Austrian theatre of war.

Volume 2
Volume 2 includes the battles of Mollwitz, Chotusitz and a small action at Sahay. The book begins with an overview of Grant's armies and organizations of the Vereinigte Freie Stadt (which look similar to the Prussian army) and the Grand Duchy of Lorraine (which looks suspiciously like the French army). There are lots of color pictures of figures from Minden Miniatures and Crann Tara Miniatures that look lovely and are pleasing to the eye.

Grant next gets down to business and opens with the famous battle of Mollwitz, which is a Grant family classic as shown in the original book The War Game. Charles presents the original Mollwitz game fought by his father (Charles Grant senior) followed by some helpful historical material on Mollwitz and how he boiled the forces down into playable wargame armies for table top action.  Then follows a modern version of the game in which the Austrian cavalry arm plays a major role in winning the battle of Mollwitz (oh the horror!).

Grant then offers a rather novel scenario for Mollwitz that features only the cavalry action of the two armies, which he calls "A Slice of Mollwitz". Again the Austrian cavalry prevailed in this scenario, and in spite of that (considering my Prussian bias) it looks like a fun scenario. After all, how many times do we get to fight a cavalry-only battle on the table top. The battle report is chock full of colorful pictures of the action.

Next up is the battle of Chotusiz, considered Frederick "first victory" (Marshall Schwerin should get the credit for the historical victory at Mollwitz). This is a battle that I've rarely seen gamed and is a scenario that I would like to try on my own in the near future. Following the same format as Mollwitz, the Chotositz battle begins with an historical overview followed by the methodology of translating the armies into smaller, more playable wargame forces, and then the actual wargame report, again with lots of color pictures of Minden Miniatures. Alas, the Austrians win again, doh! The game report also includes a number of specially drawn maps of the game at various stages of the battle, which make it easier to follow the course of the wargame. Grant allows the two army commanders to give a summary of their battle plans and pregame strategy is I find to be an interesting twist to the usual wargame after action report.

The third and final battle in Volume 2 is an action fought at Sahay fought on May 24, 1742 between the French and the Austrians. The battle was fought some 65 miles from Prague, in Bohemia. It was actually a fighting withdrawal of the Austrian army (10,000 men) in the face of a superior force of French (18-20,000). Sahay is not a very well documented battle in the history books so this part of the book reveals some new information about the WAS, as far as I'm concerned, so this is a useful book to have if you have an interest in the WAS.

The refight of the battle results in a rather Pyhric Victory for the French army.  I like this sort of game scenario as there is an imbalance between the two armies, with the objective of the smaller army being to extricate itself from the battle  rather than fighting for a victory.

Volume 2 ends with a look at the historical maneuvering of forces and how to adapt this to table top warfare. Charles shows you a picture of what an actual squadron of cavalry and a battalion of infantry would look like at a 1:1 scale. Interesting stuff and much to ponder. He also illustrates what a 10-gun artillery battery would look like including all of its logistical support elements.

Volume 3
The next volume in the series covers the Silesian battles of Hohenfriedburg and Soor, both of which were Prussian victories historically and also Prussian victories on the table top (huzzah, at last!). It concludes with the battle of Rocoux which was fought in modern day Belgium between the French and the Pragmatic Army.

The book begins with more pictures of Charles S. Grant's modern wargame armies, which I'm pleased to see are largely Minden and Crann Tara figures, both ranges being sculpted by the talented Richard Ansell.

Next up is the Battle of Hohenfriedburg fought on June 3, 1745. This battle featured the famous charge of the Prussian Bayreuth Dragoons (who put 20 Austrian battalions to flight, captured 67 colours, 2,500 prisoners and 5 guns. Grant breaks the battle down into two war-game scenarios: the initial attack of the Prussians on the Austrian left wing held by the Saxon army and then the central action between the Austrians and Prussians. The battle retelling follows the same format as discussed in Volume 2, so I won't rehash the details of that. Both battle scenarios end up as Prussian victories, but both could have gone either way so the scenarios are very balanced, as far as I'm concerned.

The next battle is the Battle of Soor fought September 30, 1745 between the Austrians and Prussians. It ended as a Prussian victory and basically ended the War of Austrian Succession as the Austrians concluded that they could not defeat Frederick in battle. Soor is presented in the usual format with an historical overview, a construction of the war-game armies, and a presentation of the battle scenario fought between two players. Soor is another one of those battles that rarely gets attention in the history books or on the table top, so it is a scenario that I look forward to fighting. Soor is broken down into three different scenarios: the Prussian assault on the Graner Kop, the battle in the center, and finally, a small action in which Austrian light forces conduct a raid on the Prussian encampment. I think that readers will find the raid scenario a fun one to play - lots of color pictures enhance this scenario.

The last of the three battles is Rocoux, fought near Liege on October 11, 1746 between Marshal de Saxe's French army and Ligonier's Pragmatic Army of Dutch, British, Hanoverian and Austrian forces. The French have numerical superiority and launch a bludgeon style attack on the Allied positions. The French take quite a pounding, but in the end, the weight of numbers favors the French and results in a victory, both historically and on the table top.

Conclusion
This review is longer than normal, but I have to say that I thoroughly enjoyed both volumes 2 and 3 and give it my highest recommendation if you are an enthusiast of 18 Century warfare. The combiniation of historical overviews, construction of the scenario armies, and the actual battle report complete with the thoughts of the two commanders, make these "must have books" for your collection.

Wednesday, December 28, 2016

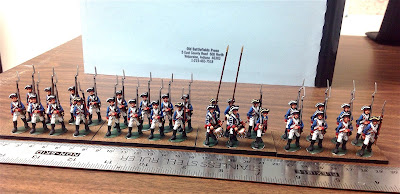
Painted Fife & Drum Hessians

Prinz Karl Regiment of Hessians (click all photos to enlarge the view)


I finished painting 30 Hessians over the holiday weekend and was getting ready to base them when I decided that the regiment would look better with 40 figures rather than 30 figures. Early in the American Revolution, the Hessian regiments mustered 400 to 600 men. At a 1:10 ration, such as I use in my own AWI armies, that would result in a regiment of 40 to 60 figures. The latter figure is too many to use on the tabletop due to the frontage that it would take up on the table, so I decided that all of my Hessian regiments will be 30 to 40 figures.

Below are some pictures of the contents of the Hessian Musketeers Marching packs of figures:

HP-001 Musketeer Command (6 figures: officer, NCO, 2 ensigns, and 2 drummers)

HP-003 Musketeers Marching (8 figures - identical pose)


Contents of Hessian Musketeers Marching pack of 8 figures: HP-003
HP-003

HP-001 Hessian Musketeer Command Pack of 6 figures.

Since Hessian regiments were single battalion regiments, I increased the size of the command packs from 4 to 6 figures so as to include 2 ensigns to carry the flags. An extra drummer was added to the pack to bring the pack to a  nice even number of 6 figures.

There are still a few more days to take advantage of the Trenton Christmas Deal and purchase 30 figure regiments for $50.00, which represents a discount of 17% off of the regular retail price of $60.00 for 30 figures. (Otherwise, foot figures continue to sell for $2.00 each).

Fife & Drum web site link

Click on the link above to visit our Fife & Drum website and explore our product offerings for both the AWI and SYW periods.


Tomorrow: a review of my Christmas war-game swag.

Saturday, December 24, 2016

The Battle of Trentonberg

Saxon camp at dawn of Christmas Eve Day


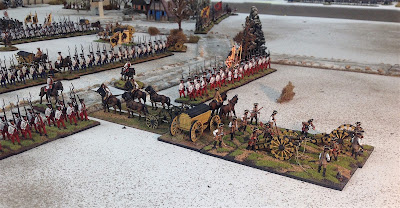
Yesterday my nephew Alex (the Heir Apparent) and I decided to cross swords in my basement and go at it with a war-game. It took me an hour to tear down the Leuthen terrain, but as long as I had the Winter ground cloth, trees, roads and buildings, I decided to organize a scenario based in the Winter.

I decided that it was time for my Hesse Seewald army to have its very first battle against their hated enemy, the Saxons. Since I only had three squadrons of Saxon cavalry in my so-called Saxon army, I recruited some Austrian infantry and cavalry into the Saxon army. Since the Hesse Seewald army is clad mostly in green coats, I added the Austrian de Ligne Dragoons to the HS army.

Since Christmas Eve and Christmas Day were but a day or two off, what better scenario could I do than to run a sort of Trenton game!

Thus 4 battalions of Saxon infantry was posted in the town of Trentonberg, 2 battalions of Croats were deployed in a screen forward of the town, and 4 regiments of cavalry were deployed on the wings (2 regiments per wing). In addition, two more Saxon regiments would be on the march to the sound of the guns and enter the table at a later date (determined by the roll of a D6 die to decide which turn their arrival would occur). Additionally, a squadron of light Uhlans were posted as a cavalry vedette to the west of the town.

The Hesse Seewalders would deploy on their table edge and get two free turns of movement before we reverted to an initiative die roll each turn hence.

On Turn 3, each Saxon battalion would roll a D10 to determine whether or not they were aroused from their brandy-induced slumber: odd number = No; even number= Yes. It would take one full turn for a Saxon battalion to form up after it was ordered to Stand To. The first battalion of the Gyuli Regiment rolled the requisite even number and so it began to form up. The second battalion was called to on Turn 4. The two battalions of the Prinz Sincere regiment did not form up until Turn 6. The reserve battalions also entered the table on Turn 6 (I decided that the reserves would not reach the table until the 4 battalions in camp were formed up.

********************

Erbprinz Friedrich of Hesse Seewald (commanded by Alex, the Heir Apparent) received a scouting report that the Saxon army had taken up winter quarters in nearby Trentonberg. Their camp was established too close to the Hesse Seewald army, which had taken up quarters on the west bank of the Saale River in Thuringia. His mentor, Marshal von Glasenap agreed that now would be an opportune time to strike a blow against the Saxons and disrupt their plans for the coming Spring Campaign.

The Erbprinz gathered up his small army of 8 battalions (including the Garde and a battalion of converged grenadiers) and 6 cavalry squadrons and make a night march towards Trentonberg. The infantry was divided into two brigades of 4 battalions, one commanded by his brother Prinz Heinrich and the other commanded by General Alberti. The cavalry on both wings were commanded by their regimental commanders.

At dawn, having been undetected by the Saxons (commanded by me), the Hesse Seewalders methodically deployed from their march columns and conducted the minuet of deploying into two lines of battle. Their deployment was virtually completed before a company of Croats fired off a volley at the HS Jagers, who preceded the army just to handle events such as this. The Croats took casualties from the return fire and then retired back towards Trentonberg in good order.


Another brigade of Saxons winter down in their camp too.


An aerial view of the Saxon camp at Trentonberg.


The Heese Seewald army advances

The first brigade of Prinz Heinrich deploys into line and advances toward Trentonberg.

Hesse Seewald Corps of Guides (Light Dragoons) pass through the village of Donopdorf.
The General Alberti's second brigade of the Hesse Seewalders deploys from column into line in preparation for the battle.
Both brigades are now deployed and advance towards the Saxon camp in Trentonberg. So far they are undetected.


An overview of the battle lines. Saxon Uhlans de Saxe provide a vedette line on the left flank of the Saxon camp. Trentonberg is seen on the right. Another village, whose name has been forgotten by History, anchors the HS right flank. More jagers and Croats have it with each other in that village.


The Uhlans fall back in face of the advance of formed enemy cavalry. The HS Corps of Guides preceed the Buddenbrock Dragoons.

A large cavalry melee forms on the left flank of the Saxon camp. The Hesse Seewald dragoons prevail and run the Saxon cavalry from the field.


Hesse Seewald Garde in their red coats spearhead the attack on the Saxon camp.

The Garde engages the 1st Battalion of the Gyulai Regiment, which has roused themselves from the camp.

The Garde has had enough of the firefight and decide to charge the Gyulai Regiment.


The Garde routs! However, other Hesse Seewald regiments advance through a gap in the lines which was defended only by a battery of Saxon 3-pounders. However, the second battalion of Gyulai is engaged in melee with one HS battalion and is about to flanked by another battalion. Not a good thing.

At this point in the battle, The Heir Apparent and I decided to call a halt to the game and assess the winner and loser. We both argued that our own side was losing the battle at this time. Here is my assessment (which counts the most LOL):

The HS cavalry has run all of the Saxon cavalry off on the Saxon left flank. It will be free to reform and within two turns it will run amok in the rear of the Saxon positions around Trentonberg. In the center, the Gyulai regiment was resisting remarkably well as both battalions were holding fast and preventing the HS infantry from extending their battle line. A sort of traffic jam had battalions stacked up behind each other in Prinz Heinrich's brigade. The veteran General Alberti's brigade would likely clear out the 2nd Gyulai battalion and capture a part of the town. So I would award the center to the HS army. Total numbers: 3 battalions versus 1 battalion would eventual play out in the Hesse Seewalders' favor on the right flank.

The rest of the Saxon army (4 battalions) were fresh and firmly ensconced in the part of Trentonberg that was on the back table of my battlefield and I didn't see the HS battalions rousting them out of the village.

Thus my assessment is that the Battle of Trentonberg was a victory for Hesse Seewald. The HS army gave the Saxons a bloody nose, but the Saxons gave as good as they got and conducted a heroic stand in the town. The Saxons would be able to retire back a few miles to safety and they were not captured or destroyed.

By the way, all of the figures used in this battle were either Minden Miniatures or Fife & Drum light dragoons, which look very smart in their Tarleton helmets.

************

I would like to wish my readers a Merry Christmas and Boxing Day and hope that you get all of the books and war-game figures that were on your wish list. We are having 23 guests at Schloss Seewald tomorrow, after which the Princess and I are going to serve a Christmas meal in the nearby homeless shelter. It should be a fun and very busy day in our home.

Tuesday, December 13, 2016

Trenton Christmas Deal for Fife & Drum Hessians


Two Fife & Drum Hessian regiments, firing and marching. Click all pictures to enlarge the view.

My next painting project will be to get two 30-figure Hessian regiments painted over the next couple of weeks. There will be one each of a marching regiment and a regiment in firing line formation. See picture of the pair of regiments at the top of the page and the marching musketeer regiment below:

Hessian Musketeer Regiment Marching

The Hessian Musketeer Marching Regiment consists of the following Fife & Drum packs:

1 x HP-001 Command Pack (6 figures per pack)
3 x HP-003 Musketeers Marching (8 figures per pack)

I have tweaked the packs by adding 2 extra NCO's, one at each end of the line, and removing 2 of the marching musketeers. (more on this later). This will become the Prinz Karl regiment for the simple matter that it is the only GMB Designs flag set that I have on hand.


The Hessian Musketeer Firing Regiment consists of the following Fife & Drum packs:

1 x HP-002 Command Pack (6 figures per pack)
3 x HP-004 Musketeer Firing Line (8 figures per pack)

As with the marching regiment, I have removed two rank and file and substituted two extra NCOs placed on each end of the line. The name of this regiment will be determined after I order more GMB flags. I want to have regiments that participated in the Philadelphia Campaign of 1777.


Hessian Musketeer Marching - Command Set

Hessian Musketeer Firing Line - Command Set

The Trenton Christmas Deal
I liked the way that these two regiments looked, especially with the extra NCOs anchoring the end of the regimental line, that I decided to offer a complete regiment for the discounted price of $50.00 per regiment. This represents a 17% discount off of the list price, which would be $60.00 without the discount.

This is a limited time offer through the end of December 2016 - after that, the deal will expire.  Click on the link below to visit the Fife & Drum website and shopping cart. Take advantage of the Trenton Deal today!


This is really a great way to get a Fife & Drum Hessian regiment into your tabletop army at a very attractive price. The Hessians were added to the AWI range earlier this year and there will be fusiliers and jagers coming in the future as we expand the AWI range.


Monday, December 12, 2016

Leuthen Update - Turn 10


Austrians retreat back to Leuthen at the end of turn 10.


Through last evening I have played ten solo turns of the Battle of Leuthen and the Prussians have pretty much tumbled the Austrians back into Leuthen, where they are preparing a new defensive line facing the Prussians. At the end of the turn, I did a deus ex machina and arbitrarily repositioned all of the troops for the next phase of the game - the Prussian assault on Leuthen itself.

The completion of the cavalry melee between Zieten and Nadasty ends in the  Prussians favor. This pretty much settled things on the Prussian left and allowed them continue their advance on the town of Leuthen.

The Prussian pursuit, post-melee.

Pursuit comes to a halt as the Austrian Reserve Brigade of Arenburg arrives just in time, deploying on the Austrian left flank, just where it needed to be!

The Hungarian brigade of Forgach makes it safely back to Leuthen.

Lucchesi's reserve cavalry brigade arrives to anchor down the Austrian right flank.


In the center, the Rot Wurzburg Regiment deploys inside Leuthen Churchyard .
At this point in the game, I stopped it at Turn 10 and reordered the lines of both sides: Prussians in a continuous line of infantry and cavalry prepare to attack; and the Austrians re-ordered and deployed in Leuthen. I think that the attack on Leuthen should be a separate scenario apart from the initial Prussian attack on Sagschutz, etc.


Prussian Gardes Brigade halts to reorder its lines at the end of Turn 10.

Forcade's brigade on the Prussian left deploys on the flank of the Austrian right  wing, but their position is threatened by Lucchesi's arrival. Driessen's Prussian reserve cavalry can be seen in the background and they are ready to intervene should the Austrian cavalry advance.


A view of the entire Austrian deployment in and around Leuthen. The grenadiers and reserve infantry are on the left flank, the Rot Wurzburg brigade is in the center, and the Hungarian infantry and Lucchesi's cavalry anchor the right flank.

I might try Charles Grant's approach to Leuthen and move the terrain forward so that the town of Leuthen is on the main table while the Prussian lines are moved to the facing back table. This way the assault action will be played out largely on the main table, rather than across the aisle.

Tuesday, December 6, 2016

Battle of Leuthen Begins


Prussian Advance Guard commander Hans Joachim von Zeiten issues orders before the battle starts. Minden Miniatures from the collection of Der Alte Fritz. Click on all pix to enlarge.

Zieten is given his game dice.

I was able to power through eight turns in total, yesterday through today, and ended up with the Prussians pressing their advantage and pushing the Austrians back towards Leuthen.

Prussian Army at Leuthen
The Prussian army was organized into two cavalry brigades and three infantry brigades:

Zieten's right wing cavalry - 7 squadrons (2 x Hussars, 2 x Dragoons, 3 x Cuirassiers)

Prinz Moritz's brigade of the right wing - 4 x Battalions Musketeers, 2 x 12-pound cannon and 2 x 3-pound regimental guns.

Ferdinand of Brunswick's centre brigade - 4 battalions (2 x Grenadiers, 2 x Guard and 2 x 3-pound regimental guns.

Forcade's Refused left wing - 4 battalions (2 x musketeers 2 x fusiliers), 3 x 12-pound Brummers, and 2 squadrons of Black Hussars.

Driessen's leftt wing cavalry - 8 squadrons (2 x Dragoons, 4 x Cuirassiers, and 2 x Hussars)

The Prussian attack was led by Zieten's cavalry brigade near Sagschutz, followed by Prinz Moritz's brigade of infantry. Next, en echelon, were the brigades of Ferdinand and then Forcade. Driessen's cavalry covered the Prussian left flank and was concealed behind the Sophienberg.

Prussian deployment showing Zieten's cavalry and three infantry brigades, en echelon. 

Driessen's left wing cavalry hidden behind the Sophienberg


Austrian Army at Leuthen

The Austrian army was organized into 5 brigades of infantry and 2 brigades of cavalry:

Nadasty's Left Wing Cavalry  -  8 squadrons (4 x Dragoons, 2 x Saxon Cheveaulegers, 2 x Cuirassiers) - deployed behind and to the left of Sagschutz.

Wurttemberg Brigade - 3 battalions plus 1 battalion of Croats and 1 x 6-pounder - deployed in and around Sagschutz on the far left wing of the Austrian army.

Colloredo's Brigade (centre) - 4 battalions of infantry and 2 x 3-pounders; deployed perpendicular to Sagschutz facing east.

Forgach's Brigade (centre) - 4 battalions of Hungarian infantry, 2 x 6-pounders and 2 x 3-pounders; deployed to the right of Colloredo's brigade, also facing east.

Leuthen Churchyard Garrison - 2 battalions of Rot Wurzberg infantry deployed inside the churchyard. No artillery.

Ahrenberg's Reserve Brigade - 4 battalions including 2 x musketeers and 2 x grenadiers plus 2 x 12-pounders. Deployed off table behind Leuthen

Lucchesi's Right Wing Cavalry 8 squadrons (6 x Cuirassiers and 2 x Dragoons) - deployed off table. behind Leuthen.

Overview of the battlefield on the centre table. To the left is the village of Sagschutz. Off in the distance are Lobetinz (left) and Radaxdorf (right). Austrian infantry brigades in the centre are facing east towards the expected direction of the Prussian army. Nadasty's cavalry brigade is deployed at the bottom right corner in the picture. The Leuthen churchyard is to the right, off picture.

Nadasty's cavalry of the left wing.

The battle begins at Sagschutz

dd

Wurtemberg battalions defend Sagschutz

Prinz Moritz attacks Sogschutz, leading with the Itzenplitz Regiment (IR13).
Prussian dragoons draw first blood, over running the Croats.

The Prussian dragoons (left)  have at with with Austrian cuirassiers (right).

The remaining Croats get run down by the Zieten Hussars in the wooded area around Sagschutz.


Next in line: Ferdinand of Brunswick's brigade follow Moritz's brigade and crash into the other side of Sagschutz, routing the Truchsess regiment.

Ferdinand's brigade advances in the center.

Prinz Moritz's brigade.

Ferdinand's brigade pushes through the Austrian centre.

The large cavalry melee behind Sagschutz draws in more and more horsemen.


Austrian Deutschmeister Regiment demonstrates how to change formation from column into line.

Another view of the column to line maneuvers.

The maneuver into line is completed.

Austrian battery of 6-pounders guards the far right flank of Forgach's brigade.

But danger lurks on the horizon as the Black Hussars approach from the flank...

...and they over run the Austrian battery with ease.


Prussian Brummer battery advances to a new position on the Galgenberg.

An earlier rendition of the huge cavalry melee. After awhile, they all start to look the same.

The relative positions of the two armies at the end of Turn 8. You can see how the Austrian lines (center and right hand side of the picture) are bending back on each end. It is not a good sign when your battle line bends at any point in the line, much less at two different points in the line.

So the brief summary of the first 8 turns of Leuthen are that a huge cavalry scrum took place throughout the whole game. At first the Austrians had the edge, but gradually the Prussian cavalry gained the upper hand as the Austrians made the mistake of not committing their last two squadrons of reserve dragoons until it was too late. The Austrian cavalry commander was afraid that the Austrian infantry flanks would be uncovered if he lost the flank. He was correct.

Prinz Moritz pushed the Wurttembergers out of Sagschutz with relative ease, save for the Prinz Ludwig regiment which refused to rout out of town - they died to the last man in Sagschutz (died for Sagschutz????!!!!). The next brigade in echelon was that of Ferdinand of Brunswick and consisted of the elite regiments in the army - grenadiers and guards. They pushed forward in the center and seemed to be taking on the entire Austrian army, but pushing them back.

The third brigade in echelon, Forcade, held back as the refused wing and reserve of the army. Eventually they formed column and started marching around the right flank of the Austrian army. They will make a juicy target for Lucchesi's Austrian cavalry reserve, should it ever decide to show up for the battle (it will).

I am up to Turn 9 now, and I expect that the Austrian center will start to cave in or retreat back into the town of Leuthen, where the fight for the churchyard will begin. Ahrenberg's Austrian reserve infantry should arrive on the next turn.

More tomorrow evening.