 |
| Der Alte Fritz contemplates a game ruling in his Zorndorf game. |
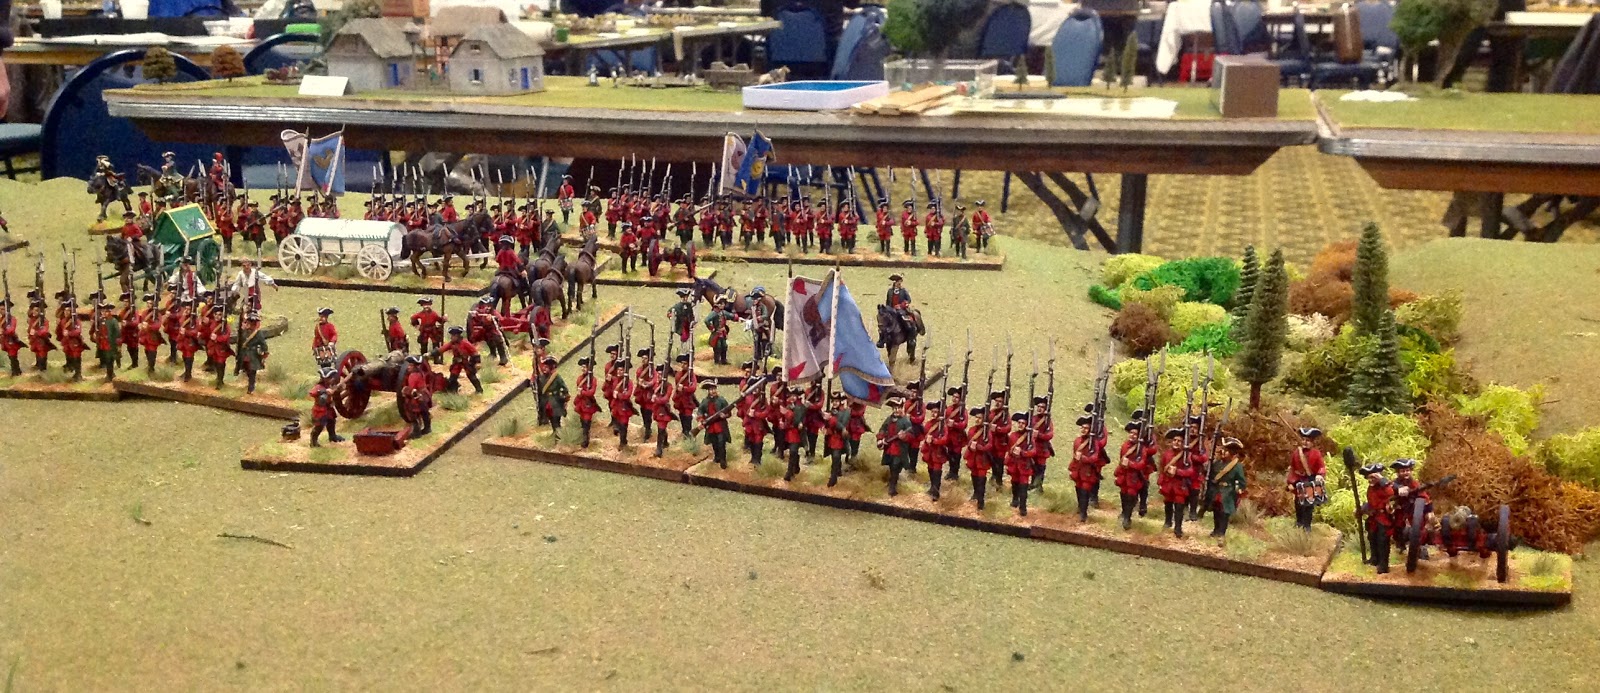
The second batch of pictures features the Battle of Zorndorf game that I hosted on Friday and Saturday. Most of the figures are Minden Miniatures with a few RSM and Crann Tara figures sprinkled into the mix. All three of these figure ranges are completely compatible in size and appearance.
Zorndorf Cavalry Melee
I added some new rules for cavalry melees that are designed to speed up the melees so that they do not slow down the game in a convention setting. Essentially, there is only one round of melee now and the attacker either wins or retires back to its own lines.
The charge procedure begins with the Attacker declaring his intent to charge; he tests his morale and if he passes, then his cavalry unit closes in on the Defender. There is a possibility that the charging regiment will fail its morale test, either going Shaken and standing still, or horror of horrors it decides to rout.
If the Attacker passes his morale test, then the Defender tests his morale next. Again, the Defender can advance into melee if it passes his moral test. A Shaken results causes the Defender to fall back a full move and a rout does ... you know how that ends.
Assuming that both sides pass their morale, they move into contact and conduct a round of melee. Morale tests ensue after one round. The Charger must win the melee or else it is considered to have been "repulsed" and it must retire back towards its own lines. In the event of a tie in melee casualties, all ties go to the Defender because the onus is on the Charger to win the ground.
At the conclusion of the melee, I now have a cavalry pursuit table based on the roll of one D10. In most outcomes, the Winner will stay put. There is an opportunity that it will continue to charge and another outcome is that the unit halts, but remains in good order rather than in Shaken order.
 |
| Cavalry action on the Prussian right wing (Russian left wing) near the Langen-Grund. |
 |
| Russians (right) and Prussians (left) cross swords. |
 |
| The Russians gain the upper hand in the melee as fresh reinforcements arrive . |
 |
| The aftermath of the cavalry melee: each casualty disc represents the spot where a melee was won - red and green discs for the Russians and blue discs for the Prussians. |
The picture above depicts a number of casualty discs on the ground. Everytime there is a melee, a casualty disc is placed on the spot where the melee occurred: red and green for Russians and blue for the Prussians. For example, if the Prussians lose the melee then it falls back and a blue casualty disc is placed on the ground where the swords were crossed. At the end of the game, the side with the most casualty discs on the field is generally the loser of the game.
Zorndorf - the Infantry Battle
The mainstay of the Zorndorf game is the infantry battle that covers approximately 12 feet of the overall 16 feet of table length that was used in the game. In the first game on Friday, the Prussian did something that I have rarely seen in one of my wargames: they bombarded the Russian infantry for about three game turns before launching their infantry attack. That is a pretty smart tactic.
 |
| A view of the whole table, from the Zabern-Grund stream heading towards the Stein-Busche wooded area. Russians are on the left and the Prussians are on the right sides of the table. |
 |
| The initial Russian deployment with the Zabern-Grund in the foreground and the Stein-Busche near the top of this picture. |
 |
| Galitzin's Russian Division awaits the attack of Manteuffel's advance guard of the Prussian army. |
 |
| Minden Russian infantry in waistcoats are "seeing the elephant" in their very first game. |
 |
| The Russian Observation Corps and Dohna's Prussians fight it out in the Stein-Busch. |
 |
| Eventually a break occurs in the Russian line and they have to retire. |
The Prussians lost the cavalry battle on their right flank, but they broke through the Russian battle lin in the center and won the game. They also had the least number of casualties on the field, as represented by the casualty figure discs. This was one of the victory conditions in the game. Each disc is a Victory Point f(VPs) or the other side. Additional VPs can be earned by capturing cannon and flags, killing a general, and for each melee won. The Prussians won on points 23 to 34, with a low number being the winner.
The Second Zorndorf Game - Saturday
The battle of Zorndorf was played again on Saturday, with the outcome being the same as in the first game: a Prussian victory. The Prussian cavalry won the battle on both flanks of the table and Seydlitz's cavalry was roaming around behind the Russian lines at the end of the game which was bad news for the Russians.
 |
| I posted a map of the strategic movements of the armies that occurred prior to the Battle of Zorndorf. The map is courtesy of Jeff Berry (Obscure Battles blog) who creates some wonderful battle maps. The map is printed on foam core board and laminated. I think that it helps the players to give them a strategic overview in order to get the context of the battle and why it was fought. |
 |
| The Prussian infantry close in to engage in a close range firefight with the Russians. |
 |
| Bill Protz makes a surprise appearance as the Prussian cavalry commander of the refused right wing of the Prussian army. |
 |
| Russian horse grenadiers and Cossacks square off against the Puttkamer Hussars. |
 |
Seydlitz negotiates the passage of the Zabern-Grund with his Prussian cavalry
and eyeballs the flank of some Russian infantry |
 |
Russian infantry is in a bit of a pickle with Prussian infantry to their front
and Prussian dragoons hover on their flank. |
 |
Prussian dragoon regiment Meinicke (D3) reforms after crossing the rough terrain of the Zabern-Grund
and prepare to charge the Russian infantry. |
I have been painting Russians since August 2017 almost nonstop. I had started with 4 Russian battalions and one squadron of Horse Grenadiers. Over the period August 2017 through March 2018 I painted 8 battalions of Russian infantry, five artillery pieces with crew and limbers, and 10 squadrons (12 figures per squadron) of cavalry.
Most of the Russian musketeers were part of the new range of Russian infantry that has been added to the Minden figure range. We will soon be adding Observation Corps musketeers and grenadiers probably by June 2018. The figures have been sculpted and they are now at Griffin Moulds, where they will be turned into production castings.


Most impressive pictures, sounds great!
ReplyDeleteWhat a lovely looking set of games. Most impressive.
ReplyDeleteI use 'Honours of War' for my SYW games and an artillery bombardment can be, if the die Gods are with you, a most effective way of softening up the opposition. This is especially true for the Austrian artillery.
Wow, Jim! THAT is wargaming!
ReplyDeleteLovely looking games, they look worth the time you took putting them together!
ReplyDeleteWell done!
A fine looking game!
ReplyDeleteGreat looking game Jim. I like what you've done re the rules. I don't know why we don't bombard the enemy a bit before getting stuck in. makes admirable sense. If you remember the Leuthen game at AMG last year the Prussian artillery dominated the centre of the table in both games, although much more so on the second.
ReplyDeleteStunning as always kind Sir!
ReplyDelete