|
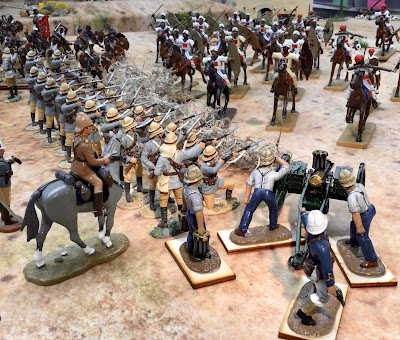
British square at Abu Klea
The figures are from the new Britain's range of 54mm collectors' figures. |
Yesterday I took my 54mm Sudan collection of figures out for a spin and decided to refight the Battle of Abu Klea. The actual battle was fought on January 17, 1885 between the British Desert Column, commanded by General Herbert Stewart, and the Dervish army of The Mahdi.
The Desert Column consisted largely of the British Camel Corps, which was an amalgamation of a number of British cavalry regiments that were trained to ride camels. The approximate forces were 1,200 British and 14,000 assorted Dervish war bands (only 3,000 fought in the battle). Briefly, Lord Wolseley was commissioned with the task of relieving General Charles Gordon's doomed command in Khartoum, Sudan. Wolseley sent the bulk of his command ("the River Column") up the Nile River towards Khartoum. A second army, titled "the Desert Column" was tasked with cutting across the great bend in the Nile River, traveling from Korti on the Nile, across the desert, and arriving back at the Nile at the town of Metemmeh. There, the Desert Column would be a near 50 miles north of Khartoum and be in a position to advance and rescue Gordon.
 |
Map of the Battle of Abu Klea from the
British Battles web site. Click on link below. |
 |
Major General Herbert Stewart (on camel) and war correspondent Melton Pryor.
Note the baggage and camels in the center of the square. |
Click on the link to the British Battles web site here: Abu Klea for a very good overview and summary of the battle. For those who are interested in a more detailed analysis of the battle, I highly recommend Mike Snook's book "Go Strong Into the Desert".
There is, of course, the famous poem about the battle, Vitai Lampada, penned by Sir Henry Newbolt, the most famous part of the poem, shown below, that is probably well known by war gamers of the Sudan Campaign of 1884-1885:
The sand of the desert is sodden red, —
Red with the wreck of a square that broke; —
The Gatling’s jammed and the colonel dead,
And the regiment blind with dust and smoke.
The river of death has brimmed his banks,
And England’s far, and Honour a name,
But the voice of schoolboy rallies the ranks,
“Play up! play up! and play the game!”
OK then, we have got the potted history bit out of the way, so let's get on to the solo war game that I fought. Basically, Abu Klea is a classic battle of the British Square versus a mass of thousands of native troops. The British have crossed the desert and are in desperate need of water, of which there are water wells at Abu Klea. Therefore, the British Desert Column must defeat any Dervish that stand between them and the water wells. The Dervish objective is to prevent the British from reaching the water supply.
Here is a list of the forces that I used in my war game version of the battle:
British Forces:
60 x Lancaster & Yorkshire Regiment ("Lances. & Yorks." or "L&Y" in this account).
60 x British Camel Corps (dismounted)
3 x Royal Navy Gatling Guns
1 x Royal Artillery 7-pound screw gun
12 x 19th Hussars (mounted as scouts). - I substituted some Egyptian lancers
There are 3 British players: one each commanding one of the infantry regiments, and one player commanding all of the artillery and the cavalry.
Dervish Forces:
98 x Berber Dervish
100 x Metemmeh Dervish
100 x Beja warriors
50 x Dervish Rifles
30 x Dervish cavalry
There are 4 Dervish players: one each commanding the Berber, Metemmeh and Beja war bands, and one player commanding the rifles and the cavalry in the game.
RULES USED: Colonial Wars variant of Bill Protz's "BAR" rules. These rules feature big battalions, saving throws and lots of D6 dice.
The above forces are not absolutely historically accurate. For example, the Beja did not fight in the Nile River theater of war and the Dervish did not have/use cavalry at the battle. The cavalry charge in the movies is pure Hollywood. The British have more Gatling guns than they did at the battle, however, I wanted to have a machine gun or a screw gun on each corner of my square. Finally, I do not have any mounted Hussars so I substituted some Egyptian lancers from my collection.
Battle Account of the Game
The British were deployed in square formation with the Lancs. & Yorks. defending two faces of the square and the dismounted Camel Corps defending the other two faces. Three of the corners had Gatling guns and one corner had a 7-pound screw gun. The British players were informed that the Dervish could attack from any or all sides of the square over the course of the game. The Dervish players were told that they could only attack from any three of the four sides of the square. Of course, the British players do not know this.
 |
| The Dervish attack one of the faces of the British square. |
Troop Deployments
Dervish: The Dervish deployed the Berber contingent on the west face of the square and the riflemen and cavalry on the east face of the square. The main attack would be launched by the Beja and Metemmeh Dervish on the North face of the square. The south face of the square would not see any Dervish troops deployed.
British: The British Camel Corps occupied the North and East faces of the square, the Lancs. & Yorks. the south and west faces of the square, and the cavalry patrolled the south face of the square.
Berbers open the game with the first attack
The Berbers launched a premature attack from the east and pitched into the face manned by the Lancs. & Yorks. There were 98 Berbers and 12 riflemen facing off against 30 L&Y soldiers and the screw gun. The Berber attack was a total failure as they lost 87 of their 98 figures and never made it to the zariba of the L&Y. This informs me that it probably takes at least 150 Dervish to attack a face of a square and have some chance of success in breaking into the square.
While all of this was going on, the Dervish riflemen were peppering the Camel Corps soldiers on the opposite side of the British square.
I forgot to take pictures of the Berber attack so all of the pictures are of the attack on the Camel Corps sides of the square.
The Dervish main attack goes in
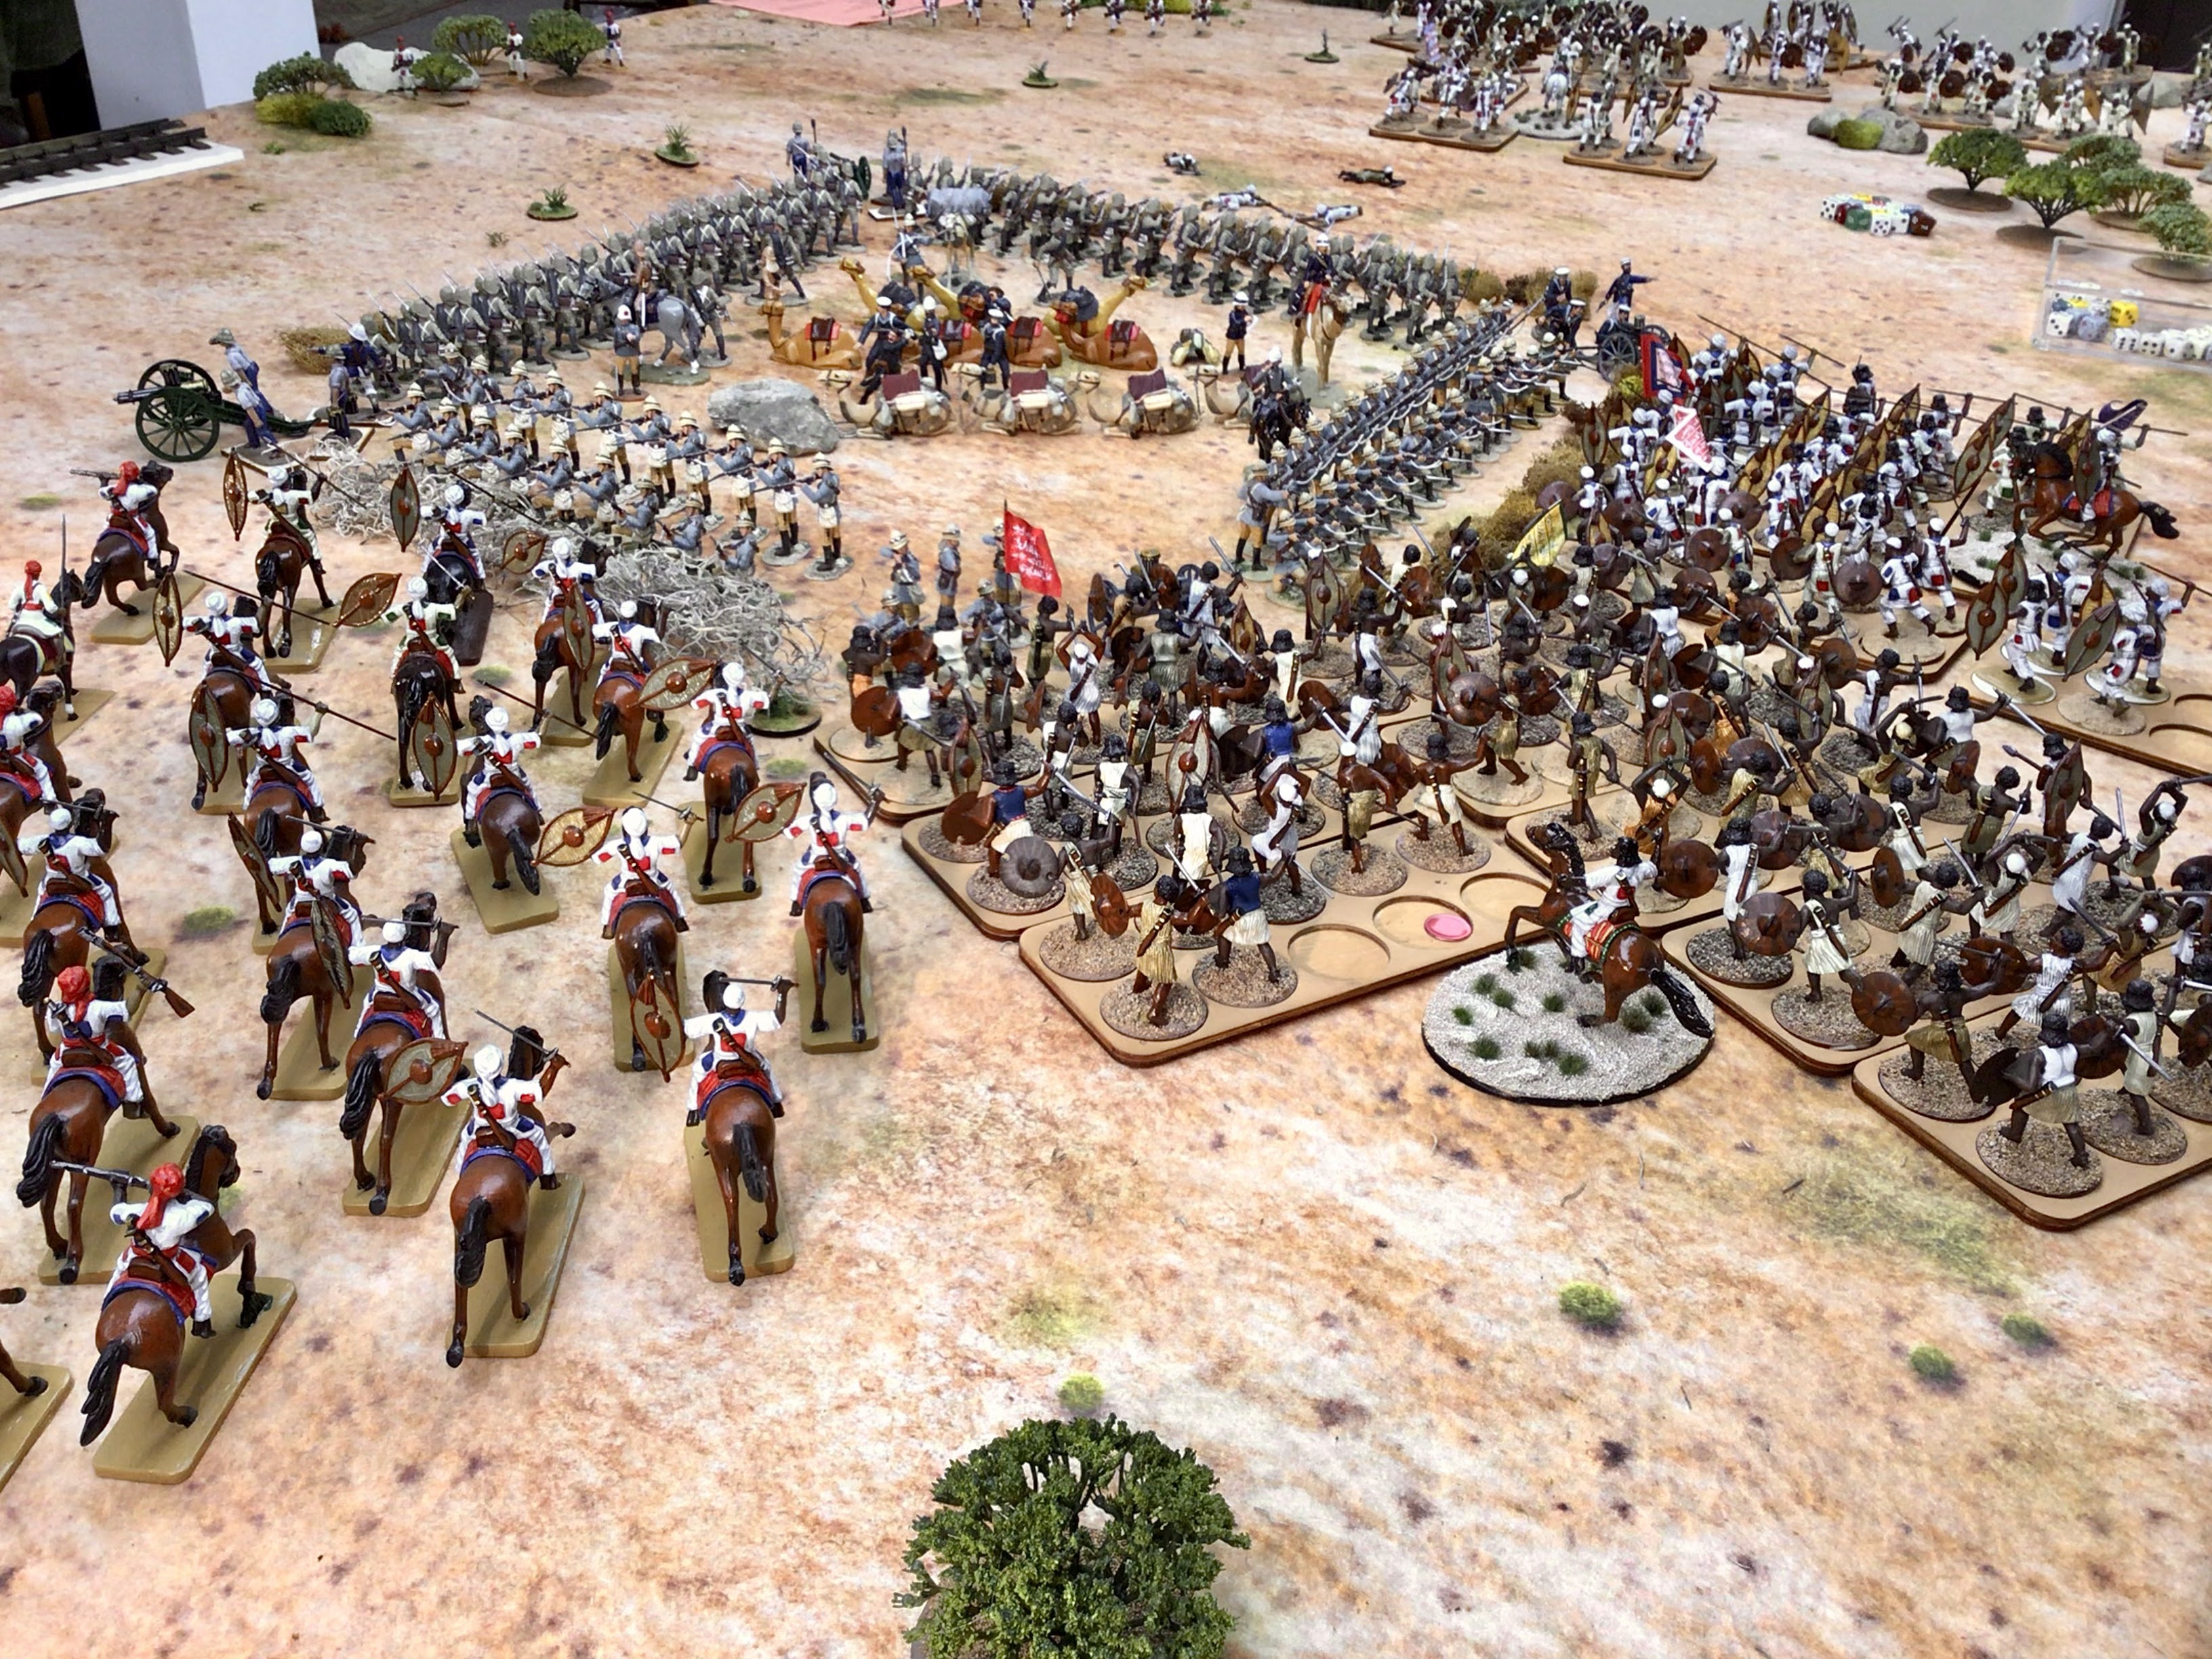
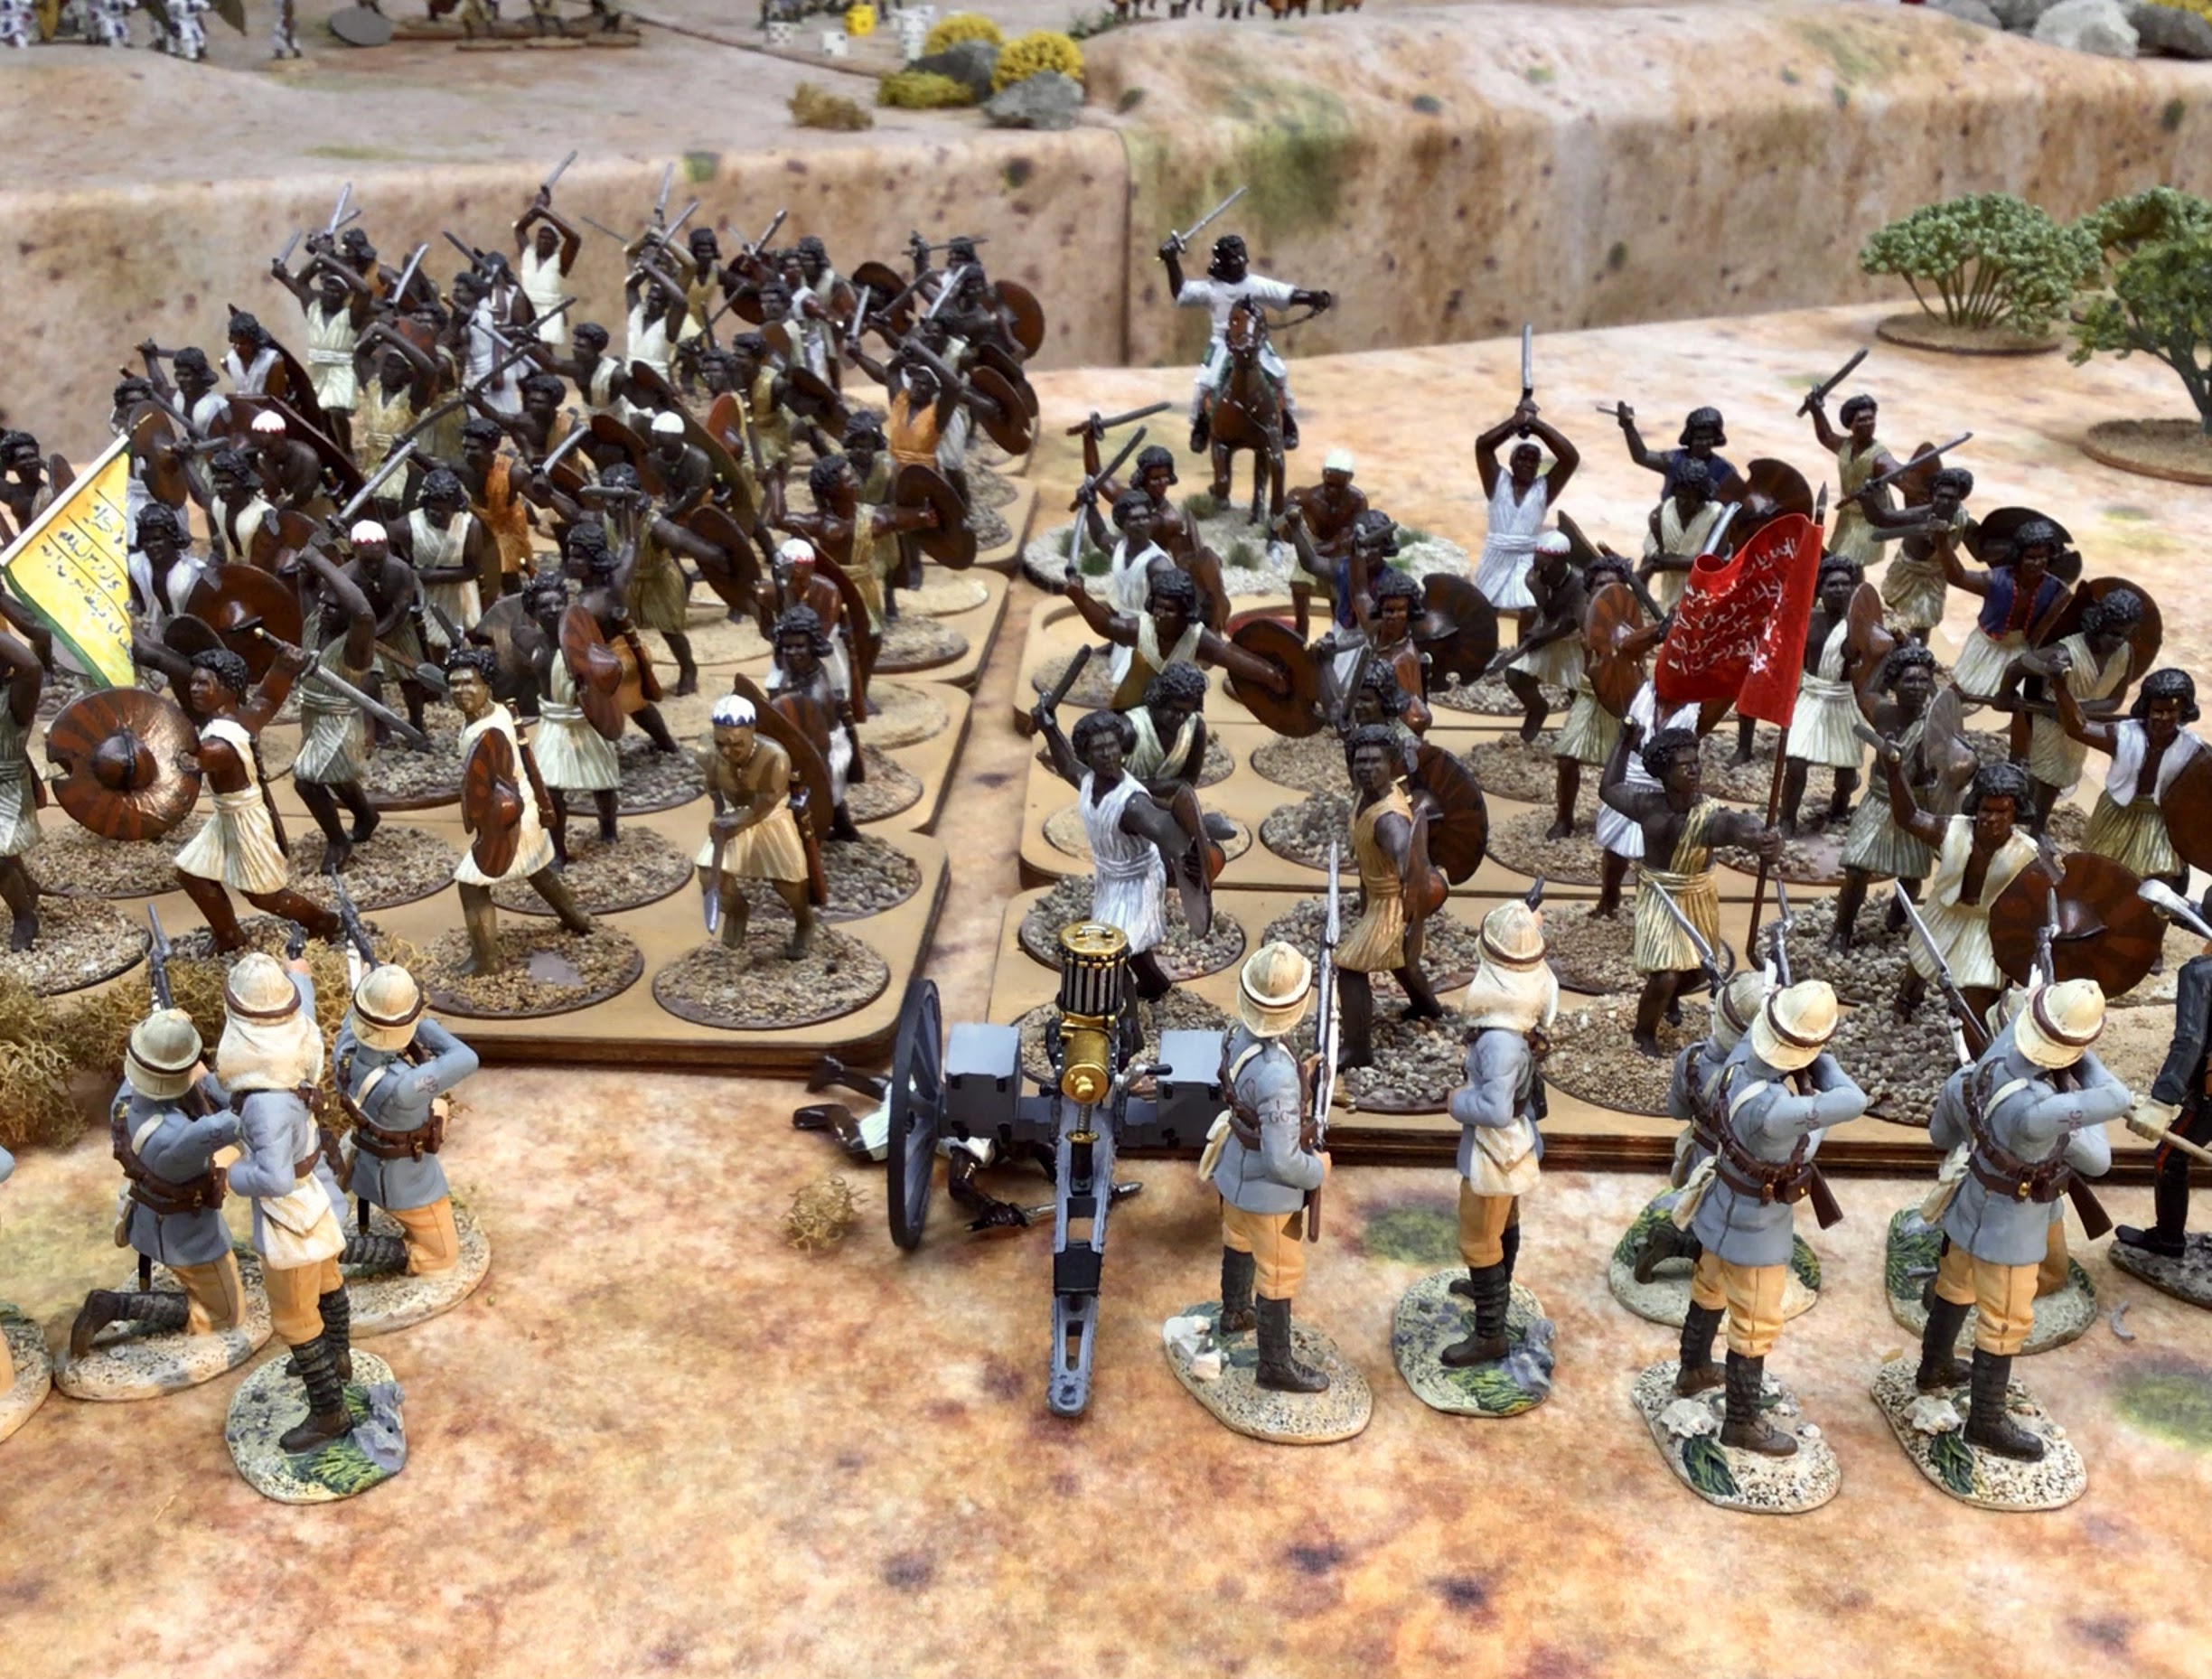
Next, it was the turn of the Metemmeh and Beja to launch the main attack on the north face of the square. Having seen what 30 men and a screw gun could do to 98 men, the two contingents ganged up and launched a combined 200 figures against the north face of the square. The rifles and cavalry would tease the the Camel Corps soldiers on the east face and only demonstrate a potential attack.
The Metemmeh Dervish charged right into the teeth of the Camel Corps while the Beja focused on hitting the corner on the Northwest corner of the square, where they would only face a Gatling gun.
 |
| Camel Corps soldiers and a single Gatling gun send a hail of bullets the Dervish' s way |
 |
| The first 50 Beja aim for the corner of the square. |
 |
Freddy Burnaby and the Royal Navy Gatling Gun crew are about to be overwhelmed by the on-rushing Beja.
Note that if the Beja crash through the corner they will start hacking into the flank of the Camel Corps soldiers. |
 |
That didn't turn out very well for the Camel Corps. The Gatling gun crew fired off their gun and legged it out to the protection of the reserve line of troops in the center of the square. The Camel Corps soldiers on the left have fallen back and reformed into a second line in the middle of the square.
|
A Short Tale of a Cavalry Charge |
| Oops! I didn't follow the rules correctly. The Royal Navy gunners went on the lam back to the protection of the camel baggage. So there was no melee, thus the Beja could continue to advance and they hit the flank of the Camel Corps on the east face of the square. So I had to return the CC figures back to their place and conduct a melee with the Beja. |
I forgot to mention that on this particular game turn, the Dervish army decided to go "all in" and send everyone, including the cavalry, into a charge against the square. The Beja unit that over ran the Gatling Gun were astonishingly defeated in their melee with some of the CC men on the flank. Thank God, better yet, thank high pips on the dice rolls for the British. So the Beja unit had to fall back, but it elected to charge yet again when the rest of the army went "all in".
 |
| The overhead view from the observation balloon. You can see that everyone is charging the two sides of the square that are defended by the Camel Corps (the poor sods). The red chip on the Beja unit in the middle indicates that it is disordered from the previous melee, which it lost. |
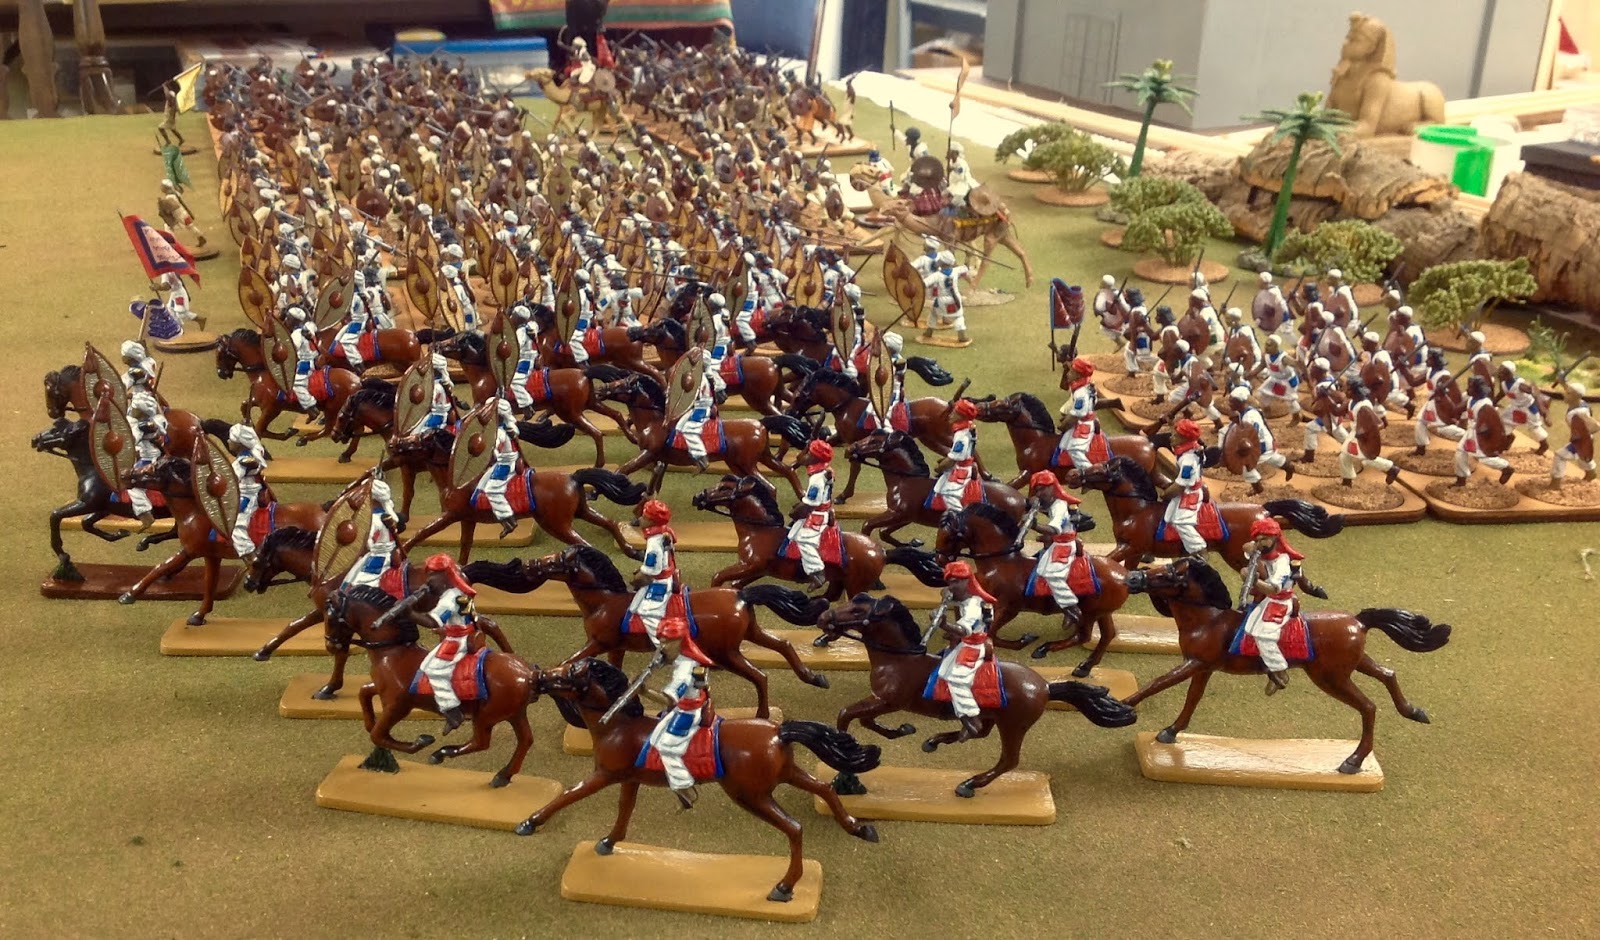
The cavalry charge did not go very well for the Dervish horsemen. They were mowed down by Gatling Gun fire and rapid fire volleys from the Camel Corps. Only 5 of 27 figures even made it to the zariba, and they routed off into eternity.
 |
| This time the Gatling Gun did not jam and the Dervish horse stopped short of the zariba. That's why you build a zariba. |
 |
| The Dervish send in everyone this time. |
 |
The Dervish cavalry are a sight to behold. Charging infantry armed with rifles
and deployed behind a zariba is not a smart thing to do. |
 |
Here they come! Fire! Reload!
Independent fire at will! |
And Now For The Finale - Ferocious Beja Charge
The cavalry charge had failed, but more importantly, the Metemmeh Dervish charge closed with the Camel Corps but were repulsed. The Dervish had one more card to play. It came in the form of a fresh, unblooded Beja war band.
 |
The Beja hit the weakest point in the square - at the Northeast corner
which is thinly defended by an ever smaller force of grey coats. |
 |
At the other end of the square, on the Northwest corner General Stewart (on camel) shouts encouragement to his men.
Meanwhile, Colonel Freddy Burnaby is always there in the thick of things.
You can see some British khaki clad soldier in the background. These are men of the Lancs. & Yorks. regiment which has sent every other man to the center of the square to set up a second line of defense in case the Camel Corps breaks. |
The CC vs. Beja melee lasted for three rounds. In each round, the Beja won the melee, but the CC soldiers had were made of iron and they refused to fall back to safety behind the L&Y regiment.
 |
Camel Corps soldiers from the far left face of the square reinforce the melee, but keep a thin line of defenders just in case.
The British second line, amid the camels and baggage, can be seen in this picture. You can also see how the L&Y regiment has thinned out its lines at the zariba and have redeployed in the center of the square. |
 |
Note the thinned out line of Camel Corps soldiers on the left hand side of the square.
Most of its men have hived off to reinforce the melee over on the right hand side of the picture. |
The Final Curtain Comes Down - What Happened?
In the Colonial BAR rules, melees can last up to three rounds, after which the attacker must fall back one full charge move (18" plus 1 D6 die roll). The Beja vs. Camel Corps melee went the full three rounds. The Beja won each melee round, but British morale was sky high and they never broke into a rout, thus they could continue to fight another round.
 |
| They have been repulsed. The remaining Camel Corps began to realize what they have accomplished. |
 |
The Beja have retreated. General Stewart and his men are frozen
in a stunned silence as what they did begins to sink in.
Colour Sergeant (bandaged head): "It's a miracle.
Colonel Burnaby: "If it's a miracle, it's a short chambered Boxer Henry point 45 miracle."
Color Sergeant: "And a bayonet, sir, with some guts behind. |
 |
The aftermath of the battle. The Camel Corps took a hard pounding, but they prevailed.
Cue in the music "Rule Britannia." |
Men are detailed to attend to the wounded and pick up the debris of the battle. A roll call will be taken to determine what the Butcher's Bill will be.
British Casualties:33 Camel Corps soldiers. 16 of these would be saved by D6 dice roll. Thus 17 men died.
60 Lancs. & Yorks soldiers. No casualties.
16 Royal Artillerymen. No casualties
Total British killed: 33 (before recovery saving throws)
Dervish Casualties:
Berber Dervish lost 87 men out of 98, 11 survivors.
Metemmeh Dervish lost 61 out of 100, 39 survivors.
Beja lost 44 out of 100, 56 survivors.
Dervish cavalry lost 22 out of 27 horsemen, 5 survivors.
Riflemen lost 8 out of 52, 44 survivors.
Total Dervish killed: 222
Comment:
I intend to fight the follow on battle of Abu Kru with the remaining British figures, so casualties are deducted from the Camel Corps for the next battle. I did a die roll for each casualty. A 5 or 6 brings them back; a 4 is wounded; and a 1, 2 or 3 is a fatality.
The Dervish do not need to do an army casualty save because they are replenished with an entirely new Dervish army. The Mahdi has so many men flocking to his banner that he can afford such battle losses.
I played the game over the course of two days on my home pitch (field) and the Colonial BAR rules proved easy to use, even though they are a bit heavy on the charts. However, I have played these rules so many times that it is easy for me to negotiate my way through the movement, firing, melee and morale charts without too much effort. The rules worked very well for a solo game.
It was really spectacular to see so many large 54mm toy soldier size figures on my game table. I am really quite taken with 54mm figures these days. They are easy to see and to paint and their size almost gives each figure its own personality, which adds to the fun.
HISTORICON 2023 GAME
This game is a play test of one of the games that I will be hosting at Historicon 2023 in Lancaster, PA. I expect to run four or five games at the convention, including the assault on the walls of Khartoum, Abu Klea and perhaps another scenario to be determined. If you enjoyed this game report, then I think that you will enjoy seeing it in person at Historicon. Better yet, sign up and play in my Khartoum! series of games.