 |
Gadzooks! Look at all of those Dervish!
28mm Connoisseur figures |
This past weekend we convened at the manse of General Pettygree to play our annual Fall Sudan Game.
 |
| The long view of the 24-foot game table. There were also two 3-foot back tables on each side. |
 |
The British Museum Expedition's "Site A".
Our task was to protect the archeologists. |
 |
| More of the Site A area |
 |
| The British Museum Expedition's "Site B". |
 |
| At the far end of the table, the large port of El Wil-Yum situated on the Dongola River. |
 |
| The wharf area. |
 |
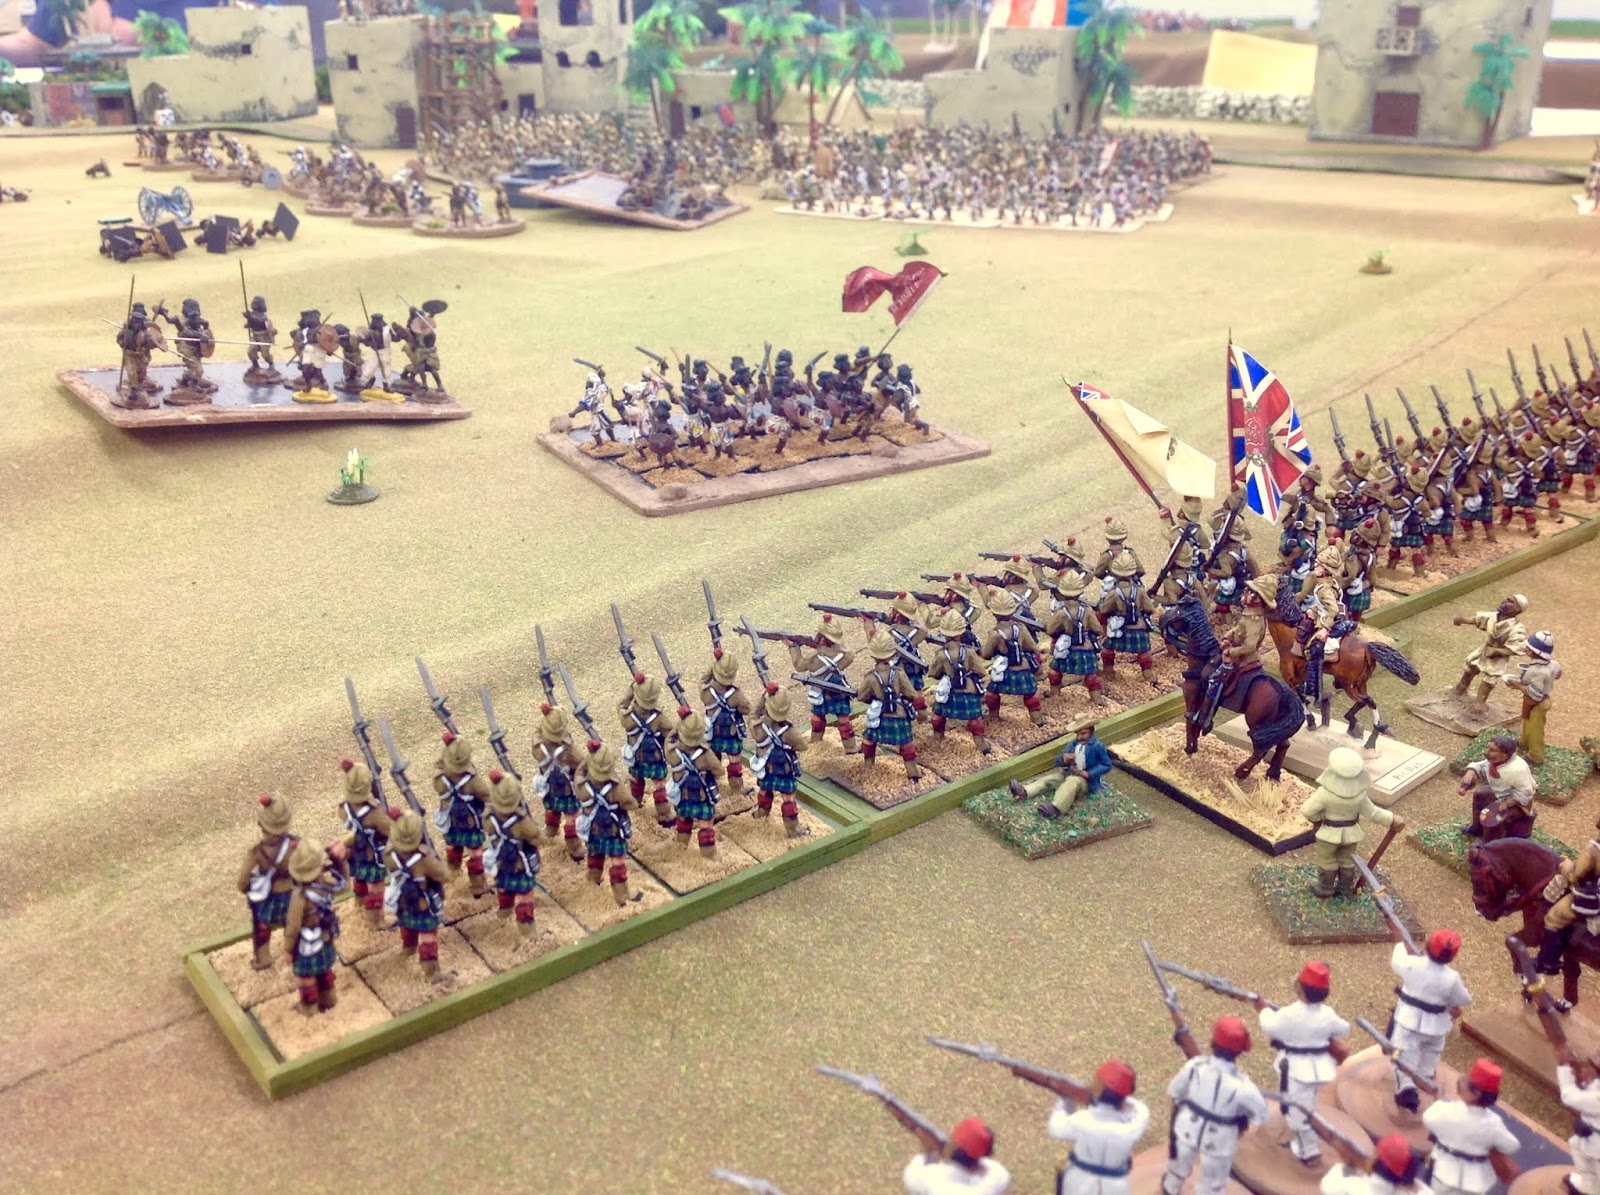
The 78th Seaforth Highlanders, in square, commanded by Colonel Archibald Sinclair.
Connoisseur figures; they still hold up favorably by today's standards. |
 |
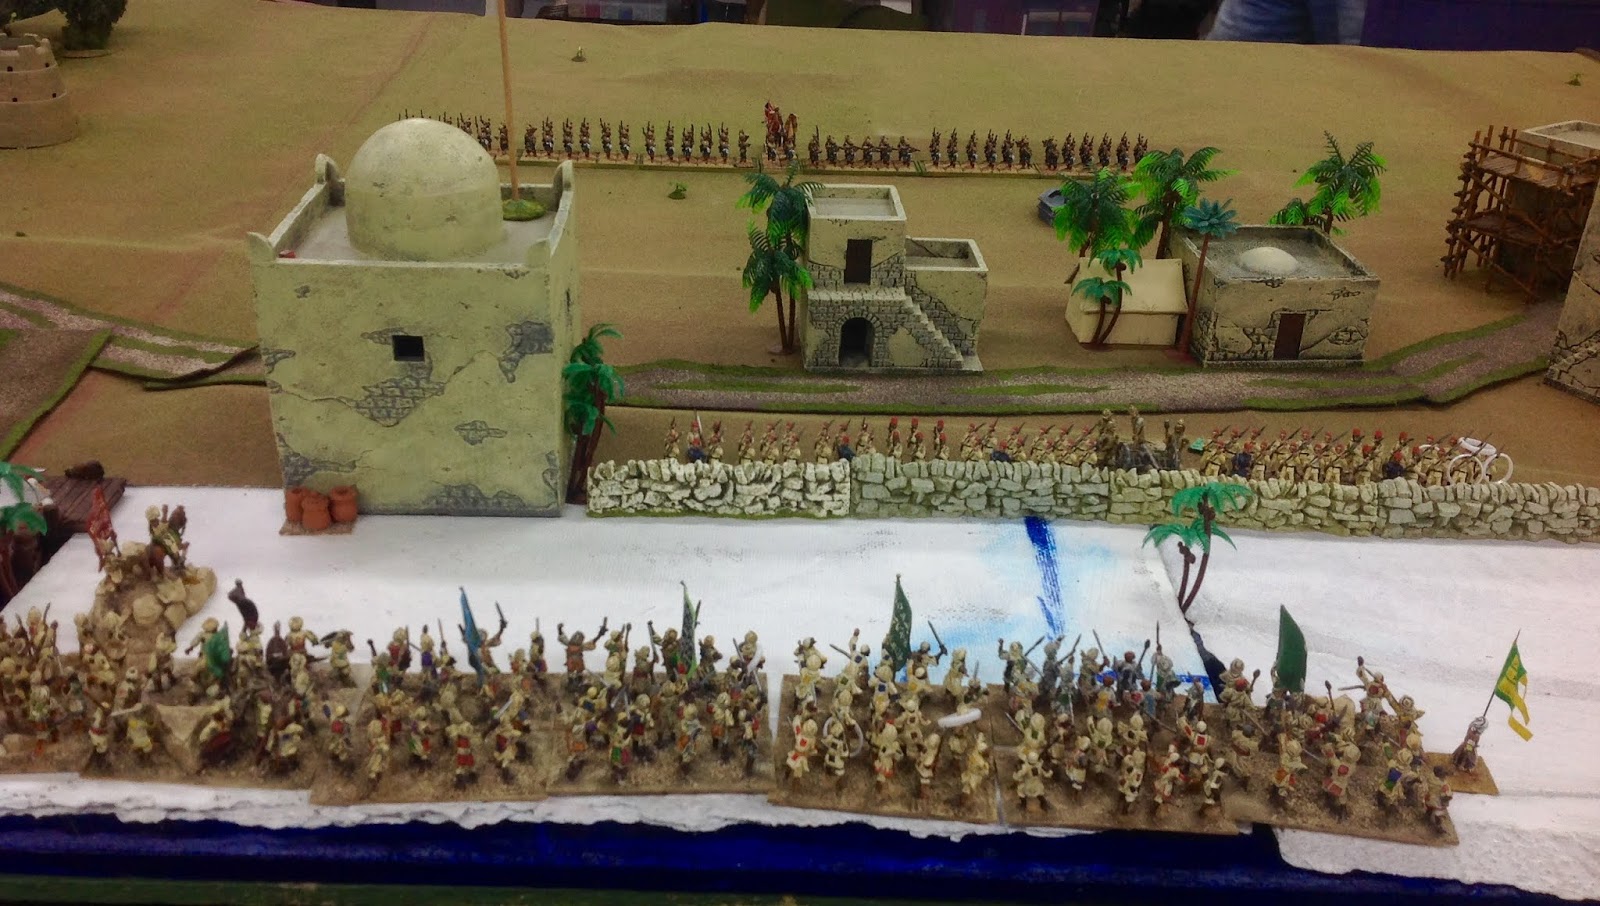
| The Egyptian regiment guarding a stretch of the Dongola River. They were in for a big surprise... |
 |
| ...because this hoard was header their way. |
 |
| Here come the Dervish |
 |
| The Seaforth Highlanders (middle right ground) back up the Egyptian troops that manned the river levee against the Dervish. In the far background you can see the Site A British Museum Expedition. |
 |
| Now things were getting serious. |
 |
| However, the Egyptians held off the Dervish in the first several melees. |
 |
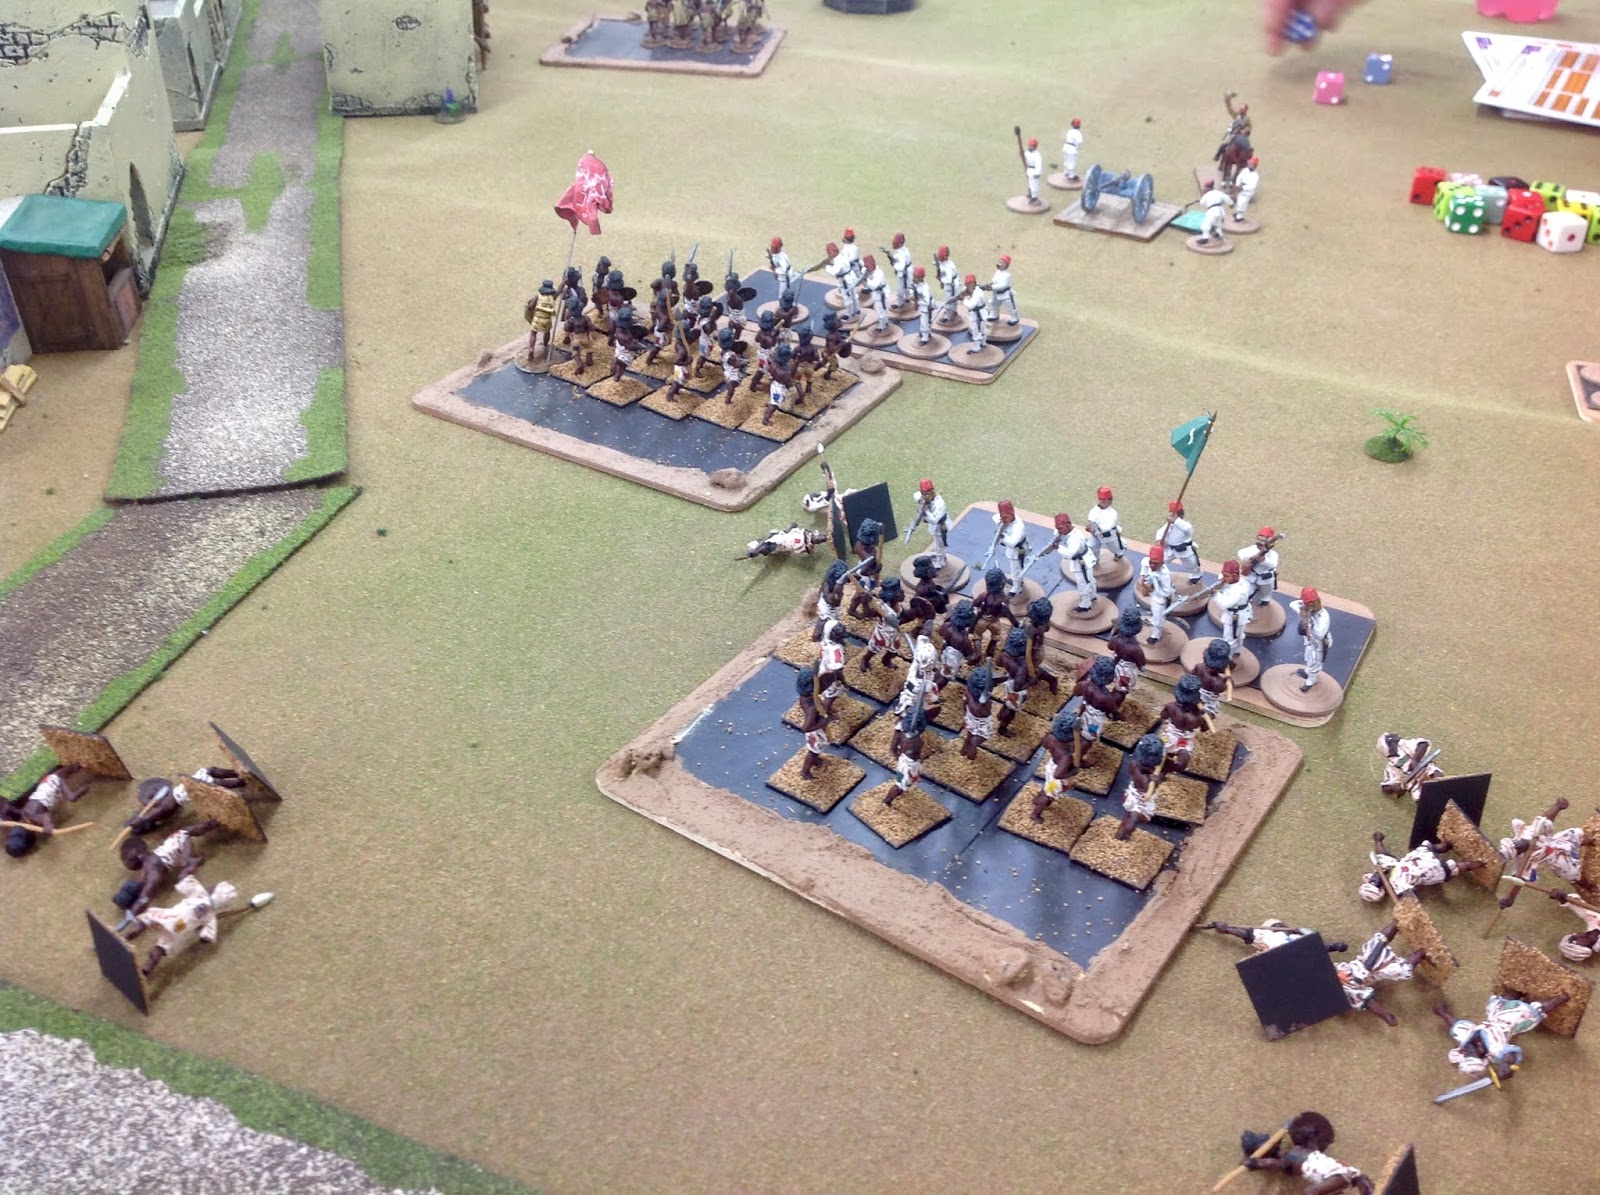
| To the right of the Egyptians, the crack XI Sudanese regiment repulsed another contingent of Dervish. |
 |
| The 1st Sikh Regiment arrives on the scene near Site A, and just in time... |
 |
| ...because even more Dervish sail up the Dongola River and disembark near the right flank of the XI Sudanese. |
 |
| A group of Beja riflemen suddenly appear on the cliffs above Site A and start shooting at the Expedition members. |
 |
| The camp site is caught unaware of the threat from above. |
 |
| The Expedition members flee towards the Sikh regiment for protection. |
 |
| A hoard of Beja suddenly appear behind the Site A encampment, but the Sikhs are ready to receive them. The Sikhs deploy into a left wing and a right wing due to the large size (72-figures) of the regiment. |
 |
| The left wing is routed by the Beja (by just one pip on a D6 die. The Right Wing stops the Beja, who rout away into the wilds. A lone company of Sikh riflemen (upper middle) are all that is left of the Left Wing. |
But Wait, there's More!
While the Seaforth Highlanders and the Sikhs were dealing with the Beja and Dervish near Site A, there came a rumbling in the distance off the left flank. The Egyptian brigade that was defending El Wil-Yum were suddenly seen pouring over a bridge and creek and running pell mell towards the Seaforths. They were all that was left of the El Wil-Yum garrison and they were being pursued by a number of mad Beja, who were screaming for blood.
 |
| Just what we need, the left horn of the bull appears to the left of the Seaforth Highlanders. A few clumps of Egyptian troops attempt to rally and stop the Dervish. |
 |
| An overview of the action on the left. In the upper left corner the large Dervish hoard have expelled and slaughtered the Egyptian garrison. The Seaforth Highlanders, in the upper middle part of the picture, are the last reserve, the last line of defense. |
 |
| The remaining Egyptians from El Wil-Yum seek refuge behind the stead Seaforths. The Beja's numbers are dwindled by a crashing volley of rifles from the Seaforths. |
 |
| A few Beja remnants continue their charge, but they will be easily dispersed. I guess that takes care of the trouble on the left. |
 |
| Well not quite. The large Dervish hoard in the middle of the table now pour out of the Dongola town and spy the Seaforth Highlanders in the distance. |
 |
| The Harrington sisters: Alexandra with the shotgun and Minerva with the pepperbox, fall in with the Highlanders. The sisters are made of stern stuff. |
Fortunately, the Sahara sun began its descent into the horizon and the Seaforth Highlanders staged a classic rearguard defense at the mass of European civilians, Egyptian and Sikh soldiers retire to the west and to safety.
 |
| Colonel Archie Sinclair (me, on the left) takes a tea break with his compatriots. |
I have no idea of what happened around the river port area, off to my far left. I gleaned that the Egyptian garrison were overwhelmed by the swarm of Beja warriors who invaded via the river in their dhows. Afterall, the remains of that garrison were trickling back towards my Seaforth Highlanders so I knew that something had gone terribly wrong "over there".
I would direct you, dear readers, to the blog and journal of Major General Augustus Pettygree for the rest of the story "over there".
here:
Pettygree Blog
 |
A preview of the dire things that happened elsewhere on the table.
Check out the Pettygree blog for the rest of the story. |


Excellent stuff..
ReplyDeleteSpectacular.
ReplyDeleteI am still full of suspense and yet the game is over. Or is it? Site B has a formidable square around it now atop the mound being excavated.
ReplyDeleteWell done Jim and thanks for the fine photo story. I think the Seaforths will survive - hope so.
Respectfully,
Bill P.
Chronicler for The Adventures of General Pettygree
I hope that they survive too! 😳
DeleteWhat a great set of photos and a very entertaining commentary as always Jim.
ReplyDeleteIts easy to get good pictures when the tabletop is so enticing.
DeleteWhat a set-up!
ReplyDeleteBest Regards,
Stokes
Awesome game set up and report.
ReplyDeleteA very enjoyable read and view of a fantastic set up - thanks for showing it.
ReplyDeleteExcellent stuff: "Hold until relieved"!
ReplyDeleteReally enjoy your blog. Keep up the nice work!
We will play the game outcome this evening. I hope that The Relief Column arrives in time!
DeleteTruly a wargaming spectacle. The massed natives are an impressive sight.
ReplyDeleteThat is simply superb in every way! Thanks for sharing
ReplyDelete