 |
| The Croats retire to the second line of defense |
I completed the solo game of the Battle of Kuhstall on Thursday evening last week and the scenario was a real stem winder with lots of unexpected twists and turns throughout the game. The following battle report focuses on the key fighting that occured on the Prussian right flank, for it was here that the battle was won or lost, depending on one's point of view.
Follow the rest of the action by reading the picture captions, and be sure to click or double click each picture so that you can enlarge the view.
 |
| The Winterfeld musketeer regiment follows the Croats and attacks the second line. |
 |
| The Prussian Black Hussars move forward to protect the right flank of the Winterfeld musketeers. A few Croats pepper the hussars with a few shots from the protective woods. |
 |
| The second squadron of the Black Hussars peels off to deal with the Croats in the woods while the first squadron continues to move toward the third Austrian line. |
 |
| Winterfeld musketeers (left) close in on the Austrian grenadier battalion (right) which is supported by a 3-pound battalion gun. |
At this point in the game, the regular Austrian and Prussian infantry were finally coming to grips and it was likely that the outcome of the battle would soon be settled. The first big break occurred in the Austrians' favor as the second battalion of the Winterfeld musketeer regiment routed from the close up musketry and canister fire of the Austrians.
 |
| But then, the second battalion of the Winterfeld musketeer routs! This leaves the right flank of the first battalion of Winterfeld potentially exposure to flanking fire from the Austrian grenadiers. |
Zieten still had a couple of aces up his sleave, so he ordered his Black Hussars to charge into the Austrian grenadier battalion to prevent it from wheeling right into the now exposed right flank of the first battalion of Winterfeld musketeers. His second ace was to commit his infantry reserve: the Kremzow (17/22) Grenadier Battalion into the battle (see below).
 |
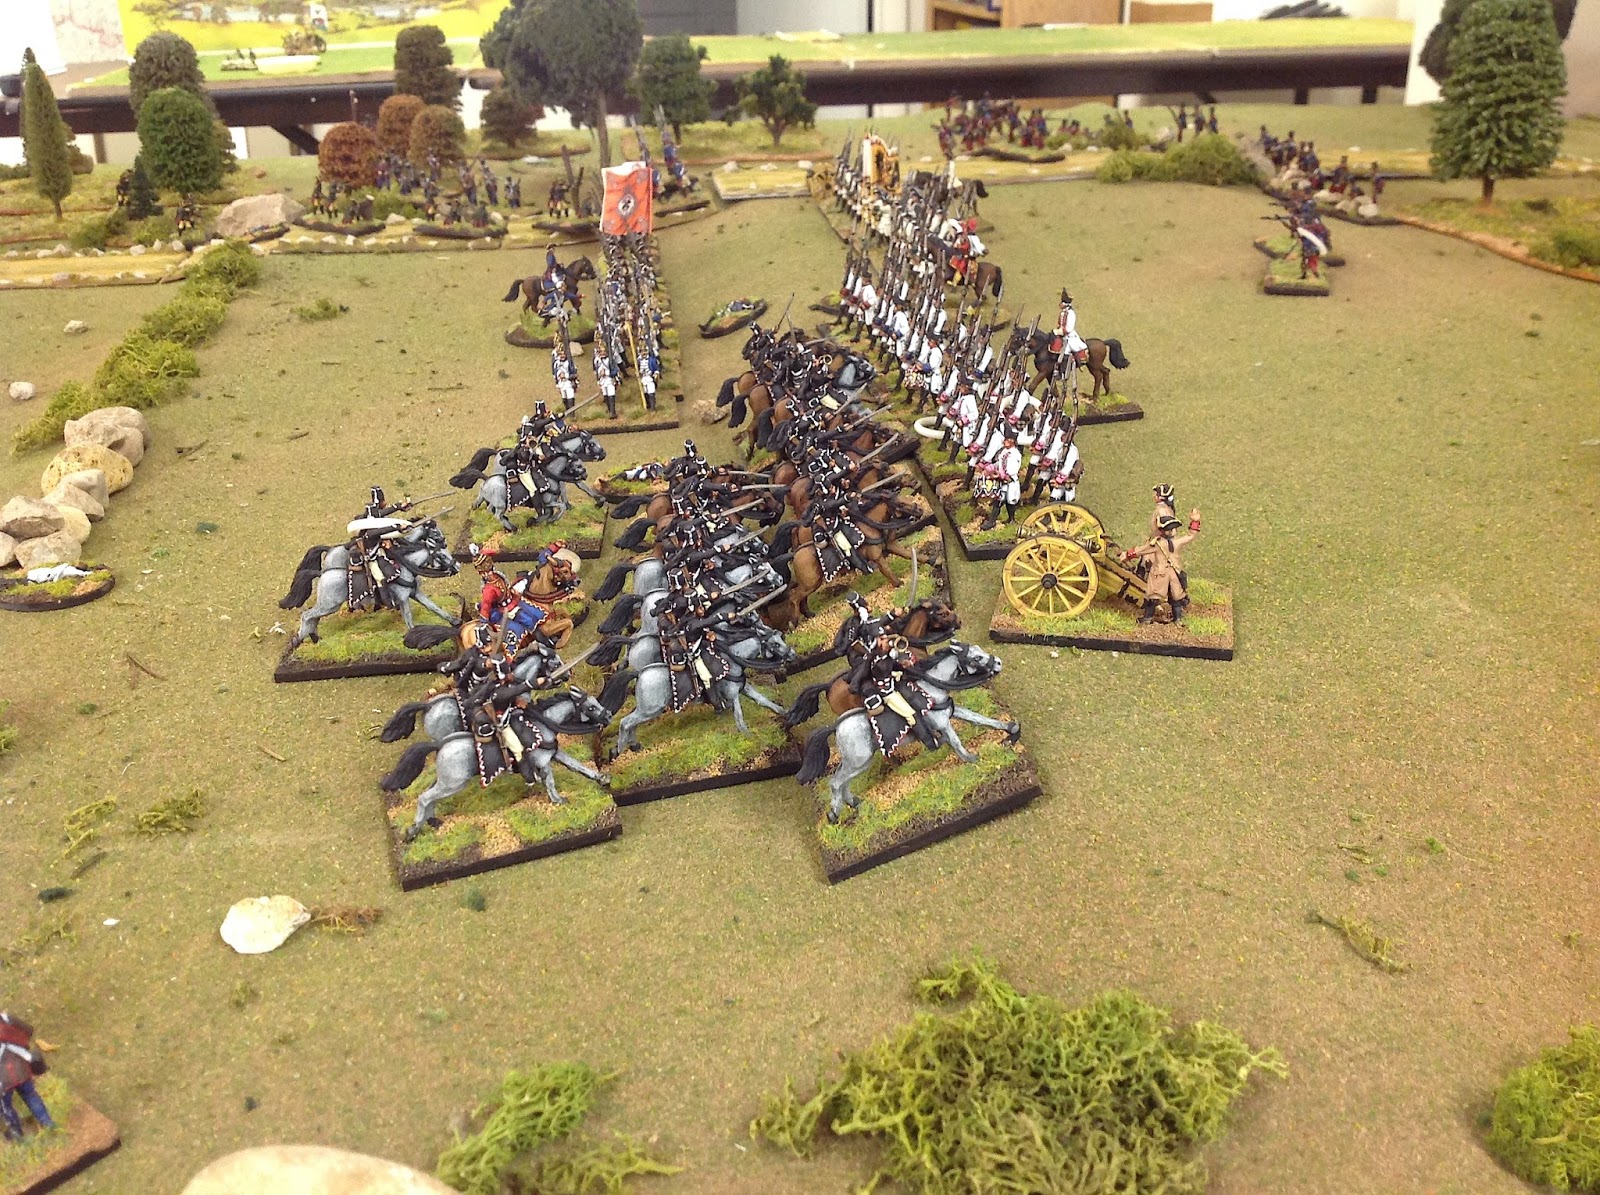
| The Black Hussar now charge into the Austrian grenadiers to fill in the gap caused by the routing Prussian musketeers. Meanwhile, the Prussian reserve - the Kremzow Grenadier Battalion (17/22) sends three companies to extend the Prussian right flank of infantry, while the other two companies of Kremzow veer off to the left to protect that flank from the swarm of Croats in the woods (upper part of the picture). |
Two companies of the grenadiers hived off to cover the left flank of the infantry battle line, while the other three companies extended the infantry line to the right, just in case the Black Hussars failed to drive off the Austrian grenadiers.
 |
| The two companies of the Kremzow grenadiers cross bayonets with the Croats. It is no contest as the Croats flee to the rear. |
 |
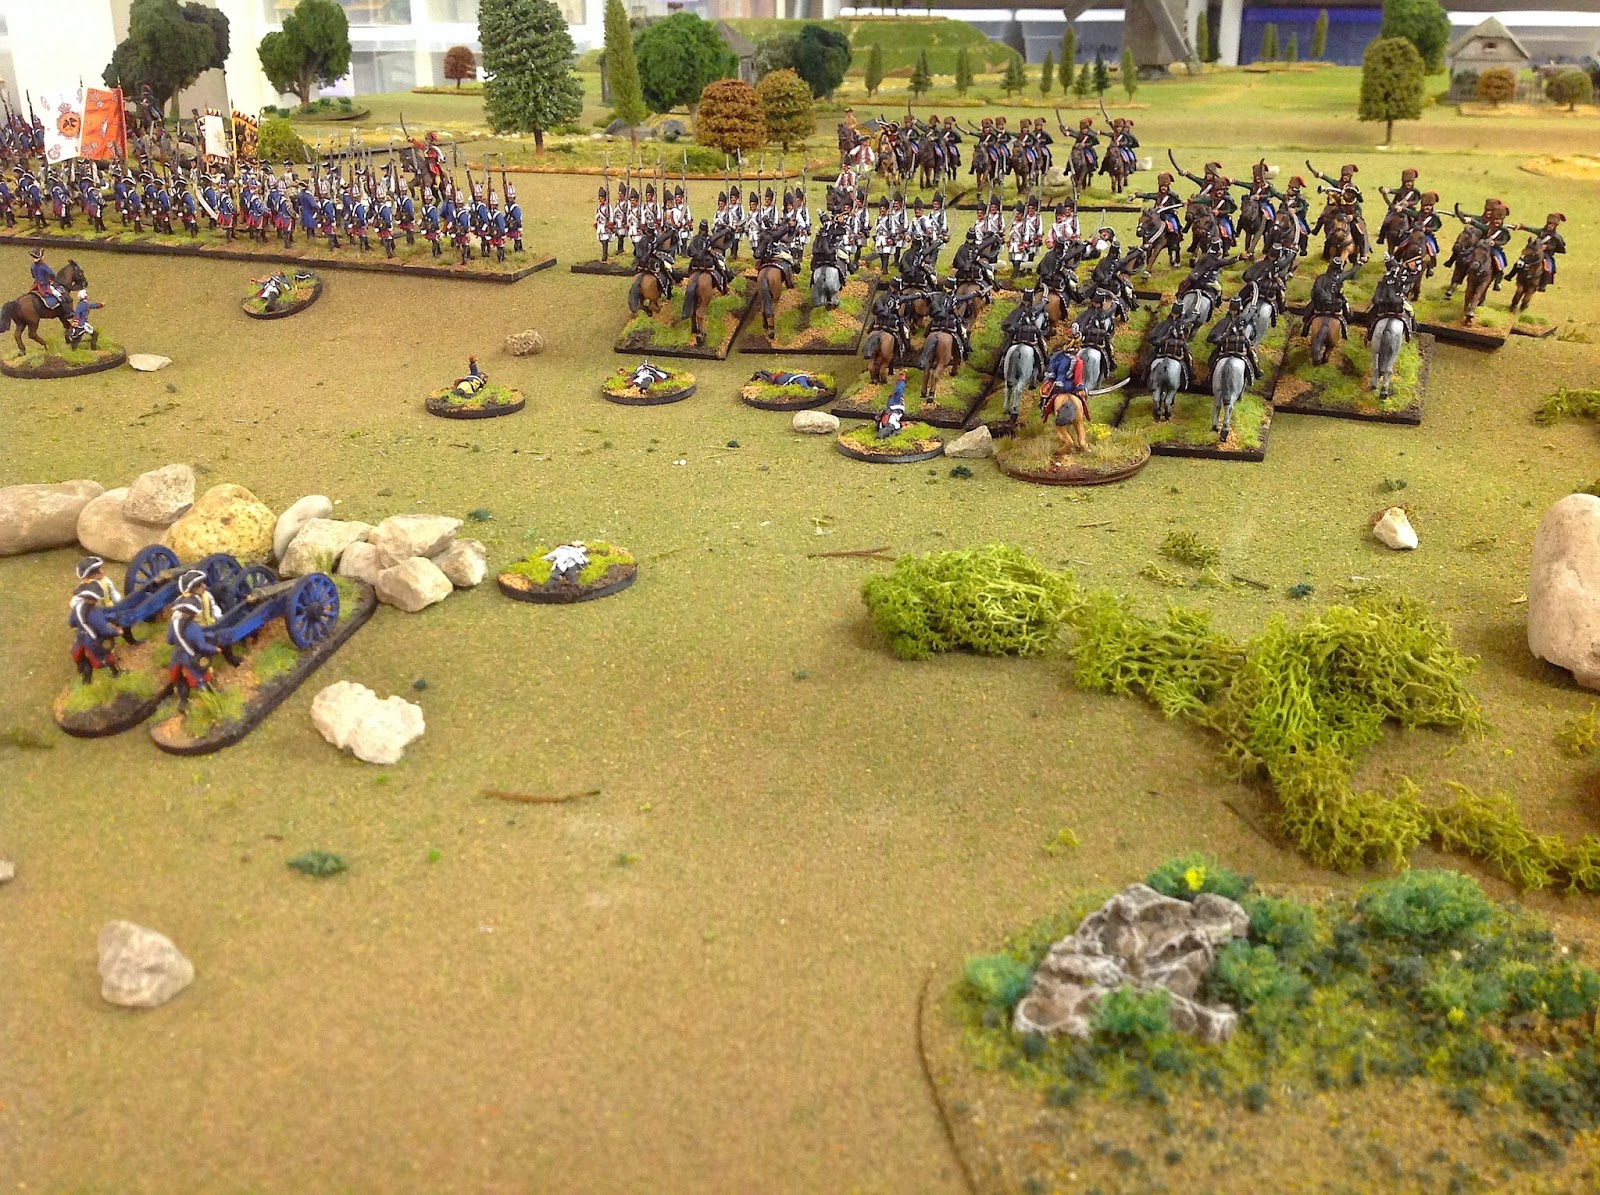
| Back on the Prussian right, the cavalry versus grenadier melee is in full swing. |
 |
A closer view of the bloody melee.
|
 |
| Austrian commander Hadik hurls a squadron of the Baranyai Hussars into the melee to support the Austrian grenadiers. |
 |
| The colorful Baranyai Hussars (green pelisse and red breeches and dolman) clash with the Black Hussars. Prussian casualties begin to mount. Can the Black Hussars prevail and win the battle? |
 |
| Then the Black Hussars fail a morale test and rout! Von Zieten himself tries to stem the rout, but to no avail. It is not all bad news though, as the second battalion of the Winterfeld musketeers has rallied (see background next to the artillery pieces ). |
At this point of the game, on Turn 11, it looked as though Hadik's Austrians would win the battle because the Black Hussars, having suffered nearly 50% casualties, routed. This followed on top of the second battalion of the Winterfeld musketeers failing to rally from a previous rout. Things were looking good for the Austrians.
The next sequence in the turn (movement, melees and finally firing) was the musketry and with effectively two battalions of Prussian infantry blazing away at the lone Austrian battalion of Wied musketeers, the high rate of casualties caused Wied to rout into the woods. In one brief moment, the apparent Austrian victory evaporated along with the flight of the Wied musketeers from the Austrian battle line. There were still two full battalions of Croats in the woods (on the left flank of the Prussians), but since they are not allowed to "form", they stood little chance of standing up to the Prussian regular infantry.
 |
| Now Hadik sends the second squadron of the Baranyai Hussars forward to finish off the Prussian Black Hussars. But wait a minute, EGADS, the Austrian Wied musketeer regiment also routs and runs into the woods to hopefully recover and reform. |
 |
| Hadik orders his Austrian forces to break off the action and retire towards the Vachewasser and the windmill on the horizon. The Austrians have plenty of light cavalry and Croats that Hadik can put to good use as his little army retires back towards Saxony. Note how the battlefield is littered with fallen soldiers. We place a round casualty stand in every place where a unit losses a stand or wherever a cavalry melee has taken place. This allows us to follow the course of the battle. |
At this point in the game, it seemed logical to me that the Austrians would attempt to break off of the action and retire back towards their base in Saxony. They had a huge advantage in cavalry at this point, which could cover the army's withdrawal, whereas the Prussians had no cavalry left, making it difficult to follow and harass the Austrian retirement.
As I stated at the beginning, the ebb and flow of the battle was simply amazing. Through the first 8 or 9 turns, it seemed like the Austrian light infantry could do nothing to stop the blue wall of Prussians from advancing up the ridge and claiming victory. All of the routs were going in Austria's favor. First a company of jagers on the left flank, followed by a battalion of musketeers, and finally by all of the remaining Black Hussars.
But then Hadik could only watch in disbelief as the Wied musketeer battalion on his right flank routed, leaving his right center completely open to the two relatively fresh Prussian battalions to advance forward. His Austrian grenadiers were pretty beat up from the melee, so Hadik had little in the way of reliable regulars to fight the Prussian infantry.
This was a fun action to fight. It worked very well as a solo game what with only 5 or so units per side. It could very easily be a 2 to 4 player convention game that would play to a conclusion in a couple of hours.
In retrospect, I would make a few tweaks to the order of battle for both sides. I would replace one of the Prussian musketeer battalions with a lower grade fusilier battalion, or even a garrison or freikorps battalion. Concurrently, I would replace one of the three Croat light infantry battalions with a low quality unit of regulars - maybe Reichsarmee troops or a unit such as the Grune Loudon regiment. And finally, I would tweak the ranges on the 3-pound cannon, extending their long range from a maximum of 18-inches to about 30-inches so that they could inflict a few casualties on the attackers. The Croats would also be given a longer musket range than the regulars so as to make them more annoying and potent versus the Prussian infantry.


Excellent AAR on such a wonderful looking game, that was certainly full of action!
ReplyDeleteYes, just the thing to help me come into consciousness at 6:06am.
ReplyDeleteBest Regards,
Stokes
Sone great action!
ReplyDeleteTop notch stuff. I for one would be very interested to see a few more of these small solo games, if you're so inclined.
ReplyDeleteFascinating conclusion Jim and very interesting tweaks you propose for the game balance. Would be interesting to see you refight it again whilst the terrain is still down with the amendments to see what happens and how the battle differs.
ReplyDeleteSpledid visual treat! Very fond of the Baranyi Hussars myself. Great joy and study comes from solo play. I quite enjoy it!
ReplyDeleteGreat stuff!
I enjoyed following this. Visually delightful and a very easy to read narrative, thank you.
ReplyDelete