Showing posts with label American Civil War. Show all posts

Tuesday, April 29, 2025

Antietam Battle Report: Hooker's Attack


Action in the Miller Cornfield


Back on October 9, 2024 I set up my game table to do a solo play of the ACW Battle of Antietam

Hooker's Attack

The battle of Antietam is best split up into a number of smaller actions during the battle rather than trying to fight the entire battle on one table. Smaller? I decided to recreate the opening of the battle with the morning attack of Major General Joseph Hooker's First Corps of the Army of the Potomac. As you probably can guess, I used my 54mm Confederate and Union troops from last year's Pickett's Charge war game at Historicon.

I used battalions to represent brigades in both armies. This allowed me to put the entirety of Hooker's and Jackson's division on my two game tables (6 ft x 15ft and 5ft by 12ft). The orders of battle are as follows:

Hooker's I Corps (3 divisions)

  Doubleday's Division (3 units) + 2 guns  / Patrick, Gibbon and Phelps

  Meade's Division (3 units) + 2 guns / Anderson, McGilton and Duryee

  Ricketts' Division (3 units) + 2 guns / Hartsuff, Christian and Seymour

Mansfield's XII Corps (2 divisions)   --- Optional for larger game

  Greene's Division (2 units) + 2 guns

  Williams' Division (3 units) + 2 guns


Stonewall Jackson's wing of the Army of Northern Virginia

  J.R.Jones' Division (4 units) +2 guns -- Grigsby, J.Jackson, Penn, and Starke

  Lawton's / Early's Division (4 units) + 2 guns  Early, Hays, Douglass and Walker

D.H. Hill's Division (2 units) + 2 guns --- optional  ---- Ripley

Hood's Division (2 units) + 2 guns --- optional --- Wofford and Law

In summary, the Union army has 14 brigades and 10 guns; Jackson's wing has 12 brigades and 10 guns. If this seems like too many units for the game table, then Mansfield's corps and the Confederate divisions of DH Hill and Hood could be eliminated from the game rosters.

For my game I used the Confederate divisions of Jones and Lawton and only Ripley's brigade from DH Hill's division. This gave me 9 CSA brigades. I only used the three divisions of Hooker's corp, each with 3 brigades. This gave me 9 USA brigades.


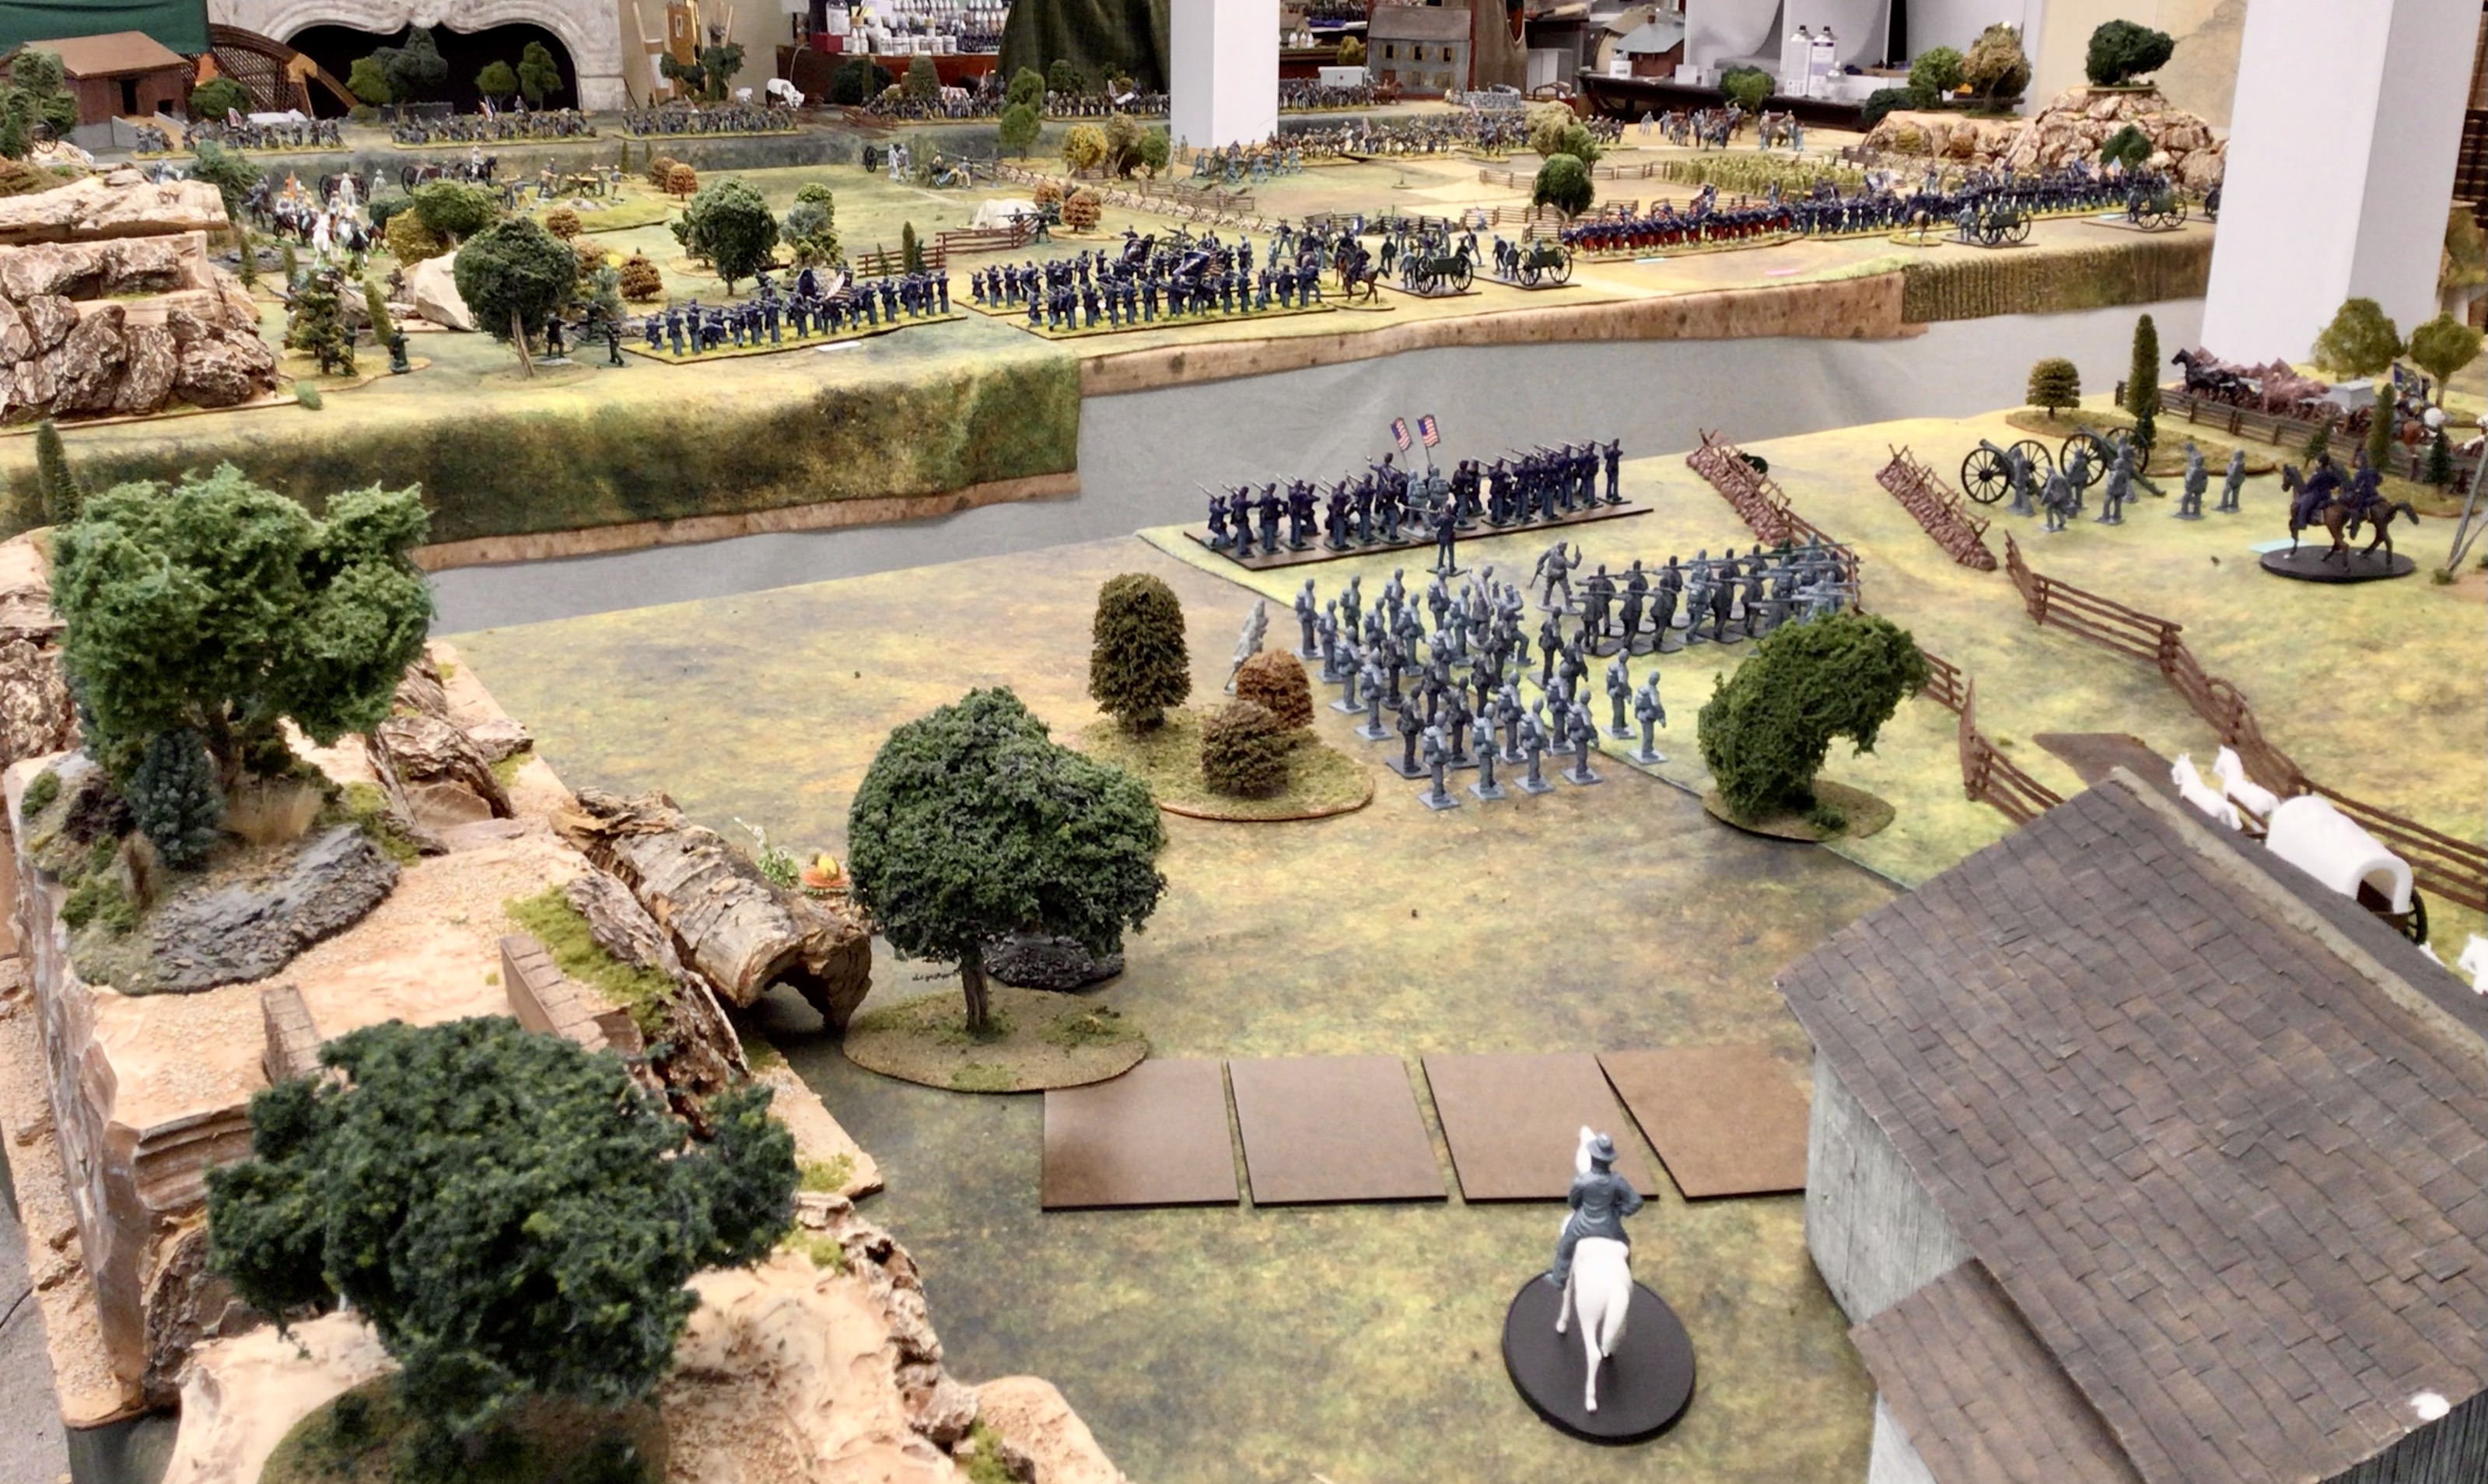
The table top set up. The split of my game tables is approximately at the lower end
of the East Woods and runs horizontally to Grigsby's location in the West Woods.

Hooker's stepping off point at the edge of the North Woods. The Hagerstown Pike runs
down the center of the table. Off in the distance one can see the Dunker Church where
the Hagerstown Pike intersects the Smoketown Road. Miller Cornfield in the mid-distance.

The Smoketown Road (right) marks the left flank of Hooker's Corps

The intersection of the Smoketown Road and the Hagerstown Pike in front of the Dunker Church.
This marks the back table edge of the Confederate army.


Let The Battle Begin - my report

On Turn 1 the battle kicked off with mostly long range artillery firing from both sides. Ripley's and Walker's CSA surprisingly move forward into the East Woods, hoping to bog down the Federal advance in that area. I didn't want this to happen, but the dice dictated otherwise. Doubleday's Division of Hooker's Corps advanced across a broad front.


Union artillery lob shells up the Hagerstown Pike to open the action.


Turn 2 sees the brigade of J. Jackson (not Stonewall, but the "other Jackson") marching forward on the CSA left into the West Woods. Walker's brigade charges the Union brigade of Seymour in the East Woods and wins the melee. On the CSA far left, they watch Gibbon's Iron Brigade advancing over open ground. The Iron Brigade opens up with its first fire of the game (aiming at Grigsby's CSA brigade in the West Woods) and completely whiffs on its target. Booooo!!!!

Gibbon's Iron Brigade unleashes some ineffective fire. 
(The 14th Brooklyn regiment is standing in for the Iron Brigade)

Turn 3: The action is starting to heat up as both sides come into rifle range. In the East Woods, Seymour's Union brigade had fallen back on Turn 2, but they gathered themselves together and counter-attacked Walker's CSA brigade. Seymour wins the melee and Walker's brigade routs.

Walker's and Ripley's Confederate brigades storm into the East Woods, where
they run into two Union brigades of Seymour and Christian, from Ricketts' division.

Meanwhile, Doubleday's Division (USA) attack is not going well as the Iron Brigade can't seem to hit a barn door and Patrick's brigade routs after receiving some musket fire. The prompts Meade to send his whole division of three brigades forward to help Doubleday.


Meade's division enters the Cornfield. Hartsuff's brigade from Ricketts' division
emerges from the East Woods, moves up the Smoketown Road, and attempts to 
outflank the Confederate defenders at the edge of the Cornfield.

Turn 4: Back to the action in the East Woods, Ripley's CSA brigade has to fall back as it is now faced off against two Union brigades (Christian and Hartsuff) and doesn't want to get outflanked. Walker rallies his brigade and they form a new line with Ripley's retreating Confederates.


Walker's Confederate brigade in the East Woods


Doubleday's brigades continue to have problems as Phelps routs out of the Cornfield and the Iron Brigade fall back to keep their flank covered. Now Doubleday has two brigades routing and the Iron Brigade's wheels are stuck in the mud. But wait! Patrick rallies his brigade. Hays' CSA brigade also routs out of the Cornfield.


Phelps' brigade enter the Cornfield (right), but do not stay there for
long as two Confederate brigades open fire.


Turn 5: With the West Woods no longer threatened by Doubleday's division, Jones shifts his division to the right and anchors his flank on the Hagerstown Pike to reinforce the Confederate center. Taliaferro advances up the Pike and wheels right so that it can pour enfilading fire into any Union troops traipsing through the Cornfield. In the center, Lawton moves his reserve brigade (Early) into the gap created by the rout of Hays' brigade on the previous turn. On the Confederate right flank, Lawton orders Ripley and Walker to retire from the East Woods and form a new line. He positions his artillery to give it a clean shot down the Smoketown Road.

Taliaferro's brigade wheels to the right to enfilade the Federals advancing 
through the Cornfield.


What is going on in the Cornfield at this moment? Ricketts hived off Duryee's brigade from his command, transferring the brigade to Meade's command. Duryee's Zouaves march smartly into the Cornfield. The other three brigade's in Meade's division are now advancing into the Cornfield and threatening the vulnerable Confederate center. It looks like we might have a Union traffic jam developing in the Cornfield.


Duryee's Zouaves make for a stirring sight as they enter the Cornfield.


Doubleday is still having problems getting his division to move forward. Inexplicably the Iron Brigade continues to fall back to its starting line. Patrick notices Confederates leaving the West Woods so he advances his brigade towards the woods. Phelps finally rallies his brigade. Meanwhile, Penn's CSA brigade routs out of the West Woods.

Grigsby's brigade of Jones' division seems to have things well in hand in the West Woods.

More action in the West Woods. Doubleday's Union division is 
running away from the hot fire zone.


A section of a Napoleon battery drops trail in the middle of the Hagerstown Pike.


At the end of Turn 5 the Union army had five brigades stacked up in the center (the Cornfield) and they are faced off by only two Confederate brigades: Douglass and Early. So Stonewall Jackson shifts Starke's fresh brigade to the center to back up the Confederates who are contesting the Cornfield. The CSA brigades of Hays and Penn are trying to rally behind their lines, near the Dunker Church. There, they come under the gaze of Robert E. Lee and he is not feeling very giddy at the moment. Over in the East Woods, the severely depleted Confederate brigades of Walker and Ripley are struggling to form a new defensive line to fend off the Union advance through the East Woods.

Game summary through the first five game turns

On the Union side, there is good news and bad news. The good news is that Ricketts' division (on the left) seems to have taken control of the East Woods and Meade has a mass of troops gathering in the Union center. The bad news is that Doubleday's division on the Union right is struggling to make a difference in the battle.

The Confederates are not feeling very good about their position at the end of the turn. Their right flank has been pushed out of the East Woods and the center is in trouble with two brigades routing out of the Miller Cornfield. Fortunately, Stonewall Jackson's left flank in the West Woods doesn't seem to be threatened any time soon, thank you very much Abner Doubleday. This enables him to shift two brigades into his center to confront Meade's attack.


Let us resume the report of the battle

Turn 6 saw lots of rifle firing but neither side was gaining advantage. Penn's CSA brigade rallied near the Dunker Church.

Turn 7: Union firing was beginning to take its toll on the Confederate forces. The Confederate right is destroyed as Walker and Ripley rout again near the East Woods and they are out of action for the rest of the game.

Turn 8: Jackson moved his last fresh brigade, Starke, over to the Smoketown Road - East Woods area and hoping that this will be enough to stall the advance of Rickett's two brigades (Hartsuff and Seymour). The Confederate center was still holding up, but the brigades of Early and Douglass were starting to see their numbers whittled down. At least Starke was there to back them up. The action was coming to a standstill in the West Woods on the Confederate left.


Jackson shifts Starke's brigade from the West Woods to the center.

Meade now had four brigades in the Cornfield (center). Hartsuff and Seymour seem to have hunkered down in the East Woods (left). Doubleday had two brigades trying to rally (Iron Brigade and Phelps) and his third brigade (Patrick) had no interest in advancing forward.

The final decision


I decided to end the game after Turn 8. The Union had enough troops to break the Confederate center, but they couldn't unwind the traffic jam of soldiers in the Cornfield and so they couldn't bring their whole weight to bear in their attack. There was no more fighting in the West Woods and the fight in the East Woods was petering out.

The losses were fairly even as the Confederates had 5 brigades of doubtful status and 1 brigade gone for the day. They had 4 viable brigades remaining in the game. The Union army had 5 viable brigades, 4 doubtful brigades and 1 brigade gone for the day.

I saw that neither side had enough of an advantage to stage a convincing win and I really didn't want to carry the game out to the last man.

This was a very balanced scenario that contained a lot of back and forth action. I think that it would make for a good convention game. All in all, this was a fun game to play.


vvvv

Wednesday, October 9, 2024

Battle of Antietam: Hooker's Attack


Antietam diorama in 1/72 scale. This is an amazing piece of work and
regrettably I can not recall the name of the individual's work so that I can give him credit.


CLICK PICTURES TO ENLARGE


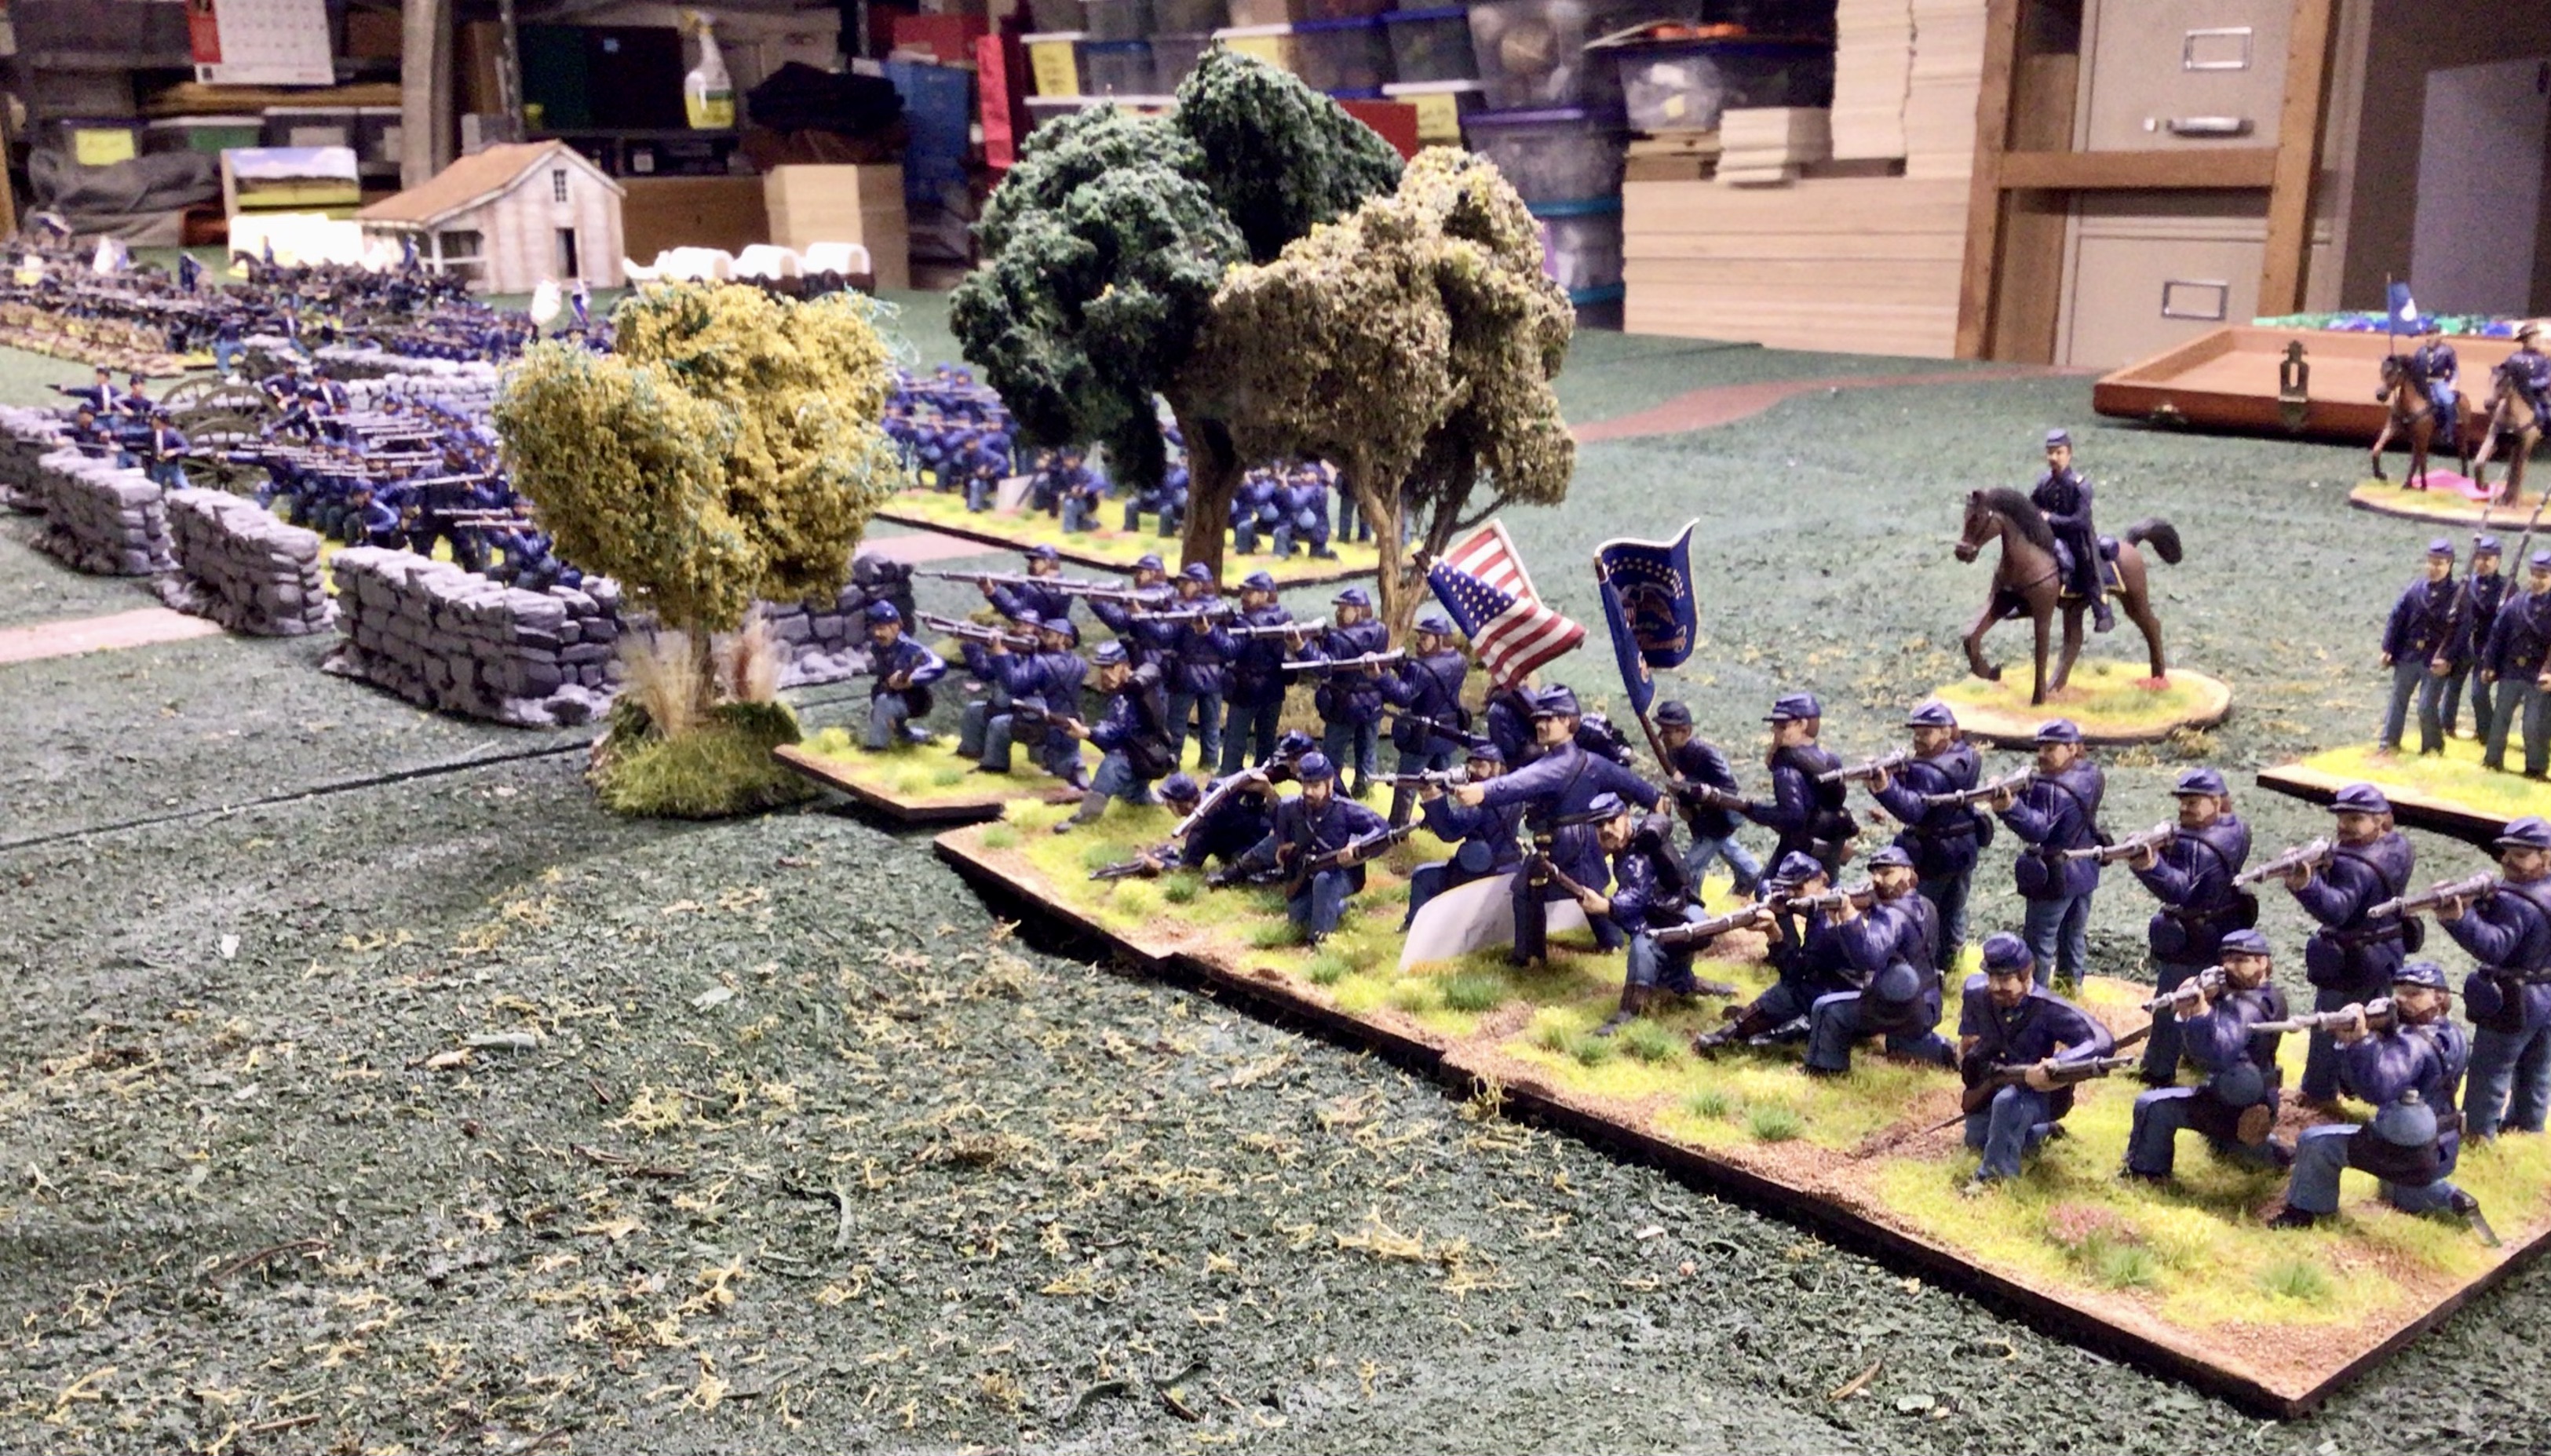
I have been watching Bill Molyneaux's Battle of Antietam wargame on YouTube in recent days and it has gotten me interested in developing my own scenario for the opening battle in the Miller Cornfield. The game will be conducted using the large 54mm toy soldier figures that I painted over the past year for my Pickett's Charge game.


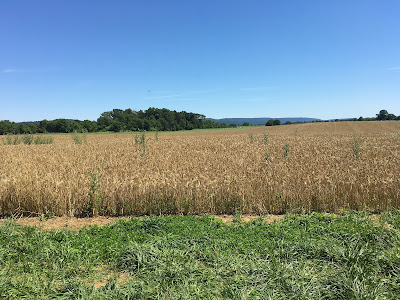
The Miller Cornfield at Antietam in June.

The Confederate Texas Brigade counter-attacks through the Miller Cornfield
Figures from my former 28mm ACW set of armies.
.


Miller's Wheatfield? 54mm figures.


Here are a pair of links to Bill's YouTube battle of Antietam, Parts 1 and 2

Antietam Part 1

Bill's War Game World


Confederate artillery battery fires at Union troops in the Cornfield.
54mm Britains Deetail figures


Confederate artillery at Antietam, also known as "Artillery Hell".
Britain's Ltd. 1/32 scale soldiers

Antietam is a huge battle, but it can easily be broken down into a series of individual corps actions over the course of the day:

(1) Hooker's opening attack through the Miller Cornfield

(2) Mansfield's XII Corps supporting attack for Hooker's attack 

(3) Sumner's Union II Corps attack

(4) Union VI Corps attack by Sedgewick 

(5) French & Richardson's attack on the Sunken Lane

(6) Burnside's IX Corps attack across "the bridge"

(7) Arrival of A.P. Hill's division saves the day

Each of these phases of the battle could be developed into a fun and interesting scenario that reduces the scope and the number of wargame figures that one would need rather than trying to fight the whole, larger battle.


I decided to gin up a scenario for Hooker's Attack In The Cornfield suitable for my 54mm ACW figures. The Union attack by Hooker's I Corps is one of the iconic pieces of fighting in the Civil War and appears to be evenly matched so that either side, Union or Confederate, could win the game. Presenting the game at the regimental level would be a huge undertaking in the number of troops that would be needed and, more importantly, would require more table space than I have in my basement wargaming room.

So I decided that one of my 30-figure regiments would stand in for one brigade of soldiers. With approximately 3 brigades per division in Hooker's I Corps, and 3 divisions, I would need 9 of my painted "regiments" to represent the Union side.

The Confederate side is a little more difficult to understand because brigades were scattered all over Stonewall Jackson's battle line, rather than finding all of the brigades in a Confederate division deployed in an orderly side by side formation. 

Here is the order of battle for the Confederate forces on the left wing of the army, commanded by Stonewall Jackson. Some of the original brigade commanders have been replaced either from becoming a casualty during the fight, or in the cases of J.R. Jones (for Jackson) and Lawton (for Ewell), elevated to division command. Ewell was back in Richmond, VA recovering from his leg amputation suffered at the Battle of Groveton while Lawton was elevated to replace Stonewall Jackson when the latter moved up to wing command. Note: each battery of artillery will be represented by one cannon model with crew.

Stonewall Jackson's Left Wing Command

Jackson's Division (J. R. Jones commanding)

Jones's Brigade (Grigsby commanding)

Starke's Brigade

Taliferro's Brigade (J. Jackson commanding)

Jones' Brigade (Penn commanding)

Division Artillery (6 batteries)

Ewell's Division (Lawton commanding)

Early's Brigade

Hays' Brigade

Lawton's Brigade (Douglass commanding)

Trimble's Brigade (James Walker commanding)

Division Artillery (6 batteries)

Reinforcements - Hood's Brigade

Wofford's Texas Brigade

Law's Brigade

Ripley's Brigade (from D.H. Hill's division)

Thus Stonewall Jackson's command begins the game with 8 brigades of infantry and 12 batteries of artillery, represented by 12 cannon models. You could make the arrival of Hood's two brigades and the detachment of Ripley's brigade from D.H. Hill's division to Jackson's command optional.

*********************************************************

Hooker's Union I Corps

Hatch's Division (Doubleday commanding)

Hoffmans' Brigade (replacing Doubleday)

Gibbon's Iron Brigade

Patrick's Brigade

Phelps' Brigade

Division Artillery (4 batteries)

Rickett's Division

Duryee's Brigade

Christian's Brigade (Lyle commanding)

Hartsuff's Brigade

Division Artillery (2 batteries)

Meade's Division

Seymour's Brigade

Magilton's Brigade

Gallagher's Brigade (Anderson commanding)

Division Artillery ( 3 batteries)

So Hooker's I Corps will have 10 brigades of infantry, each represented by one of my "regiments" of painted figures. There will be 9 cannon models, each representing one battery in the I Corps.

The Game Table and Battle Map

I based my scenario and game table map using the map that I found on Wikipedia, which I believe uses the map created by The American Battlefield Trust. I hope that I got the citation correct. I enlarged this map as much as I needed on my desktop computer and put a piece of light see-through tracing paper over the screen. Then I traced the terrain features onto the paper and used the drawing to create my game table map.


Here is a crude map of the Cornfield terrain features that I will transform into a table top map. The Union I Corps attack will  deploy in the north at the top of the map and attack south towards the "V-shaped" intersection of the Hagerstown Pike (running north to south) and the Smoketown Road (running diagonally from NE to SW). Where the two roads meet lies the iconic Dunker Church which was a landmark that became the focus of both armies during the battle.

Map depicting the terrain for my table top layout.

Other terrain features are the North Woods at the top of the map; the East Woods at the right side of the map; the West Woods on the lower center left part of the map. The Miller Cornfield is in the center of the map surrounded by the North, East and West Woods.

Here are two photos of the Dunker Church, one taken just after the battle and the a more contemporary image.


Contemporary photo of the Dunker Church after the battle. Confederate casualties are shown.
Union forces wouldhave attacked from the right and moving to the left in this picture. You can
just barely make out the position of the Hagerstown Pike by the location of the fences.

The Dunker Church at Antietam National Military Park
Sharpsburg, Maryland. Photo: NPS
The Hagerstown Pike is in the foreground.

Brigade Deployments

Brigade deployments are shown in the map below. Union brigades are in blue and Confederate brigades are in red.


I haven't finalized the map of my game table layout, but I would imagine that on the lefthand side, I will not have Nicodemus Heights on the table. The righthand table edge will probably be at the eastern edge of the East Woods. My game table is 6ft wide by 15ft long and I can, and probably will, use a parallel table measuring 5ft wide by 12ft long so that I can have more table width. The Hagerstown Pike will probably mark the edge of both tables with the aisle running in between along that road. And then imagine that the map will tilt or rotate several degrees to the right. Of the two game tables, the smaller 5ft by 12ft table will be on the left side of the maps above and the larger 6ft by 15ft table will be on the righthand side.

Here is the math with respect to the width of the tables:

Each regiment of mine is 15 to 18 inches in frontage. I don't have the exact measurements in front of me because the figures are packed away into their storage containers at the present. But my recollection from my Pickett's Charge set up was that a brigade of two regiments in the front and one supporting regiment in a second line took up approximately 36 inches of space. 

Another table layout to consider is to play the game out on the horizontal axis. A 15ft wide by 6ft deep front table could encompass the entire Miller Cornfield and the East Woods. The back table would have most of the West Woods, the Dunker Church and the intersection of the Hagerstown Pike and the Smoketown Road. I find myself leaning towards this option because (1) I can place the entire frontage of Hooker's attack on one table and (2) the fighting in the West Woods and the Dunker Church are really not the focus of my game.

Comments on deployment, below, relate to the table option of playing the game on the vertical axis with two parallel game tables.

Union Deployment
In my Antietam game the brigade will now be represented by just one of my painted regiments and three regiments will now represent the three brigades of one division. So Doubleday's Union division, comprised ob Gibbon and Phelps' brigade in the front, supported by Patrick's brigade in the second line, will take up a frontage of approximately 36 inches or 3 feet. This includes a little bit of spacing between units so that the brigades are not lined up end to end in a perfect linear formation with no maneuvering space. Next to Doubleday, we have Rickett's Division comprised of the brigades of Duryee, Hartsuff and Christian. Meade's third division has the brigades of Magilton, Anderson and Seymour and it would be lined up behind Doubleday's and Ricketts' divisions on the tabletop. Thus a two division frontage takes up 6ft, which is the width of my primary game table.

Now I am going to make a slight change to the Union order of battle that will facilitate the play of the game. You will note that one of Meade's 3rd Division brigades, Seymour, is located far away from the rest of the division as it is deployed in the East Woods whereas the other two brigades are positioned in the North Woods at the start of the battle. At the same time, one of Meade's other brigades, Magilton, managed to slide its way into the front line of the ICorps' attack. So I am going to give Rickett's 2nd Division the brigades of Magilton, Duryee and Seymour and Meade's 3rd Division will now own Anderson, Hartsuff and Christian. This places brigades under a command closer together and thus easier to manage during the game.

Just kind of eyeballing things, Doubleday's 1st Division on the right of the I Corps line will have Gibbon's brigade and Patrick's supporting brigade deployed on the smaller 5ft by 12ft table on the left table. Phelps' brigade will be on the larger 6ft by 15ft right table, just above the Cornfield. Rickett's Division will see  Duryee lined up north of the Cornfield, with Magilton's brigade behind him; while Seymour's brigade will start in the East Woods. 

Thus the larger righthand table will have Phelps, Duryee and Seymour in the front line and taking up a frontage of 54 inches out of a total of 72 inches of table width. This should allow room for Union artillery to deploy and give the infantry some space to maneuver on the table. Magilton will line up behind Duryee. Meade's three brigades will form a third battle line behind Magilton.

On the smaller lefthand table we will deploy Gibbon's Iron Brigade on the front line with Patrick's brigade deployed behind him. This table has 60 inches of width with only one brigade in the front occupying 18 inches of space. This provides a lot of maneuvering area for Patrick to move forward and line up to the right of Gibbon and present a two brigade frontage on the smaller table.

So far it looks like we will have plenty of table space for the opening attack on the Cornfield. Of course, the Confederates have a say in all of this too.

Confederate Deployment

The Confederates will have three player commands in the game consisting of Jones' Division on the left and Ewell's (Lawton) Division on the right, with Hood's Division in reserve. As with Hooker's Union I Corps, I need to make some adjustments to the CSA order of battle to keep proximity of brigades in a division. The main problem is that Lawton's Division has Early's brigade is deployed on the far left while the rest of Lawton's Division is deployed on the center and right of the table. So I will add Early's brigade to Jones' Division (deployed on the left table) and transfer Starke's brigade to Lawton's Division. Thus the CSA has two division commands on the front line with a third division command under Hood in the rear. Since Hood only has two brigades (Wofford and Law) I will add Ripley's brigade to Hood's division.

Conclusions and Summary

I am looking forward to setting up my game tables and giving this scenario a go. I will use my 54mm ACW armies and employ the set of rules that I used in my Pickett's Charge war game at Historicon. I have never set up a game where a regiment/battalion takes the place of a brigade so I am keen on seeing how this mechanism works out.


ccc

Sunday, July 7, 2024

New Pickett's Charge Video Is Up On YouTube


The center game table with the Emmitsburg Road running down the middle. The 
table on the left is where Cemetery Ridge is located, while the table on the right
is where the Confederate starting point is on Seminary Ridge. By the way,
I don't have the third table in my basement due to lack of space

Click on the pictures to enlarge the view

Here is a short video tour of some of the terrain that I have set up on my home field game table for my Pickett's Charge game at Historicon July 17 - 21st in Lancaster, Pennsylvania. I have two 6ft wide by 12ft long tables in my basement, with an aisle between the two parallel tables. My Pickett's Charge game at Historicon will have three 6ft by 18ft tables, running parallel with aisles between the tables.

I have set up a smaller portion of the terrain and troops on my table so that I can assess the amount of spacing that I have for terrain and troop deployments. So what you will see in the video is about half as large as the actual game will be.

The Movie


I have spent most of the past week working on terrain pieces and some vignettes to enhance the overall look of the game table at Historicon. Some of my additions include a large expanse of wheat field that has been freshly cut down and harvested. This fixes the problem of having troop bases stumble over the top of the material that represents the wheat in the field.


The Making of The Wheat Field

The first iteration or generation of my wheat field was made by cutting strips of coir or sisal from a door mat and gluing them down onto a two inch wide base that I made from a cork-backed place mat for one's dining table. I sprinkled some strands of fiber, that I cut off of the door mat, over the rows of wheat to give more texture to its appearance.

The next generation of wheat field was cutting out irregular/circular shapes of door mat material and then basing those pieces on the cork mat with fiber sprinkles. I didn't like that version that much so then I hit on the idea of my third generation.

The third generation wheat field assumes that all of the wheat has been cut and harvested or that it has been trampled down by passing regiments of soldiers. Thus the ground is flat, save for a few clumps of mat fiber that I glued to the board to give it s 3D effect. Then I used spray adhesive on the surface and sprinkled more cut up strands of fiber on top of the glue. I let it dry for a short while and then give it another spritz of spray to seal it.

The two haystacks are resin pieces that Ian Weekley used to make and sell. These had been sitting in my bits box for at least three decades and I finally had a project where I could put them to good use. I painted the haystacks with a light tan color and simply sprayed adhesive on the surface and sprinkled and placed bits of coir fiber that were cut off of the door mat. BTW, I purchased the door mat at Home Depot if you are trying to find a similar mat. My local hardware store (where I always look first) did not have any natural fiber door mats so I reluctantly had to go to the big box store. I like to give my business to the small Mom and Pop hardware store in my town whenever possible.

Lifelike Grass Fields (sort of )

My trip to Home Depot led to me finding a roll of artificial grass that actually kind of sort of looks like real grass. It comes in a roll 5ft by 7ft and looks much better than that Astro-turf style of plastic grass material. I cut out several 12 feet squares of the material and placed it on my game table, then I surrounded the green grass field with pieces of stone or snake rail fences.

Grassy fields of some unknown crop are framed by fences along the Emmitsburg Road.
In the distance notice how the grass and the wheat field complement each other.


Colonel Porter Alexander looks through his field glasses for enemy targets.
This is one of my favorite photos that I snapped recently.


Confederate artillery battery deployed on the artificial grass material that I found
at Home Depot. The field is framed by snake rail fence pieces.

Other Sods and Bods

I am pretty much done and ready to pack and go one week ahead of time. The other day I assembled some casualty dials for the infantry regiments and terrained the tops of the dials. These will accompany individual regiments across the fields so that the players can keep track of the casualties in their units. Each regiments has five stands of six figures. Once a stand is lost then a morale check must be made. So the dials only have to be numbered from zero to six - once there are six casualties the stand is removed and the dial is turned back to zero. I bought the dials from War Bases in the U.K.

I still need to make a few more feet of post and rail fences for the Emmitsburg Road and base a couple of wagons that I have already painted.

Finally, I have a little theatrical Hollywood vignette that will appear on the table top during the game. You will have to wait until the games are played before I reveal further details of what this is.

The last bit of work will be to start tearing down the game table terrain in my basement and put all of the terrain into stackable boxes. I want to use a uniform size plastic container that I can stack and place all of the terrain pieces therein. This is better than putting everything into random sized cardboard boxes and then hoping that I can fit everything into my vehicle. This will make it easy to transport the terrain in my vehicle and also to unload and carry to my Historicon game table.


Wednesday, February 21, 2024

Pickett's Charge Play Test Game


Union troops defending "The Angle" atop Cemetery Ridge in the center of their line.
This is Lt. Cushing's battery of 3-inch ordnance rifled cannon.


On Presidents' Day our group travelled to the home of our gaming friend Keith Leidy to run a play test of my Pickett's Charge game for Little Wars and Historicon later this year. I hauled all of the soldiers and terrain bits to Keith's house several days ahead of the game so that everything would be ready to go once all of the players showed up on game day.

The purpose of the play test covered several aspects; (1) setting up the terrain and seeing how many troops could be used on the 6ft by 24ft tables that I will use for my convention games; and (2) playing the scenario and giving the rules a work out. As a result I was able to determine the optimal spacing of terrain on the table top, things such as where to position the Emmitsburg Road and Cemetery Ridge, and figure out the frontages of the Confederate brigades that will be involved in my game scenario. Along those lines, it is important to see how many turns of movement the Confederates need to reach the road and then to be in a position to directly engage the Union regiments. After all, we are asking the Confederate troops to cross 6 to 8 feet of table top distance before they hit the Emmitsburg Road, and as such we need the infantry movement to be of sufficient length so as to minimize the amount of time it will take them to cross that deadly open space.

Union forces atop Cemetery Ridge

The Emmitsburg Road runs down the length of the middle table.

The Confederates starting position on Seminary Ridge.
The actual game will have an elevation for the ridge and game mats
will decorate the length of the table top.


We settled on infantry movement of 16-inches plus one D6 die and this seemed to work well.

We also worked on things such as the range of small arms and artillery. The game test indicated that the Confederates would take a moderate number of casualties from artillery fire until they reached the Emmitsburg Road, which acts a significant terrain obstacle for the advancing Confederates.


Confederates in the Emmitsburg Road. There will be road sections on the table
in the convention games.


For a brief moment I was concerned that the Confederates were not taking sufficient casualties, but once they got stuck climbing over the post and rail fences along the road, they were in range of small arms fire and this proved to be devastatingly effective. I think that by the time we stopped the game, the Confederates only had two regiments that stood any chance of reaching the copse of trees on Cemetery Ridge. The rest of their regiments were either all shot up or running away.

I think that we did a good job of achieving historical results, however, this does not make for a very good or playable war game in a convention setting. So we are going to tweak the effectiveness of musket/rifle fire to give the Confederates some chance of reaching the Union position on Cemetary Ridge.


The Angle defended by Webb's brigade.


Union troops in th Copse of Trees at the center of the Union defense.

Our first pass at small arms fire provided the firing unit with three D6 per stand of figures that the regiment has. So as the regiment loses figures and remove a stand, the fewer dice it will have to use to fire at the opponent. We agreed that that the small arms fire was too effective so in our next play test on March 5th we will reduce the number of dice to two D6 per stand. So now a fresh regiment will fire with ten D6 dice (5 stands x 2 D6 = 10 D6 dice) instead of 15 dice.

We are using ranges of Short, Medium and Long range for musketry and the firing unit will need to roll a 6 to hit at long range, a 5 or a 6 at medium range, and a 4, 5 or 6 at short range. A regiment gets to use a stand for purposes of determining the number of dice that it will roll. So for example, a 30 figure regiment has five stands of six figure, but has lost five figures from firing. That regiment will still get to use that fifth stand when it shoots, but once that sixth man goes down and the stand is removed, the regiment will only have four stands and thus throw 8 D6. The mechanics will be the same for the next game, but the number of dice thrown will be reduced.

Artillery fire rules worked well and we don't think that we have to make any significant changes. Each battery consists of two cannon, both having crews of 4 figures plus one reserve or mulligan figure that can be used to replace the first crew casualty. A cannon rolls one D6 for each crew manning the gun. Confederate artillery can fire at Cemetery Ridge up to the point where the Confederates cross over the Emmitsburg Road. After that the Rebs are deemed to be too close to the ridge to fire over the infantry.

Morale checks are straight forward with a unit rolling two D6 and having to roll a number of 6 or 7 or more on the two dice. (plus some morale modifiers). We don't have the Confederates taking any morale tests until they reach the Emmitsburg Road.

In the meantime, I have a lot of things to do ahead of our next play test on March 5th: painting another brigade of Confederates (90 figures), building more road sections and post & rail fences, revise and update the rules


Saturday, December 30, 2023

A Little More Table Space Couldn't Do Us Any Harm


The new 2.5ft by 12ft back (or side) table expands the depth of 
my 54mm ACW game table.

The other day I decided that my ACW game table needed more depth, so I set up another parallel table. The table layout consists of (from left to right) a 5ft wide by 12ft long back table; a 6ft wide by 12ft long center or main table, and the new 2.5ft by 12ft back table. The center table has 3ft wide aisles separating the parallel table. In practice, the aisles do not exist. When you move your unit up to the table edge you simply hop on over the other side without any movement penalty. So the entire game table is actually 13.5ft wide by 12ft long.


The view from the far back table looking out at the center table and
the new 2.5x12ft side table.


Ground level view, of sorts, looking from the new back table across the
game room towards the center table and back table. At ground level one can 
barely make out the gap between these tables.

In a pinch I could probably make the new side table 5ft wide rather than 2.5ft wide, but it would put a crimp into the amount of area available for walking around and between the various game tables. It's not something that I want to set up permanently, but I could see doing it for a game specific event. This has all been done to accommodate the large 54mm toy soldier size figures. Now imagine what I could do if I scaled the terrain down for 28mm figures. There would be no shortage of maneuvering space and open flank areas on the table.

The set up having a center table and two parallel side tables is done to provide depth to the battlefield. Rather than lining up my 54mm ACW figures from table end to end, the extra depth enables me to either (1) start the opposing forces further apart from each other, or (2) add a supporting second line of infantry regiments in the game - this creates more area for maneuvering on the center table.

For my Pickett's Charge game at Little Wars and Historicon conventions in 2024, the Confederate army will deploy in line on one of the back (side) tables representing Seminary Ridge/Warfield Ridge. Their artillery will deploy on the higher elevation while the infantry advance across the center table towards Cemetary Ridge. The center table is where most of the action will take place. Pickett's Confederates will cross the open ground and advance toward the Emmitburg Road. The Emmitsburg Road will run diagonally across the center table as it is furthest from the Union line on the south edge of the table and gradually come closer to Cemetery Ridge where the road hits the north edge of the table. The further back table is where I will place Cemetery Ridge where the Union army will deploy. There will be some dead ground behind the ridge where I will set up Meade's HQ, reserve infantry and some reserve artillery units.

Painting Update

As of today I have completed 11 Union and 12 Confederate regiments of 30 figures each. This brings the total up to 690 figures painted since the beginning of August 2023. I have not included any of the mounted command figures or the artillery crewmen that I have painted during this period, but my guess is that we are talking about 20+ figures at most. So suffice it to say, I have painted over 700 figures for my Pickett's Charge Project.

I will need 4 more Union and 3 more Confederate regiments (7 units x 30 figures = 210 figures) to complete the infantry component of my game forces. That is to say that I have painted approximately 75% of the figures that I will need for the game. The organization breaks down into 5 brigade commands per side and one artillery brigade command per side. I am considering adding one more infantry brigade per side to give me 6 brigades per side, or 12 players in the game. However, I am not sure that the size of my eventual convention game table(s) will provide sufficient frontage to accommodate the additional figures.


Monday, October 2, 2023

What I’m Reading Today. Civil War


American Battlefield Trust has a remarkable set of maps for the Eastern and Western
theaters of the American Civil War


I’m going to be on a Civil War kick for a good part of the next year as I build up my 54mm armies to host my Picketts’s Charge game at next year’s Historicon. I am kind of burned out on the Seven Years War and I also enjoy painting the large 54mm figures. They are easier to see and they are fast to paint.

I do not have many books in my library that cover the third day of the Battle of Gettysburg and more specifically books about Pickett's Charge. I remedied that by purchasing these two books from Amazon. I was already familiar with the author Jeffery Wert and found him to have an easy to read writing style while presenting and interpreting facts. I have been reading Wert's "Gettysburg Day Three" and have already learned a lot of things that I didn't know. The early part of the book covers the fighting on Culp's Hill on the night of July 2nd and the day of July 3rd.

I had never read much about Culp's Hill and so I had the mistaken impression that Ewell bungled his assignment to commence an attack in conjunction with Pickett's Charge on the afternoon of July 3rd. I hadn't realized that the Union army opened the fighting early in the morning of July 3rd, which threw off Ewell's timing for his attack. In other words, the fight was brought to him and so Ewell was forced to fight it out during the morning. I hadn't realized how bloody and difficult it was for the Confederates to assault and capture Culp's Hill. Far from being due to incompetence on Ewell's part, Wert lays out the case that the Confederate assault never had a chance from the get go.


I have just started to read about the events leading up to Lee's decision to order the attack that ultimately came known as Pickett's Charge. I am very much looking forward to having the time to finish my reading of Wert's book.

My second book, not shown in the above picture, is written by a fellow named Philip Thomas Tucker. Much to my dismay, a quick perusal of the book revealed some tinges of Lost Cause writing, which was a red flag warning to me. This is the problem of ordering books from Amazon, you don't have the opportunity to look at the back cover of the book jacket and see which Civil War historians have nice things to say about the book. When you look at the back cover and do not see any recognizable names of historians, then this is another red flag that screams "do not purchase this book!" 

I made a few calls to people I know and trust to get their assessment of the Tucker book and their comments confirmed my suspicions. I tossed the book into the garbage bin. I looked at some of the books in my Civil War library and found another book by this Tucker (there is a good historian named Glenn Tucker and he should not be confused with this one). The book was about Barksdale's attack on the second day of the battle and my reaction was "doh! He got me again!" In my defense I bought the book at the Gettysburg National Park Visitors' Center bookstore. So avoid this author at all costs.

My third book "Third Day of Gettysburg and Beyond" is an anthology of six essays edited by Gary Gallagher (an historian I trust). The essays are written by acclaimed historians such Carol Reardon, Robert Krick, A. Wilson Greene and others. I recommend this book too.