Saturday, May 31, 2025

Girl Watching In Ancient Rome

A comely servant girl carrying water has caught the eye of a number of the men.


The sport of girl watching has been going on since the beginning of time, I suppose. So here is a little vignette that I set up in my Roman town to reflect that. In the background a wife is getting ready to let her spouse get an ear full of her opinion as it relates to his wandering eyes. Poor fellow.


I think that the fellow in the blue tunic is in for a bit of trouble
as his wife gives him the old stink eye for letting his eyes wander.


Today I moved my fountain from the central forum square to a new square that I created off of one of the side streets in the city. I printed out some grey cobblestones on paper which create a rather nice visual effect.


The water fountain has been moved in front of the Basilica. The cobblestones are paper
printed off of images that I found on the internet.

A view of the fountain, the Roman Bath house behind it, and the Basilica on the right.


cc

Friday, May 30, 2025

Time for a Bath, Anyone?


A Roman Bath with a black and white tile floor. The two building wings are 
not attached to the floor for ease of packing for travel.

Click on the pictures to enlarge

Earlier this week I commenced work on a Roman Bath for my Roman town/city and it is nearly finished today, save for a little bit of touch up painting and gluing the columns into place.

The model had to fit into an area measuring 16" long by 12" high as this is the size of the cork placemat that will serve as the base for the model. The only problem is that the Roman Bath model would not fit into one of my cardboard carrying boxes (purchased from Uline). So I came up with the idea of making the components of the bath free-standing so that they would fit into a smaller container. Then when I am ready to set up the model on the game table, then I lay the 16x12 cork placemat on the table and place the two sections of the bath on top of the placemat. The actual bath and other accoutrements are added as needed.

The bath has two separate "wings" of the building that flank the center bathing pool. The wings are removable. I use my usual black foam core board as my basic building material and pieces of bass wood to make the roof trusses. The terra cotta roof tiles come in a plastic sheet made by Plastruct. I bought my tiles online and they arrived within two days of placing the order.


The joins where two pieces of foam core board meet are taped over with masking tape to hide the join lines (see below). The plastic columns are from a wedding cake tier set that I found on Amazon. The black and white floor tile is a decorative paper that I found at Michael's Stores.


This morning I glued the roof onto the structure using a hot glue gun. One of the roof panels was glued upside down, but this error is barely noticeable given the size of the individual tiles on the tile sheets. Take care to line everything up before hand so that once the hot glue is spread over the roof frame you end up with the exact amount of roof overhang that you want. On one of the panels, my overhang on the left was one rank of tiles whilst the right rank of tiles was three tiles wide. I had to tear off the piece of tile before the glue set in and do it all over again. Then I tried it again, but this time the overhang was even on both sides, but I had glued the tile sheet upside down. Doh!!!!

Eventually I got it right, as seen in the pictures below. Then I applied a coat of linen grey chalk paint over the walls of the buildings. This is to hide the color of the black foam core board. After the grey color dries, I apply a coat of antique white chalk paint for the final color. A border of terra cotta red will be applied around the base of the buildings.

The following pictures show the model after the first base coat of chalk paint has been applied and after the roof tiles are attached. The two columns shown in the front are part of a set of four columns that will be attached to the building sections, two columns per building. I drilled two holes into each column so that I can pin it to the building wall so that the columns do not fall off of the model during handling or travel.


So here are some pictures of the almost finished Roman Bath House:


Is it a public Roman Bath or is it Messalina's House of Fun?

We had better close the drapes and not find out.

The bathing pool in better times. A tribune is consoled with vino,
served by one of the servants at the bath house. A senator appears to 
be negotiating for something that he shouldn't be doing.

The Roman City Continues to Grow

I have now built 15 buildings and six feet of Roman aqueducts since the beginning of February 2025 and I have been rather amazed to see how this project has grown from a village to a larger town and now into a city with each new addition.

The new Roman Bath is located in the lower right corner.

I added a narrow side street that runs parallel to the forum square.

The dock area is a "what if" type of set up just so that I could see what it might
look like. I won't have enough room in my vehicle to take the docklands to Historicon.

The view of the city looking from the Triumphal Arch towards the Temple of Athena.
The new bath house is located in the upper left corner to the left of the temple.

Another view of the town from the same point of view as the previous picture.


And finally, nearly all of the civilian figures that populate this Roman city are 1/30 scale (60mm) figures from King & Country of Hong Kong. Some of KC's new civilian releases arrived the other day and now I have over 80 civilians roaming around the streets of my city. The population is certainly growing!

ccc

Saturday, May 24, 2025

Street Scenes in My Roman City


A typical narrow Roman street lined with shops on each side.

Click on all pictures to enlarge

I have my games entered for this year's Historicon and now that I know how much table space I have, I can better figure out the layout of my Roman city. I have a 6ft wide by 15ft long center table and two 3ft by 15ft "back tables" that run parallel to the larger center table. I decided that the city will be located on the end of the center table and that I will have to limit the city's footprint to an area measuring 3ft by 6ft. Anything larger will eat into the available space for the table top battle. Thus the table top battle of Hannibal versus the Romans will have an area of 6ft by 12ft.

I was going to use a three large table layout, but after running my Hannibal! games at Little Wars, I saw that I can easily run the game on two tables (or one table with two smaller back tables).

These considerations force me to think long and hard about which buildings are essential and need to be in the show, versus peripheral buildings that can be left out of the game.

Here is a picture of what the city may look like:

The view from afar. The width of the city is 6 feet so that it will fit on the end of the table.

Here are several pictures snapped at "street level". If you play in one of my games then I encourage you to stoop down until your eyes are at tabletop level. The view really brings things to life.

I love stooping down to table level and looking at the terrain at the level of the civilian models.
This picture is snapped from the entrance to the victory arch.

Getting down to street level lends an air to realism. The buildings on the right
are "facades" made by Last Post in New Zealand. My bespoke buildings are
on the left side. Figures are from King & Country. This shot is similar to the 
one at the top of this page.

Roman Warehouse

This week I made a two-story warehouse for my city. The materials were foam core board, balsa and bass wood, masking tape, and corrugated cardboard.


The basic shape of the walls are cut from foam core board. I size doorways to 
one of my civilian figures. The upper story of the building is the warehouse.
You can see the string and pulley, which is used to haul goods up to the second
story, above the upper doorway.

View of the rear wall of the warehouse. The door is balsa wood that is scored with
straight lines to resemble wood planks. There will be a covered eave overhanging 
the doorway. Cardboard from a shipping box is used to make roof tiles.

I use masking tape to cover the joins where the walls come together.
This hides the join and it is easy to paint over the tape.

Some of the wood work is stained rather than painted.

Here is the finished warehouse model:

The front side of the warehouse.

The back entrance to the warehouse.

The warehouse model "in situ" placed next to other buildings. Again,
King & Country civilian models.

Here are some more pictures of the town:

The local temple where some senators gather to discuss the issues of the day.

Overhead view of the city.

Workers making repairs to the roof of the basilica.

Some of the shops in the city: the cobbler (left) and the curio dealer (right)

And finally, I was messing around with setting up a harbor scene, but I won't have enough space in my vehicle to haul this extra terrain to Historicon. Still, it gives me lots of ideas for new things. A Roman lighthouse may be in the offing.

Monday, May 19, 2025

Historicon: "Romans, Come Out to Play-yay"


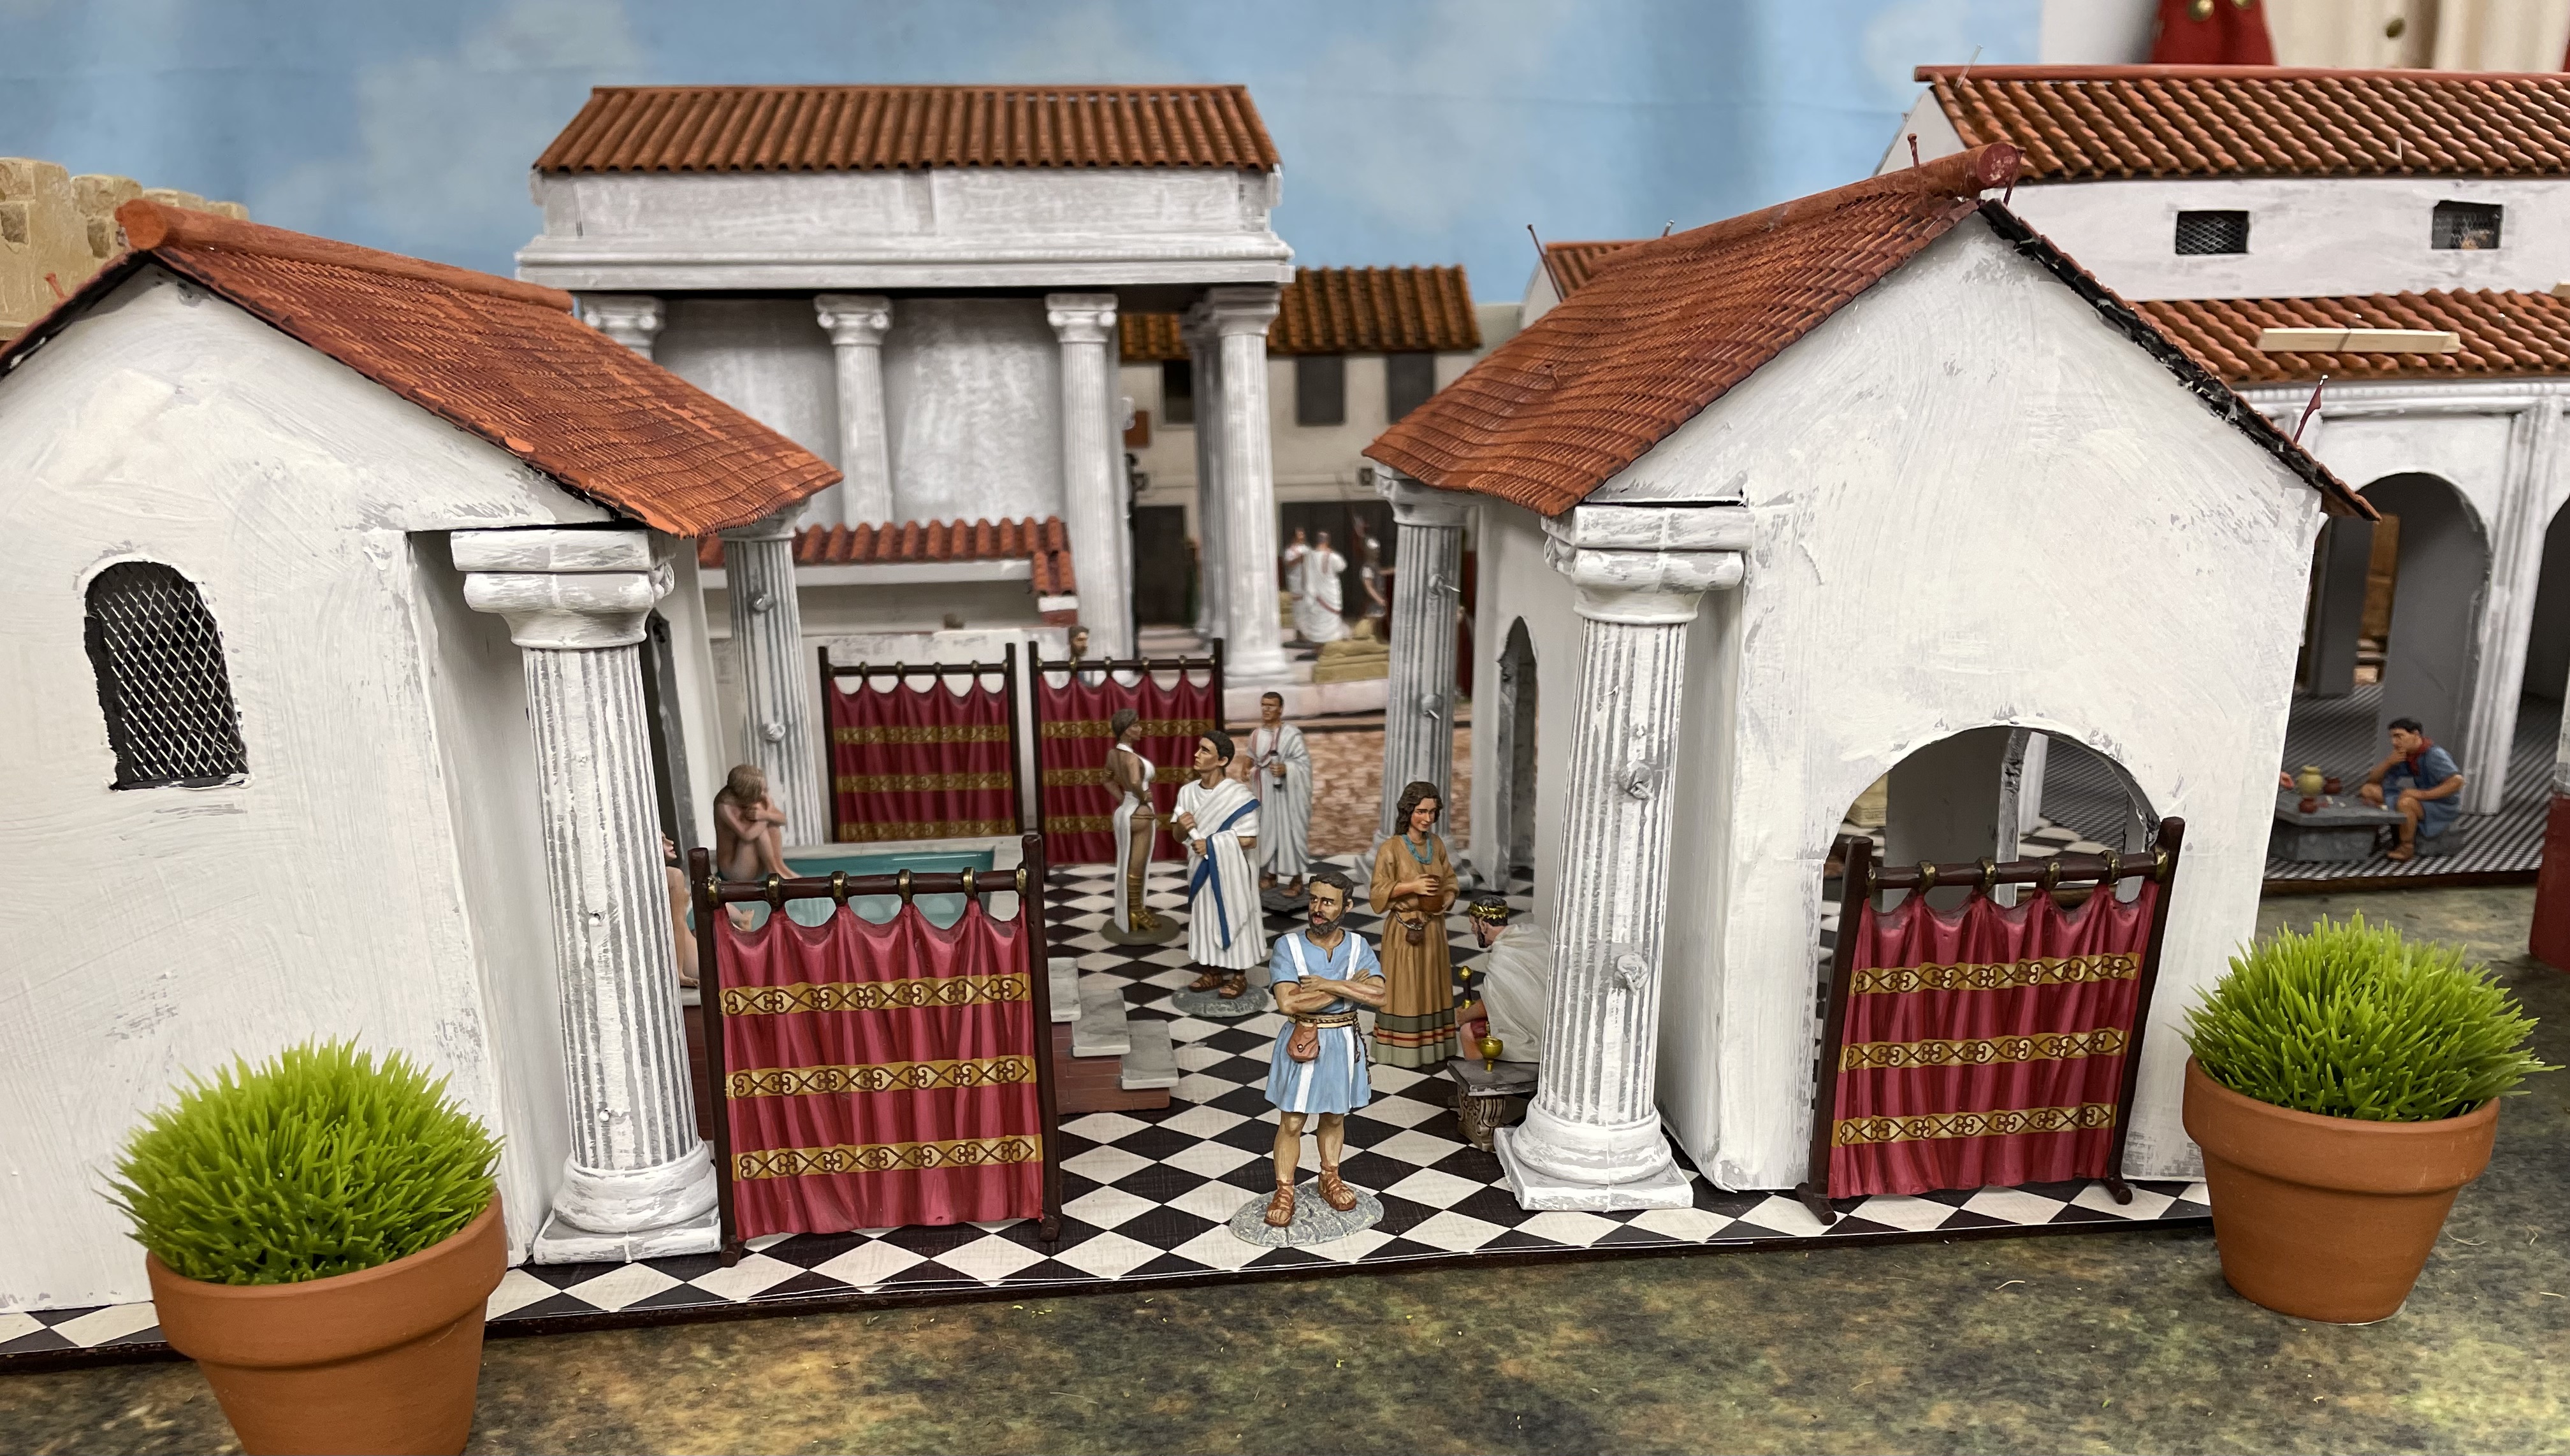
My reconfigured Roman town for Historicon games.

CLICK ON THE PICTURES TO ENLARGE


I entered three games for this year's Historicon convention and received confirmation that they have all been approved. So here is list of my games:

Thursday: 11A.M.  "Hannibal! The Wargame (10 players, set-piece battle, 4 hours duration)

Friday: 11A.M. "Hannibal! The Battle of Zama (10 players, set-piece battle, 4 hours duration)

Saturday: 1P.M. Romans, Come Out to Play-yay! ( 8 players, skirmish level game, 2 hours)

So the Thursday and Friday games are large set-piece games where the two sides line 'em up and get on to the business of bashing each other up. The Saturday game is a skirmish level game. Over the past several years I have noticed that the number of players signing up for my games dwindles the third time that I run the scenario. So this year I decided that my third game will be something completely different: a skirmish level game.

"Romans, Come Out to Play-yay!" should be obvious to many of my blog readers as being inspired by the movie "The Warriors".

The Warriors (1979) Imdb


A small group of Roman soldiers were on a mission to kidnap Hannibal, but there plans went awry, as they are want to do, and Hannibal has offered a huge reward for their capture. Now the Romans have to fight their way back to the safety of their camp. However, life ain't very pretty in the city and various gangs of Celts, Iberians and even some turncoat Romans are out to stop the Romans and prevent them from reaching safety.

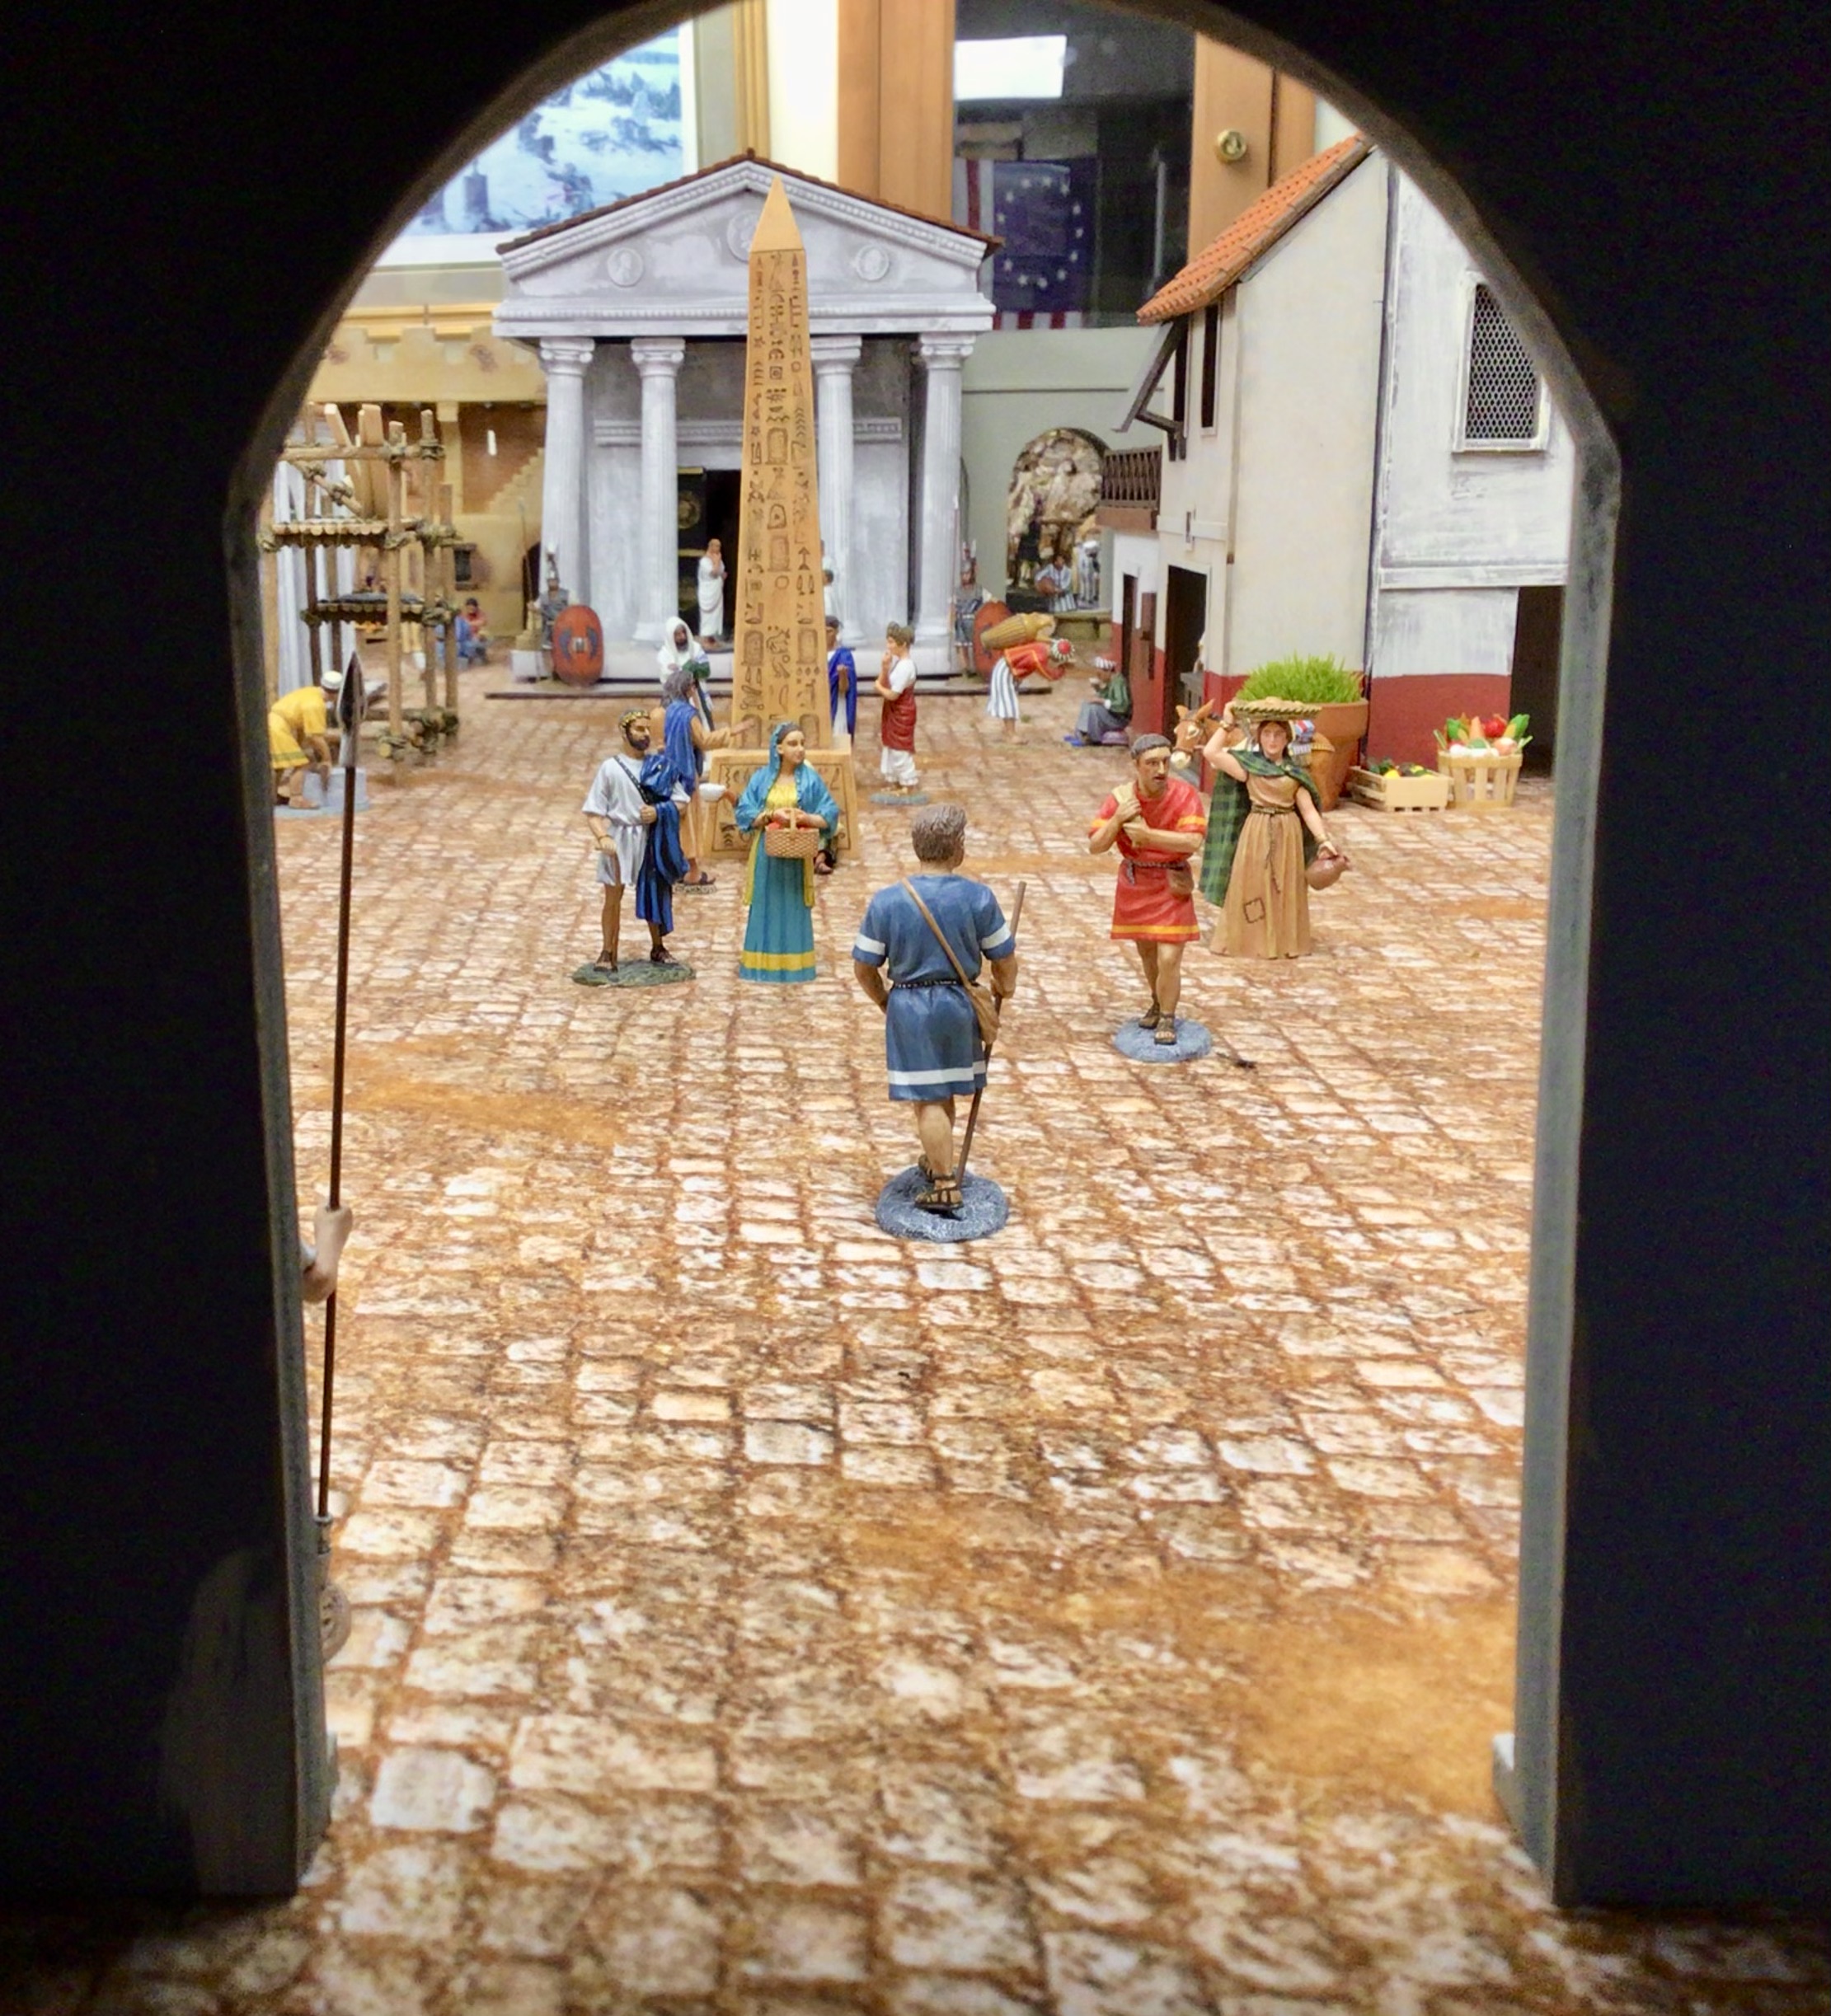
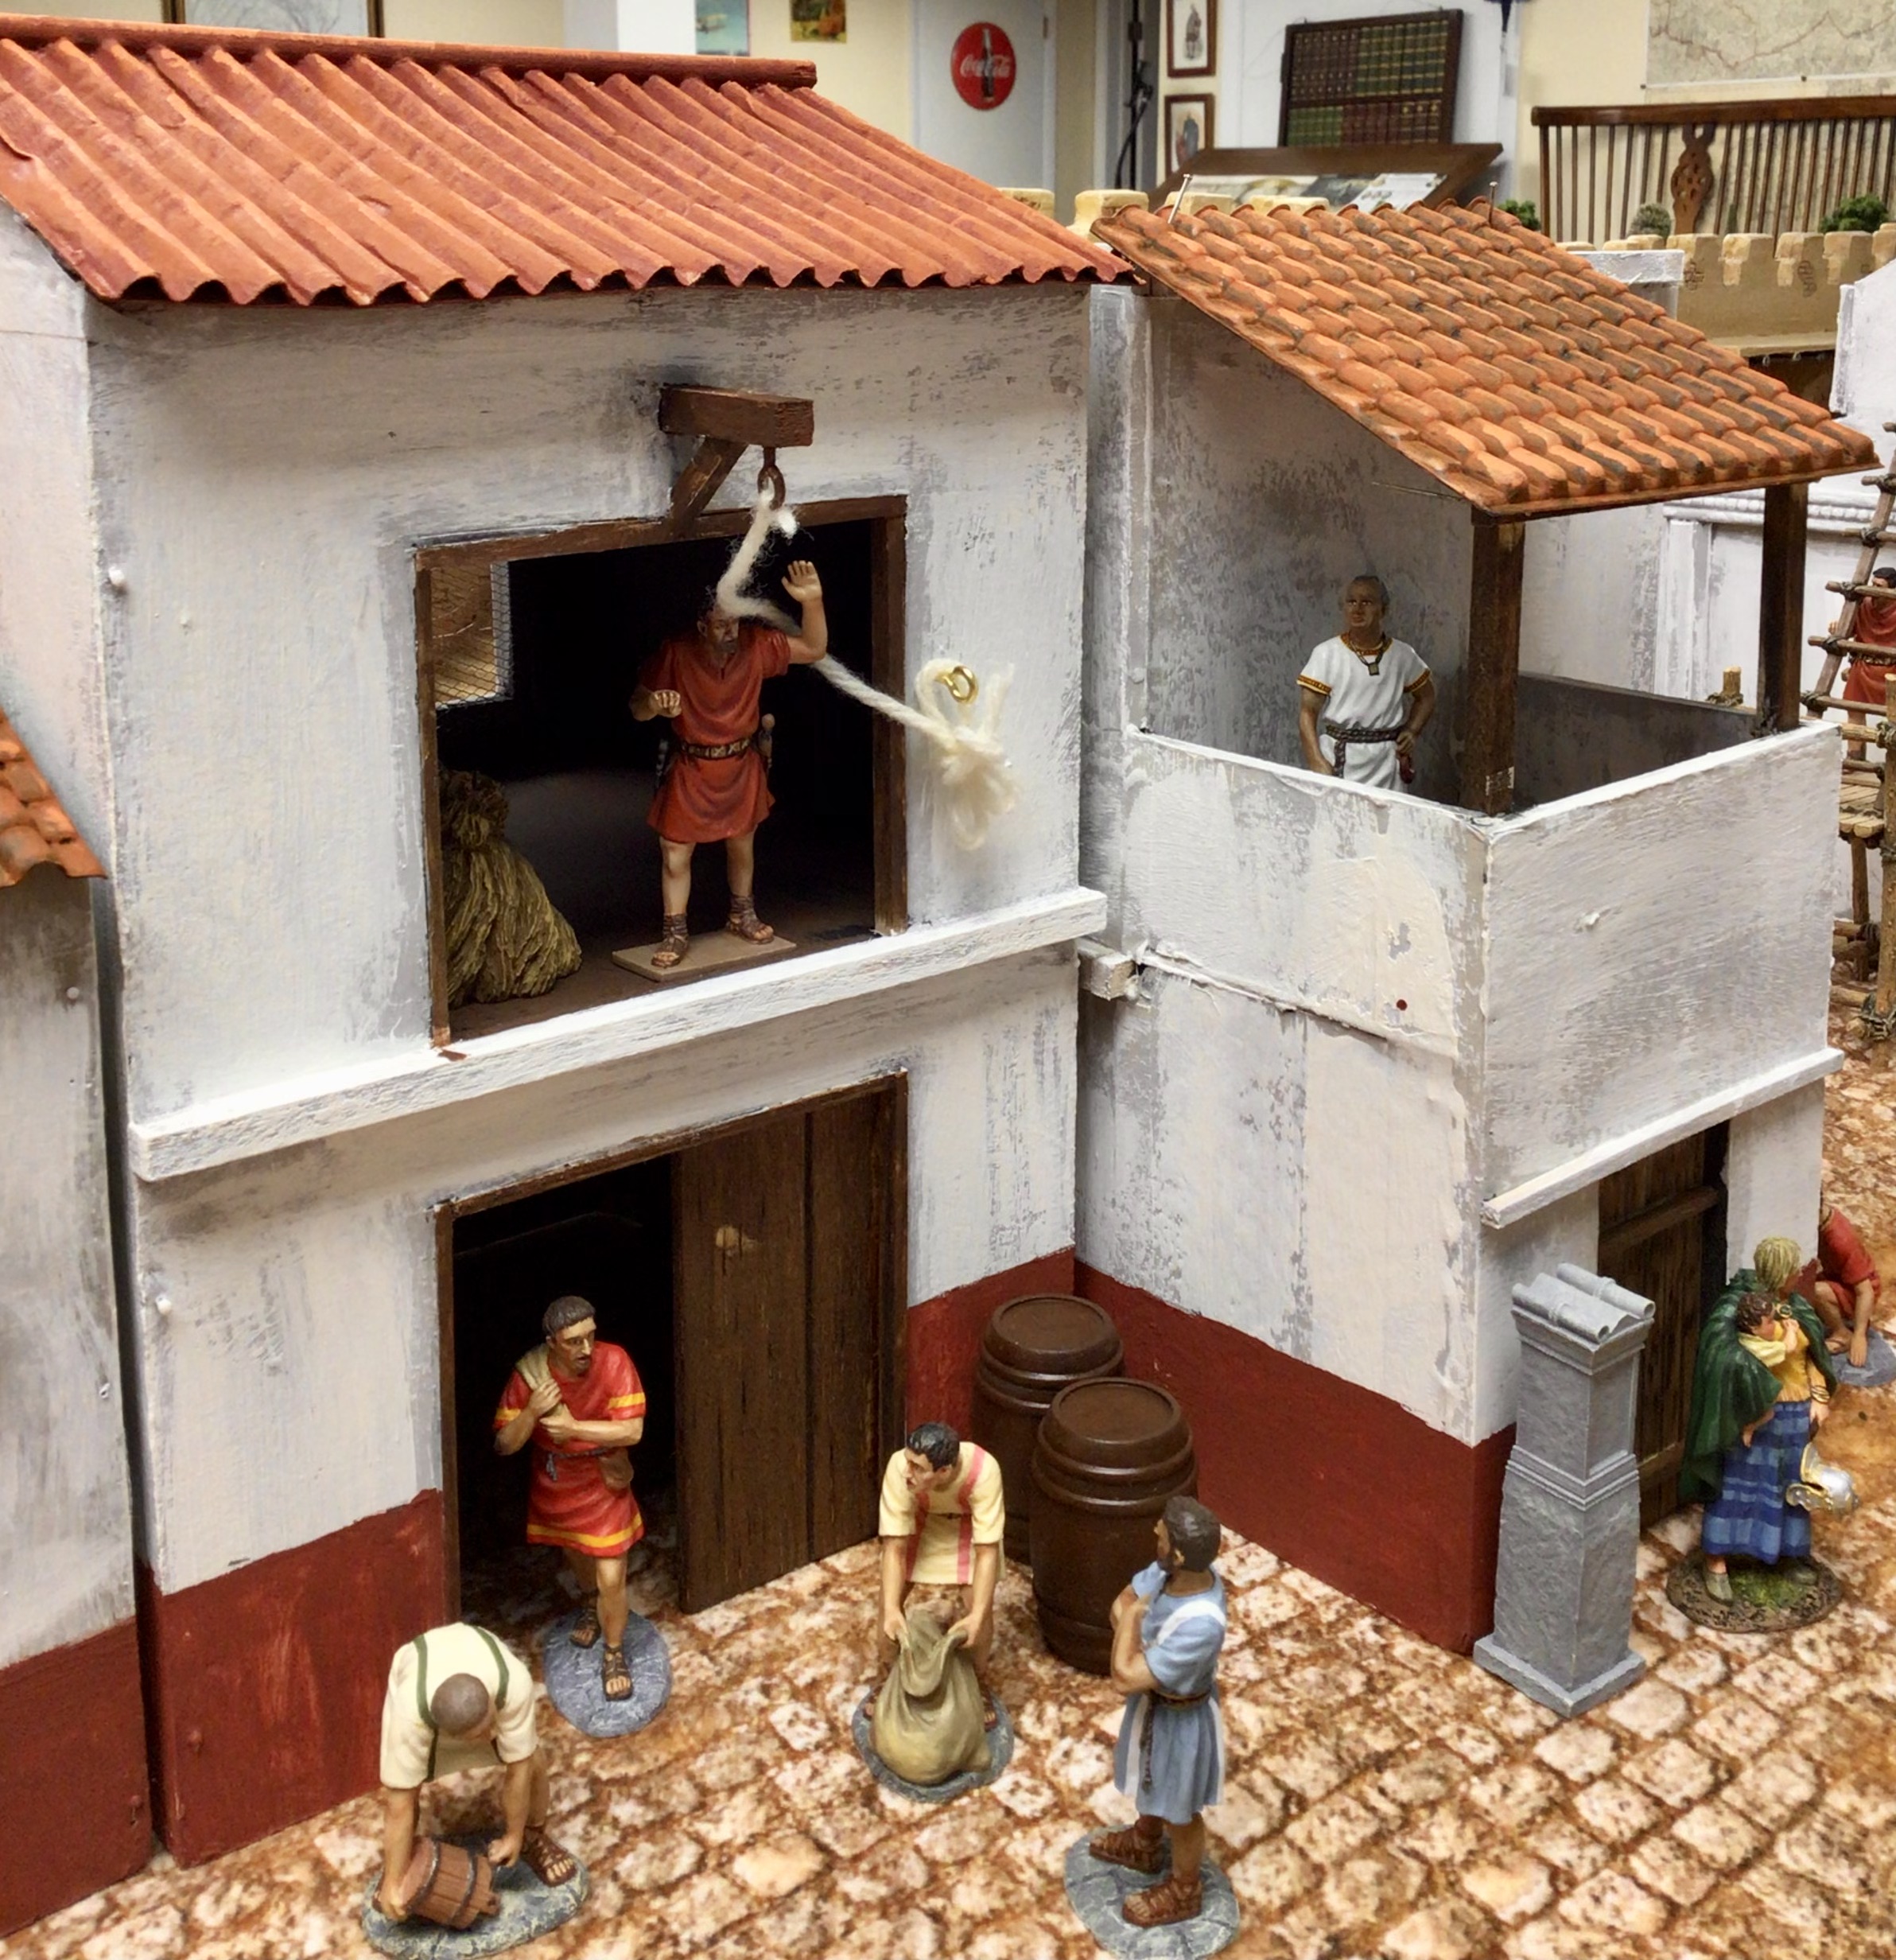
Here are some pictures of life in a Roman city. The 60mm civilians are largely made by King & Country toy soldiers.

The Butcher (or is he?) talks to a customer. In the background is the green grocer.

Some of the citizens having a good time at the taberna.

The shoe maker in the left store bay and the curios dealer in the righthand bay.

cc

Logistics

I decided to cut back the area of my Hannibal game from three 15 x 6 tables down to two such tables. Space is at a premium at Historicon and after giving the game a little bit of thought, I decided that I could run the game on two tables. This creates a minor problem for me as I no longer have that third table for depth in the gaming area, plus this leaves me with less space to plant terrain, such as the Roman Camp (which I have axed), farm houses and my Roman town. Of all the terrain features, the Roman town is the one that has to stay.

I have a pair of 15 x 6ft tables. The second table will be split into two narrow back tables, one on each side of the large center table. So the layout will be (1) 15 x 3ft back table; (2) 15 x 6ft center table; and (3) 15 x 3ft back table. Where to put the Roman city? It will be at the end of the center table and have a ground footprint of 3ft x 6ft at one end of the table. This results in a main battle table area of 6ft by 12ft, which should be sufficient for the game. The two back tables allow for more deployment depth for each army.

Given these parameters, I had to figure out how to reduce the size of my Roman city so that it fits into the 3ft length by 6ft width area. I took down my existing Roman town and reconfigured the buildings to fit into the allotted space. I think that I came up with a workable building arrangement. 

On the plus side,  (1) I won't need to bring as much terrain to Historicon as I would if I were using three tables rather than two. This is an important consideration as I will be renting a large SUV vehicle to carry all of my game gear and my spouse. She wants to see what a large convention is all about and I am grateful to have her company on the trip. (2) I don't have to build anymore terrain for my Historicon games so I'm pretty much set and ready to go, save for painting one last 32-figure unit of Italian allies to Rome.


cc

Wednesday, May 14, 2025

George Washington Is Missing!


George Washington personality figure by Fife and Drum Miniatures 


I am working on a game scenario for the Battle of Princeton in January 1777 and one of the key elements is when Washington rode to the rescue to stop his men from routing away.


To my horror I cannot find the Washington figure that I painted in my collection. After searching high and low I have come to the regrettable decision that I will have to paint a new Washington figure. This time, though, I will make the command base larger and add a mounted soldier carrying his headquarters flag.


Nathaniel Greene with standard bearer. This is how I will depict Washington.


Ccc

Tuesday, May 13, 2025

Thinking About the Battle of Princeton


After watching the Little War TV video about the Battle of Princeton from the American Revolutionary War (or AWI for those of you who are heathens), I decided that it was time to work up my own scenario for the battle.

Fife and Drum Miniatures: British artillery 6-pounders with limbers.


Here is a link to the Little Wars video about their game. It includes some really good historical background about the battle and it is well worth the look.


Continental infantry opening up a withering fire on the British 


The following map from Mount Vernon depicts the opening moves of the battle. Princeton is basically a "meeting engagement" where the two sides are marching in the opposite direction and then spot each other. A short intense battle follows. The British commander, Lt. Colonel Mawhood (pronounced "maud")

Map copyright of the Mount Vernon Ladies' Association. 

Princeton Order of Battle


cc