Thursday, May 14, 2015

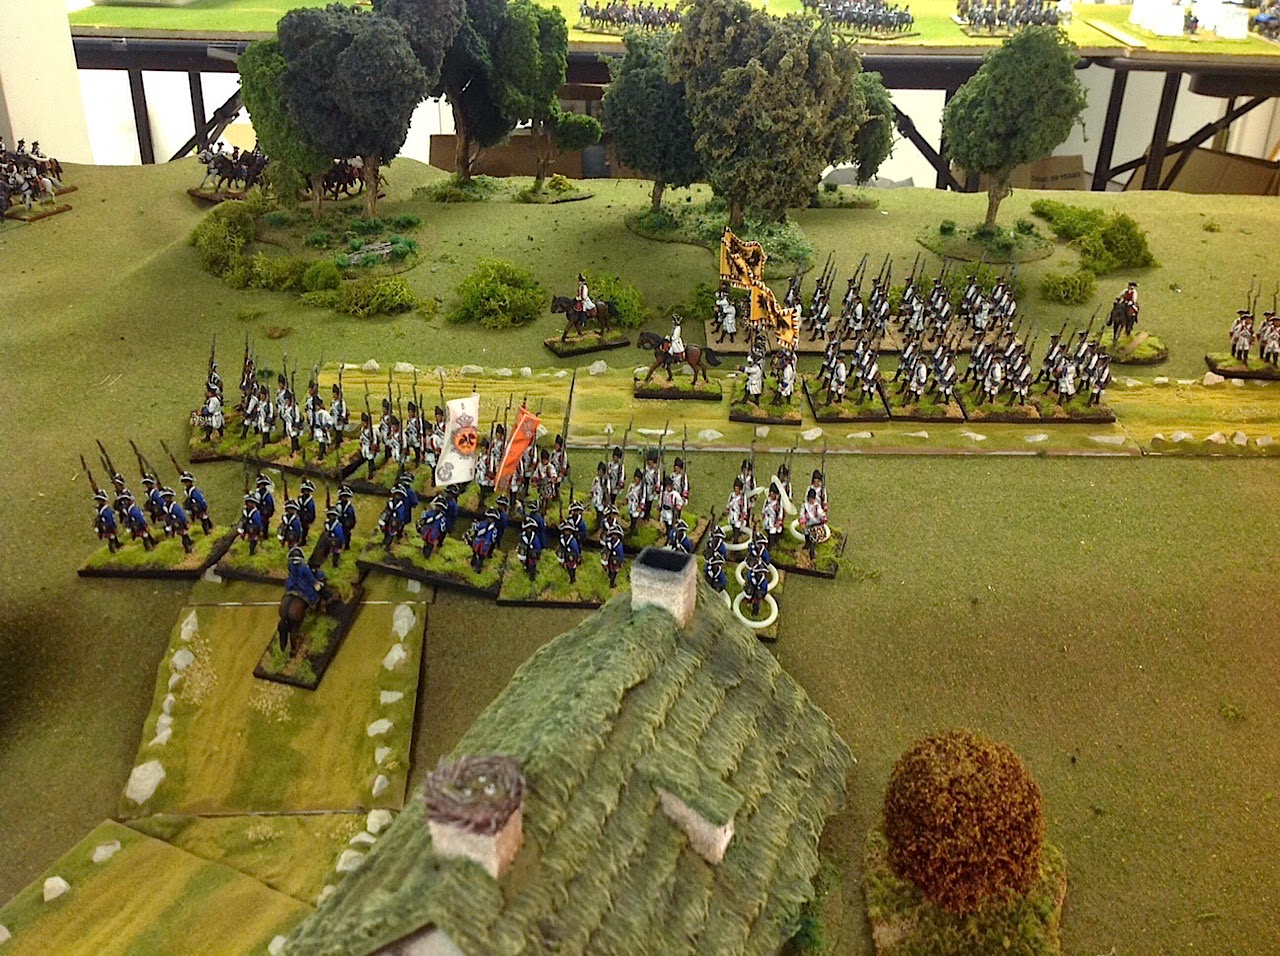
Battle in the Oak Wood


Overhead view of the fight for the Oak Wood.

The above picture provides a general overview of the action on Turn 12 of the Kolin game. While the Austrian and Prussian infantry vie to control the Oak Wood, a massive cavalry melee continues behind the woods. Should the Prussian cavalry prevail, it would jeopardize the entire Austrian defense of Krechor Hill as the Austrian infantry would be facing Prussian infantry to their front and Prussian cavalry behind them. Austrian cavalry general Serbelloni sees the same thing and so he has committed all of his remaining cavalry to the scrum.
The cavalry battle behind the Oak Wood draws in more and more cavalry from both sides.


While on the other side of the woods, Hulsen continues to press the attack.


Marshal von Daun rushes reinforcements from Sincere's division to Krechor Hill  to support the Austrian right flank.


c

Monday, May 11, 2015

Emergency help needed for fuzzy primer

I primed a squadron of 12 Austrian cuirassiers yesterday and three of the new Austrian 3-pd cannon models in the Minden range. I was all "primed to paint " them tonight, but to my complete horror, every figure has one side covered with fuzzy black primer

I tried scraping the fuzz off with a new tooth brush in the hope that they could be recovered and reprimed. however, they are not up to snuff and I don't want to spend hours painting the figures only to find that I could not cover up the rough fuzzy surface on one side of the figure.

I'm sure that some of my regular readers have gone through this experience before and I'm hoping that you can give me some advice. I've decided that I need to strip all of the primer off the figures and start anew. So the question is, what is the best way to strip primer off of a figure. I used Armory black primer if this helps. I shall never use black primer again.

I'm going to have a wee dram or two of Highland Park 18 year old Scotch right now. I think that I deserve one right now.

Please leave a comment in the comment section if you have a good method for striping figures or send me an email at
Altefritz1740@yahoo.com

Sunday, May 10, 2015

Grand Cavalry Melee at Kolin

Prussian hussars and DR12 Wurtemberg Dragoon cross swords with the Austrians, east of Krechor.
 I have downloaded some pictures of the grand cavalry melee that took place to the east of Krechor village. This did not happen historically...


Another view of the same melee scrum.

After the casualties and morale tests, few Austrians are left standing.
The next turn of cavalry melee would have been fought on the edge of the table, so the light bulb went on and I pushed one of my back tables forward so as to add an extra 2 feet of depth to the table. I like the way that this worked out.

Several turns later, more Austrian cavalry enters from the bottom of the picture. I shoved my back table up to the main table so that I could stretch the width of the table to better fight this melee.

A better view of the extra table that I pushed forward to extend the width. These are standard school cafeteria tables 2.5ft wide by 6ft long, purchased at Staples.

Seydlitz leads the Prussian cavalry circling around Krecho to the east. IR5 Alt Braunschweig regiment follows.

Several squadrons of the Bayreuth Dragoons (DR5) await their turn to get into the rumble.


fff

Saturday, May 9, 2015

Hulsen's Advance Guard Attacks Krechor


Von Seydlitz leads his cuirassiers into the cavalry melee


After setting up the Kolin terrain and looking at the table for several days, I decided that it was time to haul out the D10 dice and take the scenario out on a test drive. As always, please click on the pictures to enlarge the view (it is worth the clicking effort).

Also, comments are always appreciated as reading your comments is the best part of blogging.

Finally, if you are not already a follower of this blog, click on the Follow button in the upper left corner of this page and become a follower of the Der Alte Fritz Journal.

The game was played using Minden Miniatures, Herb Gundt buildings and trees and my own Der Alte Fritz rules (which are available as a free download on the Fife & Drum Miniatures website.


Overhead view of Hulsen's attack. He has cleared the Croats from Krechor and has sent a brigade of grenadiers around the left to outflank the Austrian infantry of Wied (arriving).

Here are some pictures of Prussian General Hulsen's opening attack on the Austrian right flank near Krechor village. Commentary is provided in the captions.


Prussian regiment Winterfeldt (IR1) tries to press the attack out of the village, but its path is blocked by the Soro Grenadier battalion of the Austrian army.
At the same time, Serbelloni commits his Austrian cavalry in a forlorn hope charge to slow down the Prussian grenadiers to the east of Krechor and to stop the Prussian flank maneuver.
A view of the battlefield to the east of Krechor. Prussian hussars screen off the Croats deployed in Kutlire so that the rest  of the attack can pass without getting shot in the flank.


Wied's Austrian division is the first of the Austrians to arrive on their far right flank between Krechor and Chozenitz.
Hulsen deploys a battery of Prussian 12-pounders that inflict a lot of damage to Wied's forces on the Krechor Hill.

Prussian grenadiers press home the attack near the Oak Wood.
The same action, but from the Austrian point of view.


The first battalion of IR1 Winterfeldt routs through Krechor.


Sincere's division arrives around Turn 8.


A close up view of Sincere's division on the march.


Hulsen rallys the first battalion of IR1 Winterfeld, while the second battalion waits for the traffic jam to clear.


As of late Friday evening, the game has progressed nine turns and both Wied and Sincere's divisions have arrived at Krechor to stem Hulsen's attack.

To the east of Krechor, a massive cavalry melee is developing with both sides feeding ever more squadrons into the action. Seydlitz has brought the Prussian cavalry reserve from the center to all the way on the the left flank and his cuirassiers will soon enter the melee.

Treskow split up is left wing command into two brigades: the IR49 Fusiliers and the Prussian 12-pound battery occupy the front on the Kaiserstrasse between Krechor and Chozenitz; the IR5 Alt Braunschweig regiment continues the original plan of marching around the left or east of Krechor village, adding their weight to the advance of the Prussian grenadiers.

If the Prussian cavalry prevails in the melee, then there will be little to stop the attack on the left to the east of Krechor. This will create a kink or bend in the Austrian defensive position that is now anchored on the Oak Wood.


ccc

Friday, May 8, 2015

Hulsen's Attack At Krechor Village

Hulsen has chased the Croats out of Krechor

Thursday evening I commenced my solo game test of the Kolin scenario that I am working on and I was able to complete six turns before calling it a night.

Hulsen cleared the Croats out of Krechor by the end of the third turn but was making little headway beyond the village. The Austrian Soro grenadier battalion had sealed off the exit from the town and as a result, two Prussian battalions of the IR1 Winterfeldt regiment were bottled up in the town stuck in a traffic jam.


Hulsen sent his two grenadier battalions, supported by two squadrons of hussars, around the east side of the village in order to outflank the Soro grenadiers. Just as they were starting to shake out into a line, the Austrian cavalry general Serbelloni had ordered two squadrons of the Sachsen Gotha Dragoons to,charge into the Prussian grenadiers. Both of these actions created enough time for Wied's Austrian division to march to Krechor. In addition, Sincere's division was also marching to Krechor, two moves behind Wied.


I am creating this post in the Blogger iPad app which does not allow,me to enlarge the pictures. So tomorrow night I will replace the pictures and add some more to,this report.

Thursday, May 7, 2015

More New Kolin Terrain Pix

Croats in defense of Krechor village
I did a little tweaking of the Kolin scenario the other night and added some bits and pieces to the terrain to break up the expanse of game mat. I still need to embelish the terrain a little more, but slowly and surely it is coming around. Click on all pictures to enlarge the view.

Hulsen's advance guard prepare to attack Krechor
I added the village of Kutlire on the left hand side of the picture and stuffed more Croats into it.

Austrian 6-pounder battery deploys near Chocenitz

I just happen to like this picture of the Austrian battery and the perspective with the village in the background.

The vanguard of Wied's division on the march to Krechor.

Overhead view of the terrain from Krechor to Chocenitz, showing the Austrian grenadiers as the only units available to link Krechor village to Chocenitz.

A good overhead view of the new terrain. I removed Wied's division and will now have it marching towards Krechor from the far right in hopes that it will get to the Oak Wood before Hulsen does.

On old version of the Kolin game that I ran years ago at the SYW Assn convention. Sorry, but I can't make this picture larger.
I build purpose built terrain boards for Kolin many years ago and ran this game at the SYW Assn convention.


I

Monday, May 4, 2015

Setting Up the Kolin Terrain

The Croats defend Krechor village.

Today I cleared off the Winter terrain from my game table and moved things to the Summer of 1757, where I am experimenting with some scenarios to stage the Battle of Kolin, fought on June 18, 1757. Probably the best battle map I have seen is the one by Christopher Duffy in his book, The Army of Maria Theresa. It is a good starting point for laying out the table and seeing how many battalions can comfortably deploy in various parts of the table.

Christopher Duffy's map of the Battle of Kolin, from The Army of Maria Theresa. This is probably one of the best maps showing the key troop movements during the battle.
The picture below show my third and final attempt at transferring the Duffy map into suitable wargame terrain.


Overview of the terrain set up. 
I have boiled the 30,000 plus troops in both the Austrian and Prussian armies down to a manageable size for a 6ft by 12ft table. The Austrians will have five infantry commands, each having four battalions; and three cavalry command, each with 4 cavalry regiments. Thus the Austrian army has 20 battalions and 12 cavalry regiments. I omitted the Austrian division of Puebla since it did not figure in the first part of the battle, up through 6PM on that day.

Wied's division forms up behind Krechor just as Hulsen's Prussians have driven the Croats out of the village.
So my intent is to game the Prussian assault on the Austrian right flank at Krechor village and stretch it west to as far as the little hamlet of Chozenitz. It was in this ground that Hulsen's and Treskow's advance guard and left wing, respectively fought. I do not intend to model the Prussian refused right wing, opposite Przerovsky Hill. In this manner, I can also eliminate Bevern's right wing troops from game consideration and thus reduce the number of wargame figures that I will need for the game.


Another view of Wied's battle line as it deploys on Krechor Hill.
The scenario will begin with Hulsen's advance guard attacking the Croats in Krechor village and driving them out. While this is going on, Daun is sending the Austrian division of Wied to his right flank to counter Frederick's attempt to outflank the Austrian army. Once Wied's troops pitch into the fight, I will allow Starhemberg's and Sincere's divisions to march from the Austrian left to its right using a timed arrival mechanism in the game.

Treskow's left wing of the Prussian army marches up the Kaiserstrasse.
The remaining portion of the Prussian left wing, under the command of Hulsen, will start the game marching up the Kaiserstrasse. Each Prussian command consists of four elements too, with three infantry commands (Hulsen, Treskow and Manstein) and three cavalry commands (Zieten, Krosigk and Pennavaire). This gives me 12 Prussian battalions and 12 cavalry regiments. I organize my cavalry into "squadrons" of 12 riders with two such squadrons comprising a regiment.

I will have to create some sort of deus ex machina roll of the dice to determine whether Treskow follows Frederick's original battle plan, calling for him to follow Hulsen in a march around the Austrian right flank, or will the combination of sniping Croats in the cereal grass and Frederick going battle mad and sending all of his troops on a frontal assault of the Krechor Hill?


Croats hide in the tall cereal grass in front of Chosenitz, behaving like, um, well, Croats!
"Gentlemen, it looks like the King is going to lose today." - Marshal Daun.
When I first set up the game table, I deployed Wied's division between Krechor village and the Oak Wood, four batallions in one line, and found that they took up about 4 feet of table space.  And then I would have to leave enough space to the left of Wied for Sincere's deployment of four batallions. If you look at the Duffy map at the top of this page, then you will see the area between Krechor village and Chozentiz and confirm that this is the area of the battle that I would have to set up, if I deployed he Austrian divisions into single lines of battalions.

The whole point of the game is to recreate the Prussian attack on Krechor village so the first idea (see paragraph above) might be the way to go. However, if I wanted to extend the ground to include the Prussian refused right wing, under Bevern's command, then I would have to shorten up the ground space between Krechor and Chozenitz. I shifted the terrain around a bit, and then doubled up the deployment of Wied and Sincere into formations with two battalions up front, supported by two battalions behind them.

This seemed to compress the battlefield a little bit, allowing me to place Bevern's refused wing on the table. I opted to go with the compressed battle terrain for my first stab at the Kolin scenario.

I am not going to depict the fight that Duffy calls, "The Cauldron" wherein both sides throw in everything they got in a desperate attempt to win the battle. I would like to try the Cauldron scenario as a separate game in and of itself. Christopher Duffy's map of "The Cauldron" is shown below. I would use this map to design a separate game scenario than the Krechor assault.


There is still a bit of tweaking to do before I am happy with the scenario. One benefit of laying all the troops out on the table is that I can see how many units I need to add to my wargame armies for this battle. Needless to say, I will be painting a lot of white coats and cavalry over the next 10 months as I shape the game up to present at the Seven Years War Association convention in March 2016.