Wednesday, August 28, 2024

40mm Vistula Lancer 3D Printing


While at Historicon this year I found a company that sells 3D printed figures for the Napoleonic Wars. Since they are 3D printed figures, they can be scaled to a variety of sizes. I bought one 40mm Polish Vistula Lancer because it looked like a figure that I would enjoy painting. And indeed I did.

The figure is a bit brittle noting that the left foot broke off on the way home, whilst carefully stored in a cardboard box. Accordingly, I can't see jumping into 40MM Napoleonics and using any brand of 3D printed figures. There are a couple of other brands that also have the same problem, but I don't care to name the names because I don't know enough about the printing process to talk intelligently about it.

I have to say that these are very attractive looking figures and my mouth drools over the thought of looking at a 24-figure regiment of these Vistula Lancers. Fear not, I don't intend to jump into 40mm Napoleonics. I know that there are a few of you are doubting me on this and I completely understand why.

On the other hand, 54mm Napoleonics...


cc

Tuesday, August 27, 2024

Hand Painted Flag: Russian 3rd Cuirassier Regiment


Flag of the 3rd Cuirassier Regiment in Russian service.

Kronoskaf image of the 3rd Cuirassiers flag

I am almost finished with a new 24-figure regiment of Russian (boo, hiss) cuirassiers and so it was time to find a flag for it.  Usually I would look for the appropriate flag from GMB Designs, but this particular regiment was not available.

My backup plan was to download the flag from the Kronoskaf website. After the download, I put the image into Word and manipulate the size of the image until it is just the right size, and then I print it out. Sometimes this is all that is needed, but this time I decided to paint over the flag image with my own brush strokes. I use the image as a sort of "paint by numbers" template and repaint the flag over the image. 

Remember those old Paint By Numbers art kits? You would get a canvas in the box and the image of the painting would be printed on the canvas. Each area of the canvas had a number assigned to it and each number represented a particular color of paint. If the color "Blue" was number "6" then you would paint blue in all of the areas that had the number "6" on them.

I am not a professional flag painter, but I am rather pleased with the way the flag turned out. The actual flag is smaller than what you see in the first picture so there is some distortion to the images.

I was spreading terrain goop all over the bases of the Russian cuirassiers earlier today. I will let them dry overnight and then dry brush the surface and add some static grass and tufts to the bases.

cc

Tuesday, August 13, 2024

A Peaceful Village In Silesia, Circa 1758


The Prussian Red Hussars (H7) come marching into Frobeldorf.
Is the captain's name Ned and is he the pride of the regiment?
 Minden Prussian hussars and some Blue Moon and Minden civilians

Another view of the March of the Red Hussars.
Buildings by HG Walls.


Click on all pictures to enlarge


I have been working on my terrain for the SYW era group of German villages located somewhere in Silesia. The pictures in this post depict the little hamlet of Frobeldorf, which has suffered from the depredations of marauding Russian light cavalry and Cossacks. They have made an appeal to King Frederick II of Prussia to protect them and save them from the bad guys: the Russians. Boo, hiss!

When I set up the four villages on my game table, I realized that I needed to have more civilians on the table, so I painted 20 Minden civilians and converted the pioneers into civilians by painting the latter in civilian clothing colors. I am also working on some of the Ratnik civilians, but I find these to be more difficult to paint due to all of the extra nic-nacs and accouterments that they have. I also found a box of Venture/Suren Miniatures civilians that I forgot that I had and I will be placing an order for some more Old Glory 18th Century civilians to add into the mix. The more the merrier I say.

Minden agricultural workers cutting down the grain.

The grain fields were made for my Pickett's Charge project, but I had 28mm vignettes in mind when I made them. I used a coir material door mat for the grain and sprinkled it with coir cuttings that I clipped off of the door mat.

I find that if I stoop over and crank my aged knees into the down position, then I can view the various villages and vignettes from "the ground level". This point of view almost makes the little men come alive and if you squint your eyes just a little bit then a sense of realism is seen. Good stuff. Good idea.

Here are some ground level pictures that I recently snapped:

Minden Bosniaks and Black Hussars on the march.

Looking down the main street of Gross Kammin. Buildings by HG Walls. Roads by Der Alte Fritz
and some Foundry, Perry and Minden civilians.

The Heroic Zeiten personality from the Minden Miniatures figure range.
This is one of the best figure sculpts every made by Richard Ansell.

Prussian camp scene. John Ray made the officer and servant vignette and 
the two camp followers are Foundry figures.

Prince Ferdinand of Brunswick vignette from the Minden Miniatures figure range.

My next terrain project will be to make some green agricultural fields for my 18th Century villages. I also want to make some "backyard" terrain pieces, such as the ones that Troop of Shew (Alan Steward) made for his Normandy WW2 terrain. He includes things like flower and vegetable gardens, an out house and general yard clutter. Each small terrain vignette tells its own story.

This picture shows some of Alan's work. This is THE ULTIMATE in war game terrain modeling.

Normandy terrain vignettes by Alan Sheward.

Very inspirational to say the least.

Next up on my painting table are another 8 Prussian Yellow Hussars that I need to finish in order to complete a squadron of 12 such figures. These figures are the newer hussars with shouldered swords pose that can be used for hussars at rest or trotting into position or prior to a charge. While I like the Minden charging hussar poses, I prefer the shouldered sword pose for its durability.

I am starting to get adjusted to painting smaller 28mm figures as compared to the large 54mm figures that I had been painting over the past twelve months. Once you get the hang of it, Minden Miniatures are a joy to paint.

I hope you agree.


And finally, Bella the Golden Retriever asks that you leave some comments in the comment section of this blog post. Bella says, "My favorite human is much happier when people leave comments, so please do so. He will give me some liver treats if you do."


Monday, August 5, 2024

Claymore Castings Russian 3-pound Cannon


Russian light 3-pound cannon from Claymore Castings

I was very excited to hear that Claymore Castings (David Imrie - see Saxon Dog blog) decided to add that unique Russian 3-pound field artillery piece that featured the regular gun tube plus two small coehorn style mortars attached to the gun carriage. I had only ever seen one model of this gun ever made, that in HO scale (20mm) by Zvezda. I had also heard about a metal model made by some obscure company in Austria, but I had never seen a picture of it.

Here is Christopher Duffy's take on the Russian 3-pounder, or more specifically, the mortars:

The Blizniatki were tiny field mortars, cast two-and-two together, designed by the artillery officer Mikhail Vasilevich Danilov after he had read Saint-Remy's "Memories d'Artillery". Great quantities were sent to the army in 1757, but they were soon discarded as useless.

That may be, but if you have a Russian SYW war game army you have to have these models in your army.

Christian Rogge has an excellent blog in which he covers his own scratch built SYW artillery models. Christian details his work on Russian artillery models in the following link:

Christian Rogge's SYW Blog

As you can see from the pictures that I am posting, the 3-pounder has a forked gun trail that allows it to be pulled by a team of two horses without using a limber. This presumably would have given the piece more mobility than, say, an Austrian or Prussian 3-pounder that would need their own limbers.

A front view of the Russian 3-pounder shows the two small mortars mounted on the gun carriage near the axle.

The Claymore Castings model with a Minden limber horse. The Minden officer figure
is shown for comparative purpose.

The Claymore Castings model is nicely done and the castings are clean and do not require any clean up work prior to priming and painting. They seem a tad large relative to Minden Miniatures figures, but then David has sized these pieces to fit with his own SYW Russian and Prussian figures. The company makes two versions of the Russian 3-pounder: large and small. I believe that models that I bought were the large versions and I have one small version on order so that I can compared the sizes of the two versions. I would point out that from my experience in standing next to cannon wheels from a variety of historical figures, my shoulders are approximately the same height as the wheel on 3/6/12 pound artillery pieces. So I believe that the scale of the Claymore Castings model is appropriate for any 28mm figure.

Here is a link to the Claymore web site. Click on the SYW pull down menu to look at the various offerings for the Russian and Prussian armies. They are very nice figures and look to be "Perry size" in style and height. I am very appreciative of David adding these Russian cannon to his figure range as they fill a definite need in the 28mm SYW universe. I am not planning on adding the Russian 3-pounder to the Minden Miniatures range because the Claymore Castings model is a good one and you might as well purchase their cannon model rather than me offering a redundant model.

Claymore Castings

My opinion: I give my highest recommendation to the Claymore Castings artillery models.


Here are a couple pictures of the Claymore Casting Russian 3-pounder model  with some Minden Russian artillery crew. To my eye the two should fit together quite nicely.


Here are a pair of artillery munitions wagons, made for me by Mr. Ed Phillips.
The painted scene on the 4-wheel lid depicts a blacksmith at his forge, so maybe
this version was used by the army's blacksmiths and field forge units.

I am currently working on the painting of 24 of the new Minden Miniatures Russian Cuirassiers and I should have them ready for photography later this week. They will come in handy when I play Phase 3 of the all-cavalry battle, as the heavy cavalry of both sides enters the battle.

Click on the link below if you have an interest in adding Minden Russian cuirassiers to your Russian armies.

Minden Miniatures Russians


My plan is to add some Cossacks to the Minden range in the near future. Steve Barber, who sculpted the entire Minden Russian army set of figures, will be the sculptor for the Cossacks. There will likely be mounted and dismounted versions of the Cossacks. I will post more information on this new project as it develops.


Thursday, August 1, 2024

The SYW Light Cavalry Battle - Part 2


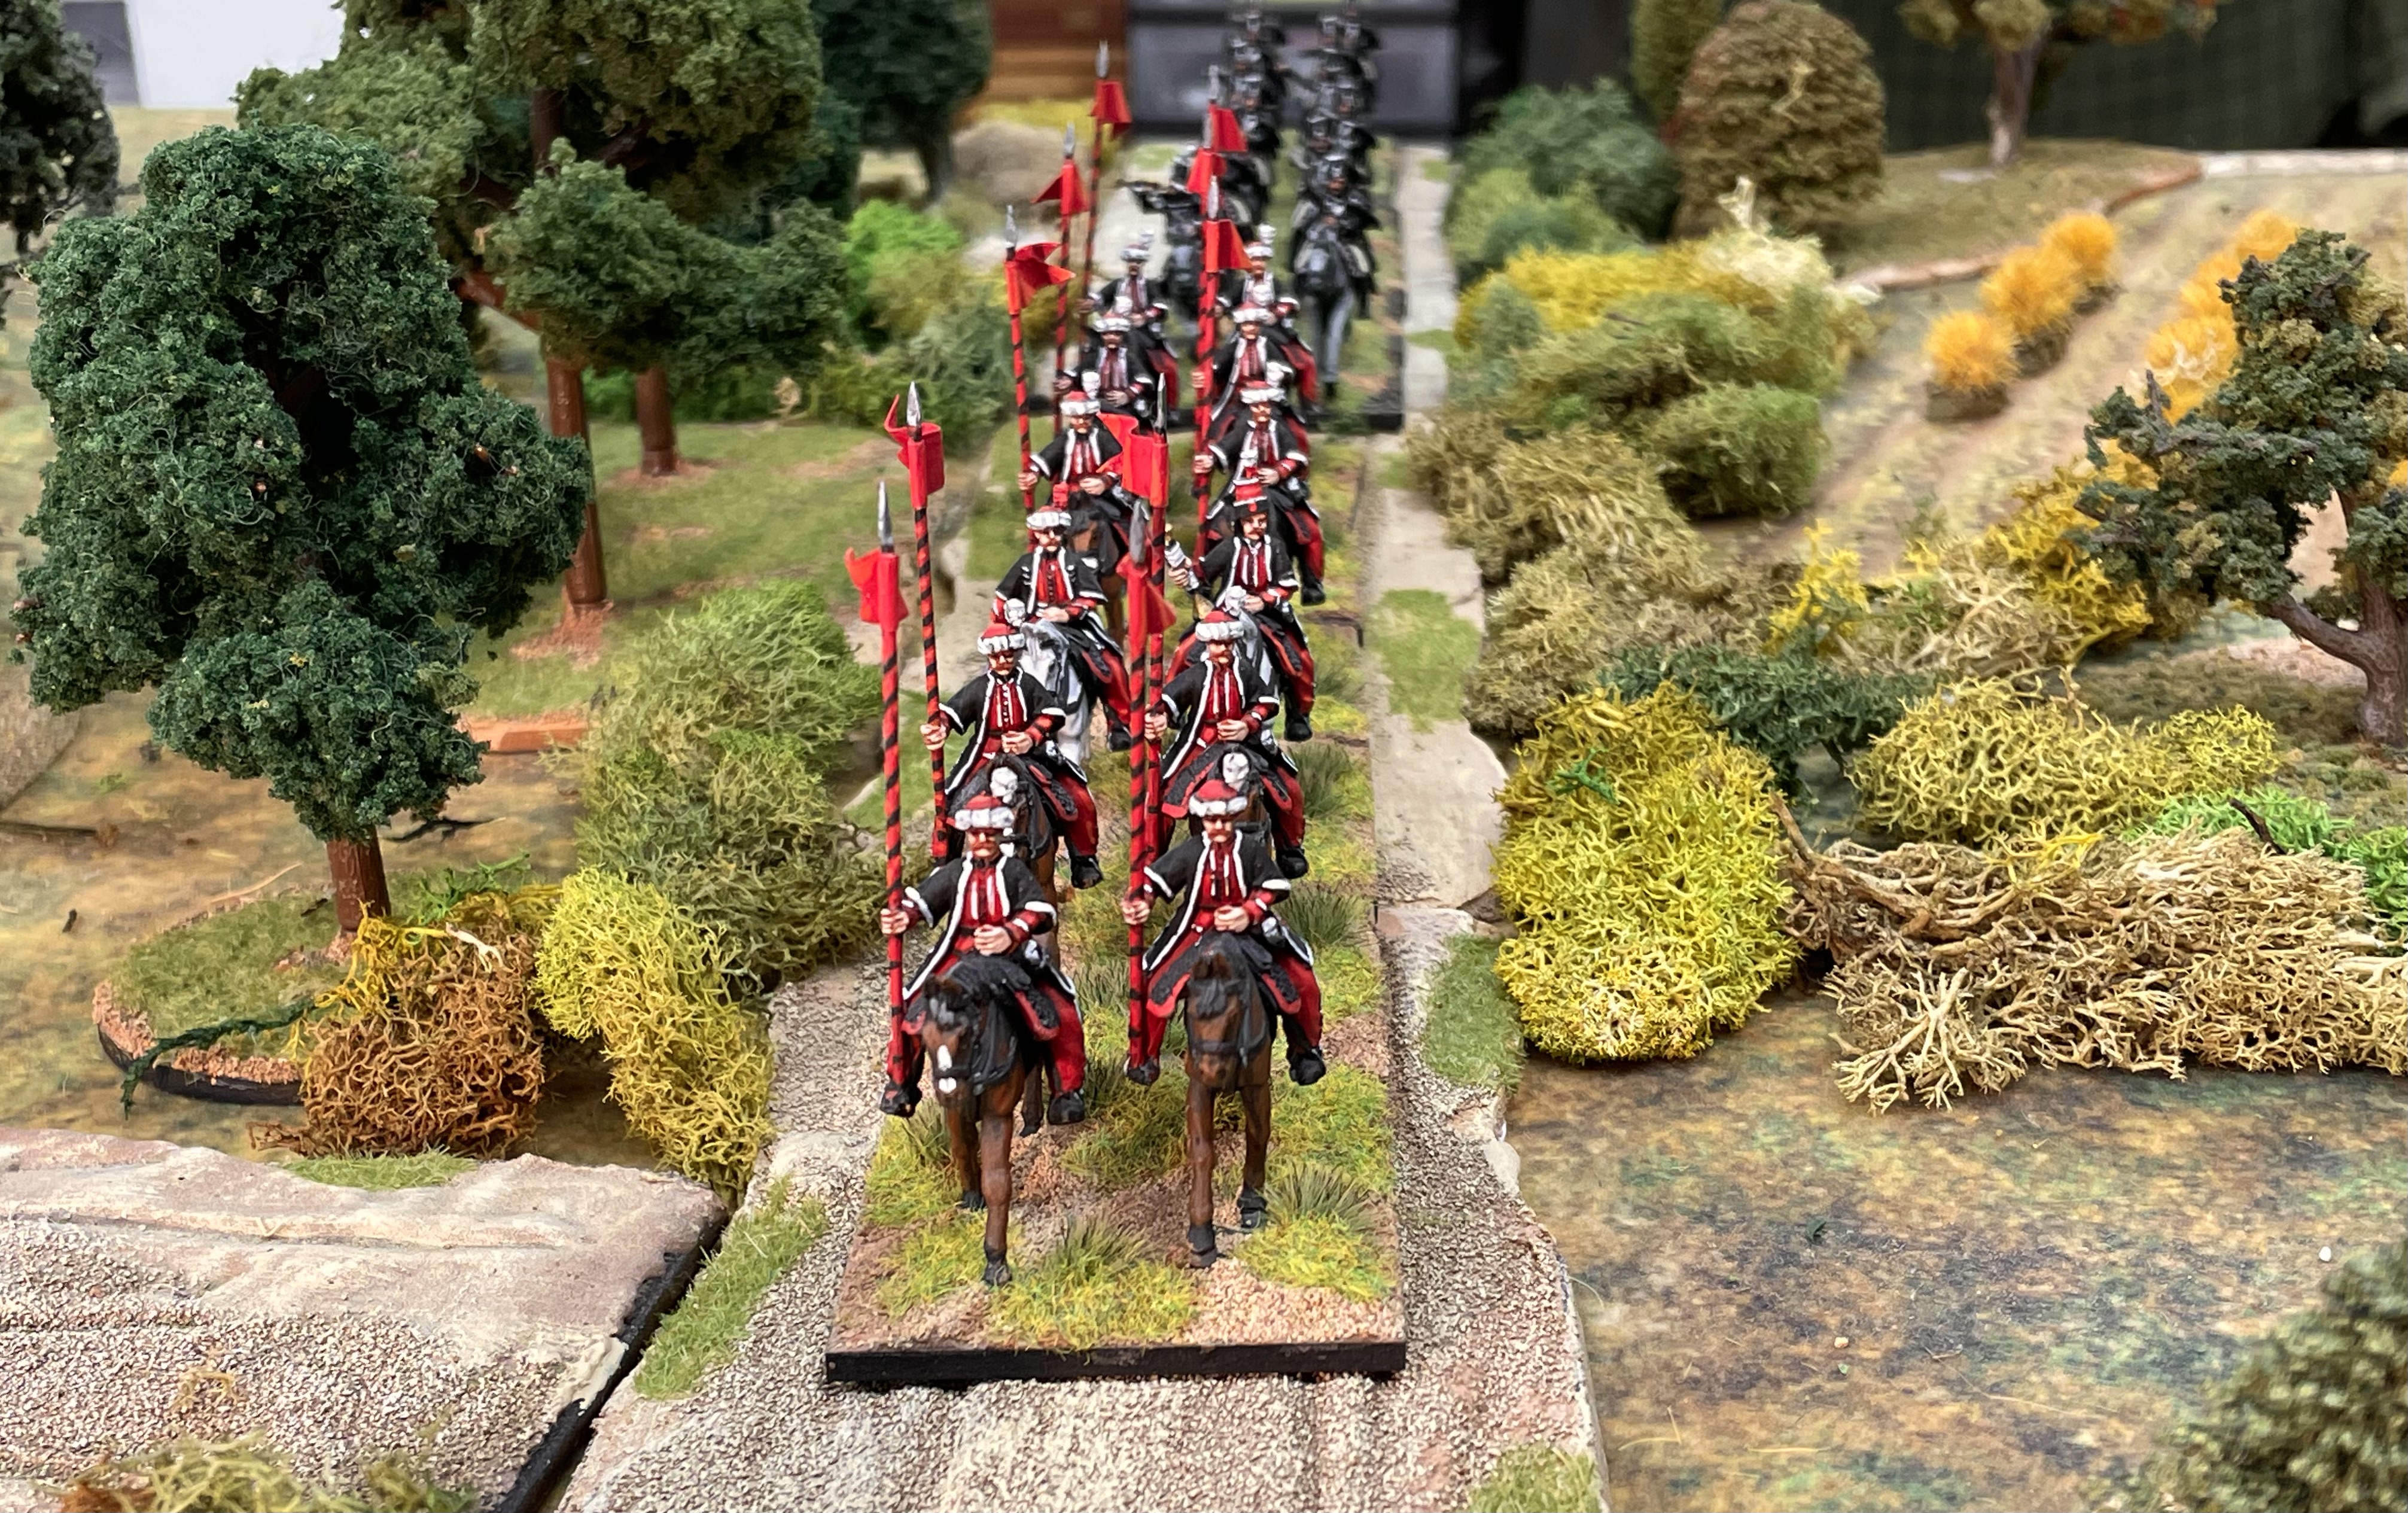
Lt. General von Zieten leads his own regiment of hussars into the field.
All figures are from Minden Minatures.

The razing of Kustrin prior to the Battle of Zorndorf. Frederick had a strong dislike of the Russians,
but their destruction of the city of Kustrin on the Oder really stuck in his craw and he wanted revenge.
(Karl Rohling print)


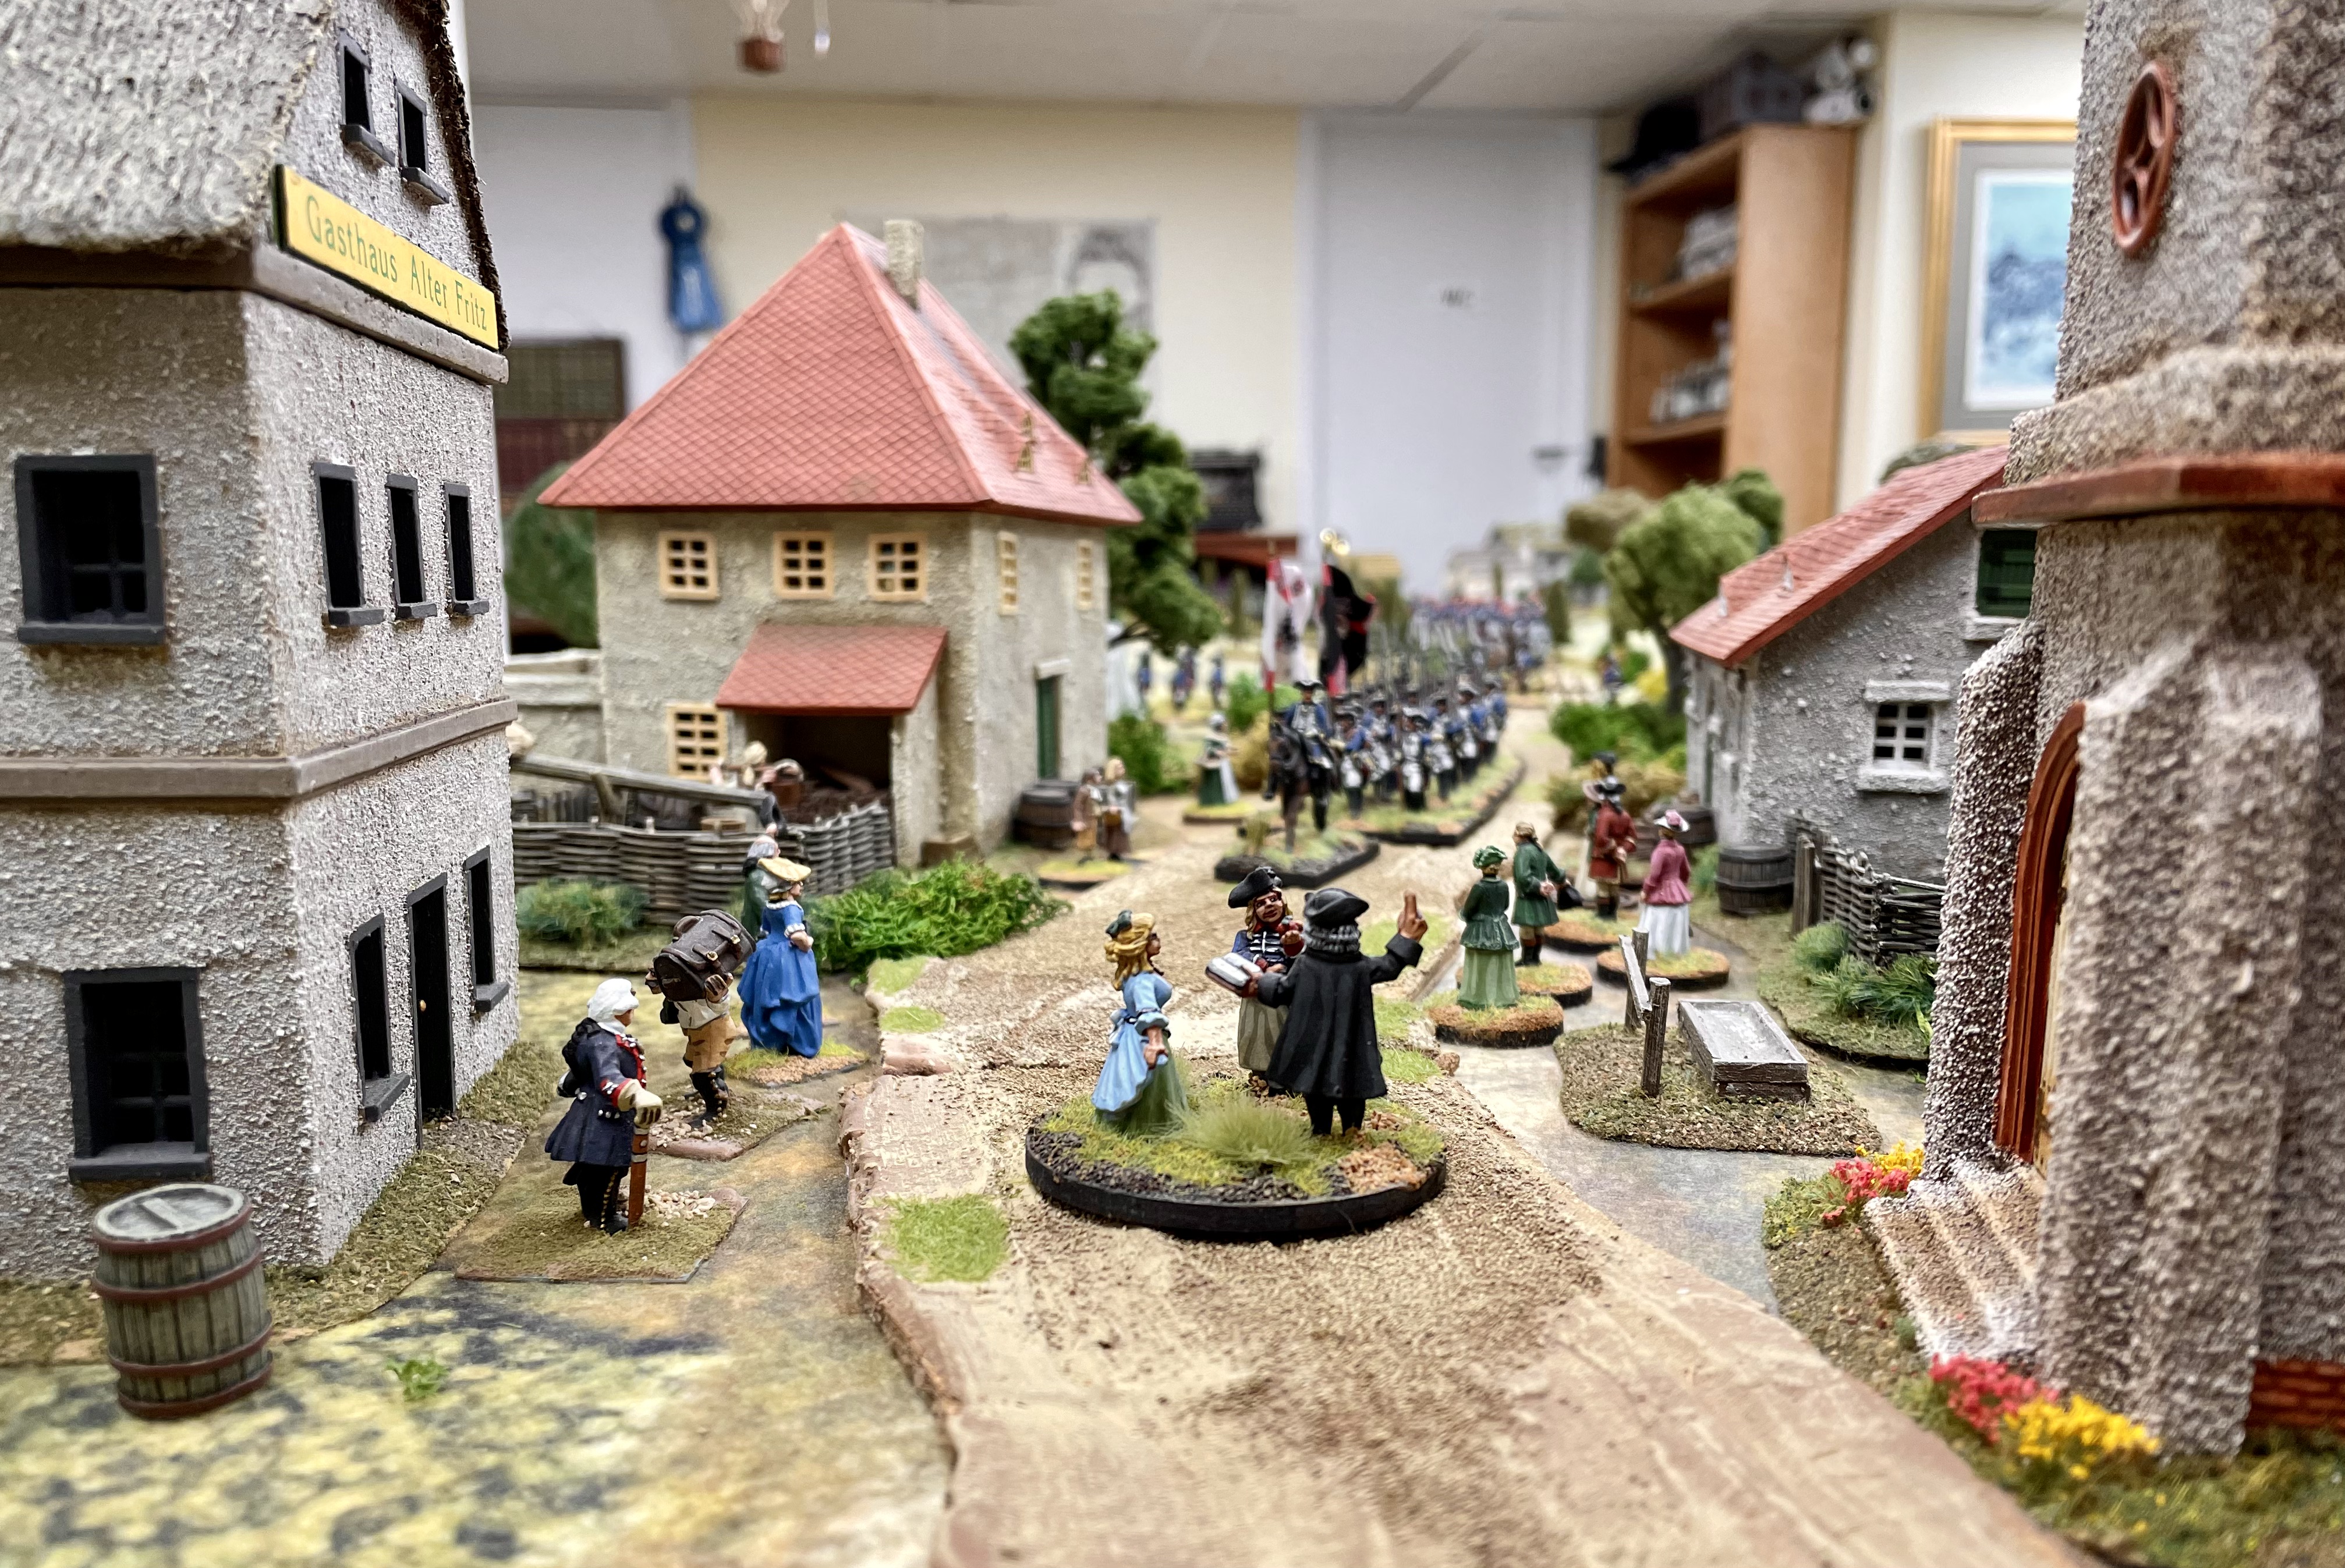
As we discussed in our last episode of the great cavalry battle of Gross Kammin, the basis for the war game is to play out a scenario where the Russian army's Cossacks are lured into the area and surrounded by Prussian hussars as they spring the trap. The bait will be the Prussian field bakery at Sagwitz and the undefended village of Frobledorf. If the Cossacks stop in at The Savage Swann they are going find a welcoming party of rowdy Prussian Black Hussars. The Prussian light cavalry division is commanded by Lt. General Hans von Zieten.

Lt. General Hans von Zieten personality figure from Minden Miniatures


Prussia's objective is to surround the Cossacks and eliminate them as a threat to area around Gross Kammin.

Russia's objective is to burn down the Prussian field bakery and lay torch to as many villages as they can before skedaddling out of town,

MAP #1 shows the initial deployments of Russian and Prussian light cavalry squadrons .


MAP #1 - Initial deployment of both armies


The Russians have deployed one Cossack Pulk in a swale (low ground) behind the Kammin Heide. Two squadrons of the Horvath Hussars are deployed in reserve on the high ground behind the Cossacks. A second Cossack pulk is deployed on the hill next to the Horvath Hussars. A squadron of Yellow Hussars protects the Russian right flank, advancing towards Sagwitz and the Prussian field bakery. The Russian plan is to lure the Prussian hussars over the Kammin Heide and then unleash all Cossacks and Horvath Hussars on them,

The 1st Cossack pulk moves up onto the Kammin Heide to goad the Prussians to charge.

The 2nd Cossack pulk deploys in reserve on the high ground. They are not
visible to the Prussian hussars in the center, who are on the other side of the Kammin Heide.
The intervening high ground blocks the Prussians' line of sight.

Russia's squadron of Yellow Hussars protect the Russian right flank
as they advance towards Sagwitz.


The Prussians plan to surround the Cossacks, Three squadrons of hussars (H1 / H2 /H3) deploy on the horizontal road between Frobeldorf and Gross Kammin. Two squadrons (H4 or White Hussars) and one squadron of Black Hussars (H5) move into Zicherwitz to prevent the Cossacks from escaping to the east. Two squadrons of H5 and one squadron of Bosniaken lancers guard the Prussian left flank and they move north into the village of Frobeldorf

Bosniaken lancers and Black Hussars  (H5) advance towards Frobeldorf
moving in a south to north direction to guard the Prussian left flank.

A squadron of the Black Hussars (H5) rides with the Bosniaken.
There are a total of three squadrons of Black Hussars dispersed around the battle field.

A Cossack scouting party watches von Zieten's center column riding across the Kammin Heide.


The Cossack scouts are spotted! Zieten's center column of Green Hussars (H1), Zieten Hussars (H2) 
and Red Hussars (H7) deploy from column into line of battle in front of the Kammin Heide

Zieten leads his three squadrons up the Kammin Heide after spotting some Cossacks.

The White Hussars (H4) ride into Zicherwitz to protect the Prussian right flank 
and block a potential escape route for the Cossacks.


MAP #2 shows the elements of Zieten's Prussians on the attack as they attempt to surround and cut down the Cossacks of Pull #1.


MAP #2 - The first Prussian attack at the Cossacks


Von Zieten leads his own squadron of hussars (H2) up the Kammin Heide
to attack the Cossacks. The Green and Red Hussars follow in support.

Zieten leads his three squadrons of Prussian hussars over the crest of the Kammin Heide
where he discovers that there are a lot more Cossacks hiding in the dead ground behind the hill.

The Bosniaken move off the Frobeldorf Road to set up a blocking position to 
prevent the Cossacks from escaping to the south. Meanwhile, two squadrons
of Black Hussars (H5) gallop through the village of Frobeldorf so that 
they can attack the Cossacks in the rear.

Meanwhile, on the Prussian right, two squadrons of White Hussars (H4) take 
up a blocking position in the village of Zicherwitz.

A squadron of Black Hussars (H5) move through Zicherwitz to support the White Hussars (H4)

The Prussian trap is sprung and they surround the 1st Cossack pulk and the slaughter begins. The Cossacks' inclination is to run away anyway as  they don't want to fight formed Prussian cavalry troopers. However, one of the squadrons of Black Hussars rides through Frobeldorf and gains the rear of the Cossack mass. Now it is everyone for themselves as they are now surrounded.

The Prussian Red Hussars (H7) are the first to pitch into the flank of the Cossacks.

The Zieten Hussars (H2) hit the Cossacks from the front.

The Black Hussars send a squadron out of Frobeldorf and aim for the rear of the Cossacks.


The Zieten Hussars (H2) pursue the fleeing Cossacks


MAP #3 depicts the final destruction of the 1st Cossack pulk


We are doomed!


Everyone save yourselves!


The Cossacks realize that they are outnumbered and they attempt to flee at first.
Then they find themselves surrounded by Prussian hussars and so they 
resolve to fight their way out of the trap.

A few of the Cossacks think they see an escape route if they can ride through Frobledorf;
however, a squadron of Black Hussars (H5) was deployed in the village to block
any escape attempts and the few Cossacks in the streets are cut down to the last man.

The first Cossack pulk has now been destroyed and von Zieten sounds the recall to pull his forces back together so that they can reorganize for the next phase of the battle. The Russians have another card to play as the 2nd Cossack pulk moves from their position on high ground and charges down into the swale behind the Kammin Heide to slaughter an unsuspecting squadron of Black Hussars emerging from Zicherwitz to the east (the Prussian right flank)

Having destroyed the 1st Pulk of Cossacks, Zieten sounds the recall to 
reorganize his hussars in preparation for a possible Russian counterattack.


Map 4 depicts the Russian counter-attack.

MAP #4 - The Russian Counterattack.


A squadron of Black Hussars (H5) emerges from Zicherwitz, but do not see
the 2nd Pulk of Cossacks bearing down on them while they are still deployed 
in a march column formation.


The Black Hussars are surrounded and they are fighting for their lives. It will not end well for them.


Zieten's hussars have finally reorganized and he orders the Bosniaken
to charge the Cossacks and rescue the Black Hussars.


The Bosniaken charge into the Cossack-Hussar melee

A small number of the Black Hussars are able to escape under the wing of the Bosniaken.

Their job is finished so the 2nd Cossack pulk breaks off from the melee and rides back to 
the crest of their hill, where a lot of Russian heavy cavalry have just arrived.

The Prussian White Hussars (H4) were in a good position to help their comrades
and charge into the melee, but they noticed a different kind of trouble emerging
on the Russian hill - Horse Grenadiers and Dragoons!


The Russian heavy cavalry arrives on the scene.
They have four squadrons of horse grenadiers, two squadrons of dragoons
and two squadrons of cuirassiers. The Prussian hussars are no match for this lot.

The Zieten Hussars (H2) return to their own lines after chasing off the remains of the 1st Cossack pulk.


The Bosniaken return to their lines too. Note how Zieten has deployed the 
rest of his hussars, facing the Russians, as a bulwark for his cavalry to fall back to.


The Zieten Hussars return triumphantly to Zieten's reorganized cavalry position on the Kammin Heide.

So there you have it. We have covered the great light cavalry battle at Gross Kammin in all of its thrilling, glorious and gory detail. An all-cavalry war game is an unusual game scenario and it has a special feel and flavor of its own that is quite different from the usual 18th Century linear warfare battle. I hope that this battle report will inspire you to give it a try. Cavalry games tend to go quicker because most of the game action involves the back and forth of cavalry melees.

Today's battle report is sponsored by Minden Miniatures. All of the figures shown in this battle report are Minden Miniatures and you can purchase your own light cavalry castings for Austrian, British, French and Prussian armies. The Cossacks are made by RSM, but are mounted on Minden Miniatures horses.

Fife and Drum / Minden Miniatures web store

Be sure to click on all of the pictures and maps to enlarge them for your viewing pleasure. Your comments are both welcomed and encouraged. I'd like to hear what people think about this all-cavalry war game scenario.

But wait, there is more. Our next episode will cover the upcoming engagement of the Russian and Prussian HEAVY cavalry forces as the Battle of Gross Kammin continues. The two armies will take up positions that were gained by their light cavalry forces. Thus the Prussians have the advantage of hiding their reinforcements behind the Kammin Heide in the area of dead ground to Russian viewing.

There is certain to be lots of eye candy for you 18th Century war game enthusiasts. I think that you are really going to enjoy the combat as the heavies enter the fray.

With that, our report comes to an end so it is time to wrap it up and put a bow on it. Stay tuned to this blog for Part 3 of the great cavalry battle at Gross Kammin.