


 |
| The 72nd Seaforth Highlanders capture the summit of Haggis Hill. |
This past weekend I had the pleasure to travel north to Brown Deer, WI and visit the country estate of Major General William Augustus Pettygree. The good general elected to host a wargame set somewhere in Afghanistan circa 1903.
 |
| Overhead view of the battlefield. The British relief column was to march from the near end of the table to the hill fort in the distance, and rescue the British garrison on the hill. |
The Crown Forces were tasked with rescuing a beleagured British hill fort that was surrounded by angry Pathans who would likely give no quarter. I had the honor, once again, of commanding the 72nd Seaforth Highlanders taking the role of Colonel Archibald ("Archie") Sinclair. I also had the 1st Sikh regiment and a pair of 15-pound rifled cannon under my command. My colleague, Major Benson, commanded the famous 66th (Berkshires) Regiment, two squadrons of British hussars, and the 2nd Sikh regiment.
 |
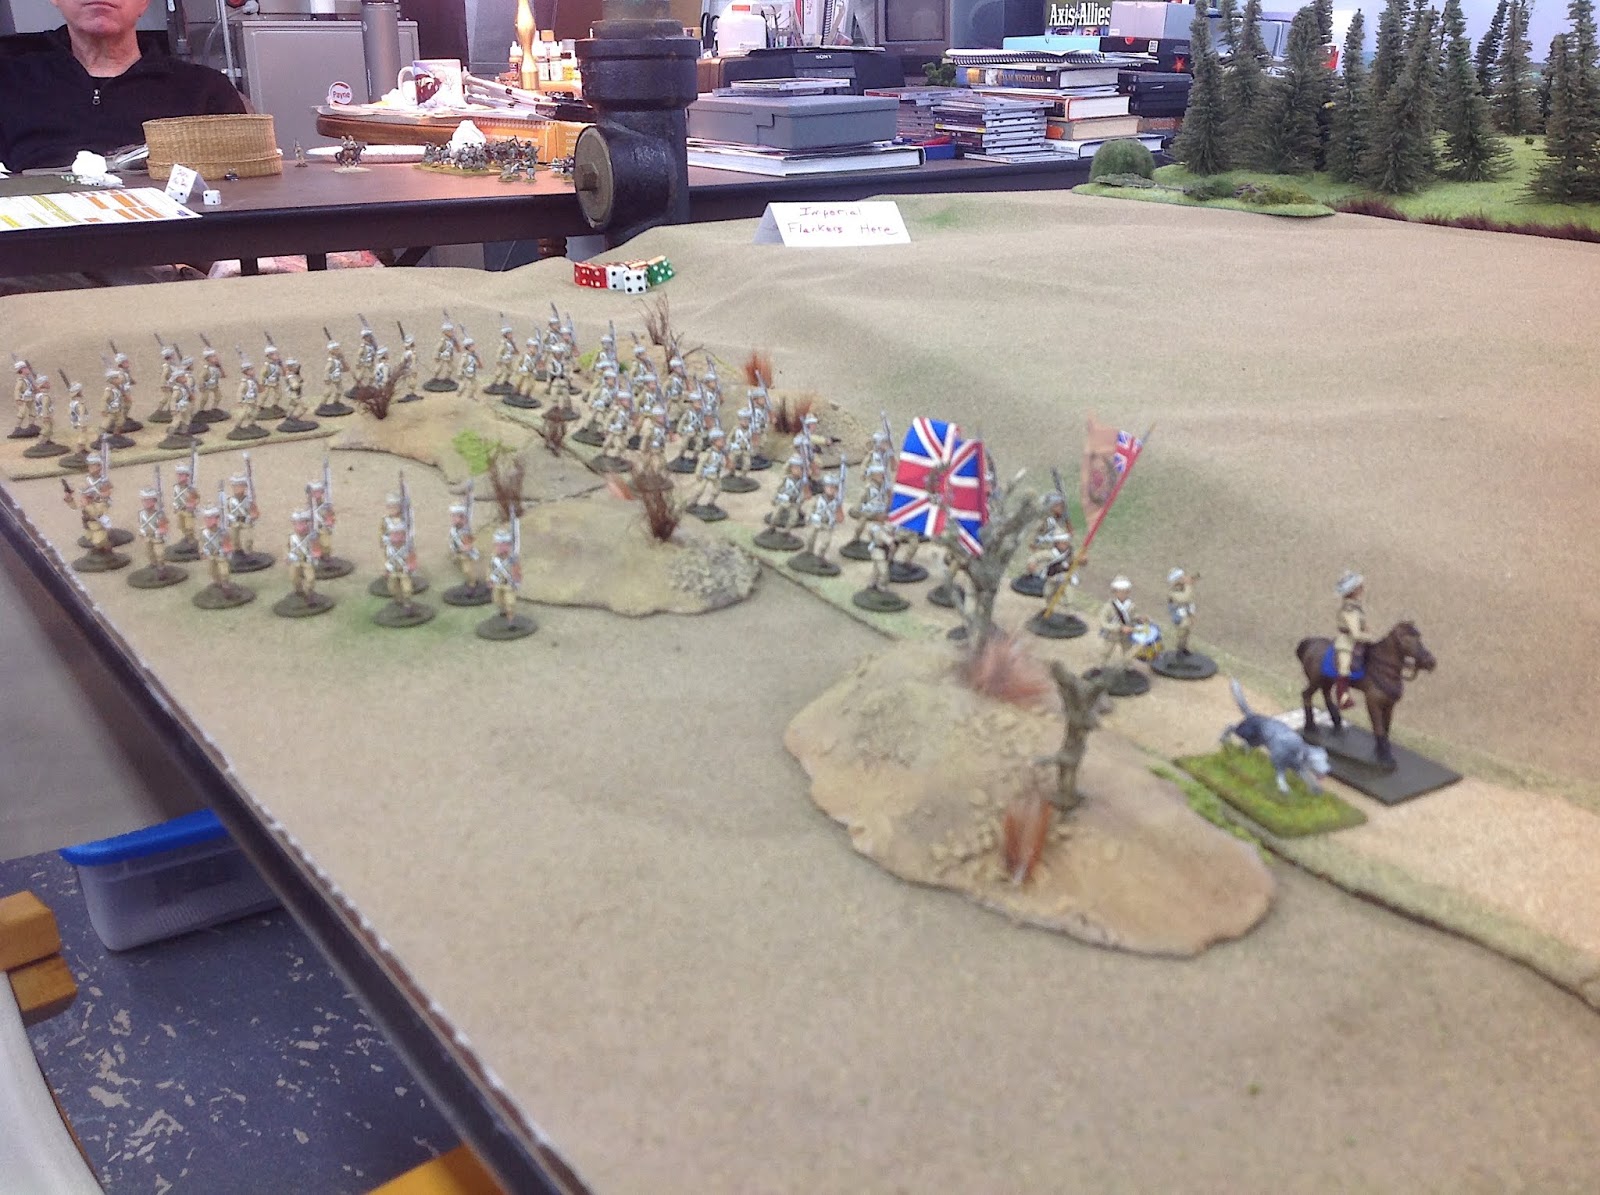
| The 72nd Seaforth Highlanders form up into battle line. |
The British garrison in the hill fort appeared to have one regiment of Sikhs and one regiment of red coats. Since the hill fort was far away from where the Seaforths fought, I have no certainty of what happened there on the day of battle.
 |
| The property in question - British hill fort commands the Shalalabad Pass. |
Major General Pettygree left Colonel Sinclair in charge of the relief expedition. Pettygree gave Sinclair his assurances that he would arrive with the cavalry, the famous Bengal Lancers, at some point during the day. Sinclair was further instructed to watch the flanks and rear areas of the battlefield, as Pathans could suddenly appear at any point on the table.
 |
| British wagon laager. |
 |
| The Seaforths prepare to cross the bridge. They will screen the march of the Berkshires and 2nd Sikh regiments, which will make a left turn behind the Seaforths and march around the flank of the Pathan defenses. |
The Pathan defensive positions:
The Pathans occuppied three significant hills across the battlefield and these presented difficult obstacles to the British relief column. The main body of Pathans were located on Hill Number 1 and they would soon be scrambling and screaming their way to the Hill Fort, to slaughted the infidels that garrisoned the fort.
 |
| Pathans mill around Hill Number 1. They will attack the Hill Fort. |
 |
| Pathans atop Hill Number 2, which guards the right hand approach to the fort. |
 |
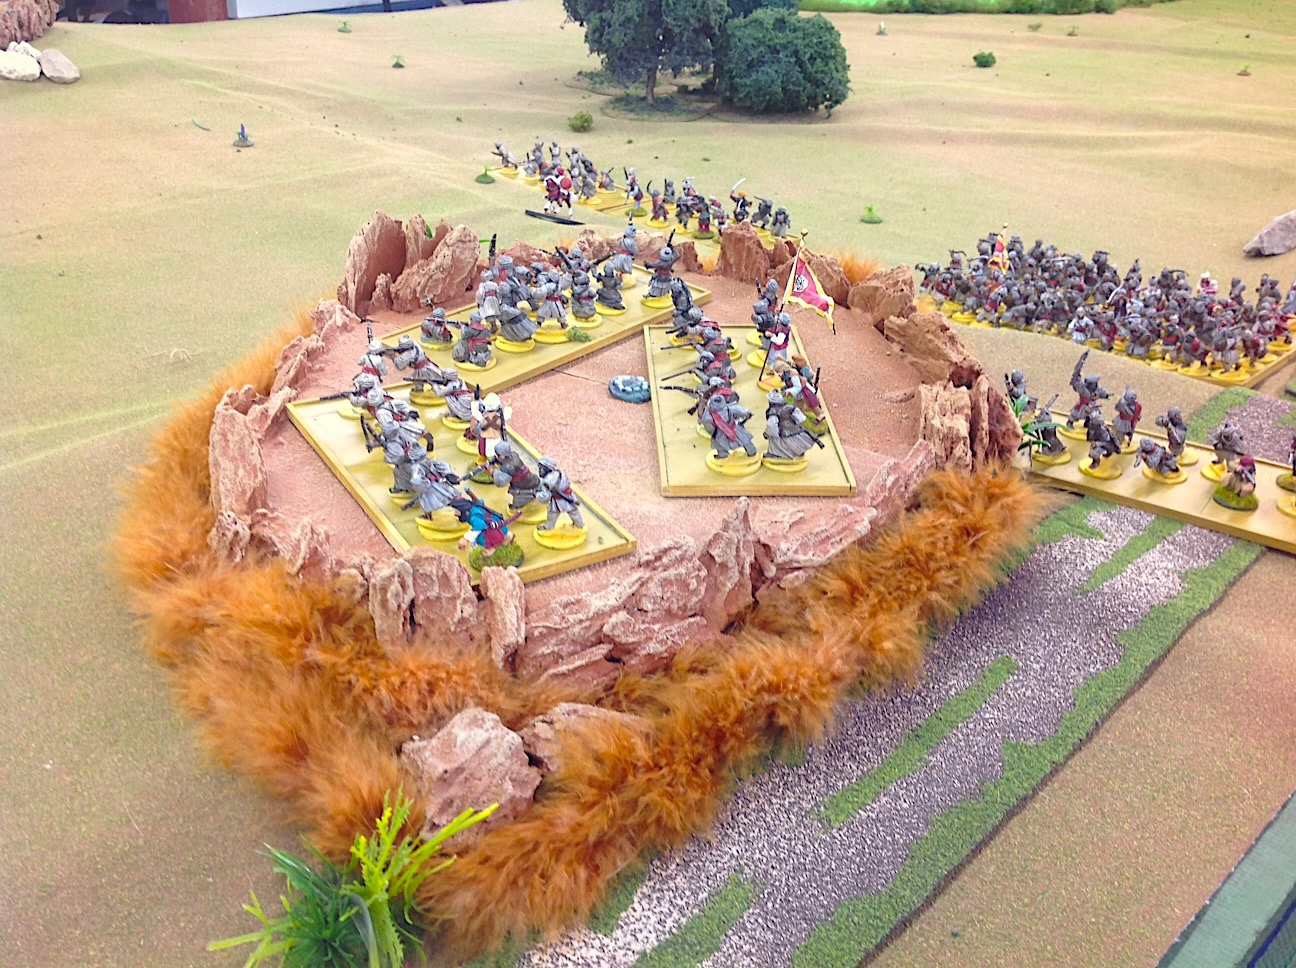
| Pathan riflemen occuppy the summit of Hill Number 3, soon to known as Haggis Hill. |
 |
| A ground level view of the foreboding Haggis Hill. |
The Battle for the Hill Fort.
 |
| The British hill fort on the left, Hill Number 1 on the right. |
The Hill Fort looked to be impregnable from the distance of the British relief force's encampment, but that did not disuade the Pathans, commanded by the notorius Amrahn Khan, from surging up the hill in a frenzy. There was one regiment of Red Coats whose name escaped me, and one regiment of Sikhs plus a couple of Mountain Screw Guns. The garrison had but a little time to erect a shaky wall of mealie bags that formed the defensive perimeter.
From what I could tell, the Pathans never made it over the mealie bags, but I will let the picture captions tell the rest of the story.
 |
| Here they come! |
 |
| The Red Coats defend the mealie bag walls that were erected in the nick of time. |
 |
| The desperate fight for the Hill Fort. Against all odds, the Red Coats held the fort. |
Colonel Archie Sinclair was a long time friend of William Augustus Pettygree and a fellow classmate at Sandhurst. It seemed that where ever Pettygree went across the Empire, Archie Sinclair was sure to follow. The two soldiers had shared adventures in the Sudan, in the Raj and across the Khyber Pass and into Afghanistan, their current location.
Colonel Sinclair observed the several hills in front of him, all crammed full of Pathans, and reasoned that he could pin down a large number of them with one of his brigades and march around their flank with his second brigade and some cavalry. At some point during the afternoon Sinclair expected the arrival of Pettygree at the head of a column of the Bengal Lancers.
The first brigade, comprised of the Seaforth Highlanders and the 1st Sikh regiment, would advance towards Hills Number 2 and 3 with the intention of drawing all of the Pathans fire on them. While this fighting was going on, Major Benson would lead the second brigade comprised of the 66th (Berkshires) Regiment, the 2nd Sikh Regiment, and two squadrons of the 10th Hussars, across the open plain to their left. Sinclair hoped that they might get lucky and sneak through the back door into the Hill Fort and relieve the garrison.
And so it was that the Seaforth Highlanders were the first to cross the bridge over the stream in front of Hill Number 3. To their right, the 1st Sikh Regiment would entertain whatever Pathans that they could stir up around Hill Number 2. The Sikh's orders were to protect the right flank of the Seaforths as they attacked Hill Number 3.
While these events were taking place, Major Benson formed his brigade into march column and moved out sharply behind the Seaforths. As Benson approached the stream he ordered the head of his column to make a left turn and march towards the open plain to the left of Hill Number 3. The Seaforths provided a screen that kept the Pathans from shooting into the flank of Benson's column as it marched off to the left.
 |
| The Berkshires march onto the open plain to outflank the Pathan defenders of Hill No. 3. |
|
| Now you see 'em -- Pathans atop of Hill Number 3. |
 |
| ...and now you don't. Berkshires on the left, and Seaforths on the right make a joint assault on Hill No. 3 |
The Pathans dropped a surprisingly large number of Highlanders during the early stages of the assault on Hill No. 3. Colonel Sinclair quickly realized that his rifles had little effect on the Pathans, who were ensconced in hard cover. They could be hit by rifle fire, but on their saving throws all they needed was "anything but a 1" on a six-sided dice.
"Well then, let's soften them up with some artillery fire," said Colonel Sinclair to his commander of the Royal Artillery 15-pound rifled cannon. Long range artillery fire proved to be more effective than small arms firing (noting that the saving throws were "anything but a 1 or a 2" on the D6 dice. ) Pathans began to drop in droves as they scattered for cover.
The Highlanders held back for a couple of turns and let the artillery do the damage. Everytime the Pathans lost 10% of their unit strength in a turn, they had to fall back 8-inches. This happened a number of times and the Seaforths eagerly awaited the opportunity to rush to the summit of Hill No. 3. However, the Pathans seemed to win the first movement advantage on numerous turns. Thus they would take casualties, fall back 8-inches, and then return to the hill to fire at the Highlanders. It seemed that no matter what they did, the Pathans would return before they could rush up the hill. It was such a hard grind that the Highlanders began to call the hill "Haggis Hill".
Eventually, Major Benson detached two companies of the Berkshires to assist in the taking of Hill No. 3. They fought in open order, which made them harder to hit. The Highlanders would have used the same tactic but for the fact that they were constantly under the threat of being attacked by Pathan melee soldiers - the Seaforths stood a better chance of winning melees if they fought in close order.
Indeed, a mob of unruly Pathans charged down the hill and into the bayonets of the Highlanders. Then the rest of the companies in the regiment swung around both flanks of the charging Pathans, who were soon despatched to their deity.
 |
| Success! Colonel Sinclair leads his men to the summit of Haggis Hill, with support from the Berkshires. |
The Pathans continued to fall back and then reoccuppy the hill before the Seaforths could crest the summit. However, attrition from the cannon fire and close range rifle fire whittled the Pathans down enough so that they finally ran away for good.
Out on the right flank of the Seaforths, the 1st Sikh Regiment was having its hands full with the local Pathan tribes. It seems that the Pathans kept finding fire arms, even though they were not so armed. With this handicap, the 1st Sikhs could not hope to capture Hill No. 2, so they held their position on the rear slope of a ridge and kept the Pathans at bay with fire arms. This had the effect of also protecting the right flank of the Seaforths from attack by the Pathans.
The Finale or End Game
Colonel Sinclair was too involved with the action at Haggis Hill to follow what was happening elsewhere on the battlefield. General Pettygree finally arrived on the open plain and drove off the Pathan cavalry, thus opeing the road to the Hill Fort. The fort garrison saw their chance and they scurried down the slopes of the hill to greet their comrades in khaki. Seeing this, the Pathans broke off the fight and disappeared into the foothills surrounding the fort.
The British had won the day, but General Pettygree knew that it was hopeless to try to hold the fort, so he retrieved the garrison and the column returned to their base in Khandahar.

Great batrep sir!
ReplyDeleteExcellent looking battle and exciting report !.
ReplyDeleteWhat a wonderful looking game and a great AAR:)
ReplyDeleteVery nice! Lovely figs and scenery
ReplyDeleteStirring deeds of Empire! What's not to like?
ReplyDeleteA splendid report. Lovely to see behind the scenes at Chez Pettygrew!
ReplyDeleteVery jealous that you got to play at Pettigrew's!
ReplyDeleteWow!
ReplyDeleteA+ report Jim. One of your best if not the best ever. Bravo,
ReplyDeleteRespectfully,
Bill P.
Wonderful AAR Jim. Very evocative of the period.
ReplyDeleteBill
Great report Jim!
ReplyDeleteA very enthralling and inspiring battle report!
ReplyDeletewonderful report .you guys always put on great games. thanx for sharing.
ReplyDeleteThanks for that, looked like great fun.
ReplyDeleteSplendid show! I very much agree with Juergen, your games are always a visual feast.
ReplyDeleteAs said previously, excellent report!
ReplyDeleteA fine show
ReplyDelete